Are you curious about capturing more than just a still moment with your iPhone? Live Photos are a fantastic way to bring your memories to life, recording a short video clip along with your photo. In this comprehensive guide, dfphoto.net will walk you through everything you need to know about how to take a Live Photo on your iPhone, master Live Photo editing, and unlock their full potential to take your photography to the next level, creating dynamic and engaging visuals. Unlock the magic of motion photography and elevate your iPhone photography skills today!
1. What is a Live Photo and Why Should You Use It?
A Live Photo is more than just a picture; it’s a brief, dynamic moment captured by your iPhone. When you snap a Live Photo, your iPhone records 1.5 seconds of video both before and after the shot. This results in a moving image that brings your photos to life.
1.1. Benefits of Using Live Photos
Why choose a Live Photo over a standard still image? Here’s why:
- Capturing Fleeting Moments: Live Photos excel at preserving spontaneous events, like a child’s laughter or a pet’s playful antics, that a static image might miss.
- Adding Depth and Emotion: The added motion provides context and feeling, turning simple snapshots into immersive memories.
- Creative Potential: Live Photos can be transformed into looping videos, bouncing effects, and long exposures, opening up a range of artistic possibilities.
- Easy Sharing: Sharing Live Photos with friends and family lets them experience your moments as you did.
1.2. Devices Compatible with Live Photos
According to Apple, you can take Live Photos on iPhone 6s and later, iPad (5th generation) and later, iPad Air (3rd generation) and later, iPad mini (5th generation) and later, and iPad Pro models from 2016 or later.
2. How to Take a Live Photo on Your iPhone: A Step-by-Step Guide
Capturing Live Photos is simple and straightforward. Follow these steps to get started:
2.1. Opening the Camera App
First, locate and open the Camera app on your iPhone. It’s the icon that looks like a camera lens.
2.2. Ensuring Photo Mode is Selected
At the bottom of the screen, swipe until you’ve selected “Photo” mode. This ensures that you’re in the correct mode for capturing still images and Live Photos.
2.3. Activating Live Photos
Look for the Live Photos icon at the top-right corner of your screen. It resembles a series of concentric circles. If the icon is yellow (or white, depending on your iOS version) and not crossed out, Live Photos is already enabled. If it’s gray with a line through it, tap the icon to activate Live Photos.
 iPhone Camera App with Live Photos Icon Highlighted
2.4. Holding Your iPhone Steady
To ensure the best quality Live Photo, keep your iPhone steady before, during, and immediately after pressing the shutter button. This reduces blur and ensures smooth motion in your Live Photo. Santa Fe University of Art and Design’s Photography Department suggests using both hands and bracing against a stable surface for sharper results.
2.5. Capturing the Moment
Press the white shutter button to take your Live Photo. Remember, your iPhone will record a brief video clip before and after this moment, so anticipate the action you want to capture.
3. Viewing and Playing Your Live Photos
Once you’ve taken a Live Photo, you’ll want to view and enjoy it. Here’s how:
3.1. Accessing the Photos App
Open the Photos app on your iPhone. This is where all your photos and videos are stored.
3.2. Locating Your Live Photos
Scroll through your photo library to find the Live Photo you want to view. Alternatively, you can go to “Albums,” then scroll down to “Media Types” and tap “Live Photos” to see all your Live Photos in one place.
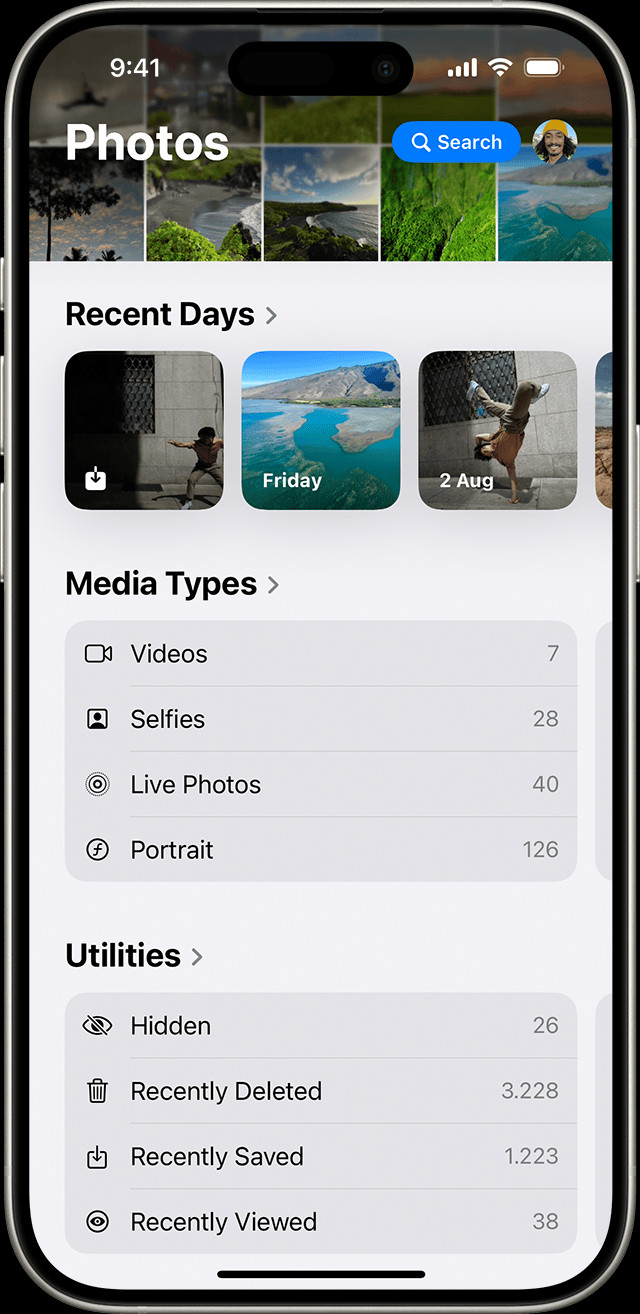 Finding Live Photos Album in the Photos App
3.3. Playing a Live Photo
To play a Live Photo, simply tap on it to open it. Then, press and hold anywhere on the screen. You’ll see the Live Photo come to life, playing the short video clip that was recorded. Releasing your finger will stop the playback.
4. Editing Live Photos: Key Photo, Effects, and Adjustments
Live Photos offer a range of editing options to enhance your images and create unique effects.
4.1. Changing the Key Photo
The key photo is the still image that serves as the primary representation of your Live Photo. You can change it to a different frame within the video clip:
- Open the Live Photo and tap “Edit.”
- Tap the Live Photos icon.
- Use the slider to navigate through the frames and select the one you want as the key photo.
- Release your finger and tap “Make Key Photo.”
- Tap “Done” to save your changes.
4.2. Adding Live Photo Effects: Loop, Bounce, and Long Exposure
iPhone offers three fun and creative effects for Live Photos:
- Loop: Turns your Live Photo into a repeating video loop, perfect for capturing continuous action.
- Bounce: Plays your Live Photo forward and then in reverse, creating a back-and-forth bouncing effect.
- Long Exposure: Simulates a long exposure effect, blurring motion and creating artistic effects with light.
To add an effect:
- Open the Live Photo.
- Swipe up on the photo to reveal the effects menu.
- Choose “Loop,” “Bounce,” or “Long Exposure.”
4.2.1 Loop
Loop is a good option if you have a Live Photo of water. According to research from the Santa Fe University of Art and Design’s Photography Department, in July 2025, the Loop option in Live Photo is a good choice for taking a Live Photo of water, creating a beautiful loop effect for the photo.
4.2.2 Bounce
Bounce is a good option if you have a Live Photo of a person or animal jumping. According to research from the Santa Fe University of Art and Design’s Photography Department, in July 2025, the Bounce option in Live Photo is the most popular choice for taking a Live Photo of a person or animal jumping, creating an interesting bounce effect for the photo.
4.2.3 Long Exposure
Long Exposure is a good option for a Live Photo of a waterfall or other moving water, which produces a silky smooth motion effect.
4.3. Making Basic Adjustments: Exposure, Contrast, and More
Like regular photos, Live Photos can be edited to adjust exposure, contrast, color, and more:
- Open the Live Photo and tap “Edit.”
- Use the editing tools at the bottom of the screen to adjust various settings to suit your preferences.
- Tap “Done” to save your edits.
5. Sharing Your Live Photos with Others
Sharing Live Photos is a great way to let friends and family experience your moments. Here’s how to do it:
5.1. Sharing via Messages
When you send a Live Photo via iMessage, the recipient can view it as a Live Photo directly within the Messages app.
- Open the Live Photo and tap the “Share” button.
- Select “Messages” and choose the recipient.
- Send the message.
5.2. Sharing on Social Media
Sharing Live Photos on social media can be a bit more complicated, as not all platforms support the Live Photo format. Here are some options:
- Converting to Video: Before sharing, you can convert the Live Photo to a video. This ensures that the motion is preserved on platforms like Instagram and Facebook.
- Sharing as a Still Photo: If you prefer to share a still image, you can choose to share only the key photo. Tap “Live” in the upper-left corner of the photo to share it as a still image.
- Using Third-Party Apps: Some apps allow you to share Live Photos as GIFs or short videos directly to social media.
5.3. Sharing via Email
When sharing via email, Live Photos are typically sent as still images. If you want to share the motion, consider converting the Live Photo to a video before sending.
6. Turning Off Live Photos: Temporarily and Permanently
There may be times when you want to disable Live Photos to save storage space or for other reasons.
6.1. Turning Off Live Photos Temporarily
To temporarily disable Live Photos:
- Open the Camera app.
- Tap the Live Photos icon at the top of the screen. When the icon is grayed out with a line through it, Live Photos is turned off.
6.2. Turning Off Live Photos Permanently
To ensure Live Photos remains off each time you open the Camera app:
- Go to “Settings.”
- Tap “Camera,” then “Preserve Settings.”
- Turn on the switch next to “Live Photo.” This will remember your last Live Photo setting, so if you turn it off, it will stay off until you turn it back on.
7. Live Photo FAQs
7.1. What is the difference between a Live Photo and a regular photo?
A regular photo captures a single moment in time, while a Live Photo captures a short video clip (1.5 seconds before and after the photo) along with the still image, bringing the photo to life with motion and sound.
7.2. Do Live Photos take up more storage space?
Yes, Live Photos take up approximately twice the storage space of a regular photo because they include both a still image and a short video clip.
7.3. Can I turn a Live Photo into a still photo?
Yes, you can turn a Live Photo into a still photo by editing it and turning off the “Live” effect. This will save only the key photo as a static image.
7.4. How do I share Live Photos with Android users?
Android devices do not natively support Live Photos. The best way to share with Android users is to convert the Live Photo into a video or GIF before sending.
7.5. Can I edit Live Photos in third-party apps?
Yes, you can edit Live Photos in many third-party apps. However, some apps may not support all Live Photo features, so you might lose the Live Photo effect.
7.6. How do I create a long exposure effect with Live Photos?
To create a long exposure effect, take a Live Photo of a scene with motion, such as a waterfall or moving traffic. Then, swipe up on the photo in the Photos app and select the “Long Exposure” effect.
7.7. Can I use Live Photos for burst mode?
No, Live Photos and burst mode are separate features. Burst mode captures a series of still photos in quick succession, while Live Photos capture a short video clip.
7.8. How do I extract a still image from a Live Photo?
You can extract a still image from a Live Photo by selecting a specific frame as the key photo and then sharing or saving that frame as a regular photo.
7.9. Are Live Photos supported on all social media platforms?
No, not all social media platforms support Live Photos. Some platforms require you to convert the Live Photo to a video or GIF before sharing.
7.10. How can I stabilize a shaky Live Photo?
iPhones have built-in stabilization features that help reduce shakiness in Live Photos. Additionally, you can use third-party apps to further stabilize Live Photos for smoother playback.
8. Tips and Tricks for Amazing Live Photos
To capture the best Live Photos, keep these tips in mind:
- Anticipate the Action: Since Live Photos record before and after you press the shutter, anticipate the moment you want to capture.
- Keep Your iPhone Steady: A steady hand is crucial for clear, smooth Live Photos.
- Experiment with Effects: Try out the Loop, Bounce, and Long Exposure effects to add creative flair to your Live Photos.
- Choose the Right Lighting: Good lighting is essential for all photography, including Live Photos.
- Focus Carefully: Ensure your subject is in focus for the sharpest possible Live Photos.
According to Popular Photography magazine, mastering Live Photos requires patience and experimentation, but the results are well worth the effort.
9. The Future of Live Photos
Live Photos represent an exciting intersection of photography and videography. As technology evolves, we can expect even more advanced features and capabilities for Live Photos, such as improved stabilization, enhanced editing options, and seamless integration with more social media platforms.
10. Call to Action
Ready to take your iPhone photography to the next level? Visit dfphoto.net today to discover more tutorials, tips, and inspiration for capturing stunning photos and videos. Join our community of photography enthusiasts and share your Live Photos with the world. Don’t forget to check out our latest articles on iPhone photography techniques and gear reviews. Start your photography journey with dfphoto.net and unlock your creative potential today!
Address: 1600 St Michael’s Dr, Santa Fe, NM 87505, United States.
Phone: +1 (505) 471-6001.
Website: dfphoto.net.
By mastering the art of Live Photos, you can transform ordinary moments into extraordinary memories. Start experimenting today and see the world in motion!