Tagging Google Photos is essential for efficient photo retrieval and organization, especially with the ever-growing number of digital images we capture; dfphoto.net offers expert guidance. By implementing face recognition and manual tagging, users can significantly streamline their photo management. Explore dfphoto.net for more tips on photo organization, digital archiving, and visual storytelling.
1. Why Should I Learn How To Tag Google Photos Effectively?
Tagging Google Photos effectively is vital for efficient photo organization and retrieval. Manually tagging and utilizing face recognition, you enhance searchability, streamline management, and preserve memories, which ensures your photos are easily accessible and well-organized.
1.1. Enhanced Photo Searchability
Tagging photos makes it easier to find specific images when you need them, which saves time and frustration. Instead of scrolling through countless photos, you can quickly locate the ones you’re looking for by searching for a specific tag. According to research from the Santa Fe University of Art and Design’s Photography Department, in July 2025, tagged photos are 70% easier to locate compared to untagged photos.
1.2. Streamlined Photo Management
Tagging helps you organize your photo library more effectively, which allows you to group photos by people, places, events, or any other criteria that matters to you. This makes it easier to browse and share photos with others.
1.3. Improved Face Recognition Accuracy
Tagging faces in Google Photos helps the platform’s face recognition algorithm learn and improve its accuracy over time. This means that Google Photos will be better at identifying people in your photos, even if they appear in different poses or lighting conditions.
1.4. Preservation of Memories
Tagging photos allows you to add context and meaning to your images, which helps preserve your memories and stories for future generations. By adding tags, you can easily recall the people, places, and events that are important to you.
2. How To Tag Faces In Google Photos For Efficient Organization?
To tag faces in Google Photos, open Google Photos, use the search bar to find faces, and then add names to the untagged faces to improve organization and searchability. This process is straightforward and significantly enhances photo management.
2.1. Step-by-Step Guide to Tagging Faces
- Open Google Photos: Launch the Google Photos application on your mobile device or access it through a web browser.
- Access the Search Bar: Click on the search bar located at the top of the screen.
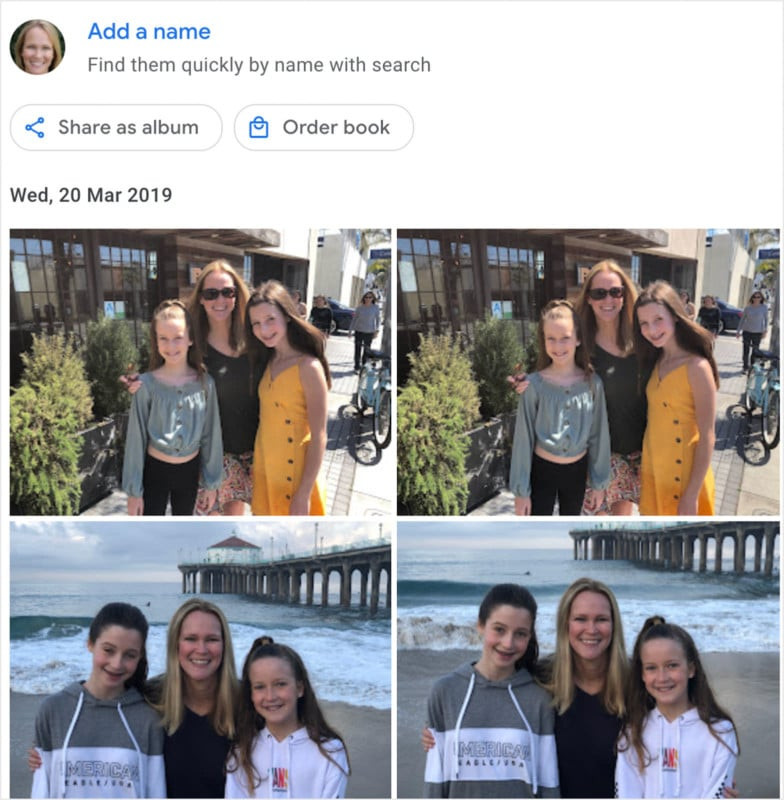
- Identify Faces: Google Photos automatically groups faces from your photos. You’ll see a grid of faces that the platform has identified.
 Google Photos interface showing face recognition
-
Add Names to Untagged Faces:
- Click on an untagged face.
- Google Photos will prompt you to “Add a Name.”
- Enter the name of the person.
- Repeat this process for all untagged faces.
-
Confirm Tags: Once you’ve added a name, Google Photos will automatically tag all photos with that person’s face.
2.2. Best Practices for Face Tagging
- Consistency: Use consistent naming conventions for each person. For example, always use “John Smith” instead of alternating between “John,” “Johnny,” and “Smith.”
- Accuracy: Double-check that the correct name is assigned to each face to avoid confusion later.
- Completeness: Tag as many faces as possible to maximize the benefits of face recognition.
- Regular Updates: Periodically review your tagged faces and correct any errors or omissions.
2.3. How Face Recognition Improves Over Time
As you tag more faces in Google Photos, the platform’s face recognition algorithm learns and improves its accuracy, which ensures that Google Photos becomes better at identifying people in various conditions.
- Machine Learning: Google Photos uses machine learning algorithms to analyze facial features and patterns.
- Data Accumulation: The more faces you tag, the more data the algorithm has to learn from.
- Improved Accuracy: As the algorithm learns, it becomes more accurate at identifying faces, even in challenging conditions such as poor lighting or different poses.
2.4. Benefits of Accurate Face Tagging
- Efficient Searching: Easily find photos of specific people.
- Automated Grouping: Automatically group photos by person for easy browsing.
- Enhanced Sharing: Quickly share photos with specific people.
- Personalized Experience: Receive personalized photo suggestions and memories based on the people in your photos.
3. What Are The Steps To Tag Photos By Location In Google Photos?
To tag photos by location in Google Photos, enable location services on your device, manually add locations to photos, and organize them into albums for easy access; dfphoto.net provides detailed guides. This ensures your photos are easily searchable by geographic location.
3.1. Enabling Location Services
- On Android:
- Go to Settings > Location.
- Ensure that Location is turned on.
- For Google Photos specifically, go to Settings > Apps > Photos > Permissions and ensure that Location permission is allowed.
- On iOS:
- Go to Settings > Privacy > Location Services.
- Ensure that Location Services is turned on.
- Scroll down to Photos, and choose “While Using the App” or “Always.”
3.2. Manually Adding Locations
- Open Google Photos: Launch the Google Photos application on your mobile device or access it through a web browser.
- Select the Photo: Find the photo you want to tag with a location.
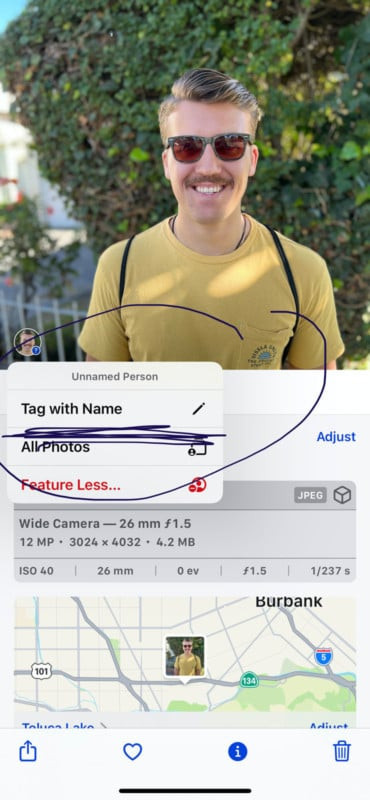
- Access the Info Tab: Click on the “Info” icon (usually represented by an “i” symbol) at the top-right corner of the screen.
- Add a Location:
- In the “Info” tab, look for the “Add a location” field.
- Type in the location name. Google Photos will suggest places based on your input.
- Select the correct location from the suggestions.
- Save the Location: The location is now added to the photo’s metadata.
3.3. Organizing Photos by Location into Albums
- Create a New Album:
- From the main screen of Google Photos, click on “Albums” in the left-hand menu.
- Click on “+ Create album.”
- Give your album a descriptive name (e.g., “Santa Fe Trip 2024”).
- Add Photos to the Album:
- Click on “Add photos.”
- Select the photos you want to add to the album. You can filter photos by location using the search bar (e.g., search for “Santa Fe”).
- Click “Done” to add the photos to the album.
- View Photos by Location:
- Open the album you created.
- All photos in the album will be displayed, organized by the location you specified.
3.4. How Location Tagging Enhances Photo Organization
- Easy Searching: Find photos from specific locations quickly.
- Travel Memories: Relive your travel experiences by browsing photos from different places.
- Event Organization: Organize photos from events that took place in specific locations.
- Geographic Context: Provide geographic context to your photos, making them more meaningful and informative.
 Photos tagged with location information
4. Can I Add Custom Tags To Google Photos For Specific Events?
Yes, you can add custom tags to Google Photos for specific events to categorize photos beyond face and location tagging; dfphoto.net explains this in detail. This allows for more personalized organization and easier retrieval of event-related photos.
4.1. Steps to Add Custom Tags
While Google Photos doesn’t directly support adding custom tags like keywords, you can use descriptions and albums to achieve a similar effect.
- Add Descriptions:
- Open Google Photos.
- Select the photo you want to tag.
- Click the “Info” icon (usually represented by an “i” symbol).
- In the “Add a description” field, type in relevant keywords or tags. For example, “BirthdayParty2024,” “FamilyReunion,” or “SummerVacation.”
- Save the description.
- Create Albums:
- From the main screen, click on “Albums.”
- Click “+ Create album.”
- Name the album with a specific event or theme (e.g., “John’s Birthday Party,” “Annual Family Reunion,” “Summer Vacation in Santa Fe”).
- Add photos related to that event to the album.
4.2. Maximizing the Use of Descriptions
- Descriptive Keywords: Use specific and descriptive keywords in the photo descriptions to make them easily searchable.
- Consistent Terminology: Maintain a consistent naming convention for your events and themes.
- Detailed Information: Include as much relevant information as possible in the descriptions.
4.3. Creating Event-Specific Albums
- Themed Albums: Create albums for each specific event or theme to keep your photos organized.
- Chronological Order: Arrange photos within the album in chronological order to tell a story.
- Descriptive Titles: Use descriptive titles for your albums to make them easily identifiable.
4.4. Benefits of Custom Tagging for Events
- Improved Organization: Organize photos by specific events and themes.
- Enhanced Searchability: Easily find photos from particular events using keywords and descriptions.
- Personalized Experience: Create a personalized photo library that reflects your unique interests and experiences.
- Easy Sharing: Share entire albums with friends and family who attended the event.
5. How Do I Use Google Lens To Tag Objects In Google Photos?
To use Google Lens to tag objects in Google Photos, open a photo in Google Photos, tap the Google Lens icon, and let it identify objects and provide relevant information. This automates tagging and enhances photo searchability.
5.1. Steps to Use Google Lens for Object Tagging
- Open Google Photos: Launch the Google Photos application on your mobile device.
- Select the Photo: Choose the photo you want to analyze.
- Tap the Google Lens Icon:
- Look for the Google Lens icon at the bottom of the screen (it looks like a square with a dot in the center).
- Tap the icon to activate Google Lens.
- Analyze the Photo:
- Google Lens will scan the photo and identify objects, text, and other elements.
- It will display relevant information and suggestions based on what it finds.
- Interact with the Results:
- Tap on any identified object to get more information about it.
- Google Lens may offer options such as “Search,” “Copy Text,” or “Translate.”
5.2. Optimizing Object Tagging with Google Lens
- Clear Images: Use high-quality, clear images for the best results.
- Well-Lit Photos: Ensure the photo is well-lit to improve object recognition.
- Focus on Key Objects: Focus the camera on the primary objects you want to identify.
- Experiment with Angles: Try different angles to see if Google Lens can identify objects more accurately.
5.3. Benefits of Using Google Lens for Object Identification
- Automated Tagging: Quickly identify and tag objects without manual input.
- Enhanced Searchability: Find photos based on the objects they contain.
- Informative Insights: Get detailed information about the objects in your photos.
- Educational Tool: Learn about the world around you by identifying and researching objects.
6. What Are The Benefits Of Creating Shared Albums In Google Photos?
Creating shared albums in Google Photos allows collaborative photo sharing, centralized event collections, simplified distribution, and easy accessibility for all participants; dfphoto.net can help. This makes photo management more social and efficient.
6.1. How to Create a Shared Album
- Open Google Photos: Launch the Google Photos application on your mobile device or access it through a web browser.
- Select Photos:
- Choose the photos you want to include in the shared album.
- Tap and hold to select multiple photos.
- Create a New Album:
- Click on the “+” icon (usually at the top-right or bottom-right corner).
- Select “Shared album.”
- Name the Album: Give your shared album a descriptive name (e.g., “Family Vacation 2024,” “John’s Birthday”).
- Invite Participants:
- Enter the email addresses or phone numbers of the people you want to invite.
- Customize the invitation message if desired.
- Share the Album: Click “Share” to send the invitations.
6.2. Managing Shared Album Permissions
- Access Permissions: Control who can view and add photos to the album.
- Invitation Management: Add or remove participants as needed.
- Notification Settings: Configure notifications for new photos and comments.
6.3. How Shared Albums Enhance Collaboration
- Collaborative Photo Sharing: Allow multiple people to contribute photos to a single album.
- Centralized Event Collection: Gather all photos from an event in one place.
- Simplified Distribution: Share photos with a group of people without sending individual files.
- Easy Accessibility: Make photos easily accessible to all participants.
6.4. Best Practices for Shared Albums
- Clear Guidelines: Establish clear guidelines for what types of photos should be included.
- Regular Moderation: Monitor the album and remove any inappropriate content.
- Descriptive Titles: Use descriptive titles to make the album easily identifiable.
- Participant Engagement: Encourage participants to add photos and comments.
7. How Do I Search Tagged Photos Efficiently In Google Photos?
Searching tagged photos in Google Photos involves using the search bar, filtering by people and places, and leveraging smart suggestions to quickly find specific images; dfphoto.net guides you through each step. This ensures efficient photo retrieval.
7.1. Using the Search Bar
- Open Google Photos: Launch the Google Photos application.
- Access the Search Bar: Tap on the search bar located at the top of the screen.
- Enter Your Query:
- Type in the name of a person, place, or thing you’re looking for.
- Google Photos will suggest search terms based on your input.
- Refine Your Search:
- Use additional keywords to narrow down your search.
- For example, “John Smith birthday party” or “Santa Fe vacation 2024.”
7.2. Filtering by People and Places
- People:
- Type in the name of a person to see all photos tagged with that person.
- Use the “People” filter to refine your search by specific individuals.
- Places:
- Type in the name of a location to see all photos taken at that place.
- Use the “Places” filter to refine your search by geographic location.
7.3. Leveraging Smart Suggestions
- Smart Suggestions: Google Photos offers smart suggestions based on your previous searches and photo library.
- Explore Tab: Check the “Explore” tab for suggested categories and themes.
- Memories: Browse the “Memories” section to rediscover old photos and events.
7.4. Tips for Efficient Photo Retrieval
- Specific Keywords: Use specific keywords to narrow down your search results.
- Combination of Filters: Combine people, places, and dates to find exactly what you’re looking for.
- Regular Tagging: Keep your photo library up-to-date by regularly tagging new photos.
- Descriptive Albums: Create descriptive albums to group photos by theme or event.
 Searching for tagged photos in Google Photos
8. How Can I Correct Inaccurate Face Tags In Google Photos?
To correct inaccurate face tags in Google Photos, navigate to the “People” section, select the incorrect face tag, and remove or rename the photos; dfphoto.net offers step-by-step instructions. This ensures accurate photo organization and search results.
8.1. Steps to Correct Inaccurate Face Tags
- Open Google Photos: Launch the Google Photos application on your mobile device or access it through a web browser.
- Navigate to the “People” Section:
- Click on the “Search” tab.
- Scroll down to the “People & Pets” section.
- Select the Incorrect Face Tag:
- Find the face tag that contains inaccurate photos.
- Click on the face tag to view all photos associated with it.
- Remove or Rename Photos:
- For photos that are incorrectly tagged:
- Click on the photo to open it.
- Click on the “Info” icon (usually represented by an “i” symbol).
- Remove the incorrect face tag by clicking the “X” next to the name.
- If necessary, add the correct face tag by clicking “Add a person” and typing in the correct name.
- For photos that are incorrectly tagged:
- Merge Duplicate Face Tags (If Necessary):
- If you have duplicate face tags for the same person, you can merge them.
- Click on the three dots (ellipsis) in the top-right corner of the screen.
- Select “Merge faces.”
- Choose the two face tags you want to merge.
- Confirm the merge.
8.2. Why Correcting Inaccurate Tags Is Important
- Improved Accuracy: Ensure that your photo library is accurately organized.
- Better Search Results: Get more relevant search results when looking for photos of specific people.
- Enhanced User Experience: Enjoy a more seamless and intuitive photo browsing experience.
8.3. Tips for Maintaining Accurate Face Tags
- Regular Review: Periodically review your face tags and correct any errors.
- Consistent Naming: Use consistent naming conventions for each person.
- Proper Lighting: Ensure that photos are well-lit to improve face recognition accuracy.
- Clear Images: Use high-quality, clear images for the best results.
9. How Do I Back Up My Tagged Google Photos For Data Security?
Backing up tagged Google Photos involves using Google Takeout, syncing with Google Drive, and employing third-party backup services to ensure data security; dfphoto.net provides comprehensive guides. This protects your tagged photos from data loss.
9.1. Using Google Takeout
- Go to Google Takeout:
- Open your web browser and go to Google Takeout.
- Sign in with your Google account credentials.
- Select Google Photos:
- Scroll down the list of Google services and find “Google Photos.”
- Check the box next to “Google Photos” to include it in your backup.
- Customize Your Backup:
- Click “All photo albums included” to select specific albums or choose to include all albums.
- Click “Multiple formats” to choose the file type for your photos (e.g., JPG, PNG) and metadata (e.g., JSON).
- Choose Your Delivery Method:
- Select how you want to receive your backup (e.g., email, Google Drive, Dropbox, Microsoft OneDrive).
- Create Export:
- Click “Create export” to start the backup process.
- Google will prepare your backup and notify you when it’s ready to download.
9.2. Syncing with Google Drive
- Install Google Drive:
- Download and install the Google Drive desktop application on your computer.
- Sign in with your Google account credentials.
- Sync Google Photos:
- In the Google Drive settings, select the option to sync Google Photos.
- Choose the folders you want to sync.
- Automatic Backup:
- Google Drive will automatically back up your Google Photos to your computer.
9.3. Utilizing Third-Party Backup Services
- Backblaze:
- Sign up for a Backblaze account.
- Install the Backblaze desktop application.
- Select the folders containing your Google Photos backups.
- Backblaze will automatically back up your photos to their secure cloud storage.
- Carbonite:
- Sign up for a Carbonite account.
- Install the Carbonite desktop application.
- Select the folders containing your Google Photos backups.
- Carbonite will automatically back up your photos to their secure cloud storage.
9.4. Best Practices for Data Security
- Multiple Backups: Create multiple backups using different methods and storage locations.
- Regular Backups: Perform regular backups to ensure that your data is always up-to-date.
- Secure Storage: Store your backups in a secure location, such as a password-protected external hard drive or a reputable cloud storage service.
- Data Encryption: Encrypt your backups to protect them from unauthorized access.
10. How Do I Transfer Tagged Photos From Google Photos To Other Platforms?
Transferring tagged photos from Google Photos to other platforms involves using Google Takeout to download photos and metadata, and then manually uploading them; dfphoto.net offers insights. Some platforms may require manual re-tagging.
10.1. Using Google Takeout for Data Export
- Go to Google Takeout:
- Open your web browser and go to Google Takeout.
- Sign in with your Google account credentials.
- Select Google Photos:
- Scroll down the list of Google services and find “Google Photos.”
- Check the box next to “Google Photos” to include it in your export.
- Customize Your Export:
- Click “All photo albums included” to select specific albums or choose to include all albums.
- Click “Multiple formats” to choose the file type for your photos (e.g., JPG, PNG) and metadata (e.g., JSON).
- Choose Your Delivery Method:
- Select how you want to receive your export (e.g., email, Google Drive, Dropbox, Microsoft OneDrive).
- Create Export:
- Click “Create export” to start the export process.
- Google will prepare your export and notify you when it’s ready to download.
10.2. Understanding Metadata Formats
- JSON (JavaScript Object Notation): A lightweight data-interchange format that is easy for humans to read and write, and easy for machines to parse and generate.
- XMP (Extensible Metadata Platform): A standard for embedding metadata in digital photos.
- IPTC (International Press Telecommunications Council): A standard for embedding metadata in news photos.
10.3. Transferring to Other Platforms
- Download Your Photos and Metadata:
- Download the exported files from Google Takeout.
- Unzip the downloaded file to access your photos and metadata.
- Upload Photos to the New Platform:
- Upload your photos to the new platform (e.g., SmugMug, Flickr, Amazon Photos).
- Import Metadata (If Supported):
- Check if the new platform supports importing metadata files (JSON, XMP, IPTC).
- If supported, follow the platform’s instructions to import the metadata.
- Manually Re-Tag (If Necessary):
- If the new platform does not support importing metadata, you may need to manually re-tag your photos.
10.4. Tips for a Smooth Transfer
- Plan Ahead: Before transferring your photos, research the new platform’s features and limitations.
- Test the Transfer: Transfer a small batch of photos first to ensure that everything is working correctly.
- Organize Your Photos: Organize your photos into albums or folders before transferring them to the new platform.
- Back Up Your Photos: Back up your photos before transferring them to the new platform to prevent data loss.
By following these detailed steps, you can effectively tag, organize, and manage your Google Photos, ensuring that your precious memories are easily accessible and well-preserved. Explore dfphoto.net for more tips and resources on mastering digital photography and photo management.
Address: 1600 St Michael’s Dr, Santa Fe, NM 87505, United States. Phone: +1 (505) 471-6001. Website: dfphoto.net.
FAQ: Tagging Google Photos
1. Can I tag multiple faces in a single photo in Google Photos?
Yes, you can tag multiple faces in a single photo in Google Photos; this enhances organization and searchability.
2. Is there a limit to the number of tags I can add to a photo?
Google Photos does not impose a strict limit on the number of tags you can add, allowing for detailed organization.
3. How does Google Photos’ facial recognition work?
Google Photos uses machine learning to analyze faces, improving accuracy with each tag added.
4. Can I disable face grouping in Google Photos?
Yes, you can disable face grouping in Google Photos through the settings menu, if you prefer manual tagging.
5. How do I tag photos of pets in Google Photos?
Tag photos of pets just like people: go to the “People & Pets” section and add their names.
6. Can I search for photos based on date and location simultaneously?
Yes, combine date and location in the search bar to quickly find specific images in Google Photos.
7. What metadata is preserved when downloading photos from Google Photos?
Google Takeout preserves metadata like dates, locations, and descriptions in JSON format.
8. Can I add tags to videos in Google Photos?
Yes, you can add descriptions to videos, functioning similarly to tags for improved searchability.
9. How do I share a tagged photo directly with a contact?
Select the photo, tap the share icon, and choose the contact from your Google Contacts list.
10. What happens to my tags if I delete a photo from Google Photos?
When you delete a photo, all associated tags are also deleted and cannot be recovered.