Syncing photos from your computer to your iPad is a straightforward process, ensuring you can enjoy your favorite images on the go. dfphoto.net is here to guide you through the steps, whether you’re using a Windows PC or a Mac, so you can have your cherished memories and artistic creations readily available on your iPad. We also cover troubleshooting steps and alternative syncing methods, including cloud storage and third-party apps, so you can find the perfect solution for your photo transfer needs. Discover wireless syncing and photo management tips for Apple devices, ensuring optimal photo library organization.
1. What Are The Ways To Sync Photos From My Computer To My iPad?
There are several effective ways to sync photos from your computer to your iPad, including using the Apple Devices app on Windows, iTunes (for older systems), iCloud Photos, and third-party applications. The best method depends on your operating system, your preference for wired or wireless syncing, and whether you want to keep your photo library synchronized across all your Apple devices.
- Apple Devices App (Windows): This is the primary method for syncing photos on newer Windows systems. It allows you to select specific albums or folders to sync, providing granular control over which photos are transferred to your iPad.
- iTunes (Older Systems): For older Windows and macOS versions, iTunes remains a viable option for syncing photos. Like the Apple Devices app, it allows you to choose specific albums or folders.
- iCloud Photos: If you use iCloud Photos, your photos are automatically updated across all your Apple devices, including your iPad. This method requires an active iCloud subscription and ensures your photo library is always consistent across devices.
- Third-Party Apps: Numerous third-party applications, such as Dropbox, Google Photos, and Amazon Photos, can also be used to transfer photos to your iPad. These apps often provide additional features like automatic backup and cross-platform compatibility.
2. How Do I Sync Photos From My Windows Computer To My iPad Using The Apple Devices App?
To sync photos from your Windows computer to your iPad using the Apple Devices app, connect your iPad to your computer, open the Apple Devices app, select your iPad, navigate to the Photos section, choose the folders you want to sync, and then apply the changes. This method allows you to selectively sync specific albums or folders.
Here’s a detailed step-by-step guide:
- Connect Your iPad: Use a USB or USB-C cable to connect your iPad to your Windows computer. If prompted on your iPad, tap “Trust” to allow your computer to access your device.
- Open the Apple Devices App: Locate and open the Apple Devices app on your Windows computer. If you don’t have it, you can download it from the Microsoft Store.
- Select Your iPad: In the Apple Devices app, your iPad should appear in the sidebar. Click on your iPad to select it.
 iPad selected in Apple Devices app sidebar
The sidebar showing an iPad selected in the Apple Devices app
- Navigate to Photos: In the sidebar, find and click on “Photos.”
 Photos selected in Apple Devices app sidebar
The sidebar showing Photos selected in the Apple Devices app
- Choose Sync Options:
- Check the box that says “Sync Photos to your device from,” then choose an option from the pop-up menu.
- Select “All folders” to sync all photos from your selected source, or choose “Selected folders” to pick specific albums or folders.
- Select Albums or Folders: If you chose “Selected folders,” a list of albums and folders will appear. Check the boxes next to the ones you want to sync to your iPad.
An interface with options to sync all or selected albums in the Apple Devices app
- Include Videos (Optional): If you want to include videos in your sync, check the “Include videos” box.
- Apply Changes: Once you’ve selected your desired albums and settings, click the “Apply” button at the bottom of the window to start the syncing process.
- Wait for Sync to Complete: The syncing process may take some time depending on the size of your photo library. Ensure your iPad remains connected to your computer until the sync is complete.
- Eject Your iPad: Once the sync is finished, you can safely eject your iPad by clicking the eject button in the sidebar next to your device’s name.
3. How Do I Sync Photos From My Mac To My iPad Using Finder?
To sync photos from your Mac to your iPad using Finder, connect your iPad to your Mac, open Finder, select your iPad, navigate to the Photos tab, choose the albums you want to sync, and then apply the changes. Finder provides a seamless way to manage and sync content between your Mac and iPad.
Here’s a detailed breakdown:
- Connect Your iPad: Connect your iPad to your Mac using a USB or USB-C cable. If prompted on your iPad, tap “Trust” to allow your Mac to access your device.
- Open Finder: Open a new Finder window on your Mac.
- Select Your iPad: In the Finder sidebar, under “Locations,” you should see your iPad listed. Click on your iPad to select it.
- Navigate to Photos: In the Finder window, click on the “Photos” tab.
- Choose Sync Options:
- Check the box that says “Sync photos to your device from,” then choose an option from the pop-up menu.
- Select “All photos” to sync all photos from your Photos library, or choose “Selected albums” to pick specific albums.
- Select Albums: If you chose “Selected albums,” a list of your albums will appear. Check the boxes next to the ones you want to sync to your iPad.
- Include Videos (Optional): If you want to include videos in your sync, check the “Include videos” box.
- Apply Changes: Once you’ve selected your desired albums and settings, click the “Apply” button at the bottom of the window to start the syncing process.
- Wait for Sync to Complete: The syncing process may take some time depending on the size of your photo library. Ensure your iPad remains connected to your Mac until the sync is complete.
- Eject Your iPad: Once the sync is finished, you can safely eject your iPad by clicking the eject button in the Finder sidebar next to your device’s name.
4. Can I Use iCloud Photos To Sync Photos Between My Computer And iPad?
Yes, you can use iCloud Photos to sync photos between your computer and iPad, ensuring that any photos you take or add to one device are automatically available on all your other devices. This method requires enabling iCloud Photos on both your computer and iPad and having sufficient iCloud storage.
To set up iCloud Photos:
-
On Your Computer:
- Mac: Go to System Preferences > Apple ID > iCloud, and make sure “Photos” is checked.
- Windows: Download and install iCloud for Windows from the Microsoft Store. Open iCloud for Windows, sign in with your Apple ID, and check the box next to “Photos.” You may need to restart your computer for the changes to take effect.
-
On Your iPad:
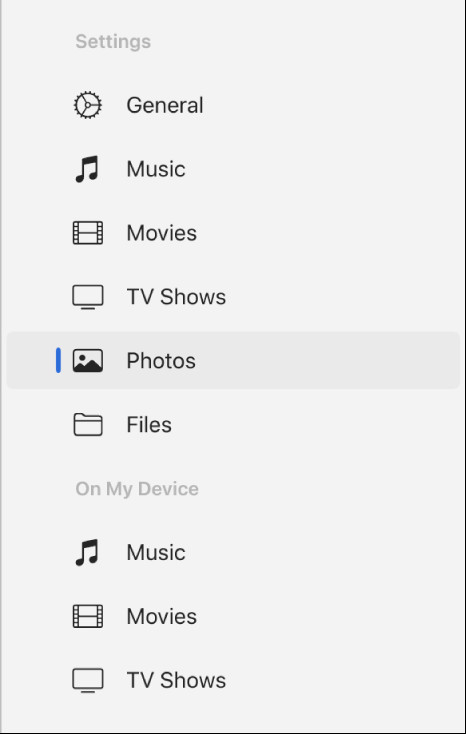
- Go to Settings > Photos, and make sure “iCloud Photos” is turned on.
Once iCloud Photos is enabled, any photos you add to your Photos library on your computer will automatically upload to iCloud and sync to your iPad, and vice versa. Keep in mind that this requires a stable internet connection and sufficient iCloud storage. Apple provides 5GB of free iCloud storage, but you may need to purchase additional storage if you have a large photo library.
5. What Are The Benefits Of Using iCloud Photos For Photo Syncing?
Using iCloud Photos for photo syncing offers several benefits, including automatic syncing across devices, easy access to your photos from any device, storage optimization, and backup protection. It ensures your photos are always up-to-date and accessible, regardless of which device you’re using.
- Automatic Syncing: iCloud Photos automatically syncs your photos and videos across all your Apple devices, including your iPhone, iPad, and Mac. Any changes you make on one device are reflected on all other devices.
- Easy Access: With iCloud Photos, you can access your entire photo library from any device with an internet connection. This means you can view and share your photos from anywhere, without having to manually transfer them.
- Storage Optimization: iCloud Photos offers storage optimization features that can help you save space on your devices. It stores full-resolution photos in iCloud and keeps smaller, optimized versions on your devices.
- Backup Protection: iCloud Photos provides a backup of your photo library in the cloud, protecting your photos and videos from loss or damage. If something happens to your device, you can easily restore your photos from iCloud.
- Seamless Integration: iCloud Photos is deeply integrated into the Apple ecosystem, providing a seamless and intuitive experience for managing and sharing your photos.
6. How Do I Use Third-Party Apps Like Dropbox Or Google Photos To Sync Photos?
To use third-party apps like Dropbox or Google Photos to sync photos, install the app on both your computer and iPad, upload your photos from your computer to the app’s cloud storage, and then access and download them on your iPad. These apps often offer additional features like automatic backup and cross-platform compatibility.
Here’s how to use Dropbox or Google Photos for photo syncing:
Dropbox:
- Install Dropbox: Download and install the Dropbox app on your computer and iPad.
- Sign In: Sign in to your Dropbox account on both devices.
- Upload Photos: On your computer, upload the photos you want to sync to a folder in your Dropbox account. You can do this by dragging and dropping the photos into the Dropbox folder on your computer or by using the Dropbox website.
- Access Photos on iPad: On your iPad, open the Dropbox app and navigate to the folder where you uploaded the photos. You can then view and download the photos to your iPad.
Google Photos:
- Install Google Photos: Download and install the Google Photos app on your computer and iPad.
- Sign In: Sign in to your Google account on both devices.
- Upload Photos: On your computer, upload the photos you want to sync to Google Photos. You can do this by using the Google Photos website or by installing the Backup and Sync tool on your computer.
- Access Photos on iPad: On your iPad, open the Google Photos app. Your photos will automatically sync and be available for viewing and downloading.
7. What Are The Limitations Of Using Third-Party Apps For Photo Syncing?
Using third-party apps for photo syncing can have limitations such as storage limits, privacy concerns, reliance on internet connectivity, potential costs for additional storage, and integration issues with the iPad’s native Photos app. It’s important to consider these factors when choosing a syncing method.
- Storage Limits: Most third-party apps offer limited free storage, and you may need to pay for additional storage if you have a large photo library.
- Privacy Concerns: Storing your photos on third-party servers raises privacy concerns, as you are entrusting your personal data to a third-party company.
- Internet Connectivity: Syncing photos with third-party apps requires a stable internet connection, which may not always be available.
- Cost: While some apps offer free storage, you may need to pay for additional storage or premium features.
- Integration Issues: Third-party apps may not integrate as seamlessly with the iPad’s native Photos app as iCloud Photos, which can make it more difficult to manage and share your photos.
8. How Do I Delete Photos From My iPad That Were Synced From My Computer?
To delete photos from your iPad that were synced from your computer, you need to unsync them through the Apple Devices app (on Windows) or Finder (on Mac). Connect your iPad, deselect the synced folders, and then sync again to remove the photos.
Here’s a detailed guide:
Using Apple Devices App (Windows):
- Connect Your iPad: Connect your iPad to your Windows computer using a USB or USB-C cable.
- Open the Apple Devices App: Open the Apple Devices app on your computer.
- Select Your iPad: Select your iPad in the sidebar.
- Navigate to Photos: Click on “Photos” in the sidebar.
- Deselect Folders: In the folders list, deselect the checkboxes of the albums or folders you want to remove from your iPad.
- Sync Your iPad: Click the “Apply” button to sync your iPad. The selected photos will be removed from your iPad during the sync process.
Using Finder (Mac):
- Connect Your iPad: Connect your iPad to your Mac using a USB or USB-C cable.
- Open Finder: Open a new Finder window.
- Select Your iPad: Select your iPad in the sidebar.
- Navigate to Photos: Click on the “Photos” tab.
- Deselect Albums: Deselect the checkboxes of the albums you want to remove from your iPad.
- Sync Your iPad: Click the “Apply” button to sync your iPad. The selected photos will be removed from your iPad during the sync process.
Important Note: If you delete an automatically synced item from your computer, the deleted item is removed from your iPad the next time you sync.
9. What Should I Do If My Photos Are Not Syncing To My iPad?
If your photos are not syncing to your iPad, check your connections, ensure iCloud Photos is properly set up, verify your storage space, restart your devices, and update your software. Addressing these common issues can often resolve syncing problems.
Here are some troubleshooting steps:
- Check Connections:
- Make sure your iPad and computer are properly connected via USB or Wi-Fi.
- If using Wi-Fi, ensure both devices are on the same network and have a stable internet connection.
- Verify iCloud Photos Setup:
- Ensure iCloud Photos is turned on in Settings > Photos on your iPad and in System Preferences > Apple ID > iCloud > Photos on your Mac.
- On Windows, make sure iCloud for Windows is installed and iCloud Photos is enabled.
- Check Storage Space:
- Make sure you have enough available storage on your iPad and in your iCloud account. You can check your iCloud storage in Settings > Apple ID > iCloud > Manage Storage on your iPad.
- Restart Devices:
- Restart both your iPad and computer. This can often resolve temporary software glitches that may be preventing syncing.
- Update Software:
- Ensure your iPad and computer are running the latest versions of their respective operating systems. Update to the latest version of iOS/iPadOS on your iPad and the latest version of macOS or Windows on your computer.
- Check Sync Settings:
- In the Apple Devices app (Windows) or Finder (Mac), make sure the correct albums or folders are selected for syncing.
- Disable and Re-enable iCloud Photos:
- Try turning off iCloud Photos on your iPad and then turning it back on. This can sometimes resolve syncing issues.
- Check for Conflicts:
- Make sure there are no conflicting settings or apps that may be interfering with the syncing process.
10. How Can I Organize My Synced Photos On My iPad?
You can organize your synced photos on your iPad by using the Photos app to create albums, add photos to existing albums, and use smart albums to automatically sort your photos. Proper organization makes it easier to find and enjoy your photos.
Here’s how to organize your synced photos:
- Create Albums:
- Open the Photos app on your iPad.
- Tap the “+” icon at the top of the screen.
- Select “New Album.”
- Give your album a name and tap “Save.”
- Select the photos you want to add to the album and tap “Done.”
- Add Photos to Existing Albums:
- Open the Photos app and select the photos you want to add to an album.
- Tap the “Share” icon (the square with an arrow pointing up).
- Scroll down and tap “Add to Album.”
- Select the album you want to add the photos to.
- Use Smart Albums:
- Smart Albums automatically organize your photos based on criteria like date, location, or people.
- To create a Smart Album, tap the “+” icon in the Albums tab and select “New Smart Album.”
- Choose the criteria you want to use to organize your photos and tap “Save.”
- Use Keywords and Captions:
- Add keywords and captions to your photos to make them easier to search and find.
- Open a photo and swipe up to see the photo’s information.
- Tap “Add a Caption” to add a description.
- Use keywords in your captions to make your photos searchable.
11. What Is The Best Way To Transfer Large Video Files From My Computer To My iPad?
The best way to transfer large video files from your computer to your iPad is to use a USB connection via the Apple Devices app (on Windows) or Finder (on Mac). This method is faster and more reliable than wireless syncing, especially for large files.
Here’s how to transfer large video files:
- Connect Your iPad: Connect your iPad to your computer using a USB or USB-C cable.
- Open Apple Devices App (Windows) or Finder (Mac):
- On Windows, open the Apple Devices app.
- On Mac, open a new Finder window.
- Select Your iPad: Select your iPad in the sidebar.
- Navigate to Movies or TV Shows:
- In the Apple Devices app, click on “Movies” or “TV Shows” in the sidebar.
- In Finder, click on the “Movies” or “TV Shows” tab.
- Sync Videos:
- Check the box that says “Sync Movies to your device from” or “Sync TV Shows to your device from,” then choose an option from the pop-up menu.
- Select the videos you want to sync to your iPad.
- Apply Changes: Click the “Apply” button to start the syncing process.
- Wait for Sync to Complete: The syncing process may take some time depending on the size of the video files. Ensure your iPad remains connected to your computer until the sync is complete.
Alternatively, you can use cloud storage services like Dropbox or Google Drive to transfer large video files, but this may take longer due to upload and download times.
12. Can I Sync Photos From An External Hard Drive To My iPad?
Yes, you can sync photos from an external hard drive to your iPad by connecting the external hard drive to your computer and then using the Apple Devices app (on Windows) or Finder (on Mac) to select the folders on the external hard drive to sync.
Here’s how:
- Connect External Hard Drive: Connect your external hard drive to your computer.
- Connect Your iPad: Connect your iPad to your computer using a USB or USB-C cable.
- Open Apple Devices App (Windows) or Finder (Mac):
- On Windows, open the Apple Devices app.
- On Mac, open a new Finder window.
- Select Your iPad: Select your iPad in the sidebar.
- Navigate to Photos: Click on “Photos” in the sidebar.
- Choose Sync Options:
- Check the box that says “Sync Photos to your device from,” then choose an option from the pop-up menu.
- Select “Choose folder” and navigate to the folder on your external hard drive that contains the photos you want to sync.
- Select Albums or Folders: If you chose “Selected folders,” select the checkboxes of the albums you want to sync from the external hard drive.
- Apply Changes: Click the “Apply” button to start the syncing process.
- Wait for Sync to Complete: The syncing process may take some time depending on the size of your photo library. Ensure your iPad remains connected to your computer until the sync is complete.
13. How Do I Prevent Duplicate Photos From Syncing To My iPad?
To prevent duplicate photos from syncing to your iPad, regularly organize your photo library on your computer, use duplicate photo finder software, and carefully select the folders you want to sync. Taking these steps can help maintain a clean and organized photo collection.
Here are some tips to prevent duplicate photos:
- Organize Your Photo Library:
- Regularly organize your photo library on your computer to remove any duplicate photos.
- Create a consistent folder structure to make it easier to find and manage your photos.
- Use Duplicate Photo Finder Software:
- Use duplicate photo finder software to scan your photo library and identify any duplicate photos.
- Remove the duplicate photos before syncing them to your iPad.
- Carefully Select Sync Folders:
- When syncing photos to your iPad, carefully select the folders you want to sync to avoid including duplicate photos.
- Review the folders before syncing to ensure they only contain the photos you want to transfer.
- Use iCloud Photos:
- iCloud Photos can help prevent duplicate photos by automatically syncing your photo library across all your devices.
- If you have duplicate photos on one device, deleting them will remove them from all other devices.
- Review Photos After Syncing:
- After syncing photos to your iPad, review your photo library to ensure there are no duplicate photos.
- If you find any duplicate photos, delete them from your iPad.
14. What Are Some Tips For Managing A Large Photo Library On My iPad?
Managing a large photo library on your iPad can be easier with strategies like using albums, utilizing iCloud Photos for storage optimization, employing smart albums, and periodically backing up your library. These practices help maintain an organized and accessible photo collection.
Here are some tips:
- Use Albums:
- Create albums to organize your photos by category, event, or date.
- Use descriptive names for your albums to make them easier to find.
- Utilize iCloud Photos:
- Use iCloud Photos to store your full-resolution photos in the cloud and keep smaller, optimized versions on your iPad.
- This can help save storage space on your iPad.
- Employ Smart Albums:
- Use Smart Albums to automatically organize your photos based on criteria like date, location, or people.
- This can help you quickly find specific photos without having to manually sort through your entire library.
- Periodically Back Up Your Library:
- Regularly back up your photo library to protect your photos from loss or damage.
- You can back up your photos to iCloud, your computer, or an external hard drive.
- Delete Unnecessary Photos:
- Regularly review your photo library and delete any unnecessary photos, such as duplicates, blurry photos, or photos you no longer need.
- This can help keep your photo library organized and manageable.
- Use Keywords and Captions:
- Add keywords and captions to your photos to make them easier to search and find.
- Use descriptive keywords and captions to provide context for your photos.
- Optimize Storage:
- Go to Settings > Photos and enable “Optimize iPad Storage” to automatically manage your storage space by storing full-resolution photos in iCloud and keeping smaller, optimized versions on your iPad.
15. How Do I Share Synced Photos From My iPad To Social Media Or With Friends?
You can share synced photos from your iPad to social media or with friends by using the Photos app to select the photos, tapping the share icon, and then choosing the desired sharing method, such as email, मैसेज, or social media platforms. This allows you to easily share your favorite moments with others.
Here’s how:
- Open the Photos App: Open the Photos app on your iPad.
- Select Photos: Select the photos you want to share.
- Tap the Share Icon: Tap the “Share” icon (the square with an arrow pointing up).
- Choose Sharing Method: Choose the desired sharing method from the list of options, such as:
- Email: Send the photos via email.
- Message: Send the photos via मैसेज.
- Social Media: Share the photos on social media platforms like Facebook, Instagram, or Twitter.
- AirDrop: Share the photos with nearby Apple devices using AirDrop.
- Copy Link: Create a link to share the photos with others.
- Follow Prompts: Follow the prompts for your chosen sharing method to complete the sharing process.
16. How Do I Turn Off Photo Syncing Between My Computer And iPad?
To turn off photo syncing between your computer and iPad, connect your iPad to your computer, open the Apple Devices app (on Windows) or Finder (on Mac), deselect the “Sync Photos” option, and then apply the changes. This will stop the automatic syncing of photos.
Here’s how to do it:
Using Apple Devices App (Windows):
- Connect Your iPad: Connect your iPad to your Windows computer using a USB or USB-C cable.
- Open the Apple Devices App: Open the Apple Devices app on your computer.
- Select Your iPad: Select your iPad in the sidebar.
- Navigate to Photos: Click on “Photos” in the sidebar.
- Deselect “Sync Photos”: Uncheck the box that says “Sync Photos to your device from.”
- Apply Changes: Click the “Apply” button to save the changes.
Using Finder (Mac):
- Connect Your iPad: Connect your iPad to your Mac using a USB or USB-C cable.
- Open Finder: Open a new Finder window.
- Select Your iPad: Select your iPad in the sidebar.
- Navigate to Photos: Click on the “Photos” tab.
- Deselect “Sync Photos”: Uncheck the box that says “Sync photos to your device from.”
- Apply Changes: Click the “Apply” button to save the changes.
17. Will Deleting Synced Photos From My iPad Also Delete Them From My Computer?
Deleting synced photos from your iPad will not delete them from your computer if you are using manual syncing through the Apple Devices app or Finder. However, if you are using iCloud Photos, deleting a photo from one device will delete it from all devices connected to the same iCloud account.
- Manual Syncing: If you are syncing photos using the Apple Devices app or Finder, deleting a photo from your iPad will not delete it from your computer. The photos are only removed from your iPad.
- iCloud Photos: If you are using iCloud Photos, deleting a photo from your iPad will delete it from all devices connected to the same iCloud account, including your computer. This is because iCloud Photos keeps your photo library synchronized across all devices.
18. How Do I Edit Synced Photos On My iPad?
You can edit synced photos on your iPad using the built-in Photos app or third-party photo editing apps. The Photos app offers basic editing tools, while third-party apps provide more advanced features.
Here’s how to edit photos on your iPad:
Using the Photos App:
- Open the Photos App: Open the Photos app on your iPad.
- Select Photo: Select the photo you want to edit.
- Tap “Edit”: Tap the “Edit” button in the top-right corner of the screen.
- Use Editing Tools: Use the editing tools to adjust the photo’s brightness, contrast, color, and other settings.
- Apply Changes: Tap “Done” to save your changes.
Using Third-Party Apps:
- Download a Photo Editing App: Download a photo editing app from the App Store, such as Adobe Lightroom Mobile, Snapseed, or VSCO.
- Open Photo in Editing App: Open the photo you want to edit in the photo editing app.
- Use Editing Tools: Use the editing tools in the app to adjust the photo’s settings.
- Save Changes: Save your changes to the photo.
19. How Can I Ensure The Quality Of Synced Photos Is Maintained?
To ensure the quality of synced photos is maintained, use high-resolution originals, avoid compressing photos during transfer, and use iCloud Photos to preserve full-resolution versions. Following these steps will help you retain the best possible image quality.
Here are some tips:
- Use High-Resolution Originals:
- Start with high-resolution original photos to ensure the best possible quality.
- Avoid using low-resolution photos, as they will not look good on your iPad’s Retina display.
- Avoid Compressing Photos:
- Avoid compressing photos during transfer, as this can reduce their quality.
- When syncing photos using the Apple Devices app or Finder, make sure the “Optimize Photos” option is disabled.
- Use iCloud Photos:
- Use iCloud Photos to store your full-resolution photos in the cloud and keep smaller, optimized versions on your iPad.
- This will help you save storage space on your iPad while still preserving the quality of your photos.
- Check Photo Formats:
- Ensure your photos are in a compatible format, such as JPEG or PNG.
- Avoid using older or less common formats, as they may not be supported by your iPad.
20. What Are Some Alternatives To Syncing Photos From A Computer To An IPad?
Alternatives to syncing photos from a computer to an iPad include using cloud storage services, wireless transfer apps, email, or direct transfer via USB drives with appropriate adapters. These methods offer flexibility and convenience for transferring photos.
Here are some alternatives:
- Cloud Storage Services:
- Use cloud storage services like Dropbox, Google Photos, or Amazon Photos to upload your photos to the cloud and then access them on your iPad.
- This is a convenient way to transfer photos wirelessly.
- Wireless Transfer Apps:
- Use wireless transfer apps like AirDrop (for Apple devices) or SHAREit to transfer photos directly from your computer to your iPad.
- These apps use Wi-Fi to transfer photos quickly and easily.
- Email:
- Email the photos to yourself and then open the email on your iPad to download the photos.
- This is a simple way to transfer a small number of photos.
- USB Drives with Adapters:
- Use a USB drive with a Lightning adapter to transfer photos directly from your computer to your iPad.
- This is a good option if you don’t have access to the internet.
By understanding these various methods and tips, you can effectively sync and manage your photos on your iPad, ensuring you always have access to your favorite memories and creations. At dfphoto.net, we are committed to providing you with the best resources and guidance to enhance your photography experience.
Ready to explore more about photography and enhance your skills? Visit dfphoto.net today for detailed tutorials, stunning photo collections, and a vibrant community of photographers! Address: 1600 St Michael’s Dr, Santa Fe, NM 87505, United States. Phone: +1 (505) 471-6001. Website: dfphoto.net.
FAQ: Syncing Photos from Computer to iPad
1. How can I sync photos from my PC to my iPad without iTunes?
You can sync photos from your PC to your iPad without iTunes by using the Apple Devices app (available on Windows 10 and later), iCloud Photos, or third-party apps like Dropbox or Google Photos. The Apple Devices app allows you to select specific albums or folders to sync, while iCloud Photos automatically syncs your photos across all your Apple devices.
2. What is the best way to transfer photos from my computer to my iPad?
The best way to transfer photos from your computer to your iPad depends on your specific needs. For newer Windows systems, the Apple Devices app is a reliable option. For Mac users, Finder provides a seamless experience. iCloud Photos is ideal for automatic syncing across all Apple devices, while third-party apps offer additional features like cross-platform compatibility and automatic backup.
3. Why are my photos not syncing from my computer to my iPad?
If your photos are not syncing from your computer to your iPad, check your connections, ensure iCloud Photos is properly set up, verify your storage space, restart your devices, and update your software. Also, make sure that the correct albums or folders are selected for syncing in the Apple Devices app or Finder.
4. How do I delete synced photos from my iPad?
To delete synced photos from your iPad, connect your iPad to your computer, open the Apple Devices app (on Windows) or Finder (on Mac), deselect the synced folders, and then sync again. This will remove the selected photos from your iPad.
5. Will deleting synced photos from my iPad delete them from my computer?
Deleting synced photos from your iPad will not delete them from your computer if you are using manual syncing through the Apple Devices app or Finder. However, if you are using iCloud Photos, deleting a photo from one device will delete it from all devices connected to the same iCloud account.
6. How do I sync photos from an external hard drive to my iPad?
You can sync photos from an external hard drive to your iPad by connecting the external hard drive to your computer and then using the Apple Devices app (on Windows) or Finder (on Mac) to select the folders on the external hard drive to sync.
7. How can I organize my synced photos on my iPad?
You can organize your synced photos on your iPad by using the Photos app to create albums, add photos to existing albums, and use smart albums to automatically sort your photos. Additionally, you can add keywords and captions to your photos to make them easier to search and find.
8. What are the limitations of using third-party apps for syncing photos to my iPad?
Using third-party apps for photo syncing can have limitations such as storage limits, privacy concerns, reliance on internet connectivity, potential costs for additional storage, and integration issues with the iPad’s native Photos app.
9. How do I ensure the quality of synced photos is maintained?
To ensure the quality of synced photos is maintained, use high-resolution originals, avoid compressing photos during transfer, and use iCloud Photos to preserve full-resolution versions.
10. Can I sync videos from my computer to my iPad?
Yes, you can sync videos from your computer to your iPad by using the Apple Devices app (on Windows) or Finder (on Mac). Connect your iPad to your computer, navigate to the Movies or TV Shows section, select the videos you want to sync, and then apply the changes.