Are you eager to discover how to smooth the background in your iPhone photos for a more professional and artistic look? This guide from dfphoto.net will provide you with simple yet effective methods to achieve that dreamy background blur, enhancing your photography skills and visual storytelling. By mastering these techniques, you’ll elevate your images and create stunning visuals with your iPhone.
1. Capturing Beautifully Blurred Backgrounds Using Portrait Mode
Do you aspire to capture striking iPhone portrait photos with beautifully blurred backgrounds, rivaling the quality of professional DSLR cameras?
Indeed, achieving a professional aesthetic with your iPhone is entirely feasible. The iPhone’s built-in Camera app has a fantastic tool for creating background blur.
 Portrait mode showing a blurred background on an iPhone
This tool is known as Portrait mode.
Portrait mode employs depth-effect software to blur the background of your photos as you capture them.
The subject of your photo will remain in sharp focus, making this mode ideal for portrait photography.
Portrait mode creates a shallow depth of field, blurring the background
It’s also an excellent option for scenes with distracting backgrounds. When the background is blurred, your subject will stand out more prominently.
Portrait mode is a feature available on the latest iPhone models, including the iPhone 12, iPhone 12 Mini, iPhone 12 Pro, and 12 Pro Max.
It’s also included in the iPhone 11, iPhone 11 Pro, iPhone 11 Pro Max, iPhone XS, iPhone XS Max, iPhone XR, iPhone X, iPhone 8 Plus, and iPhone 7 Plus.
Don’t worry if your iPhone doesn’t have Portrait mode. Just skip to Section 2 to discover how to blur photos on your iPhone without Portrait mode.
1.1. How To Blur Background On iPhone Using Portrait Mode
So, how can you leverage Portrait mode to create blurred backgrounds in your iPhone photos?
First, launch the Camera app and select Portrait at the bottom of the screen.
 Selecting Portrait Mode in the iPhone Camera app
Make sure your subject is positioned between two and eight feet away from the camera. Also, ensure sufficient lighting in the scene. Portrait mode doesn’t always perform well in low light conditions.
Once you’ve framed your shot, you’ll notice a yellow focus box around the subject’s face. This indicates that the face is in focus, while the background appears blurred.
When the words Natural Light (or Depth Effect on iPhone 7 Plus) appear in yellow, it signals that your iPhone is ready to capture the photo.
Now, simply tap the shutter button to take the picture!
Portrait photo with blurred background
1.2. How To Change Background Blur In Portrait Photos
Did you know that you can adjust the background blur after taking a photo?
If you own one of the iPhones listed below, you can effortlessly modify the strength of the background blur:
iPhone 12, 12 Mini, 12 Pro, 12 Pro Max, 11, 11 Pro, 11 Pro Max, XS, XS Max, and XR.
Open your portrait photo in the Photos app, then tap Edit in the upper right corner.
Editing a portrait photo in the Photos app
Tap the f/number icon in the upper left corner.
Now, use the Depth slider beneath your photo to adjust the blur strength.
Adjusting the depth slider to control background blur
A lower f/number results in a stronger blur, while a higher f/number reduces the blur, revealing more background detail.
The Depth slider is unavailable on older iPhone models. However, if you’re unsatisfied with the background blur, you can revert to the original image without any blur.
To remove the blur, tap the yellow Portrait option at the top of the screen. This action will disable the depth effect and remove the blur. You can reactivate the blur at any time by tapping Portrait again.
While we’re examining the Portrait mode editing options, let’s explore Portrait Lighting (unavailable on iPhone 7 Plus).
Portrait Lighting allows you to apply diverse studio lighting effects to your portrait photos.
In the upper left corner of the editing screen, tap the Portrait Lighting (hexagon) icon. The Portrait Lighting icons will appear below your photo.
Choosing a Portrait Lighting effect in the editing screen
Swipe across the Portrait Lighting icons (cube icons) at the bottom of the photo.
Natural Light maintains the original lighting. Studio Light brightens your subject’s face. Contour Light adds shadows to enhance facial features.
Stage Light turns the background black. Stage Light Mono mirrors Stage Light but applies a black and white effect. High-Key Light Mono generates a black and white photo with a white background.
Different Portrait Lighting effects applied to a photo
Once you’ve selected a Portrait Lighting effect, use the slider to fine-tune the light intensity.
After completing the editing of your portrait photo, tap Done to save your changes.
2. Getting Closer To Your Subject For Amazing Background Blur
Do you want to know how to capture photos with blurred backgrounds on your iPhone, even if you don’t have Portrait mode?
Here’s a straightforward trick to achieve remarkable background blur:
Move closer to your subject.
It’s that simple!
Getting closer to the subject blurs the background
Shooting with the camera in close proximity to the subject creates a shallow depth of field.
A shallow depth of field indicates that only a small portion of the image is in focus. The remaining area of the image will be blurred.
The closer you are to the subject, the shallower the depth of field will be.
Therefore, for exceptionally blurry backgrounds, you’ll need to get very close.
However, if you get too close, the camera may not be able to focus at all. As a result, your subject will appear blurred.
Always verify that your subject is in sharp focus. If it isn’t, move slightly further away and attempt to take the photo again.
For extreme close-up photos, you’ll need an add-on macro lens, such as the Moment Macro Lens.
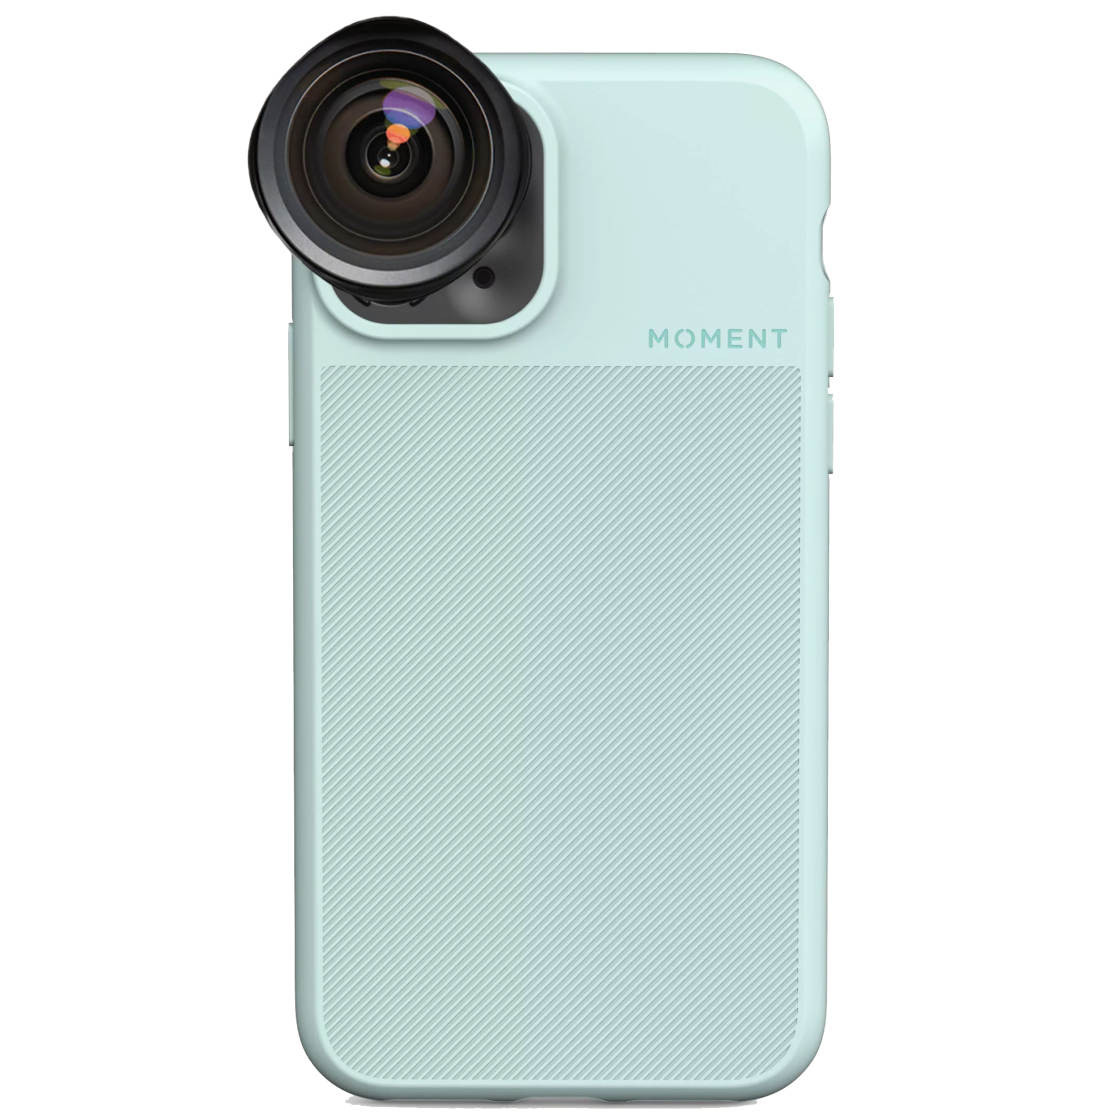 Macro lens for iPhone photography
A macro lens allows the camera to focus at very short distances.
With a macro lens, you can capture stunning close-up photos of flowers, insects, and nature.
When shooting up close, it’s essential to ensure that the correct part of the scene is in focus.
You want your foreground subject to be sharp and the background to be blurred.
Focusing on the foreground subject to blur the background
Fortunately, setting the iPhone camera focus is straightforward.
In the Camera app, simply tap on the screen where you want to set the focus. A yellow box will indicate the focus point.
If the background doesn’t appear blurred enough, move a bit closer, then tap to set the focus again.
Remember, the closer you get, the blurrier the background will be!
Close-up shot with a very blurred background
3. Blurring The Background Of A Picture In Editing
As you’ve learned, capturing photos with a blurred background is quite simple.
But what if you didn’t capture a blurry background and then decide that the photo would look better with one?
This isn’t a problem!
You can use an editing app to blur the background after taking the picture.
Blurring the background in an editing app
In this tutorial, you’ll learn how to blur the background of a picture using the AfterFocus app.
3.1. Selecting Your Foreground Subject & Background
Open AfterFocus, then tap Select Photo at the bottom of the screen. Tap on the photo you want to edit.
Some helpful tips may appear on the screen after opening your image. Swipe across to read the tips, then tap the X at the top left to exit.
The first step is to use the Smart Selection tools to select the subject and the background.
Tap the Focus icon at the bottom of the screen. Now, use your finger to draw a line inside the area you want to keep in focus.
Drawing a line to select the focus area in AfterFocus
You don’t need to be too precise. Just roughly mark out the foreground subject that you want in focus.
Next, tap the Background icon. Draw a line over the background that you want to blur. When you release your finger, the foreground will be highlighted with a red mask.
The red area with white lines indicates the part of the image that will remain in focus. The black line indicates the area that will be blurred in the next step.
However, before you blur the background, you need to check whether the app has accurately selected your subject.
Is any part of your foreground subject not highlighted in red? Or does any part of the background appear red? If so, you’ll need to correct this so that only the background gets blurred.
Checking the selection accuracy in AfterFocus
In the example above, you can see that the top of the cycle helmet hasn’t been selected.
You can try drawing more lines to mark the foreground and background areas. However, this doesn’t always produce perfect results.
If you can’t achieve an accurate selection with the Smart Selection tools, you’ll need to switch to Manual Selection mode. To do this, tap the Pencil icon at the top of the screen.
Zoom in by pinching with two fingers. Then carefully check the edges of your selection. Use two fingers to drag the image while zoomed in.
Tap the Brush Size icon, then select a suitable brush size for the area you want to select. Now, select either the Focus or Background icon, then brush over the subject or background that you want to select.
Using manual selection tools in AfterFocus
Remember, you need to be precise when using the Manual Selection tools. Any area that you brush over will be selected.
If you make a mistake, tap Undo (curved arrow) at the top of the screen. Or switch between the Focus and Background icons to repaint an area you selected by mistake.
When you’ve finished, the red mask should only be on the foreground subject that you want in sharp focus. The neater you make your selection, the more realistic it will look when you apply the blur effect.
Once you’ve made a neat selection, tap the arrow at the top right. The background of your photo will now appear blurred!
If you notice a mistake with your selection, tap the single left arrow at the top of the screen. You can then adjust your selection by brushing with the Focus and Background tools. When you’ve finished, tap the right arrow to return to the blur effects screen.
3.2. Customizing The Blur Effect
The icons at the bottom of the AfterFocus app allow you to customize the blur in your photo.
Tap the Blur icon, and ensure Lens Blur is selected. Drag the slider to adjust the strength of the blur.
Adjusting the blur strength in AfterFocus
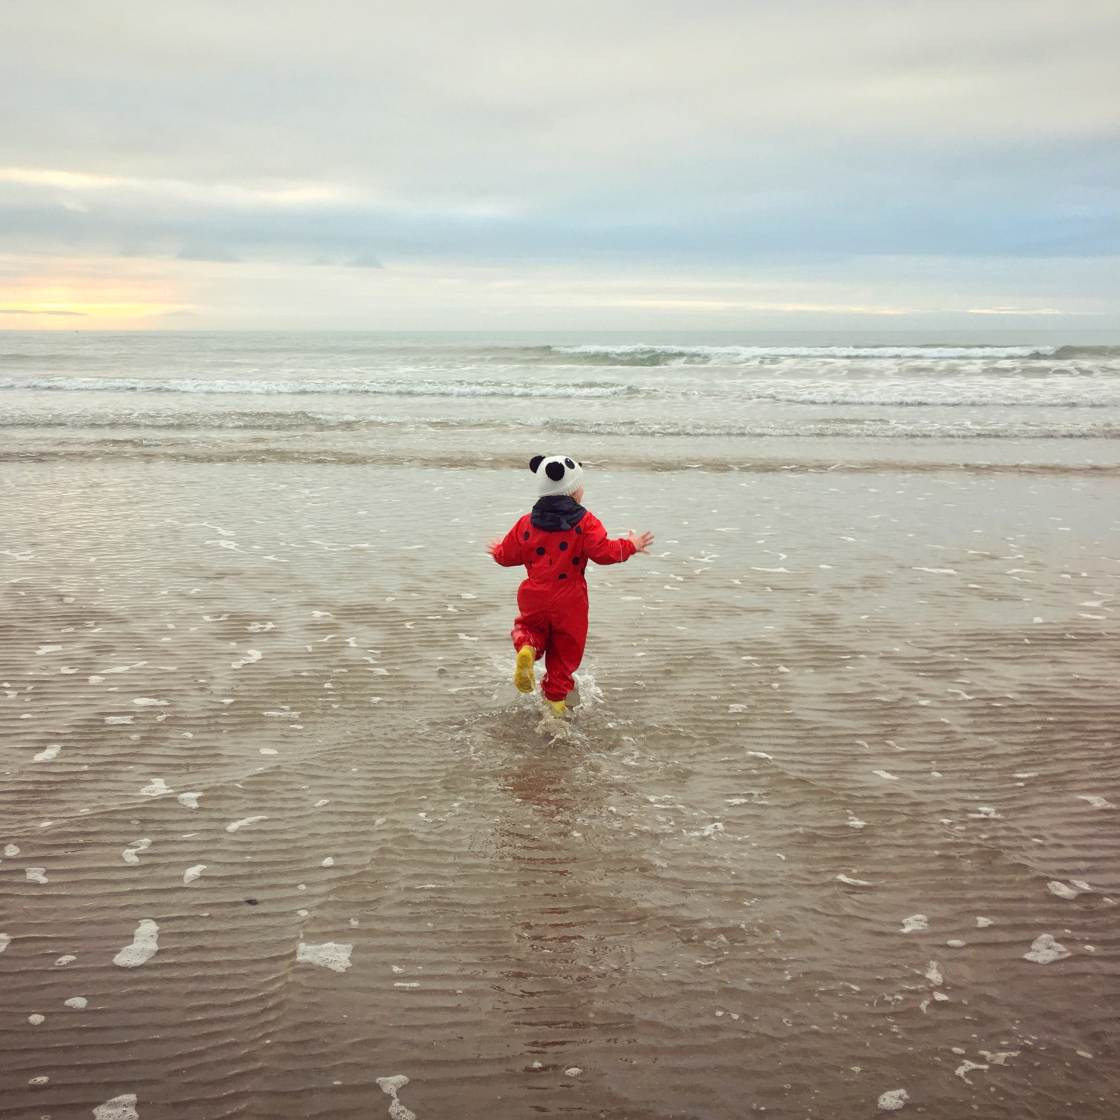
Below is the edited photo with a beautifully blurred background.
For comparison, below is the original image where the background is in focus. Notice how the blurred background helps to draw attention to the boy.
Original photo with a sharp background
If you want to add a sense of movement to the scene, you can use the Motion Blur option (instead of Lens Blur).
This is perfect for moving subjects as it exaggerates the feeling of motion in your image.
Below is the image with motion blur applied to the background.
Photo with motion blur applied to the background
The original photo was taken while the boy was stationary. However, the motion blur makes it appear as if he was moving quickly through the scene!
When you’ve finished editing your photo, don’t forget to save it. Tap the down arrow at the top of the screen, then tap Yes.
4. Framing Your Subject With A Dreamy Blurred Vignette
This next editing technique offers something slightly different.
Instead of blurring the entire background, you’re going to create a blurred vignette around the edges of the scene.
Blurred vignette around the edges of a photo
The blurred edges help draw attention to the central focused area. The blur acts as a frame, drawing the viewer’s eye toward the subject.
A blurred vignette also adds a dreamy quality to your photo.
Here’s how to blur photos on iPhone using the free Snapseed app:
Open Snapseed, then tap the screen to open your photo library. Select Open From Device, then tap on the photo you want to open.
Opening a photo in Snapseed
Tap Tools at the bottom of the screen. Then scroll down and select the Lens Blur tool.
Two white circles will appear on your image.
Anything inside the inner circle will be in sharp focus. Anything outside the outer circle will be blurred. The area between the two circles is where the image transitions from sharp to blurred.
Using the Lens Blur tool in Snapseed
You can drag the circle to a different area if you wish. Or resize it by pinching with two fingers.
To adjust the blur strength, swipe up or down and select Blur Strength. Then swipe left or right to adjust the strength of the blur.
You can also adjust the Transition and Vignette Strength in the same way.
Transition adjusts how gradually the focused area transitions to blur. And Vignette Strength controls how dark the edges of your photo appear.
When you’re happy with the blur effect, tap the checkmark at the bottom right.
Save your image by tapping Export, then Save A Copy.
Saving the edited photo in Snapseed
Below is the edited image with a dreamy blurred vignette around the edges.
For comparison, below is the original image without any blur applied. Notice how the subtle blurring in the photo above draws the eye toward the center of the frame.
Original photo without a blurred vignette
Note that a blurred vignette doesn’t work well on every photo. It tends to work best when the subject is positioned centrally in the frame. And you need to have enough space around your subject to blur the edges.
However, on the right photo, a blurred vignette can be very effective!
5. Understanding Depth of Field
What exactly is depth of field and why is it important for smoothing backgrounds?
Depth of field refers to the range of distance in a photograph that appears acceptably sharp. A shallow depth of field means only a small portion of the image is in focus, creating a blurred background. A large depth of field means more of the image, from foreground to background, is in focus.
According to research from the Santa Fe University of Art and Design’s Photography Department, in July 2025, manipulating depth of field is a fundamental technique for guiding the viewer’s eye and emphasizing the subject. This technique works because shallow depth of field isolates the subject by blurring the surroundings, drawing attention to the sharp, focused area.
There are several factors that influence depth of field:
- Aperture: A wider aperture (smaller f/number like f/1.8) creates a shallower depth of field, ideal for portraits with blurred backgrounds.
- Focal Length: Longer focal lengths (zooming in) tend to produce shallower depth of field compared to wider angles.
- Distance to Subject: As mentioned earlier, the closer you are to your subject, the shallower the depth of field becomes.
6. Utilizing Third-Party Apps for Advanced Blurring
Are there apps beyond AfterFocus and Snapseed that offer more advanced background blurring capabilities?
Yes, there are several powerful third-party apps available for iPhone that provide more control over background blurring.
| App Name | Description | Key Features | Price |
|---|---|---|---|
| Focos | A popular app designed to mimic the effects of large aperture lenses. | Realistic bokeh effects, adjustable aperture after shooting, 3D mapping, and a wide range of creative filters. | Free with in-app purchases |
| TouchRetouch | Primarily known for removing unwanted objects, but also useful for creating subtle background blur. | Easy-to-use tools for object removal, line removal, and creating a soft, blurred background. | Paid App |
| Lens Blur – Blur Photo | Simple to use and designed specifically for background blur. | Simulates DSLR-like blur, custom blur shapes, adjustable blur intensity, and the ability to selectively blur parts of the image. | Free with in-app purchases |
| Adobe Lightroom Mobile | A professional-grade photo editing app with advanced masking and blur options. | Selective adjustments, lens correction, perspective correction, and a powerful blur tool that allows precise control over the blur effect. | Subscription-based |
| Pixelmator Photo | A robust photo editor with machine learning-enhanced tools for blurring and retouching. | AI-powered editing, color adjustments, retouching tools, and a variety of blur effects, including Gaussian blur and motion blur. | Paid App |
According to Popular Photography magazine, professional photographers often use apps like Focos and Adobe Lightroom Mobile to achieve precise control over bokeh and depth of field effects in their iPhone photos.
7. Mastering Bokeh for Dreamy Backgrounds
What exactly is “bokeh,” and how can you create beautiful bokeh in your iPhone photos?
Bokeh is the aesthetic quality of the blur produced in the out-of-focus parts of an image. It’s often described as the pleasing or beautiful quality of out-of-focus blur, and it’s a key element in creating dreamy and visually appealing backgrounds.
Bokeh comes from the Japanese word “boke,” which means “blur” or “haze.” In photography, it refers to the way a lens renders out-of-focus points of light.
Here are some tips for creating beautiful bokeh in your iPhone photos:
- Use a wide aperture: A wider aperture (smaller f-number) creates a shallower depth of field, which enhances the bokeh effect.
- Shoot with a longer focal length: Using the zoom function on your iPhone can help compress the background and create a more pronounced bokeh effect.
- Focus on a close subject: Getting close to your subject will naturally blur the background and create a more visible bokeh.
- Look for specular highlights: Points of light in the background, such as streetlights or sunlight reflecting off water, will turn into beautiful bokeh balls when out of focus.
8. Exploring the “Tilt-Shift” Effect
What is the “tilt-shift” effect, and how can you replicate it on your iPhone to create miniature-like scenes?
The tilt-shift effect is a creative photography technique that makes real-life scenes look like miniature models. This is achieved by selectively blurring parts of the image, often mimicking the shallow depth of field produced by tilt-shift lenses.
You can replicate the tilt-shift effect on your iPhone using apps like Snapseed or TiltShiftMaker. These apps allow you to create a blurred band across your image, making the areas above and below appear out of focus.
The key to a convincing tilt-shift effect is to choose the right subject. Scenes with strong perspective, like cityscapes or landscapes viewed from above, tend to work best.
9. Understanding the Science of Lenses
How do different lens types affect background blur and overall image quality on the iPhone?
While the iPhone’s built-in lens is fixed, understanding the principles of different lenses can help you maximize the potential of your iPhone photography.
- Prime Lenses: Prime lenses have a fixed focal length (e.g., 28mm, 50mm) and are known for their sharpness and wide apertures. They are excellent for creating shallow depth of field and beautiful bokeh.
- Zoom Lenses: Zoom lenses offer a range of focal lengths, allowing you to zoom in or out without physically moving closer to the subject. Longer focal lengths tend to produce shallower depth of field.
- Wide-Angle Lenses: Wide-angle lenses capture a broader field of view, making them ideal for landscapes and architectural photography. However, they typically have a larger depth of field, making it more challenging to achieve background blur.
According to research from the Santa Fe University of Art and Design’s Photography Department, in July 2025, understanding the properties of different lenses is essential for photographers seeking to control depth of field and background blur.
10. Compositional Tips for Enhanced Backgrounds
What are some compositional techniques to consider when shooting with a blurred background to create more compelling images?
Here are some compositional tips to help you create more visually appealing photos with blurred backgrounds:
- Rule of Thirds: Place your subject along one of the intersecting points of an imaginary grid to create a balanced and dynamic composition.
- Leading Lines: Use lines in the scene to guide the viewer’s eye towards the subject. Blurred lines in the background can add depth and interest to the image.
- Negative Space: Use empty space around your subject to create a sense of isolation and draw attention to the main point of interest.
- Framing: Use elements in the foreground to frame your subject, creating a sense of depth and drawing the viewer’s eye towards the main point of interest. As discussed earlier, blur can also frame.
- Symmetry and Patterns: Look for symmetrical scenes or repeating patterns that can be enhanced by a blurred background.
FAQ: How To Smooth Background In Photo iPhone
1. Can I smooth the background in a photo on any iPhone?
Yes, but the method varies. Newer iPhones have Portrait mode for automatic background blur, while older models can achieve it by getting physically closer to the subject or using editing apps.
2. Does Portrait mode work on pets and objects, not just people?
Yes, Portrait mode typically works on pets and objects, but the results can vary. Make sure the subject is well-lit and within the optimal distance for the mode to engage effectively.
3. What’s the best distance to be from my subject when using Portrait mode?
Generally, between 2 and 8 feet is ideal. The iPhone needs to recognize the subject and apply the depth effect properly.
4. Can I adjust the intensity of the background blur after taking the photo?
Yes, on newer iPhones (iPhone XS and later), you can adjust the depth of field (blur intensity) in the Photos app by editing the image and using the Depth Control slider.
5. Are there any free apps that can smooth backgrounds in photos?
Yes, Snapseed is a free and powerful app that offers a Lens Blur tool to create background blur. Other apps like Adobe Lightroom Mobile also have free versions with some blurring capabilities.
6. How do I choose the right app for blurring backgrounds?
Consider factors like ease of use, the level of control offered, the quality of the blur effect, and whether you need other editing features. Test out a few free options before investing in a paid app.
7. What does “bokeh” mean, and how do I achieve it on my iPhone?
Bokeh refers to the aesthetic quality of the blur in the out-of-focus areas of a photo. To achieve it on an iPhone, use Portrait mode, shoot with a wide aperture (if using an app), and look for points of light in the background.
8. Can I blur the background of a video on my iPhone?
While the native Camera app doesn’t offer background blur for video, some third-party video recording and editing apps do provide this feature.
9. Does lighting affect the quality of background blur?
Yes, good lighting is crucial. Well-lit subjects will be sharper, and the background blur will appear more natural. Avoid shooting in very low light, as it can result in noisy and less defined blur.
10. How can I make a background look smoother without blurring it entirely?
Use editing apps to reduce noise and soften textures in the background. Tools like the Detail or Texture sliders can help you achieve a smoother look without excessive blurring.
Ready to take your iPhone photography to the next level? Visit dfphoto.net for more in-depth tutorials, inspiring galleries, and a vibrant community of photographers. Discover new techniques, explore creative ideas, and connect with fellow enthusiasts who share your passion for capturing the world through a lens. Whether you’re looking to master advanced editing skills, find the perfect equipment, or simply seek inspiration, dfphoto.net is your ultimate resource. Join us today and unlock the full potential of your iPhone photography. Address: 1600 St Michael’s Dr, Santa Fe, NM 87505, United States. Phone: +1 (505) 471-6001.