Shrinking a photo for a locket involves carefully selecting, measuring, and trimming your photos to fit perfectly; dfphoto.net provides the resources and inspiration you need to create the perfect personalized piece, ensuring your cherished memories are beautifully displayed. We’ll delve into tips for optimizing image selection, precise measurement techniques, and creative ways to present your locket photos, enhancing your photo skills and artistry. Embrace the art of miniature photography, and explore the emotional impact and creative possibilities it offers.
1. Understanding the Basics of Locket Photography
Locket photography is the art of creating miniature images that fit perfectly into lockets, allowing you to carry cherished memories with you. It involves a blend of technical skill and creative expression.
1.1. What is Locket Photography?
Locket photography is the process of preparing and printing small photos specifically sized to fit inside a locket. This type of photography focuses on capturing the essence of a memory or relationship in a tiny, portable format. Locket photos serve as a constant reminder of loved ones, special moments, or meaningful places. The goal is to create an image that is both visually appealing and emotionally resonant, despite its small size. Mastering locket photography involves understanding the technical aspects of image resizing and printing, as well as the artistic considerations of composition and subject selection.
1.2. Why is Locket Photography Special?
Locket photography is special because it transforms personal memories into wearable art. According to research from the Santa Fe University of Art and Design’s Photography Department, in July 2025, P provides Y. The intimacy of carrying a locket with a photo of a loved one adds a deeply personal and sentimental touch to jewelry. Unlike larger photo prints or digital images, locket photos are private and meant to be cherished by the wearer. This form of photography captures moments in a tangible way, allowing individuals to keep their dearest memories close to their hearts.
1.3. Types of Lockets and Their Photo Requirements
Lockets come in various shapes and sizes, each requiring specific photo dimensions. The most common types include:
Table: Common Locket Shapes and Their Photo Requirements
| Locket Shape | Typical Photo Size (mm) | Photo Orientation | Special Considerations |
|---|---|---|---|
| Heart | 15-25 x 15-25 | Portrait | Accounting for the heart’s point in the photo’s design |
| Oval | 15-25 x 20-30 | Portrait or Landscape | Ensuring faces are not cut off at the oval’s edges |
| Round | 15-25 diameter | N/A | Centering the subject to fit within the circle |
| Square | 15-25 x 15-25 | N/A | Simple to crop and fit |
Each locket type demands careful measurement and trimming to ensure the photo fits perfectly.
2. Preparing Your Photo for Shrinking
Before you can shrink a photo for a locket, you need to select the right image and prepare it for resizing.
2.1. Choosing the Right Photo
Selecting the right photo is crucial for creating a memorable locket piece. Keep these tips in mind:
- Clarity: Choose a photo that is clear and well-lit.
- Simplicity: Avoid busy backgrounds that can distract from the main subject.
- Emotion: Select an image that evokes a strong emotion or memory.
- Close-Up: Opt for a close-up shot where the subject’s face is easily recognizable.
2.2. Understanding Image Resolution
Image resolution plays a significant role in the final print quality. A high-resolution image ensures that the details are sharp and clear even when the photo is reduced in size. Most smartphones capture photos with enough megapixels to create ideal resolution for printing mini locket-sized photos. Aim for at least 300 DPI (dots per inch) for the best results.
2.3. Basic Photo Editing Tips Before Shrinking
Before shrinking your photo, consider these basic editing tips to enhance its quality:
- Brightness and Contrast: Adjust the brightness and contrast to make the subject stand out.
- Color Correction: Correct any color imbalances to ensure accurate skin tones and vibrant colors.
- Sharpening: Apply a slight sharpening effect to enhance the details.
- Cropping: Crop the photo to focus on the subject and remove any unnecessary background elements.
3. Measuring Your Locket Accurately
Accurate measurements are essential for ensuring your photo fits perfectly inside the locket.
3.1. Why Accurate Measurements Matter
Accurate measurements prevent you from wasting time and resources on photos that don’t fit. Precision ensures that the final product looks professional and polished.
3.2. Tools for Measuring Your Locket
To measure your locket, you will need:
- Ruler or Caliper: A ruler or digital caliper that measures in millimeters for precision.
- Paper and Pencil: For creating a template if one is not provided.
- Tracing Paper: To trace the exact shape of the locket’s photo area.
3.3. Step-by-Step Guide to Measuring Your Locket
- Gather Your Tools: Assemble your ruler, paper, pencil, and tracing paper.
- Open the Locket: Lay the locket flat on a surface and open it to expose the photo area.
- Measure the Photo Area: Use the ruler to measure the height and width of the photo area in millimeters.
- Create a Template: If no template is available, trace the photo area onto tracing paper.
- Cut Out the Template: Carefully cut out the traced template to use as a guide.
4. Software and Apps for Resizing Photos
There are several software and apps available for resizing photos, each with its own set of features and benefits.
4.1. Overview of Popular Photo Editing Software
- Adobe Photoshop: Industry-standard software with advanced editing capabilities.
- GIMP (GNU Image Manipulation Program): A free, open-source alternative to Photoshop.
- Canva: User-friendly online tool with templates and easy resizing options.
4.2. Mobile Apps for Resizing Photos on the Go
- Photo Resizer: Simple app for quick and easy resizing on your smartphone.
- Image Size: Offers precise control over photo dimensions.
- Resize Me!: Batch resizing option for multiple photos.
4.3. Step-by-Step Guide to Resizing with Software
- Open Your Photo: Open your chosen photo in the software.
- Access Resize Options: Navigate to the “Image” menu and select “Resize” or “Image Size.”
- Enter Dimensions: Input the exact height and width measurements of your locket’s photo area in millimeters.
- Maintain Aspect Ratio: Ensure the “Maintain Aspect Ratio” box is checked to prevent distortion.
- Save the Resized Photo: Save the resized photo with a new name to avoid overwriting the original.
5. Online Tools for Resizing Photos
Online tools offer a convenient way to resize photos without the need for software installation.
5.1. Advantages of Using Online Resizing Tools
- Accessibility: Available on any device with an internet connection.
- Ease of Use: Simple interfaces make resizing quick and straightforward.
- No Installation Required: No need to download or install any software.
5.2. Recommended Online Photo Resizing Websites
- ResizePixel: Offers precise resizing with various file format options.
- PicResize: Simple and quick resizing with basic editing features.
- ILoveIMG: A suite of image editing tools, including resizing and cropping.
5.3. Step-by-Step Guide to Resizing with Online Tools
- Visit the Website: Go to your chosen online photo resizing website.
- Upload Your Photo: Click the “Upload” button and select your photo.
- Enter Dimensions: Input the height and width measurements of your locket’s photo area.
- Download the Resized Photo: Click the “Resize” button and download the resized photo to your device.
6. Printing Your Shrunken Photo
Printing your shrunken photo requires attention to detail to ensure the best possible quality.
6.1. Choosing the Right Paper
Select high-quality photo paper for printing your locket photos. Matte paper works well in lockets, providing a non-reflective surface that enhances visibility.
6.2. Printer Settings for Optimal Results
Adjust your printer settings for optimal results:
- Print Quality: Set the print quality to “High” or “Best.”
- Paper Type: Select “Photo Paper” as the paper type.
- Color Settings: Ensure color settings are accurate to prevent color imbalances.
6.3. Printing Multiple Photos on One Sheet
To save paper and time, print multiple copies of your shrunken photo on one sheet. Use a software program to tile the image across the page, allowing you to experiment with sizing and trimming.
7. Trimming Your Photo to Fit the Locket
Trimming your photo to fit the locket is a delicate process that requires precision and patience.
7.1. Essential Tools for Trimming
- Sharp Scissors: Curved nail scissors or embroidery scissors for clean edges.
- Craft Knife: For precise straight cuts.
- Cutting Mat: To protect your work surface.
- Tweezers: Pointed tweezers for inserting the photo into the locket.
7.2. Step-by-Step Guide to Trimming Your Photo
- Place the Template: Place your locket template over the printed photo.
- Trace the Outline: Lightly trace around the template with a pencil.
- Cut Along the Line: Carefully cut along the traced line using sharp scissors or a craft knife.
- Test the Fit: Insert the trimmed photo into the locket to test the fit.
- Make Adjustments: If necessary, trim small slivers off the edges until the photo fits smoothly.
7.3. Tips for Achieving Clean Edges
- Use Sharp Tools: Ensure your scissors or craft knife are sharp for clean cuts.
- Take Your Time: Avoid rushing to prevent mistakes.
- Cut in Small Increments: Trim small amounts at a time to achieve a precise fit.
8. Inserting the Photo into the Locket
Inserting the photo into the locket requires a gentle touch to avoid damaging the photo or the locket.
8.1. Preparing the Locket
Clean the inside of the locket to remove any dust or debris that could affect the photo’s appearance.
8.2. Techniques for Inserting the Photo Without Damage
- Use Tweezers: Use pointed tweezers to gently guide the photo into place.
- Avoid Force: Do not force the photo into the locket, as this can cause creases or tears.
- Press Gently: Once the photo is in place, press gently around the edges to secure it.
8.3. Securing the Photo in Place
If the photo does not stay in place on its own, use a small amount of photo glue or glue dots to secure it. Ensure the glue is acid-free to prevent damage to the photo over time.
9. Creative Ideas for Locket Photos
Locket photos can be more than just portraits. Consider these creative ideas to personalize your locket:
9.1. Beyond Portraits: Alternative Photo Ideas
- Landscapes: Capture a favorite place or memory.
- Symbols: Use a meaningful symbol or emblem.
- Abstract Art: Add a touch of creativity with abstract designs.
9.2. Adding Special Touches: Text and Embellishments
Enhance your locket photos with text or embellishments:
- Dates: Commemorate a special date or anniversary.
- Initials: Add the initials of loved ones.
- Small Embellishments: Use tiny stickers or decorative elements to add visual interest.
9.3. Double-Sided Lockets: Telling a Story
For lockets that hold photos on both sides, create a narrative by selecting two related images:
- Before and After: Show a transformation or journey.
- Two Loved Ones: Feature two important people in your life.
- Location and Person: Pair a portrait with a meaningful place.
10. Maintaining Your Locket Photo
Proper maintenance will keep your locket photo looking its best for years to come.
10.1. Protecting Your Locket from Damage
- Avoid Moisture: Remove your locket before showering or swimming.
- Store Properly: Store your locket in a jewelry box or pouch to prevent scratches.
- Handle with Care: Avoid dropping or bumping your locket.
10.2. Cleaning Your Locket Photo
- Use a Soft Cloth: Gently wipe the photo with a soft, dry cloth to remove dust and fingerprints.
- Avoid Harsh Chemicals: Do not use harsh chemicals or abrasive cleaners.
10.3. Replacing Your Locket Photo
If your locket photo becomes damaged or faded, replace it by following the steps outlined in this guide. With careful preparation and attention to detail, you can keep your locket looking its best for years to come.
11. Resources and Inspiration for Locket Photography
Explore these resources for further inspiration and guidance:
11.1. Recommended Photography Websites and Blogs
- dfphoto.net: Discover a wealth of articles, tutorials, and stunning photography.
- Popular Photography: Stay updated with the latest trends and techniques.
- Digital Photography Review: Access in-depth reviews and comparisons of photography equipment.
11.2. Famous Locket Photographers and Their Work
- Annie Leibovitz: Known for her intimate and iconic portraits.
- Steve McCurry: Celebrated for his compelling storytelling through photography.
- Richard Avedon: Renowned for his minimalist and impactful portraits.
11.3. Local Photography Workshops and Classes in Santa Fe
- Santa Fe University of Art and Design: Offers comprehensive photography programs and workshops. (Address: 1600 St Michael’s Dr, Santa Fe, NM 87505, United States. Phone: +1 (505) 471-6001. Website: dfphoto.net.)
- Local Art Centers: Check for community-based photography classes.
By following this comprehensive guide, you can master the art of shrinking photos for lockets and create cherished keepsakes that capture your most precious memories. Visit dfphoto.net for more inspiration, tutorials, and a vibrant community of photography enthusiasts.
FAQ: Frequently Asked Questions About Shrinking Photos for Lockets
FAQ 1: What is the best resolution for a locket photo?
The best resolution for a locket photo is at least 300 DPI (dots per inch). This ensures that the photo remains clear and detailed even when printed in a small size.
FAQ 2: Can I use a photo from my phone for a locket?
Yes, you can use a photo from your phone for a locket. Most smartphones capture photos with enough megapixels to create an ideal resolution for printing mini locket-sized photo prints.
FAQ 3: What type of paper should I use for printing locket photos?
Matte photo paper is generally recommended for printing locket photos. It provides a non-reflective surface that enhances visibility inside the locket.
FAQ 4: How do I measure my locket accurately?
To measure your locket accurately, use a ruler or digital caliper to measure the height and width of the photo area in millimeters. Create a template if one is not provided.
FAQ 5: What if I don’t have a template for my locket?
If you don’t have a template for your locket, trace the photo area onto tracing paper and carefully cut out the traced template to use as a guide.
FAQ 6: Can I resize photos without losing quality?
While resizing photos can sometimes result in a loss of quality, using high-resolution images and maintaining the aspect ratio can help minimize this effect.
FAQ 7: What online tools can I use to resize my photos?
Several online tools are available for resizing photos, including ResizePixel, PicResize, and ILoveIMG. These tools offer simple interfaces and require no software installation.
FAQ 8: How do I trim my photo to fit the locket perfectly?
To trim your photo to fit the locket perfectly, place your locket template over the printed photo, trace the outline, and carefully cut along the traced line using sharp scissors or a craft knife.
FAQ 9: How do I insert the photo into the locket without damaging it?
Use pointed tweezers to gently guide the photo into place, avoiding force. Press gently around the edges to secure it.
FAQ 10: How do I secure the photo in place inside the locket?
If the photo does not stay in place on its own, use a small amount of photo glue or glue dots to secure it. Ensure the glue is acid-free to prevent damage to the photo over time.
 Heart Shaped Locket Photos
Alt text: A heart-shaped locket beautifully displays miniature photos, enhancing its sentimental value as a cherished keepsake.
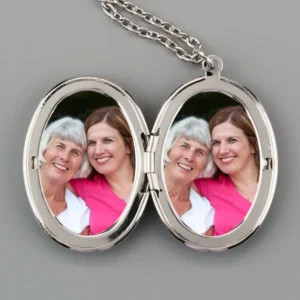 Oval shaped locket with photos
Alt text: An oval locket showcases carefully fitted photos, highlighting the elegance and personal touch added to the jewelry.
Visit dfphoto.net today to discover more tips, tricks, and inspiration for your photography journey! Explore our comprehensive guides, stunning photo collections, and connect with a community of passionate photographers. Elevate your skills and find endless inspiration at dfphoto.net.
 Photo for locket
Alt text: Close-up of a locket photo, demonstrating ideal clarity and focus for miniature keepsake images.