iCloud Shared Photo Library offers a brilliant way for families, friends, or collaborators to pool their photos and videos into a single, unified collection. This feature allows up to six people to contribute, edit, and enjoy memories together, ensuring everyone has access to a more complete and collaborative photo library. If you’re looking to simplify photo sharing and collaboration within your Apple ecosystem, understanding how to use iCloud Shared Photo Library is essential. This guide will walk you through everything you need to know to set up and effectively utilize this powerful feature.
Understanding iCloud Shared Photo Library
Before diving into the setup process, it’s crucial to understand how iCloud Shared Photo Library operates. When you add photos and videos to a Shared Library, they are moved from your Personal Library to this shared space. Think of it as creating a separate, collaborative library that exists alongside your personal one.
Key aspects of iCloud Shared Photo Library include:
- Collaborative Environment: All participants possess equal permissions to add, edit, and even delete content within the Shared Library. This encourages a truly collaborative environment where everyone can contribute to and manage the shared collection.
- Centralized Storage: The person who initially sets up the Shared Library, known as the library creator, provides the iCloud storage for all content within it. This means contributors can access and participate in the Shared Library without it impacting their personal iCloud storage limits.
- Privacy and Control: While it’s a shared space, you retain control over what you contribute and can switch between viewing your Personal Library, the Shared Library, or both combined at any time.
Creating Your iCloud Shared Photo Library
Setting up an iCloud Shared Photo Library is straightforward, provided you have a compatible device and iCloud Photos enabled. You’ll need a device running iOS 16.1, iPadOS 16.1, or macOS Ventura or later.
Setting Up on iPhone or iPad
- Navigate to Photos Settings: Open the Settings app on your iPhone or iPad, scroll down and tap on Photos.
- Access Shared Library: Tap on Shared Library.
- Invite Participants: Choose up to five people to invite to your Shared Library. You can select contacts from your list or choose to invite participants later.
- Select Photos to Share: Decide whether to move existing photos and videos to the Shared Library immediately or add content later.
- Preview and Confirm: Follow the on-screen prompts to preview your Shared Library setup, confirm your sharing preferences, and send invitations to your chosen participants.
Setting Up on Mac
- Open Photos Settings: Launch the Photos app on your Mac. In the menu bar, click Photos and then select Settings (or Preferences in older macOS versions).
- Go to iCloud Tab: Click on the iCloud tab in the Settings window.
- Enable iCloud Photos: Ensure iCloud Photos is turned on. If it’s not, check the box to enable it.
- Access Shared Library Settings: Click on Shared Library, then click Get Started….
- Invite and Add Content: Follow the on-screen instructions to invite participants and select photos and videos to add to your new Shared Library.
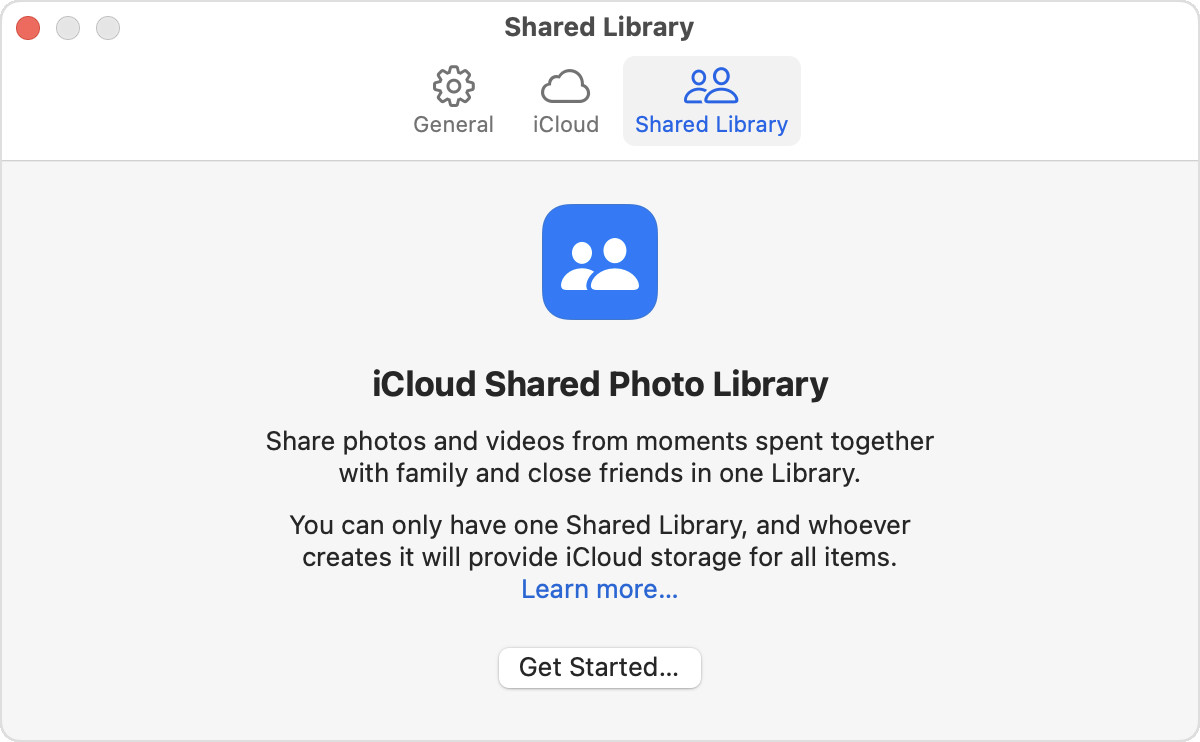 Navigating to the Shared Library settings within iCloud Photos preferences on macOS.
Joining an iCloud Shared Photo Library
If you’ve been invited to join an iCloud Shared Photo Library, accepting the invitation is a simple process on your iPhone, iPad, or Mac.
Joining on iPhone or iPad
- Find the Invitation: Open the invitation from the library creator. This might be a notification or a message. Alternatively, go to Settings > Photos > Shared Library to find pending invitations.
- Accept the Invitation: Tap Accept & Continue.
- Choose Content to Contribute (Optional): Follow the prompts to select photos and videos you wish to contribute to the Shared Library from your Personal Library, or choose to add content later.
- Preview and Confirm: Preview the Shared Library content and confirm your participation.
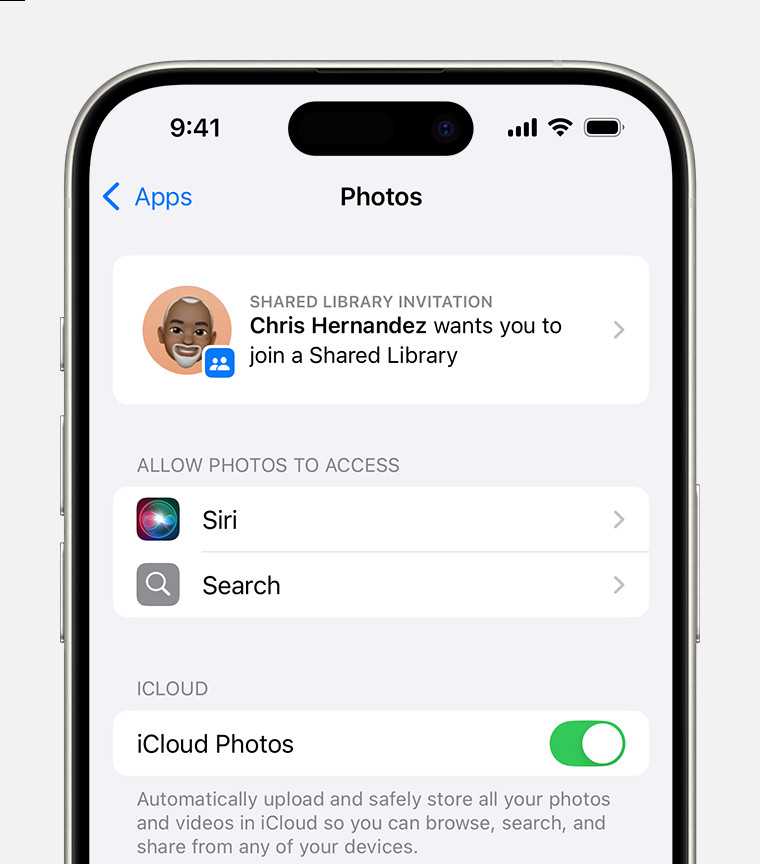 Locating a Shared Library invitation within the Photos settings on an iPhone.
Joining on Mac
- Locate the Invitation: Open the invitation from the library creator or go to Photos > Settings (or Preferences) and click View Invitation in the Shared Library section.
- Get Started: Click Get Started.
- Select Content to Contribute (Optional): Follow the on-screen steps to choose photos and videos to move to the Shared Library from your Personal Library, or skip this step to add content later.
- Preview and Join: Preview the Shared Library and confirm you want to join.
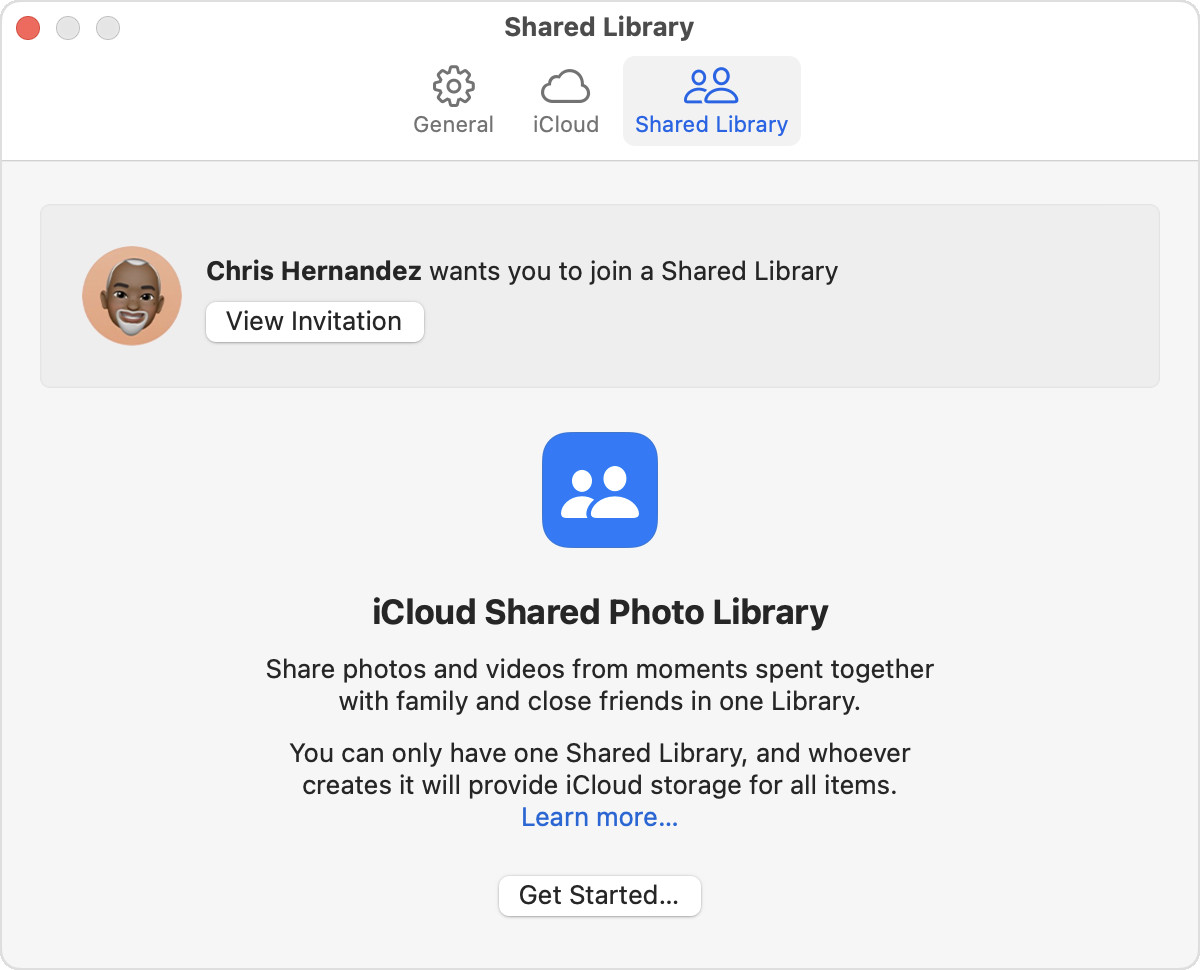 Accessing a Shared Library invitation through the Photos app settings on macOS.
Effectively Using Your Shared Library
Once your Shared Library is set up and populated, you can explore various ways to use it effectively, including sharing directly from your camera and switching between library views.
Sharing Photos Directly from Your Camera
For real-time collaboration, you can set your iPhone or iPad camera to directly save photos and videos to your Shared Library.
- Access Camera Sharing Settings: Go to Settings > Photos > Shared Library > Sharing from Camera.
- Enable Camera Sharing: Ensure Sharing from Camera is toggled on.
- Choose Sharing Mode:
- Share Automatically: The Camera app will automatically add photos to the Shared Library when you are near other participants.
- Share Manually: You choose when to send photos to the Shared Library using a button in the Camera app.
- Share When At Home: Automatically share photos taken at your home location to the Shared Library.
- Use the Shared Library Button in Camera: In the Camera app, a Shared Library button will appear at the top. Make sure this button is active to send photos directly to the Shared Library. Tap it to toggle between saving to the Shared Library or your Personal Library.
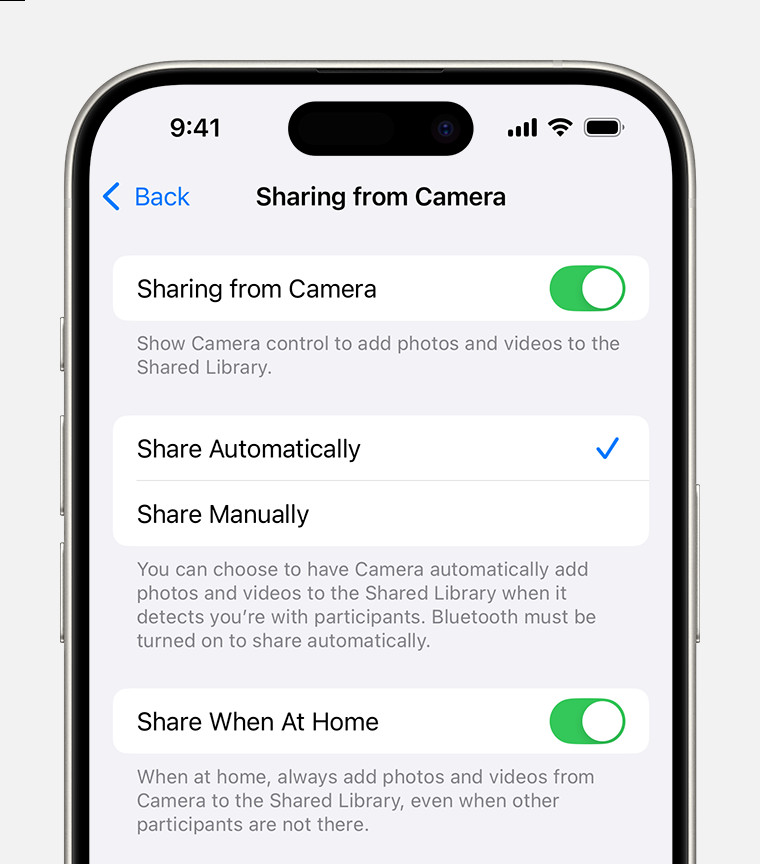 Enabling Sharing from Camera settings on an iPhone to automatically or manually contribute photos to the Shared Library.
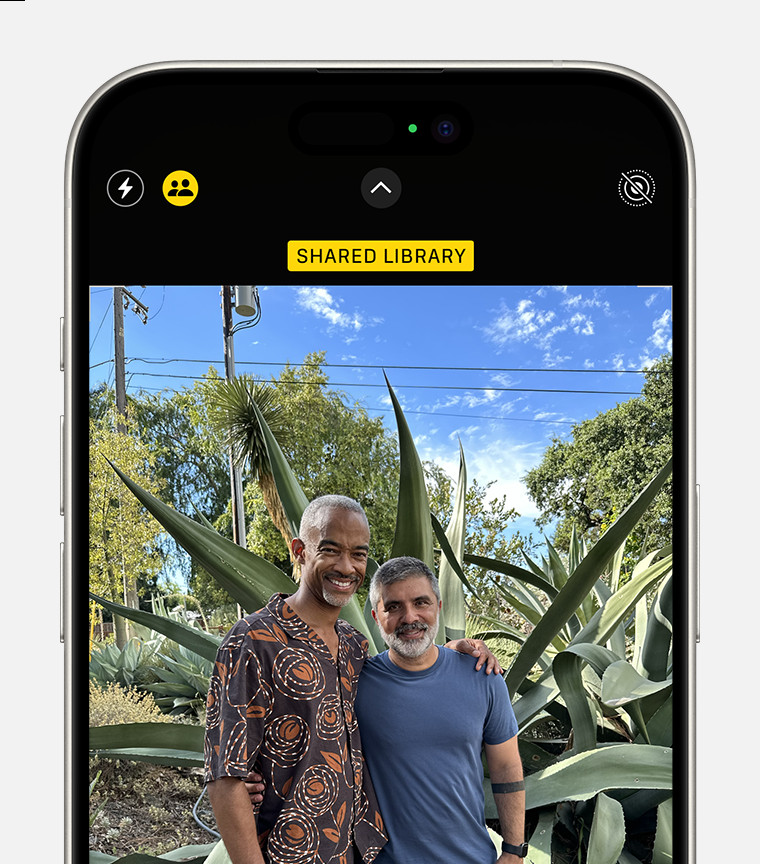 The Shared Library button highlighted in the Camera app interface, indicating photos will be saved to the shared collection.
Switching Between Personal and Shared Libraries
You can seamlessly switch between viewing your Personal Library, Shared Library, or a combined view of both within the Photos app.
On iPhone or iPad:
- Open Photos App: Launch the Photos app.
- Access Library View Options: Tap the profile button (your profile picture or initials) in the upper corner and scroll down to Library View Options. In older iOS versions, this option might be accessible by tapping a button at the top of the Albums or Library tabs.
- Select Library View: Choose between Personal Library, Shared Library, or Both Libraries.
 Choosing between Personal Library, Shared Library, and Both Libraries within the Library View Options on an iPhone.
On Mac:
- Open Photos App: Launch the Photos app.
- Select Library View: At the top of the Photos app window, you will see options to switch between Personal Library, Shared Library, or Both Libraries. Click on your desired view.
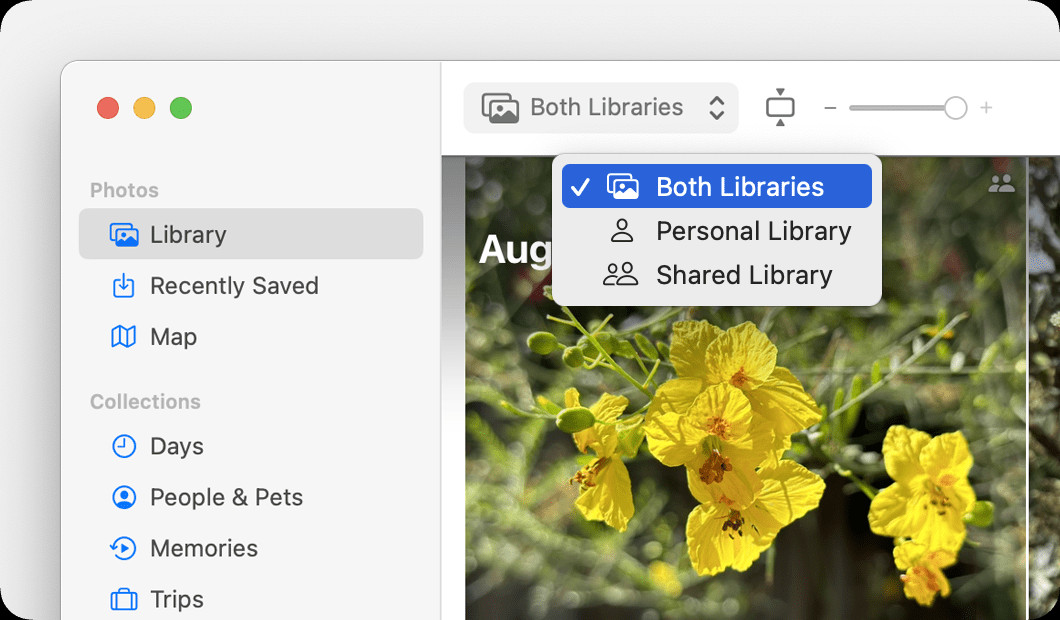 Switching between Personal Library, Shared Library, and Both Libraries using the view options in the Photos app on macOS.
In “Both Libraries” or “Shared Library” view, photos that are part of the Shared Library are typically marked with a badge or icon for easy identification. You can usually disable this indicator in the view settings if preferred.
Leaving or Managing a Shared Library
Whether you are the creator or a participant, you have options to manage your involvement with a Shared Library.
- Leaving as a Participant: You can leave a Shared Library at any time. When leaving, you typically have the choice to receive a copy of all content from the Shared Library or only the photos and videos you personally contributed.
- Deleting as the Creator: If you created the Shared Library, you can remove participants or delete the entire Shared Library. Deleting the library will notify all participants. Depending on their duration in the library, participants may receive all content or just their contributions upon deletion.
For detailed steps on leaving a Shared Library, Apple provides a dedicated support document.
Conclusion
iCloud Shared Photo Library simplifies photo sharing and collaboration, making it an invaluable tool for families, groups of friends, or teams working together visually. By following these steps, you can easily set up, join, and effectively manage your Shared Photo Libraries, ensuring everyone stays connected through shared memories and visual content. Start sharing your iCloud photos today and experience a more collaborative and enriching photo experience.