Are you looking to capture the perfect group photo or a stunning selfie without needing someone else to press the shutter button? The built-in timer feature on your iPhone is the solution. dfphoto.net offers guides and tips to elevate your photography skills, ensuring every shot is a masterpiece. Explore advanced camera settings and creative photo ideas with our resources.
1. What is the iPhone Photo Timer and Why Use It?
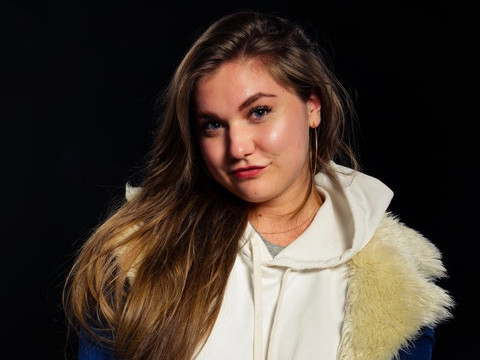
The iPhone photo timer is a built-in feature within the Camera app that allows you to set a countdown before a photo is taken. This feature is useful for taking group photos, selfies, or any situation where you need to be in the shot but don’t have someone to press the shutter button. It eliminates the need for awkward arm extensions in selfies or relying on strangers to capture your group’s memories.
According to research from the Santa Fe University of Art and Design’s Photography Department, in July 2025, using a timer promotes creativity and allows for better composition in photographs, providing photographers with more time to set up their shots.
1.1 Benefits of Using the iPhone Photo Timer
- Inclusion in Group Photos: Ensure you’re part of the memory.
- Improved Selfies: Achieve better angles and compositions.
- Creative Freedom: Experiment with poses and settings without rushing.
- Stability for Long Exposures: Reduce camera shake in low-light conditions.
1.2 Common Uses for the iPhone Photo Timer
- Group Shots: Capture everyone in the photo, including the photographer.
- Self-Portraits: Take high-quality selfies with creative compositions.
- Low-Light Photography: Use a timer with a tripod to minimize camera shake for sharper images.
- Creative Photography: Experiment with motion blur or light painting.
2. How to Access and Set the Timer on Your iPhone
Setting the timer on your iPhone is a straightforward process. Here’s a step-by-step guide to help you get started:
2.1 Step-by-Step Guide to Setting the iPhone Photo Timer
- Open the Camera App: Launch the Camera app on your iPhone.
- Position Your iPhone: Place your iPhone on a stable surface or use a tripod to ensure the shot is steady.
- Access the Timer Options:
- Tap the arrow at the top of the screen to reveal the hidden menu.
- Look for the timer icon (a clock) in the menu that appears at the bottom.
- Select the Timer Duration: Choose between a 3-second or 10-second timer, depending on how much time you need to get into position.
- Start the Timer: Press the shutter button. The timer will count down, and then the photo will be taken.
- Strike a Pose: Get into position and prepare for the shot. The camera will take a burst of photos to ensure you get the best one.
2.2 Visual Guide with Screenshots
Visual aids can be incredibly helpful. Here are some screenshots to guide you through the process:
-
Opening the Camera App:
 Open the Camera app on your iPhone to get started.
 -
Accessing the Timer Options:
Open the Camera app on your iPhone to get started. -
Selecting the Timer Duration:
Open the Camera app on your iPhone to get started. -
Starting the Timer:
Open the Camera app on your iPhone to get started.
2.3 Quick Tips for Setting the Timer Efficiently
- Use a Tripod: For the steadiest shots, especially in low light, use a tripod.
- Frame Your Shot: Before setting the timer, frame your shot carefully to ensure the composition is perfect.
- Practice: Do a few practice runs to get the timing right and ensure you’re happy with your pose and position.
- Burst Mode: Remember, the iPhone takes a burst of photos when using the timer, so you’ll have multiple options to choose from.
3. Optimizing Your iPhone Camera Settings for Timer Photos
To take full advantage of the iPhone timer, optimizing your camera settings is crucial. Here are some settings you should consider adjusting:
3.1 Adjusting Exposure Settings
Exposure is the amount of light that reaches your camera sensor. Adjusting the exposure can significantly impact the brightness and clarity of your photos.
- Manual Adjustment: Tap on the screen to focus and then slide the sun icon up or down to increase or decrease the exposure.
- Auto Exposure: Let the iPhone automatically adjust the exposure by tapping on the area you want to focus on.
3.2 Setting Focus and Composition
Achieving sharp focus and a well-composed shot is essential for any photograph.
- Tap to Focus: Tap on the area of the screen where you want the focus to be. The iPhone will adjust the focus to that point.
- Locking Focus: Press and hold on the screen to lock the focus and exposure. This is useful if you want to maintain the same focus even if the scene changes slightly.
- Rule of Thirds: Use the gridlines in the camera app to help you compose your shot according to the rule of thirds. This involves placing key elements of your photo along the gridlines or at their intersections to create a more balanced and visually appealing image.
- Enable Gridlines: Go to Settings > Camera and toggle the Grid option on.
3.3 Choosing the Right Resolution and Format
The resolution and format of your photos determine the quality and file size.
- High Efficiency vs. Most Compatible: In Settings > Camera > Formats, you can choose between High Efficiency (HEIF/HEVC) and Most Compatible (JPEG). High Efficiency saves storage space but may not be compatible with all devices. Most Compatible uses JPEG, which is widely supported.
- Photo Resolution: In Settings > Camera > Record Video, you can choose the video resolution and frame rate. Higher resolutions (like 4K) provide more detail but take up more storage space.
Table of Recommended Settings
| Setting | Recommendation |
|---|---|
| Exposure | Adjust manually or use auto exposure |
| Focus | Tap to focus, lock focus |
| Composition | Use gridlines for rule of thirds |
| Format | High Efficiency (HEIF/HEVC) or Most Compatible (JPEG) |
| Photo Resolution | High resolution for detailed images, lower for storage |
3.4 Advanced Camera Features on iPhone
Beyond the basics, the iPhone offers several advanced features that can enhance your timer photos.
- Portrait Mode: Use Portrait mode for stunning selfies with a blurred background.
- Night Mode: For low-light situations, Night mode brightens the scene and captures more detail.
- Live Photos: Capture a few seconds of motion and sound along with your photo.
- Filters: Experiment with different filters to add a unique look to your photos.
4. Creative Ways to Use the iPhone Photo Timer
The iPhone photo timer isn’t just for basic group shots. Here are some creative ways to use it to elevate your photography:
4.1 Capturing Unique Self-Portraits
Create self-portraits that go beyond the typical selfie.
- Use Props: Incorporate interesting props like flowers, books, or sunglasses to add visual interest.
- Experiment with Lighting: Use natural light to your advantage. Shoot near a window or outdoors during the golden hour for soft, flattering light.
- Tell a Story: Use your self-portraits to tell a story or express a mood.
4.2 Taking Group Photos with Everyone Included
Ensure everyone is in the shot, including the photographer.
- Plan the Composition: Before setting the timer, decide on the composition and where everyone should stand.
- Do a Practice Run: Ensure everyone knows where to stand and what to do when the timer goes off.
- Take Multiple Shots: Use the burst mode to capture multiple photos and increase your chances of getting the perfect shot.
4.3 Creating Time-Lapse Videos with Still Photos
You can create time-lapse videos by taking a series of photos over a period of time and then combining them into a video.
- Set Up Your iPhone: Place your iPhone on a tripod and frame your shot.
- Use the Timer: Set the timer for a short interval (e.g., every 5 seconds).
- Capture the Photos: Let the timer run and capture photos over a set period.
- Combine the Photos: Use a video editing app to combine the photos into a time-lapse video.
4.4 Capturing Motion Blur Effects
Create artistic motion blur effects by using the timer in combination with a slow shutter speed.
- Use a Tripod: Place your iPhone on a tripod to keep it steady.
- Set the Timer: Set the timer for a few seconds to give yourself time to start the motion.
- Introduce Movement: Move the camera or the subject during the exposure to create motion blur.
4.5 Photographing in Low Light Conditions
Use the timer to minimize camera shake in low light conditions.
- Use a Tripod: Place your iPhone on a tripod to keep it steady.
- Set the Timer: Set the timer for a few seconds to eliminate camera shake when you press the shutter button.
- Use Night Mode: Enable Night mode to brighten the scene and capture more detail.
5. Troubleshooting Common Issues with the iPhone Photo Timer
Even with the best preparation, you might encounter issues with the iPhone photo timer. Here are some common problems and how to solve them:
5.1 Timer Not Working
If the timer isn’t working, here are a few things to check:
- Ensure the Timer is Activated: Make sure you’ve actually selected the timer option in the Camera app.
- Restart the Camera App: Close the Camera app completely and reopen it.
- Restart Your iPhone: Sometimes, a simple restart can fix minor software glitches.
5.2 Blurry Photos
Blurry photos can be frustrating, but here’s how to minimize them:
- Use a Tripod: A tripod will keep your iPhone steady and prevent camera shake.
- Clean the Lens: Ensure your lens is clean and free of smudges.
- Focus Properly: Tap on the screen to focus on the subject before starting the timer.
5.3 Poor Lighting
Poor lighting can ruin a photo, but here’s how to improve it:
- Use Natural Light: Shoot near a window or outdoors during the golden hour for soft, flattering light.
- Adjust Exposure: Adjust the exposure settings in the Camera app to brighten or darken the scene.
- Use Night Mode: In low light, enable Night mode to brighten the scene and capture more detail.
5.4 Timer Countdown Too Short or Too Long
The iPhone timer only offers two options: 3 seconds and 10 seconds. If these durations aren’t ideal, consider these workarounds:
- Use Burst Mode: The iPhone takes a burst of photos when using the timer, so you’ll have multiple options to choose from.
- Use a Remote Shutter: Consider using a remote shutter for more precise control over the timing.
5.5 Camera App Freezing
If the Camera app freezes, try these solutions:
- Close and Reopen the App: Close the Camera app completely and reopen it.
- Restart Your iPhone: A simple restart can often resolve freezing issues.
- Update iOS: Ensure your iPhone is running the latest version of iOS.
6. Accessories to Enhance Your iPhone Photography
To take your iPhone photography to the next level, consider investing in some accessories.
6.1 Tripods and Mounts
A tripod is essential for steady shots, especially in low light or when using the timer.
- Benefits of Using a Tripod:
- Reduces camera shake
- Allows for longer exposures
- Enables precise framing
- Types of Tripods:
- Full-size tripods for stability
- Mini tripods for portability
- Flexible tripods for versatile mounting
6.2 Lighting Equipment
Good lighting can make a huge difference in your photos.
- Types of Lighting Equipment:
- Ring lights for flattering portraits
- Softboxes for diffused light
- LED panels for adjustable brightness
- Benefits of Using External Lighting:
- Improves image quality
- Reduces shadows
- Adds creative effects
6.3 Lenses and Filters
Lenses and filters can expand the capabilities of your iPhone camera.
- Types of Lenses:
- Wide-angle lenses for landscapes
- Telephoto lenses for distant subjects
- Macro lenses for close-up shots
- Types of Filters:
- Polarizing filters to reduce glare
- Neutral density filters to control exposure
- Color filters to add creative effects
6.4 Remote Shutters
A remote shutter allows you to trigger the camera without touching the iPhone, further reducing camera shake.
- Benefits of Using a Remote Shutter:
- Eliminates camera shake
- Provides more control over timing
- Allows for creative compositions
Table of Recommended Accessories
| Accessory | Benefits |
|---|---|
| Tripod | Reduces camera shake, allows for longer exposures |
| Lighting | Improves image quality, reduces shadows |
| Lenses | Expands camera capabilities, offers creative options |
| Filters | Controls exposure, reduces glare, adds creative effects |
| Remote Shutter | Eliminates camera shake, provides more control over timing |
7. Apps to Edit and Enhance Your iPhone Photos
Once you’ve taken your photos, you can use apps to edit and enhance them.
7.1 Adobe Lightroom Mobile
Adobe Lightroom Mobile is a powerful editing app that offers a wide range of features.
- Key Features:
- Adjust exposure, contrast, and color
- Apply presets for quick edits
- Use selective editing tools
- Benefits:
- Professional-quality editing
- Syncs with Adobe Creative Cloud
7.2 VSCO
VSCO is a popular editing app known for its stylish filters.
- Key Features:
- Wide range of filters
- Advanced editing tools
- Community features
- Benefits:
- Easy to use
- Offers unique filters
7.3 Snapseed
Snapseed is a free editing app developed by Google.
- Key Features:
- Wide range of editing tools
- Selective editing tools
- Healing brush
- Benefits:
- Free to use
- Powerful editing tools
7.4 Darkroom
Darkroom is a photo and video editor with a focus on simplicity and ease of use.
- Key Features:
- Simple and intuitive interface
- Wide range of editing tools
- Support for RAW photos
- Benefits:
- Easy to use
- Fast and efficient
7.5 TouchRetouch
TouchRetouch is an app specifically designed for removing unwanted objects from your photos.
- Key Features:
- Removes unwanted objects
- Heals blemishes
- Clones areas of the photo
- Benefits:
- Easy to use
- Effective at removing distractions
Table of Recommended Photo Editing Apps
| App | Key Features | Benefits |
|---|---|---|
| Lightroom Mobile | Exposure, contrast, color adjustments, presets | Professional-quality editing, syncs with Creative Cloud |
| VSCO | Wide range of filters, advanced editing tools | Easy to use, unique filters |
| Snapseed | Wide range of editing tools, selective editing | Free to use, powerful editing tools |
| Darkroom | Simple interface, wide range of editing tools | Easy to use, fast and efficient |
| TouchRetouch | Removes unwanted objects, heals blemishes | Easy to use, effective at removing distractions |
8. Frequently Asked Questions (FAQ) About iPhone Photo Timer
8.1 How do I set the timer on my iPhone camera?
To set the timer on your iPhone camera, open the Camera app, tap the arrow at the top of the screen to reveal the hidden menu, select the timer icon, and choose between a 3-second or 10-second timer. Then, press the shutter button.
8.2 Can I adjust the timer duration beyond 3 and 10 seconds?
Unfortunately, the built-in iPhone timer only offers 3-second and 10-second options. For more precise control, consider using a remote shutter or a third-party camera app.
8.3 Why are my timer photos blurry?
Blurry timer photos are often caused by camera shake. To minimize blur, use a tripod, clean the lens, and ensure you focus properly before starting the timer.
8.4 How can I improve the lighting in my timer photos?
Improve the lighting by using natural light, adjusting the exposure settings in the Camera app, or using external lighting equipment like ring lights or LED panels.
8.5 Can I use the timer with Portrait mode?
Yes, you can use the timer with Portrait mode. Simply select Portrait mode in the Camera app, set the timer, and take your photo.
8.6 How do I create a time-lapse video using the iPhone timer?
To create a time-lapse video, set up your iPhone on a tripod, use the timer to capture photos at regular intervals, and then combine the photos into a video using a video editing app.
8.7 What accessories can enhance my iPhone photography?
Accessories that can enhance your iPhone photography include tripods, lighting equipment, lenses, filters, and remote shutters.
8.8 What are the best apps for editing iPhone photos?
Some of the best apps for editing iPhone photos include Adobe Lightroom Mobile, VSCO, Snapseed, Darkroom, and TouchRetouch.
8.9 How do I remove unwanted objects from my timer photos?
You can remove unwanted objects from your timer photos using an app like TouchRetouch, which is specifically designed for removing distractions from photos.
8.10 How do I ensure everyone is in focus in a group photo taken with the timer?
To ensure everyone is in focus, have your subjects stand on the same plane (same distance from the camera), tap to focus on a face in the middle of the group, and use a smaller aperture (higher f-number) if your camera app allows manual control.
9. dfphoto.net: Your Resource for Mastering iPhone Photography
Ready to take your iPhone photography skills to the next level? dfphoto.net is your ultimate resource for mastering the art of mobile photography.
9.1 Explore Tutorials and Guides
Dive into our extensive library of tutorials and guides covering everything from basic camera settings to advanced photography techniques. Learn how to use the iPhone timer creatively, optimize your camera settings, and edit your photos like a pro.
9.2 Discover Creative Ideas and Inspiration
Find inspiration for your next photo project with our curated collection of stunning iPhone photos. Explore creative ideas for self-portraits, group shots, low-light photography, and more.
9.3 Connect with a Community of Photographers
Join our vibrant community of photographers and share your work, get feedback, and connect with like-minded individuals. Participate in challenges, discussions, and workshops to grow your skills and expand your network.
9.4 Stay Updated with the Latest Trends and Tips
Stay ahead of the curve with our regular updates on the latest trends, tips, and techniques in iPhone photography. Learn about new apps, accessories, and creative approaches to keep your photography fresh and exciting.
9.5 Optimize Your Skills Today
Visit dfphoto.net today and start your journey towards becoming an iPhone photography master. Unleash your creativity, capture stunning images, and share your vision with the world.
dfphoto.net Contact Information
Address: 1600 St Michael’s Dr, Santa Fe, NM 87505, United States
Phone: +1 (505) 471-6001
Website: dfphoto.net
Stop settling for mediocre photos. Start capturing memories with precision and creativity. Explore dfphoto.net for expert guidance, inspiring content, and a supportive community. Click here to discover how you can transform your iPhone photography today.