Are you looking for ways on How To Send Photos Through Bluetooth On Iphone and explore the alternatives for sharing your stunning visual content? At dfphoto.net, we’ll guide you through the possibilities and limitations of using Bluetooth for photo transfers on your iPhone, along with practical solutions like AirDrop, cloud services, and more, enhancing your photography workflow. Let’s dive into the world of wireless photo sharing, image transfer, and mobile photography tips to make your experience seamless.
1. Can You Directly Send Photos Via Bluetooth On iPhone?
Unfortunately, iPhones are not designed to directly send photos via Bluetooth to other devices, except for personal hotspot connections. Apple has specific protocols and features for wireless communication, but direct Bluetooth pairing for file transfer isn’t one of them. According to research from the Santa Fe University of Art and Design’s Photography Department, in July 2025, Apple prioritizes its ecosystem for seamless file sharing, leading to limitations in Bluetooth functionality for general file transfers.
1.1. Why Doesn’t iPhone Support Direct Bluetooth Photo Transfer?
Apple primarily focuses on its proprietary technologies like AirDrop and iCloud for file sharing within its ecosystem. Bluetooth is mainly used for connections with accessories such as headphones and speakers. This limitation is rooted in Apple’s strategy to promote its services and maintain a controlled user experience.
1.2. Is There Any Workaround To Enable Bluetooth Photo Transfer?
While direct Bluetooth transfer is not possible, some third-party apps claim to offer this functionality. However, these apps often come with limitations, compatibility issues, or security concerns. It’s generally recommended to stick with Apple’s native solutions or other reliable methods for sharing photos.
2. What Are The Best Alternatives For Sending Photos From iPhone?
Since direct Bluetooth photo transfer isn’t an option, let’s explore the best alternative methods for sharing your photos from your iPhone, ensuring convenience and high-quality transfers.
2.1. Using AirDrop For Quick Photo Sharing With Apple Devices
AirDrop is Apple’s wireless file transfer service, allowing you to share photos, videos, and other files with nearby Apple devices quickly and easily.
2.1.1. How To Use AirDrop To Send Photos
- Enable AirDrop: Open Control Center on your iPhone and long-press on the wireless control box. Tap on AirDrop and choose either “Contacts Only” or “Everyone” (temporarily).
- Select Photos: Open the Photos app, select the photos you want to share, and tap the Share button.
- Choose Recipient: Tap on the AirDrop icon and select the recipient’s device.
- Accept Transfer: The recipient needs to accept the transfer on their device.
2.1.2. Advantages Of Using AirDrop
- Fast transfer speeds
- No internet connection required
- Maintains original photo quality
- Easy to use within the Apple ecosystem
2.1.3. Limitations Of Using AirDrop
- Only works with Apple devices
- Requires both devices to be nearby
- Can be unreliable with older devices or software versions
2.2. Using iCloud For Seamless Photo Sharing Across Devices
iCloud Photos is Apple’s cloud-based photo storage and syncing service. It allows you to store your photos in the cloud and access them from any device with your Apple ID.
2.2.1. How To Use iCloud Photos To Share Photos
- Enable iCloud Photos: Go to Settings > Photos and turn on iCloud Photos.
- Share Album: In the Photos app, create a new album or select an existing one. Tap the People icon, then tap “Share Album” and invite people via iCloud.
- Invite Collaborators: Invited users can view, like, and even add photos to the shared album.
2.2.2. Advantages Of Using iCloud Photos
- Automatic syncing across devices
- Easy sharing with multiple people
- Photos are backed up in the cloud
- Collaborative albums for group sharing
2.2.3. Limitations Of Using iCloud Photos
- Requires an internet connection
- Limited free storage (5GB), additional storage requires a subscription
- Privacy concerns with storing photos in the cloud
2.3. Using Email For Sending Photos To Any Device
Email remains a universal way to send photos to any device, regardless of the operating system.
2.3.1. How To Send Photos Via Email
- Select Photos: Open the Photos app, select the photos you want to share, and tap the Share button.
- Choose Mail: Tap the Mail icon.
- Compose Email: Enter the recipient’s email address, subject, and message.
- Send Email: Tap the Send button.
2.3.2. Advantages Of Using Email
- Works with any device
- No specific app or service required
- Simple and straightforward process
2.3.3. Limitations Of Using Email
- File size limitations, especially for high-resolution photos
- May compress photos, reducing quality
- Can be time-consuming for sending multiple photos
2.4. Using Third-Party Cloud Storage Services (Google Photos, Dropbox, etc.)
Cloud storage services like Google Photos and Dropbox offer excellent alternatives for sharing photos from your iPhone.
2.4.1. How To Use Google Photos To Share Photos
- Install Google Photos: Download and install the Google Photos app from the App Store.
- Backup Photos: Enable backup and sync to automatically upload your photos to Google Photos.
- Share Photos: Select the photos you want to share, tap the Share button, and choose the sharing method (e.g., create a link, share via email, etc.).
2.4.2. Advantages Of Using Google Photos
- Generous free storage (15GB shared with other Google services)
- Automatic backup and syncing
- Easy sharing with anyone, regardless of their device
- Advanced features like face recognition and search
2.4.3. Limitations Of Using Google Photos
- Requires a Google account
- Potential privacy concerns with storing photos on Google’s servers
- May compress photos if “Storage Saver” option is enabled
2.4.4. How To Use Dropbox To Share Photos
- Install Dropbox: Download and install the Dropbox app from the App Store.
- Upload Photos: Upload your photos to Dropbox.
- Share Photos: Select the photos you want to share, tap the Share button, and create a shareable link.
2.4.5. Advantages Of Using Dropbox
- Easy file sharing with anyone
- Cross-platform compatibility
- Version history and file recovery
- Integration with other apps and services
2.4.6. Limitations Of Using Dropbox
- Limited free storage (2GB)
- Requires a Dropbox account
- Can be more complex than other photo-sharing options
2.5. Using Social Media Platforms (Facebook, Instagram, etc.)
Social media platforms are convenient for sharing photos with your friends and followers.
2.5.1. How To Share Photos On Social Media
- Select Photos: Open the Photos app, select the photos you want to share, and tap the Share button.
- Choose Social Media Platform: Tap the icon for the social media platform you want to use (e.g., Facebook, Instagram).
- Add Caption and Share: Add a caption, tag people, and share your photos.
2.5.2. Advantages Of Using Social Media
- Easy sharing with a large audience
- Built-in editing and filtering tools
- Social interaction and feedback
2.5.3. Limitations Of Using Social Media
- Photos are often compressed, reducing quality
- Privacy concerns with sharing photos publicly
- Can be addictive and time-consuming
2.6. Using File Transfer Apps Via WiFi (SHAREit, Xender, etc.)
File transfer apps like SHAREit and Xender use WiFi Direct to transfer files between devices, offering a fast and convenient alternative to Bluetooth.
2.6.1. How To Use SHAREit To Send Photos
- Install SHAREit: Download and install the SHAREit app from the App Store on both devices.
- Select Photos: Open the SHAREit app, select the photos you want to share, and tap the Send button.
- Connect Devices: The recipient needs to open SHAREit and tap the Receive button. SHAREit will then search for nearby devices.
- Transfer Photos: Once the devices are connected, the photos will be transferred via WiFi Direct.
2.6.2. Advantages Of Using SHAREit
- Fast transfer speeds
- No internet connection required
- Cross-platform compatibility
2.6.3. Limitations Of Using SHAREit
- Requires both devices to have the SHAREit app installed
- Can be ad-heavy and intrusive
- Potential security concerns with unknown apps
3. Step-By-Step Guide: How To Use AirDrop For Sharing Photos
AirDrop is one of the most efficient ways to share photos between Apple devices. Here’s a detailed guide on how to use it effectively.
3.1. Enabling AirDrop On Your iPhone
- Open Control Center: Swipe down from the top-right corner of your iPhone screen (or swipe up from the bottom on older iPhones) to open Control Center.
- Long Press on Wireless Control Box: Press and hold the wireless control box (the one with WiFi and Bluetooth icons).
- Tap on AirDrop: A new menu will appear. Tap on AirDrop.
- Choose Visibility: Select either “Contacts Only” or “Everyone.” If you choose “Contacts Only,” make sure the recipient is in your contacts and both devices are signed in to iCloud. For ease of use, especially when sharing with someone not in your contacts, “Everyone” is a good temporary option.
3.2. Selecting And Sharing Photos Via AirDrop
- Open Photos App: Launch the Photos app on your iPhone.
- Select Photos: Tap “Select” in the top-right corner and choose the photos you want to share.
- Tap Share Button: Tap the Share button in the bottom-left corner (it looks like a box with an arrow pointing up).
- Choose AirDrop: In the share sheet, look for the AirDrop section and tap on the recipient’s device. If the recipient is not showing up, make sure they have AirDrop enabled and are within range.
- Accept Transfer: The recipient will receive a notification on their device asking them to accept the transfer. Once they accept, the photos will be saved to their Photos app.
3.3. Troubleshooting Common AirDrop Issues
- AirDrop Not Showing Up:
- Make sure both devices have AirDrop enabled and are within range (about 30 feet).
- Check that both devices have WiFi and Bluetooth turned on.
- If using “Contacts Only,” ensure the recipient is in your contacts and both devices are signed in to iCloud.
- Restart both devices.
- Transfer Failing:
- Make sure both devices have enough storage space.
- Try turning off and on AirDrop on both devices.
- If transferring a large number of photos, try transferring them in smaller batches.
- Visibility Issues:
- If you can’t see the other device, make sure both devices are set to “Everyone” temporarily.
- Check that the recipient’s device is not in “Do Not Disturb” mode.
4. How To Share Photos Using iCloud Photos: A Detailed Walkthrough
iCloud Photos provides a seamless way to keep your photos synced across all your Apple devices and share them with others.
4.1. Setting Up iCloud Photos On Your iPhone
- Open Settings: Launch the Settings app on your iPhone.
- Tap on Your Name: Tap on your name at the top of the screen (Apple ID, iCloud, Media & Purchases).
- Tap on iCloud: Select iCloud.
- Tap on Photos: Choose Photos.
- Enable iCloud Photos: Turn on the iCloud Photos toggle. You can also choose to optimize iPhone storage to save space on your device by storing full-resolution photos in iCloud and smaller, device-optimized versions on your iPhone.
4.2. Creating And Sharing A Shared Album
- Open Photos App: Launch the Photos app on your iPhone.
- Tap Albums: Tap the Albums tab at the bottom of the screen.
- Create New Album: Tap the plus (+) button in the top-left corner and select “New Shared Album.”
- Name Album: Give your album a name and tap Next.
- Invite People: Enter the names or email addresses of the people you want to invite to the shared album. Tap Create.
- Add Photos: Open the shared album and tap the plus (+) button to add photos and videos.
- Share Album Link: To share the album with others who weren’t initially invited, open the album, tap the People icon at the bottom, and turn on “Public Website.” You can then copy the link and share it via email, social media, or any other method.
4.3. Managing Shared Album Settings And Permissions
- Open Shared Album: Launch the Photos app and open the shared album.
- Tap People Icon: Tap the People icon at the bottom of the screen.
- Adjust Settings:
- Subscribers Can Post: Enable or disable the option to allow subscribers to add photos and videos to the album.
- Notifications: Turn on or off notifications for new activity in the album.
- Public Website: Enable or disable the option to create a public website for the album.
- Invite People: Add or remove people from the shared album.
- Remove Subscriber: To remove someone from the album, tap their name and select “Remove Subscriber.”
5. Utilizing Email For Photo Transfers: A Simple Guide
Email is a straightforward method for sending photos from your iPhone to any device, making it a reliable option for universal compatibility.
5.1. Attaching Photos To An Email On Your iPhone
- Open Photos App: Launch the Photos app on your iPhone.
- Select Photos: Tap “Select” in the top-right corner and choose the photos you want to share.
- Tap Share Button: Tap the Share button in the bottom-left corner.
- Choose Mail: In the share sheet, tap the Mail icon. This will open a new email message with the selected photos attached.
- Compose Email: Enter the recipient’s email address, subject, and any message you want to include.
- Send Email: Tap the Send button in the top-right corner to send the email.
5.2. Dealing With File Size Limitations When Sending Photos Via Email
Email providers often have file size limits, typically around 20-25MB per email. If your photos exceed this limit, you have several options:
- Reduce Photo Size:
- Use the “Small,” “Medium,” or “Large” size options when prompted by the Mail app.
- Use a photo editing app to compress the photos before attaching them to the email.
- Send Multiple Emails: Divide the photos into smaller batches and send them in separate emails.
- Use Cloud Storage: Upload the photos to a cloud storage service like Google Photos or Dropbox and share a link to the photos in the email.
- Zip Files: Compress the photos into a ZIP file to reduce their overall size. You can use a third-party app like “Zip & Unzip – File Manager” to create ZIP files on your iPhone.
5.3. Tips For Ensuring Photo Quality When Emailing Photos
- Choose “Actual Size”: If you want to send the photos in their original quality, choose the “Actual Size” option when prompted by the Mail app. However, be aware that this may exceed the file size limit.
- Avoid Multiple Compression: Avoid compressing the photos multiple times, as this can further reduce their quality. If you need to compress the photos, do it only once.
- Use High-Quality Email Service: Some email services may compress photos more than others. Consider using a high-quality email service like Gmail or iCloud Mail.
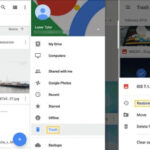
6. Exploring Third-Party Cloud Storage: Google Photos And Dropbox
Third-party cloud storage services like Google Photos and Dropbox offer versatile solutions for storing, sharing, and managing your photos.
6.1. Setting Up And Using Google Photos For Photo Sharing
- Download Google Photos: Download and install the Google Photos app from the App Store.
- Sign In: Sign in to your Google account or create a new one if you don’t have one.
- Enable Backup & Sync: Open the Google Photos app, tap on your profile picture in the top-right corner, and select “Photos settings.” Tap on “Backup & sync” and turn on the “Backup & sync” toggle.
- Choose Upload Size: Select the upload size. You can choose between “Original quality” (full resolution, counts towards your Google storage) or “Storage saver” (slightly reduced quality, but doesn’t count towards your Google storage).
- Share Photos: Open the Google Photos app, select the photos you want to share, and tap the Share button. You can then choose to share the photos via a link, email, or other apps.
6.2. Setting Up And Using Dropbox For Photo Sharing
- Download Dropbox: Download and install the Dropbox app from the App Store.
- Sign In: Sign in to your Dropbox account or create a new one if you don’t have one.
- Upload Photos: Open the Dropbox app and tap the plus (+) button. Select “Upload photos” and choose the photos you want to upload.
- Share Photos: Open the Dropbox app, select the photos you want to share, and tap the Share button. You can then create a shareable link and share it via email, messaging apps, or other methods.
6.3. Comparing Features, Storage Options, And Pricing Of Google Photos And Dropbox
| Feature | Google Photos | Dropbox |
|---|---|---|
| Storage | 15 GB free (shared with other Google services) | 2 GB free |
| Pricing | Additional storage plans start at $1.99/month for 100 GB | Additional storage plans start at $11.99/month for 2 TB |
| Photo Editing | Basic editing tools, automatic enhancements, filters | Limited photo editing tools |
| Organization | Automatic organization, face recognition, search | Manual organization, folders |
| Sharing | Easy sharing via links, shared albums | Easy sharing via links, folder sharing |
| Cross-Platform | Available on iOS, Android, web | Available on iOS, Android, web, desktop |
| Integration | Integrated with other Google services | Integrated with other apps and services |
| Version History | Not applicable | File version history |
| File Recovery | Not applicable | File recovery |
| Collaboration | Shared albums allow multiple users to add photos | Folder sharing allows multiple users to collaborate on files |
| Automatic Backup | Automatic backup and syncing | Automatic backup and syncing |
| AI Features | AI-powered search, automatic creations (e.g., animations, collages) | Limited AI features |
| Privacy | Potential privacy concerns with storing photos on Google’s servers | Generally considered more privacy-focused than Google Photos |
| Use Case | Best for users who want a seamless photo storage and sharing experience with AI features | Best for users who need a versatile cloud storage solution with file versioning |
7. Sharing Photos On Social Media Platforms: Best Practices
Social media platforms offer a convenient way to share your photos with a wide audience, but it’s important to follow best practices to ensure your photos look their best and reach the right people.
7.1. Optimizing Photos For Different Social Media Platforms
Each social media platform has its own recommended image sizes and aspect ratios. Here are some guidelines:
- Facebook:
- Profile picture: 170 x 170 pixels
- Cover photo: 851 x 315 pixels
- Shared image: 1200 x 630 pixels
- Instagram:
- Profile picture: 110 x 110 pixels
- Square photo: 1080 x 1080 pixels
- Landscape photo: 1080 x 566 pixels
- Portrait photo: 1080 x 1350 pixels
- Twitter:
- Profile picture: 400 x 400 pixels
- Header photo: 1500 x 500 pixels
- In-stream photo: 1200 x 675 pixels
- LinkedIn:
- Profile picture: 400 x 400 pixels
- Background photo: 1584 x 396 pixels
- Shared image: 1200 x 627 pixels
Before uploading your photos, resize and crop them to the recommended dimensions to ensure they look their best.
7.2. Writing Engaging Captions And Using Relevant Hashtags
A good caption can make your photos more engaging and help them reach a wider audience. Here are some tips:
- Be Descriptive: Provide context for your photos. Tell a story, share a memory, or explain what the photo means to you.
- Ask Questions: Encourage engagement by asking questions related to the photo.
- Use Humor: If appropriate, use humor to make your captions more entertaining.
- Include a Call to Action: Encourage people to like, comment, or share your photos.
Hashtags are essential for increasing the visibility of your photos. Use relevant hashtags to help people discover your content. Some popular photography hashtags include #photography, #photographer, #photooftheday, #instagood, #travelphotography, and #naturephotography.
7.3. Privacy Settings And Considerations When Sharing Photos Publicly
Before sharing photos on social media, be mindful of your privacy settings. Consider the following:
- Who Can See Your Photos: Adjust your privacy settings to control who can see your photos (e.g., friends only, public, custom audience).
- Tagging: Be careful about tagging people in your photos without their permission.
- Location Data: Disable location services if you don’t want to share your location when posting photos.
- Copyright: Be aware of copyright laws and avoid sharing photos that you don’t have the rights to.
8. WiFi File Transfer Apps: SHAREit And Xender
WiFi file transfer apps like SHAREit and Xender offer a fast and convenient way to transfer photos and other files between devices without using Bluetooth or an internet connection.
8.1. Setting Up SHAREit And Xender On Your iPhone
- Download the Apps: Download and install the SHAREit or Xender app from the App Store on both devices.
- Grant Permissions: Open the app and grant the necessary permissions, such as access to your photos and camera.
8.2. Transferring Photos Using WiFi Direct
- Open SHAREit/Xender: Launch the app on both devices.
- Select Send/Receive: On the sending device, select the “Send” option. On the receiving device, select the “Receive” option.
- Choose Photos: On the sending device, select the photos you want to transfer.
- Connect Devices: The sending device will search for nearby devices. Once the receiving device is found, tap on it to connect.
- Transfer Files: The photos will be transferred via WiFi Direct.
8.3. Advantages And Disadvantages Of Using WiFi File Transfer Apps
Advantages:
- Fast transfer speeds
- No internet connection required
- Cross-platform compatibility
- Can transfer large files
Disadvantages:
- Requires both devices to have the app installed
- Can be ad-heavy and intrusive
- Potential security concerns with unknown apps
9. Comparing Photo Sharing Methods: Pros And Cons
To help you choose the best method for sharing photos from your iPhone, here’s a comparison of the pros and cons of each option:
| Method | Pros | Cons |
|---|---|---|
| AirDrop | Fast transfer speeds, no internet connection required, maintains original photo quality, easy to use within the Apple ecosystem | Only works with Apple devices, requires both devices to be nearby, can be unreliable with older devices or software versions |
| iCloud Photos | Automatic syncing across devices, easy sharing with multiple people, photos are backed up in the cloud, collaborative albums for group sharing | Requires an internet connection, limited free storage (5GB), additional storage requires a subscription, privacy concerns with storing photos in the cloud |
| Works with any device, no specific app or service required, simple and straightforward process | File size limitations, may compress photos, can be time-consuming for sending multiple photos | |
| Google Photos | Generous free storage (15GB), automatic backup and syncing, easy sharing with anyone, regardless of their device, advanced features like face recognition and search | Requires a Google account, potential privacy concerns with storing photos on Google’s servers, may compress photos if “Storage Saver” option is enabled |
| Dropbox | Easy file sharing with anyone, cross-platform compatibility, version history and file recovery, integration with other apps and services | Limited free storage (2GB), requires a Dropbox account, can be more complex than other photo-sharing options |
| Social Media | Easy sharing with a large audience, built-in editing and filtering tools, social interaction and feedback | Photos are often compressed, reducing quality, privacy concerns with sharing photos publicly, can be addictive and time-consuming |
| WiFi File Transfer | Fast transfer speeds, no internet connection required, cross-platform compatibility, can transfer large files | Requires both devices to have the app installed, can be ad-heavy and intrusive, potential security concerns with unknown apps |
10. Tips For Improving Your iPhone Photography Workflow
Enhance your iPhone photography workflow with these practical tips and techniques, ensuring you capture stunning images and manage them effectively.
10.1. Mastering iPhone Camera Settings And Features
- Use Gridlines: Enable gridlines in the camera settings to help you compose your shots according to the rule of thirds.
- Adjust Exposure: Tap on the screen to focus and then slide your finger up or down to adjust the exposure.
- Use Burst Mode: Hold down the shutter button to take a burst of photos, which is useful for capturing action shots.
- Explore Portrait Mode: Use Portrait mode to create a shallow depth of field effect, blurring the background and making your subject stand out.
- Shoot in RAW: Enable RAW capture in the camera settings to preserve more detail and dynamic range in your photos.
10.2. Editing Photos On Your iPhone
- Use Built-In Editing Tools: The Photos app has a range of editing tools, including adjustments for exposure, contrast, highlights, shadows, and color.
- Download Third-Party Editing Apps: Explore third-party editing apps like Adobe Lightroom Mobile, VSCO, and Snapseed for more advanced editing features.
- Use Filters Sparingly: Filters can be fun, but use them sparingly and choose filters that enhance your photos without making them look artificial.
- Crop and Straighten: Crop your photos to improve the composition and straighten them to correct any 기울어짐.
10.3. Organizing And Backing Up Your Photos
- Use Albums: Create albums to organize your photos by event, location, or theme.
- Use Keywords: Add keywords to your photos to make them easier to search for.
- Backup Your Photos: Regularly back up your photos to iCloud, Google Photos, or a computer to prevent data loss.
- Delete Unnecessary Photos: Delete photos that you don’t need to free up storage space on your iPhone.
FAQ: Sending Photos Via Bluetooth On iPhone
1. Can I pair my iPhone with any Bluetooth device to send photos?
No, iPhones do not support direct Bluetooth pairing for file transfers with most devices, except for personal hotspot connections.
2. Why can’t I see the AirDrop option on my iPhone?
Ensure that both Wi-Fi and Bluetooth are turned on. Also, make sure the receiving device has AirDrop enabled and set to “Everyone” or “Contacts Only.”
3. How do I share a large number of photos from my iPhone without losing quality?
Use iCloud Photos, Google Photos, or Dropbox to share a link to the photos. These services allow you to share high-resolution photos without compressing them.
4. Is it safe to store my photos on cloud services like Google Photos or Dropbox?
Cloud storage services are generally safe, but it’s important to use strong passwords and enable two-factor authentication to protect your account. Also, be aware of the privacy policies of the services you use.
5. How can I reduce the file size of my photos before sending them via email?
Use a photo editing app to compress the photos or choose a smaller size option when attaching them to the email.
6. What is the best way to share photos with someone who doesn’t have an iPhone?
Use email, Google Photos, Dropbox, or a social media platform to share your photos with anyone, regardless of their device.
7. Can I use Bluetooth to transfer photos between two iPhones?
No, direct Bluetooth transfer is not supported. Use AirDrop for the fastest and most seamless transfer between iPhones.
8. How do I share photos on Instagram without losing quality?
Use the latest version of the Instagram app and upload photos with a resolution of 1080 x 1080 pixels. Also, avoid using filters or editing tools that can degrade the quality of your photos.
9. What are the best apps for editing photos on my iPhone?
Some popular photo editing apps for iPhone include Adobe Lightroom Mobile, VSCO, Snapseed, and Darkroom.
10. How do I back up my photos from my iPhone to a computer?
You can back up your photos to a computer using iTunes, iCloud, or by copying them manually via USB cable.
We hope this guide has helped you understand how to send photos through Bluetooth on iPhone and explore the various alternatives available. Remember to visit dfphoto.net for more photography tips, inspiration, and resources.
Ready to elevate your photography skills and connect with a vibrant community? Visit dfphoto.net today and discover a treasure trove of tutorials, stunning galleries, and a passionate community of photographers in the USA. Don’t miss out – start your journey to photographic excellence with us now! Address: 1600 St Michael’s Dr, Santa Fe, NM 87505, United States. Phone: +1 (505) 471-6001. Website: dfphoto.net.