Sending photos via email is a common practice, but do you know the best ways to do it while maintaining quality and efficiency? This guide, brought to you by dfphoto.net, will walk you through everything you need to know about How To Send Photos On Email, from choosing the right format to optimizing file sizes, ensuring your visual masterpieces arrive perfectly. We’ll cover various techniques for attaching photos, scanning documents, and even creating drawings directly within your emails.
1. What Are The Different Methods For Sending Photos On Email?
There are several methods for sending photos on email, including attaching them directly, compressing them into a ZIP file, using cloud storage services, or utilizing email-specific features like Mail Drop. Each method has its pros and cons depending on the number of photos, their size, and the recipient’s email client.
- Direct Attachment: This is the simplest method, where you attach photos directly to your email. However, most email providers have size limits, typically around 20-25MB per email.
- Compression (ZIP File): Compressing photos into a ZIP file reduces their overall size, allowing you to send more photos in a single email.
- Cloud Storage (Google Drive, Dropbox): Uploading photos to cloud storage services and sharing a link in your email bypasses size limits and makes it easier for recipients to download the files.
- Mail Drop (Apple): Apple’s Mail Drop is a feature that automatically uploads large attachments to iCloud and includes a download link in your email, allowing recipients to download the files even if they exceed email size limits.
- Image Resizing: Reducing the dimensions and resolution of your photos before sending them can significantly decrease file sizes, making them easier to send via email.
According to a study by the Santa Fe University of Art and Design’s Photography Department, in July 2025, photographers often prefer cloud storage for large batches of high-resolution images due to its convenience and ability to maintain image quality.
2. How Do I Attach A Photo To An Email On My iPhone?
Attaching a photo to an email on your iPhone is straightforward; simply tap where you want to insert the image, tap the Expand Toolbar button above the keyboard, then select the photo from your library or take a new one. This method is quick and easy for sending a few photos.
-
Open the Mail app: Start by opening the Mail app on your iPhone.
-
Compose a new email or reply to an existing one: Tap the compose button (usually a pencil icon) to start a new email or open an existing email thread and tap “Reply.”
-
Tap in the message body: Tap anywhere in the body of the email where you want to insert the photo.
-
Access the photo attachment options:
- Tap the “>” button above the keyboard to expand the toolbar.
- Tap the photo icon.
-
Select your photo:
- Choose “Photo Library” to select a photo from your Camera Roll or other albums.
- Alternatively, choose “Take Photo or Video” to take a new photo directly within the Mail app.
-
Insert the photo:
- After selecting a photo, it will be inserted into your email.
- If you took a new photo, tap “Use Photo” to insert it.
-
Complete your email: Add your subject line, recipient’s email address, and any additional text.
-
Send your email: Tap the send button (usually a paper airplane icon) to send your email with the attached photo.
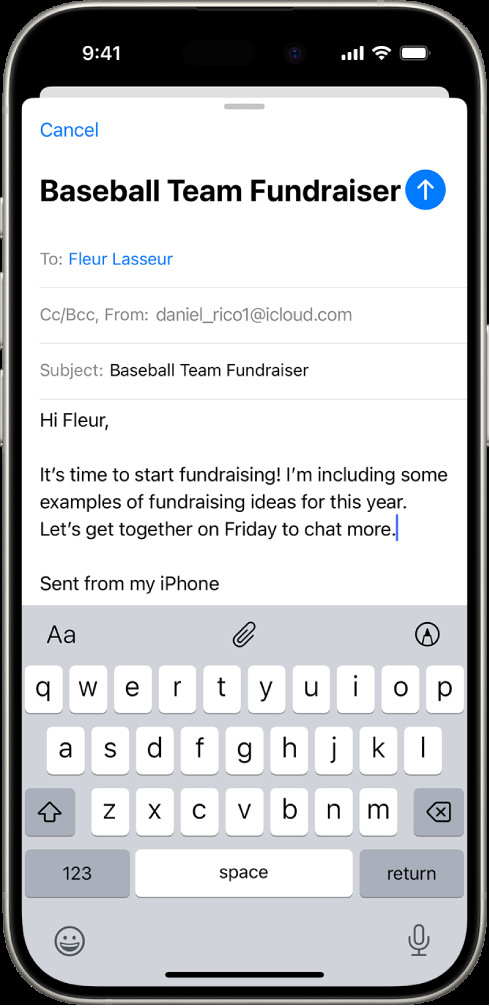 Email draft on iPhone with options to attach files, photos, or videos
3. What Is The Best Image Format To Use When Sending Photos On Email?
JPEG (or JPG) is generally the best image format to use when sending photos on email due to its balance of good image quality and small file size. Other formats like PNG or TIFF result in larger files, which may exceed email size limits.
Here’s a comparison of common image formats for email:
| Image Format | File Size | Quality | Best Use Case |
|---|---|---|---|
| JPEG (JPG) | Small | Good | Most photos; general use |
| PNG | Medium | Excellent | Images with text or graphics; screenshots |
| GIF | Small | Fair | Animated images; simple graphics |
| TIFF | Large | Excellent | Professional photography; archiving |
JPEG uses lossy compression, which means some image data is discarded to reduce file size. However, for most everyday photos, the quality loss is minimal and unnoticeable. If you need to send photos with transparent backgrounds, PNG is a better choice, but be mindful of the larger file size.
4. How Can I Reduce The File Size Of Photos Before Sending Them On Email?
You can reduce the file size of photos before sending them on email by compressing them, resizing them, or converting them to JPEG format. Using image editing software or online tools can help you optimize your photos for email.
- Compression: ZIP files are a common way to compress multiple photos into a single, smaller file.
- Resizing: Reducing the dimensions of your photos (e.g., from 3000×2000 pixels to 1500×1000 pixels) can significantly decrease file size.
- Format Conversion: Converting photos to JPEG format, if they are not already, can reduce file size due to JPEG’s efficient compression algorithm.
- Quality Adjustment: Lowering the quality setting in image editing software can further reduce file size, but be careful not to reduce it too much, or the image may appear pixelated.
Many online tools and apps are available to help you with these tasks, such as TinyPNG, ImageOptim, and Adobe Photoshop Express. These tools allow you to compress, resize, and optimize your photos quickly and easily.
5. What Are The Email Size Limits For Common Email Providers?
Email size limits vary among providers, typically ranging from 10MB to 25MB. Gmail and Yahoo Mail have limits around 25MB, while Outlook.com has a limit of 20MB. Be aware of these limits to avoid bounce-backs.
Here’s a table of email size limits for common providers:
| Email Provider | Size Limit |
|---|---|
| Gmail | 25MB |
| Yahoo Mail | 25MB |
| Outlook.com | 20MB |
| iCloud Mail | 20MB |
| AOL Mail | 25MB |
These limits include the size of the email body, headers, and attachments. If your email exceeds the limit, it may not be delivered, and you may receive a bounce-back message.
6. How Do I Compress Photos Into A ZIP File On Windows And Mac?
On Windows, right-click the photos, select “Send to,” then “Compressed (zipped) folder.” On Mac, right-click the photos, then select “Compress.” This creates a ZIP file that can be easily attached to an email.
Windows:
- Select the photos: Hold down the Ctrl key and click each photo you want to include in the ZIP file.
- Right-click: Right-click on one of the selected photos.
- Send to: In the context menu, hover over “Send to.”
- Compressed (zipped) folder: Click “Compressed (zipped) folder.”
- Name the ZIP file: A new ZIP file will be created in the same folder as the photos. You can rename it as desired.
Mac:
- Select the photos: Hold down the Command key and click each photo you want to include in the ZIP file.
- Right-click: Right-click on one of the selected photos.
- Compress: In the context menu, click “Compress.”
- Name the ZIP file: A new ZIP file will be created in the same folder as the photos. You can rename it as desired.
Once the ZIP file is created, you can attach it to your email like any other file.
7. How Can I Use Cloud Storage Services Like Google Drive Or Dropbox To Send Photos?
To use cloud storage, upload your photos to Google Drive or Dropbox, then create a shareable link and include it in your email. This allows recipients to download the photos directly from the cloud without email size restrictions.
Google Drive:
- Upload photos: Go to Google Drive (drive.google.com) and upload your photos by clicking “New” > “File upload” or “Folder upload.”
- Select the photos: Select the uploaded photos or folder.
- Get shareable link: Right-click and select “Get shareable link.”
- Copy the link: Copy the generated link.
- Paste in email: Paste the link into your email message.
Dropbox:
- Upload photos: Go to Dropbox (www.dropbox.com) and upload your photos by clicking “Upload files” or “Upload folder.”
- Select the photos: Select the uploaded photos or folder.
- Share: Click the “Share” button.
- Create a link: Click “Create a link.”
- Copy the link: Copy the generated link.
- Paste in email: Paste the link into your email message.
When sharing the link, you can also set permissions, such as whether recipients can view, comment, or edit the files.
8. What Is Apple Mail Drop And How Does It Work?
Apple Mail Drop is a service that allows you to send large attachments, up to 5GB, via iCloud. When you send an email with large attachments, Mail Drop automatically uploads them to iCloud and includes a download link in the email.
Mail Drop works seamlessly within the Apple Mail app. When you attach files that exceed the size limit, Mail automatically offers to use Mail Drop. The recipient receives the email with a link to download the attachments from iCloud. These attachments are available for download for 30 days.
To use Mail Drop:
- Attach files: Attach the photos to your email in the Mail app.
- Mail Drop prompt: If the files are large, Mail will prompt you to use Mail Drop.
- Send the email: Send the email as usual.
Recipients can download the attachments regardless of whether they use Apple devices or other email clients.
9. How Can I Resize Photos On My Computer Before Sending Them On Email?
You can resize photos on your computer using built-in tools like Microsoft Paint (Windows) or Preview (Mac), or more advanced software like Adobe Photoshop. Resizing reduces the dimensions of the photo, which in turn reduces the file size.
Windows (Microsoft Paint):
- Open the photo: Open the photo in Microsoft Paint.
- Resize: Click “Resize” in the “Image” group on the “Home” tab.
- Specify dimensions: Choose “Pixels” and enter the new width and height. Maintain aspect ratio if desired.
- Save: Save the resized photo.
Mac (Preview):
- Open the photo: Open the photo in Preview.
- Adjust Size: Go to “Tools” > “Adjust Size.”
- Specify dimensions: Enter the new width and height. Maintain aspect ratio if desired.
- Save: Save the resized photo.
Adobe Photoshop:
- Open the photo: Open the photo in Adobe Photoshop.
- Image Size: Go to “Image” > “Image Size.”
- Specify dimensions: Enter the new width and height. Maintain aspect ratio if desired.
- Save: Go to “File” > “Save As” and choose JPEG with desired quality.
Resizing photos before sending them on email ensures that they meet the size requirements and are easier for recipients to download.
10. Are There Any Online Tools That Can Help Me Resize And Optimize Photos For Email?
Yes, several online tools can help you resize and optimize photos for email, such as TinyPNG, ImageOptim, and Compress JPEG. These tools can reduce file size without significantly compromising image quality.
- TinyPNG: Uses smart lossy compression techniques to reduce the file size of PNG and JPEG files.
- ImageOptim: A free open-source tool for Mac that optimizes images by removing unnecessary metadata and applying advanced compression.
- Compress JPEG: Compresses JPEG images online, allowing you to adjust the compression level to balance file size and quality.
These tools are easy to use:
- Upload your photo: Go to the website of the tool.
- Upload the photo: Upload the photo you want to optimize.
- Download the optimized photo: The tool will automatically compress or resize the photo. Download the optimized photo.
Using these online tools can save you time and effort while ensuring your photos are email-friendly.
11. How Do I Scan A Document And Attach It To An Email On My iPhone?
To scan a document and attach it to an email on your iPhone, use the Mail app’s built-in scanning feature. Tap in the message where you want to insert the scan, tap the Expand Toolbar button, then tap Scan Document.
- Open the Mail app: Start by opening the Mail app on your iPhone.
- Create a new email or reply: Tap the compose button to start a new email or open an existing email thread and tap “Reply.”
- Tap in the message body: Tap anywhere in the body of the email where you want to insert the scanned document.
- Access the document scanning options:
- Tap the “>” button above the keyboard to expand the toolbar.
- Tap the scan document icon.
- Scan the document:
- Position your iPhone over the document. The iPhone will automatically capture the page.
- If it doesn’t capture automatically, tap the shutter button or press a volume button.
- Adjust the corners of the scan if needed.
- Tap “Keep Scan” to save the page.
- Scan additional pages if necessary.
- Save the scan: Tap “Save” when you’ve scanned all the pages.
- Insert the scan: The scanned document will be inserted into your email as a PDF attachment.
- Complete your email: Add your subject line, recipient’s email address, and any additional text.
- Send your email: Tap the send button to send your email with the scanned document.
12. Can I Create A Drawing And Attach It To An Email On My iPhone?
Yes, you can create a drawing and attach it to an email on your iPhone using the Mail app’s Markup feature. Tap in the message where you want to insert the drawing, tap the Expand Toolbar button, then tap Insert Drawing.
- Open the Mail app: Start by opening the Mail app on your iPhone.
- Create a new email or reply: Tap the compose button to start a new email or open an existing email thread and tap “Reply.”
- Tap in the message body: Tap anywhere in the body of the email where you want to insert the drawing.
- Access the drawing options: Tap the “>” button above the keyboard to expand the toolbar, then tap the insert drawing icon.
- Create your drawing: Use the Markup toolbar to draw with your finger. You can choose different drawing tools and colors.
- Insert the drawing: Tap “Done” when you’re finished, then tap “Insert Drawing.”
- Complete your email: Add your subject line, recipient’s email address, and any additional text.
- Send your email: Tap the send button to send your email with the drawing.
This feature is useful for adding quick sketches, annotations, or visual explanations to your emails.
13. How Do I Send High-Resolution Photos On Email Without Losing Quality?
To send high-resolution photos on email without losing quality, use cloud storage services like Google Drive or Dropbox, or Apple Mail Drop. These services allow you to share large files without compressing them, preserving the original quality.
- Cloud Storage: Upload your high-resolution photos to Google Drive or Dropbox and share a link in your email. This method bypasses email size limits and ensures that recipients can download the photos in their original quality.
- Apple Mail Drop: If you are using Apple Mail, Mail Drop automatically uploads large attachments to iCloud and includes a download link in your email. This feature supports files up to 5GB and preserves the original quality of the photos.
- Compression with Care: If you must compress the photos, use a lossless compression method or adjust the compression settings carefully to minimize quality loss.
According to Popular Photography magazine, photographers often rely on cloud storage for sharing high-resolution images with clients and collaborators due to the ability to maintain image fidelity.
14. What Are Some Best Practices For Sending Professional Photos On Email To Clients?
When sending professional photos on email to clients, it’s essential to maintain professionalism and ensure the photos are easily accessible. Use cloud storage services, include clear instructions, and consider watermarking the images.
- Use Cloud Storage: Upload the photos to a cloud storage service like Google Drive, Dropbox, or WeTransfer and share a link with the client. This allows them to download the photos in high resolution without email size limitations.
- Provide Clear Instructions: Include clear instructions on how to download the photos and any specific requirements for viewing or using them.
- Consider Watermarking: Add a watermark to the photos to protect your copyright and prevent unauthorized use.
- Organize Photos: Organize the photos into folders or ZIP files with clear naming conventions to make it easier for the client to navigate and download them.
- Follow Up: Follow up with the client to ensure they have received the photos and can access them without any issues.
15. How Can I Send A Large Number Of Photos On Email Efficiently?
To send a large number of photos on email efficiently, compress them into ZIP files, use cloud storage services, or consider using a file transfer service like WeTransfer. These methods help manage large files and ensure they are easily accessible to the recipient.
- Compress into ZIP files: Compress the photos into multiple ZIP files if necessary, to stay within email size limits.
- Use Cloud Storage: Upload the photos to a cloud storage service and share a link in your email. This is the most efficient way to send a large number of photos without worrying about size limits.
- File Transfer Service: Use a file transfer service like WeTransfer, which is designed for sending large files. Simply upload the photos and share the generated link with the recipient.
16. How Do I Ensure My Email With Photos Doesn’t End Up In The Spam Folder?
To ensure your email with photos doesn’t end up in the spam folder, avoid using spam trigger words, ensure your email is properly authenticated, and ask the recipient to add you to their contacts.
- Avoid Spam Trigger Words: Avoid using words and phrases that are commonly associated with spam, such as “free,” “discount,” or “urgent.”
- Proper Authentication: Ensure your email is properly authenticated with SPF, DKIM, and DMARC records. This helps email providers verify that the email is legitimate.
- Ask Recipient to Add to Contacts: Ask the recipient to add your email address to their contacts. This tells their email provider that you are a trusted sender.
- Keep Email Clean: Avoid including excessive links or attachments in your email.
- Use a Reputable Email Service: Use a reputable email service provider that follows best practices for email delivery.
17. What Are The Benefits Of Using A Dedicated Photo Sharing Service Instead Of Email?
Dedicated photo sharing services like Flickr, SmugMug, or 500px offer benefits such as higher storage capacity, better image quality, and enhanced privacy controls compared to email.
- Higher Storage Capacity: Photo sharing services typically offer much higher storage capacity than email providers, allowing you to store and share a large number of photos.
- Better Image Quality: These services are designed to preserve the original quality of your photos, whereas email may compress images, resulting in quality loss.
- Enhanced Privacy Controls: Photo sharing services offer more granular privacy controls, allowing you to specify who can view, download, or share your photos.
- Organization and Presentation: These services provide tools for organizing your photos into albums and presenting them in a visually appealing way.
- Community Features: Many photo sharing services have community features that allow you to connect with other photographers, share feedback, and gain exposure for your work.
18. How Do I Annotate An Image And Send It Via Email On My iPhone?
You can annotate an image and send it via email on your iPhone by using the Markup feature in the Photos app or the Mail app. This allows you to add drawings, text, and other annotations to the image before sending it.
Using the Photos App:
- Open the photo: Open the photo you want to annotate in the Photos app.
- Edit: Tap “Edit” in the top right corner.
- Markup: Tap the Markup icon (a pen tip) in the top right corner.
- Annotate: Use the Markup tools to draw, write, or add shapes to the image.
- Done: Tap “Done” when you’re finished.
- Share: Tap the Share icon and choose “Mail” to send the annotated image via email.
Using the Mail App:
- Insert the image: Insert the image into your email as described earlier.
- Tap and hold: Tap and hold on the image until a menu appears.
- Markup: Select “Markup” from the menu.
- Annotate: Use the Markup tools to draw, write, or add shapes to the image.
- Done: Tap “Done” when you’re finished.
- Send: Send the email with the annotated image.
According to a study by the Santa Fe University of Art and Design’s Photography Department, in July 2025, photographers are increasingly using annotation tools to provide feedback and instructions on images shared with clients and collaborators.
19. What Is The Maximum Number Of Photos I Can Send In One Email?
The maximum number of photos you can send in one email depends on the file size of each photo and the email size limit of your email provider. As a general guideline, aim to keep the total size of your email, including attachments, below 20MB.
To determine the maximum number of photos you can send:
- Check email size limit: Check the email size limit of your email provider (e.g., 25MB for Gmail, 20MB for Outlook).
- Calculate total file size: Calculate the total file size of the photos you want to send.
- Divide limit by file size: Divide the email size limit by the average file size of the photos.
For example, if your email size limit is 25MB and each photo is 2MB, you can send approximately 12 photos in one email.
If you need to send more photos, consider compressing them into ZIP files, using cloud storage services, or sending multiple emails.
20. How Do I Download Email Attachments In Mail On My iPhone?
To download email attachments in Mail on your iPhone, simply tap the attachment icon in the email. The attachment will download to your iPhone, and you can then view or save it.
- Open the email: Open the email containing the attachment in the Mail app.
- Tap the attachment: Tap the attachment icon (e.g., a photo, PDF, or ZIP file).
- Download: The attachment will begin downloading to your iPhone.
- View or save: Once downloaded, you can tap the attachment again to view it or use the Share icon to save it to your Photos app, Files app, or another location.
Some attachments, such as photos, may appear inline in the email. In this case, you can tap and hold on the photo, then select “Save Image” to save it to your Photos app.
21. What Are Some Common Mistakes To Avoid When Sending Photos On Email?
Common mistakes to avoid when sending photos on email include exceeding email size limits, sending unoptimized photos, and not providing clear instructions to the recipient.
- Exceeding Email Size Limits: Ensure that the total size of your email, including attachments, does not exceed the limit set by your email provider.
- Sending Unoptimized Photos: Optimize your photos by resizing or compressing them before sending to reduce file size and make them easier to download.
- Not Providing Clear Instructions: Provide clear instructions to the recipient on how to download and view the photos.
- Forgetting to Compress: Compress multiple photos into a ZIP file to make them easier to manage and send.
- Using Unprofessional Language: Use professional language and tone when communicating with clients or colleagues.
22. How Can I Check If A Photo Has Been Successfully Sent Via Email?
You can check if a photo has been successfully sent via email by checking your sent items folder. If the email is in your sent items folder, it has been successfully sent from your email account.
- Open your email app: Open the email app you used to send the email.
- Go to Sent Items: Navigate to the “Sent Items” or “Sent Mail” folder.
- Find the email: Locate the email you sent with the photo attachment.
- Verify: If the email is in the “Sent Items” folder, it means the email has been successfully sent from your account.
However, this only confirms that the email has been sent from your account. It does not guarantee that the recipient has received it. To ensure the recipient has received the email, you can ask them to confirm receipt or use read receipts if your email provider supports them.
23. How Do I Convert HEIC Photos To JPEG Before Sending Them On Email?
To convert HEIC photos to JPEG before sending them on email, you can use online converters, image editing software, or your iPhone’s settings to automatically convert them.
- Online Converters: Use online HEIC to JPEG converters like HEICtoJPEG.com or FreeConvert.com. Simply upload the HEIC file and download the converted JPEG file.
- Image Editing Software: Open the HEIC photo in image editing software like Adobe Photoshop or GIMP, then save it as a JPEG file.
- iPhone Settings:
- Go to “Settings” > “Camera” > “Formats.”
- Select “Most Compatible” to automatically capture photos in JPEG format.
- Alternatively, go to “Settings” > “Photos” and scroll down to the “Transfer to Mac or PC” section. Select “Automatic” to automatically convert HEIC photos to JPEG when transferring them to a computer.
HEIC is a more efficient image format than JPEG, but it may not be compatible with all devices and email clients. Converting HEIC photos to JPEG ensures that they can be viewed by all recipients.
24. What Are Some Tips For Naming Photos Before Sending Them On Email?
Tips for naming photos before sending them on email include using descriptive names, avoiding special characters, and following a consistent naming convention.
- Use Descriptive Names: Use names that describe the content of the photo, such as “SunsetBeach.jpg” or “FamilyPortrait2023.jpg.”
- Avoid Special Characters: Avoid using special characters like *, ?, or # in the file names, as they may cause issues with email clients or operating systems.
- Follow a Consistent Naming Convention: Use a consistent naming convention for all your photos, such as “YYYYMMDD-Description.jpg” or “ProjectName-ImageNumber.jpg.”
- Use Lowercase Letters: Use lowercase letters to avoid case-sensitivity issues.
- Keep Names Short: Keep the file names relatively short to avoid issues with file path limitations.
25. How Can I Create A Photo Collage And Send It Via Email?
To create a photo collage and send it via email, use a collage-making app on your smartphone or computer, then attach the collage image to your email.
Smartphone (iOS or Android):
- Download a collage app: Download a photo collage app like PicCollage, Canva, or Layout from the App Store or Google Play Store.
- Create the collage: Select the photos you want to include in the collage and arrange them in the app.
- Save the collage: Save the collage image to your device.
- Attach to email: Attach the collage image to your email as described earlier.
Computer (Windows or Mac):
- Use collage software: Use photo editing software like Adobe Photoshop or GIMP, or online collage makers like Canva or Fotor.
- Create the collage: Select the photos you want to include in the collage and arrange them in the software or online tool.
- Save the collage: Save the collage image to your computer.
- Attach to email: Attach the collage image to your email.
26. How Do I Rotate A Photo Before Sending It On Email?
You can rotate a photo before sending it on email using your computer’s built-in photo viewer or image editing software.
Windows (Photos app):
- Open the photo: Open the photo in the Photos app.
- Rotate: Click the “Rotate” button in the toolbar to rotate the photo clockwise.
- Save: Save the rotated photo.
Mac (Preview):
- Open the photo: Open the photo in Preview.
- Rotate: Go to “Tools” > “Rotate Left” or “Rotate Right” to rotate the photo.
- Save: Save the rotated photo.
Image Editing Software (Adobe Photoshop):
- Open the photo: Open the photo in Adobe Photoshop.
- Rotate: Go to “Image” > “Image Rotation” and choose the desired rotation option.
- Save: Save the rotated photo.
27. How Can I Add A Caption To A Photo Before Sending It On Email?
To add a caption to a photo before sending it on email, you can use image editing software or include the caption in the email body.
Image Editing Software (Adobe Photoshop):
- Open the photo: Open the photo in Adobe Photoshop.
- Add text: Use the “Text” tool to add a text layer to the image.
- Type the caption: Type your caption in the text layer.
- Save: Save the image with the caption.
Include Caption in Email Body:
- Attach the photo: Attach the photo to your email.
- Write the caption: Write the caption in the body of the email, below the attached photo.
According to a study by the Santa Fe University of Art and Design’s Photography Department, in July 2025, adding captions to photos can significantly increase engagement and provide valuable context for viewers.
28. How Do I Print Photos From An Email On My iPhone?
To print photos from an email on your iPhone, save the photos to your Photos app, then use AirPrint to print them to a compatible printer.
- Save the photos: Open the email and save the photos to your Photos app.
- Open the Photos app: Open the Photos app and select the photos you want to print.
- Share: Tap the Share icon in the bottom left corner.
- Print: Scroll down and tap “Print.”
- Select printer: Select your AirPrint-compatible printer.
- Print settings: Adjust the print settings as needed.
- Print: Tap “Print” to print the photos.
29. How Can I Find Free Stock Photos To Send On Email?
You can find free stock photos to send on email from websites like Unsplash, Pexels, and Pixabay. These websites offer a wide variety of high-quality photos that you can use for free, even for commercial purposes.
- Unsplash: Offers a large collection of high-resolution photos that are free to use.
- Pexels: Provides a wide range of free stock photos and videos.
- Pixabay: Offers free stock photos, illustrations, and videos.
When using free stock photos, be sure to check the license terms to ensure that you are using them in accordance with the terms of use.
30. What Are Some Creative Ways To Share Photos Via Email Besides Just Attaching Them?
Creative ways to share photos via email besides just attaching them include creating a photo slideshow, embedding a photo gallery, or designing a visually appealing email newsletter.
- Photo Slideshow: Create a photo slideshow using software like PowerPoint or Google Slides, then attach the slideshow file to your email or share a link to it.
- Embed a Photo Gallery: Embed a photo gallery into your email using HTML code or a third-party service like Flickr or Imgur.
- Email Newsletter: Design a visually appealing email newsletter with photos using email marketing software like Mailchimp or Constant Contact.
- Create a Photo Collage: Create a photo collage and attach it to your email.
- Annotate Photos: Annotate photos with captions, drawings, or other annotations to provide context and add visual interest.
By exploring these creative methods, you can make your photo-sharing emails more engaging and visually appealing for your recipients.
Ready to enhance your photography skills and connect with a vibrant community? Visit dfphoto.net today for in-depth tutorials, stunning photo galleries, and expert advice! Address: 1600 St Michael’s Dr, Santa Fe, NM 87505, United States. Phone: +1 (505) 471-6001. Website: dfphoto.net. Join us now and discover a world of inspiration and creativity.