Want to share your iPhone photos via email? This dfphoto.net guide provides simple, step-by-step instructions for easily sending photos from your iPhone to email, along with tips for optimizing your images and troubleshooting common issues, ensuring your memories are shared perfectly every time using photo attachments, photo sharing options and image optimization.
1. Why Can’t I Directly Send Photos From My iPhone to Email?
You absolutely can send photos directly from your iPhone to email. iPhones offer multiple, straightforward methods for sharing your photos via email, making it a simple process, provided you have a stable internet connection and properly configured email accounts.
Understanding Direct Photo Sharing
The iPhone’s built-in functionality allows you to seamlessly integrate with your email accounts. Here’s how to ensure you can send photos directly:
- Check Email Account Setup: Verify that your email account (like Gmail, Yahoo, or iCloud Mail) is correctly set up in your iPhone’s Mail app. Go to Settings > Mail > Accounts to check and add accounts if needed.
- Network Connectivity: Ensure you have a stable Wi-Fi or cellular data connection. Sending large photo files requires a reliable internet connection.
- Sufficient Storage: While not directly related to sending, ensure your iPhone has enough storage space. A full storage can sometimes cause unexpected issues with app functionality.
Methods for Sending Photos via Email
- From the Photos App:
- Open the Photos app and select the photo(s) you want to send.
- Tap the Share icon (a square with an arrow pointing upwards).
- Choose Mail from the share options. This will open a new email draft with your selected photos attached.
- Enter the recipient’s email address, add a subject, and any message you want to include, then hit Send.
- Directly from the Mail App:
- Open the Mail app and start a new email.
- Tap within the body of the email where you want to insert the photo.
- Tap the Insert Photo or Video option (you might need to tap the arrow to expand the toolbar).
- Select the photo(s) from your library.
- Compose your email and send it.
Troubleshooting Common Issues
- Photos Not Attaching: If photos aren’t attaching, it might be due to file size limitations. Some email providers have restrictions on the size of attachments. In such cases, consider using Mail Drop (if using iCloud Mail) or compressing the photos before sending.
- Email Not Sending: If the email fails to send, check your internet connection and ensure your email account settings are correct. Sometimes, simply restarting the Mail app or your iPhone can resolve the issue.
- Incorrect Account Settings: Double-check your outgoing mail server (SMTP) settings. Incorrect settings can prevent you from sending emails. You can find the correct settings on your email provider’s support page.
Directly sending photos from your iPhone to email is a fundamental feature designed for ease of use. By ensuring your email accounts are properly configured and understanding the basic steps, you can effortlessly share your visual memories. For more in-depth tutorials and advanced photography tips, be sure to explore dfphoto.net.
2. What Are The Different Ways to Send Photos From My iPhone to Email?
There are several convenient methods to send photos from your iPhone to email, each offering slightly different workflows. Understanding these options allows you to choose the method that best suits your needs.
Method 1: Using the Photos App
This is perhaps the most straightforward and commonly used method.
- Open the Photos App: Launch the Photos app on your iPhone.
- Select Photos: Browse your photo library and tap on the photo(s) you wish to send. You can select multiple photos by tapping each one individually.
- Tap the Share Icon: Once you’ve selected your photos, tap the Share icon located in the bottom-left corner of the screen. This icon looks like a square with an arrow pointing upwards.
- Choose Mail: In the share sheet that appears, scroll through the options until you find Mail. Tap on it. This will open a new email draft in the Mail app with your selected photos attached.
- Compose and Send: Enter the recipient’s email address in the To: field, add a subject to your email, and write any message you’d like to include. Finally, tap the Send button (usually a blue arrow in the top-right corner) to send your email with the attached photos.
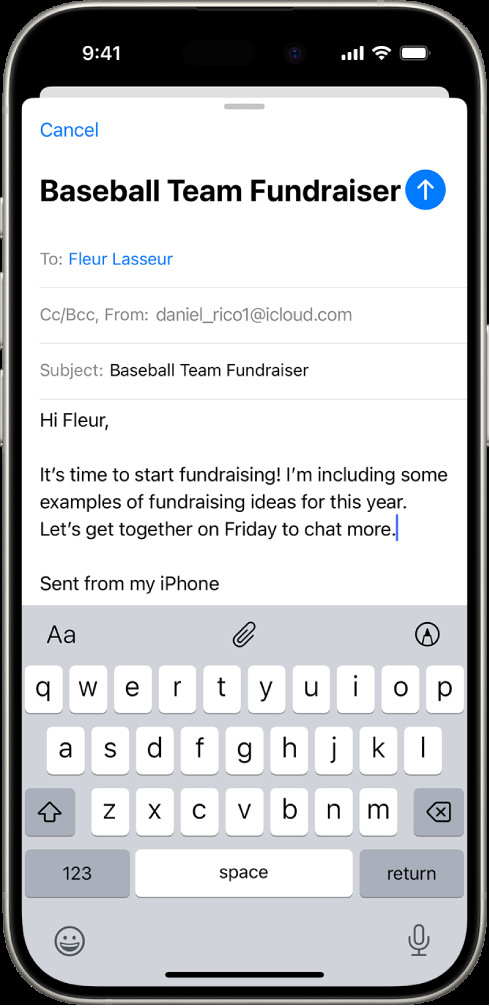 Share photos via email using iPhone's Photos app.
Method 2: Using the Mail App
This method is useful if you’re already composing an email and want to add photos.
- Open the Mail App: Launch the Mail app on your iPhone.
- Start a New Email: Tap the compose button (usually a square with a pen icon) to start a new email.
- Tap in the Email Body: Tap within the body of the email where you want to insert the photo.
- Insert Photo or Video:
- On the toolbar above the keyboard, look for an icon that represents inserting a photo or video. This might be a photo icon or a plus sign (+). If you don’t see the icon, tap the arrow to expand the toolbar.
- Tap the Insert Photo or Video option. This will open your photo library.
- Select Photos: Choose the photo(s) you want to attach to the email.
- Compose and Send: Continue composing your email, adding any text or other attachments as needed. Tap the Send button to send your email with the attached photos.
Method 3: Using Copy and Paste
While not ideal for multiple photos, this method can be useful for quickly inserting a single image into an email.
- Open the Photos App: Launch the Photos app and select the photo you want to send.
- Copy the Photo: Tap the Share icon, then tap Copy Photo.
- Open the Mail App: Launch the Mail app and start a new email.
- Paste the Photo: Tap and hold in the body of the email, then tap Paste when the option appears. The photo will be inserted into the email.
- Compose and Send: Finish composing your email and tap the Send button.
Method 4: Using Third-Party Apps
Several third-party apps can streamline the process of sending photos via email, especially if you need to resize or compress the images first.
- Download a Photo Compression App: Apps like “Image Size” or “Compress Photos” can help you reduce the file size of your photos.
- Compress Your Photos: Use the app to compress the photos you want to send.
- Share via Email: After compression, use the app’s share option to send the photos via email, or save them to your photo library and use one of the methods described above.
Comparison of Methods
| Method | Steps | Best For |
|---|---|---|
| Photos App | Open Photos > Select Photos > Share Icon > Mail > Compose & Send | Quick sharing of multiple photos directly from your library. |
| Mail App | Open Mail > New Email > Tap in Body > Insert Photo/Video > Select Photos > Compose & Send | Adding photos while already composing an email. |
| Copy and Paste | Open Photos > Select Photo > Share Icon > Copy Photo > Open Mail > New Email > Paste > Compose & Send | Quickly inserting a single image into an email. |
| Third-Party Apps | Download App > Compress Photos > Share via Email or Save to Library > Use Photos App or Mail App to Send | Compressing large photos to reduce file size before sending. |
Each of these methods offers a way to send photos from your iPhone to email. For further tips on optimizing your photography, visit dfphoto.net.
3. How Do I Resize Photos on My iPhone Before Sending Them via Email?
Resizing photos on your iPhone before sending them via email can be essential, especially when dealing with large files. High-resolution photos can quickly exceed the attachment limits of many email providers, leading to delivery issues. Here’s how to resize photos directly on your iPhone or using third-party apps.
Why Resize Photos?
- Attachment Size Limits: Most email providers, such as Gmail, Yahoo Mail, and Outlook, have limits on the total size of attachments you can send in a single email. Exceeding these limits can prevent your email from being sent.
- Faster Sending: Smaller photo files take less time to upload and send, particularly useful when you have a slow internet connection.
- Recipient Convenience: Receiving smaller photo files is also more convenient for the recipient, as they will download faster and take up less storage space on their device.
Method 1: Using the Built-In Mail App (Limited Resizing)
The built-in Mail app on your iPhone offers a basic resizing option when attaching photos.
- Select Photos:
- Open the Photos app and select the photo(s) you want to send.
- Tap the Share icon (square with an arrow pointing upwards).
- Choose Mail.
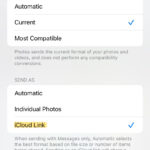
- Automatic Resizing:
- The Mail app will automatically attach the photos to a new email draft. Before sending, the app may offer options for resizing the images.
- If prompted, you might see options like Small, Medium, Large, or Actual Size. Choose a smaller size to reduce the overall attachment size.
- Compose and Send:
- Enter the recipient’s email address, add a subject, and any message you want to include.
- Tap Send to send the email with the resized photos.
Limitations: This method provides limited control over the exact dimensions and file size of the resized photos. The options are usually quite broad.
Method 2: Using Third-Party Apps for Precise Resizing
For more precise control over photo resizing, third-party apps are the way to go. Several apps available on the App Store allow you to specify the exact dimensions or file size you want.
- Download a Photo Resizing App:
- Search the App Store for apps like “Image Size,” “Resize Me,” “Compress Photos & Pictures,” or “Reduce Photo Size.”
- Download and install the app of your choice.
- Open the App and Select Photos:
- Launch the photo resizing app and grant it access to your photo library.
- Select the photo(s) you want to resize.
- Resize the Photos:
- Follow the app’s instructions to resize the photos. Typically, you can:
- Specify Dimensions: Enter the desired width and height in pixels or inches.
- Specify File Size: Enter the desired file size in kilobytes (KB) or megabytes (MB).
- Choose a Percentage: Reduce the photo size by a percentage (e.g., 50% of the original size).
- The app will resize the photos based on your specifications.
- Follow the app’s instructions to resize the photos. Typically, you can:
- Save or Share the Resized Photos:
- Once the photos are resized, save them back to your photo library or directly share them via email.
- If saving to your library, you can then use the standard Mail app method to attach and send the resized photos.
Recommended Apps and Their Features
| App | Key Features | Price |
|---|---|---|
| Image Size | Allows you to specify the exact width and height in pixels, inches, or centimeters. Also supports batch resizing. | Free (with ads) |
| Resize Me | Simple and easy-to-use interface with options to resize by percentage, custom dimensions, or preset sizes. | Free (with in-app purchases) |
| Compress Photos & Pictures | Focuses on reducing file size with options to maintain aspect ratio, remove metadata, and compress multiple photos at once. | Free (with ads) |
| Reduce Photo Size | Offers a range of resizing options, including specifying file size, dimensions, or percentage. Also includes basic editing tools. | Free (with in-app purchases) |
Step-by-Step Example Using “Image Size”
- Download and Open Image Size:
- Download Image Size from the App Store and open it.
- Select a Photo:
- Tap the Image icon and select the photo you want to resize.
- Enter New Dimensions:
- Enter the desired width and height in the appropriate fields. Ensure the Maintain Aspect Ratio option is selected to prevent distortion.
- Resize and Save:
- Tap the Resize button. The app will resize the photo and save it to your photo library.
- Share via Email:
- Open the Photos app, select the resized photo, tap the Share icon, and choose Mail to send it via email.
Tips for Best Results
- Maintain Aspect Ratio: Always maintain the aspect ratio to prevent your photos from appearing stretched or distorted.
- Experiment with Sizes: Experiment with different sizes to find the best balance between file size and image quality.
- Batch Resizing: If you have multiple photos to resize, use an app that supports batch processing to save time.
- Check Email Provider Limits: Be aware of the attachment size limits of your email provider to avoid sending issues.
Resizing photos on your iPhone before emailing them is a simple way to ensure your emails are delivered successfully and are convenient for the recipients. Whether you use the limited options in the built-in Mail app or opt for the precise control offered by third-party apps, resizing your photos can significantly improve your email experience. Visit dfphoto.net for more photography tips.
4. What Is Mail Drop and How Can It Help Me Send Large Photo Files From My iPhone?
Mail Drop is an Apple service that allows you to send large files, including photos and videos, via email when they exceed the standard attachment size limits. It’s a convenient solution for iPhone users who need to share high-resolution images without worrying about bouncing emails.
Understanding Mail Drop
- What It Does: Mail Drop temporarily uploads large attachments to iCloud, allowing recipients to download them. Instead of sending the actual file through email, Mail Drop sends a link that recipients can click to download the file.
- Attachment Size Limit: Mail Drop supports attachments up to 5 GB in size, significantly larger than the standard email attachment limits of most providers (typically around 20-25 MB).
- Availability: Mail Drop is available to users of iCloud, and it works seamlessly with the Mail app on iPhones, iPads, and Macs.
- Recipient Access: Recipients can download Mail Drop attachments on any device, whether it’s an iPhone, Android, PC, or Mac. They don’t need to have an iCloud account to download the files.
How to Use Mail Drop on Your iPhone
- Compose an Email with Attachments:
- Open the Mail app on your iPhone and start a new email.
- Add the recipient’s email address, subject, and any message you want to include.
- Attach the photo(s) or video(s) to your email as you normally would. Tap in the body of the email, then tap Insert Photo or Video.
- Mail Drop Prompt:
- When you attempt to send the email with large attachments, the Mail app will automatically detect that the files exceed the standard size limit.
- You will be prompted with a message asking if you want to use Mail Drop to send the attachments.
- Enable Mail Drop:
- Tap Use Mail Drop to proceed. If you don’t want to use Mail Drop, you can choose Don’t Use (but the email might not send if the attachments are too large).
- If this is the first time you’re using Mail Drop, you might be asked to enable it in your iCloud settings. Follow the on-screen instructions to enable Mail Drop if prompted.
- Email Sending Process:
- The Mail app will upload the attachments to iCloud. This process might take a few minutes, depending on the size of the files and your internet connection speed.
- Once the upload is complete, the email will be sent with a Mail Drop link for the recipient.
Recipient Experience
- Receiving the Email:
- The recipient will receive your email as usual.
- Instead of the actual photo or video files being attached, they will see a message indicating that the attachments were sent via Mail Drop.
- Downloading the Attachments:
- The recipient clicks the Mail Drop link in the email.
- This link will open in their web browser, where they can download the attachments.
- Recipients can download individual files or download all attachments as a ZIP file.
Troubleshooting Mail Drop Issues
- Mail Drop Not Offered: If Mail Drop is not offered when sending large attachments, ensure that you are signed in to your iCloud account on your iPhone. Go to Settings > [Your Name] > iCloud to check your iCloud settings.
- Mail Drop Fails to Upload: If the Mail Drop upload fails, check your internet connection. A stable Wi-Fi connection is recommended for uploading large files. Also, ensure that you have enough available storage in your iCloud account.
- Recipient Cannot Download: If the recipient is having trouble downloading the attachments, advise them to try a different web browser or device. Sometimes, browser-specific issues can prevent downloads.
- Mail Drop Link Expired: Mail Drop links are typically active for 30 days. If the recipient tries to download the files after this period, the link will be expired. You will need to resend the files using Mail Drop.
Benefits of Using Mail Drop
- Large File Support: Send attachments up to 5 GB, which is significantly larger than standard email attachment limits.
- Convenience: Seamlessly integrated into the Mail app on iPhone, iPad, and Mac.
- Accessibility: Recipients can download files on any device without needing an iCloud account.
- Automatic Compression: Mail Drop automatically compresses files for faster uploading and downloading.
Limitations of Mail Drop
- iCloud Requirement: Requires an iCloud account to use the service.
- Storage Space: Uploaded files count towards your iCloud storage limit.
- Link Expiration: Mail Drop links expire after 30 days.
- Internet Connection: Requires a stable internet connection to upload and download files.
Mail Drop is an invaluable tool for iPhone users who frequently share large photo and video files. By understanding how it works and its limitations, you can ensure your files are delivered successfully and efficiently. For more tips on managing your photos and videos, visit dfphoto.net.
5. How Can I Compress Photos on My iPhone to Reduce Their File Size Before Emailing?
Compressing photos on your iPhone is an excellent way to reduce their file size, making them easier to email, share, and store. Smaller file sizes mean quicker uploads, less storage space used, and smoother sharing experiences. Here are several methods to compress photos on your iPhone before emailing them.
Why Compress Photos?
- Email Attachment Limits: Email providers often have strict limits on the size of attachments. Compressing photos ensures they meet these limits.
- Faster Uploads and Downloads: Smaller files upload and download faster, saving time and bandwidth.
- Conserve Storage Space: Compressed photos take up less space on your iPhone and the recipient’s device.
- Improved Sharing Experience: Smaller files are easier to share across various platforms and devices.
Method 1: Using the Built-In Mail App (Automatic Compression)
The built-in Mail app offers automatic compression when attaching photos, though it provides limited control over the compression level.
- Select Photos:
- Open the Photos app and select the photo(s) you want to send.
- Tap the Share icon (square with an arrow pointing upwards).
- Choose Mail.
- Automatic Compression:
- The Mail app will automatically attach the photos to a new email draft.
- Before sending, the app may offer options for resizing the images. This is a form of compression.
- You might see options like Small, Medium, Large, or Actual Size. Choosing a smaller size reduces the file size.
- Compose and Send:
- Enter the recipient’s email address, add a subject, and any message you want to include.
- Tap Send to send the email with the compressed photos.
Limitations: This method provides limited control over the final file size and compression level.
Method 2: Using Third-Party Apps for Advanced Compression
For more control over photo compression, third-party apps offer advanced features and settings.
- Download a Photo Compression App:
- Search the App Store for apps like “Compress Photos & Pictures,” “Image Size,” “Reduce Photo Size,” or “Photo Compress & Resize.”
- Download and install the app of your choice.
- Open the App and Select Photos:
- Launch the photo compression app and grant it access to your photo library.
- Select the photo(s) you want to compress.
- Adjust Compression Settings:
- Follow the app’s instructions to adjust the compression settings. Typically, you can:
- Choose a Compression Level: Select a compression level (e.g., low, medium, high) to balance file size and image quality.
- Specify a Target File Size: Enter the desired file size in kilobytes (KB) or megabytes (MB).
- Adjust Dimensions: Reduce the width and height of the photos to decrease file size.
- Remove Metadata: Remove unnecessary metadata (e.g., location data, camera settings) to further reduce file size.
- Follow the app’s instructions to adjust the compression settings. Typically, you can:
- Compress the Photos:
- Apply the compression settings to the selected photos. The app will process the photos and create compressed versions.
- Save or Share the Compressed Photos:
- Save the compressed photos back to your photo library or directly share them via email.
- If saving to your library, you can then use the standard Mail app method to attach and send the compressed photos.
Recommended Apps and Their Features
| App | Key Features | Price |
|---|---|---|
| Compress Photos & Pictures | Batch compression, customizable compression levels, metadata removal, and before/after comparisons. | Free (with ads) |
| Image Size | Precise control over dimensions, batch resizing, and saving in various formats. | Free (with ads) |
| Reduce Photo Size | Easy-to-use interface, multiple compression options, and the ability to share directly to social media or email. | Free (with in-app purchases) |
| Photo Compress & Resize | Offers various compression levels, batch processing, and the option to maintain aspect ratio while resizing. | Free (with in-app purchases) |
Step-by-Step Example Using “Compress Photos & Pictures”
- Download and Open Compress Photos & Pictures:
- Download Compress Photos & Pictures from the App Store and open it.
- Select Photos:
- Tap the Photos icon and select the photo(s) you want to compress.
- Choose Compression Level:
- Select a compression level from the available options (e.g., Low, Medium, High).
- Alternatively, tap Custom to specify a target file size or compression percentage.
- Compress and Save:
- Tap the Compress button. The app will compress the photos and save the compressed versions to a separate album in your photo library.
- Share via Email:
- Open the Photos app, go to the Compressed album, select the compressed photos, tap the Share icon, and choose Mail to send them via email.
Tips for Best Results
- Experiment with Compression Levels: Experiment with different compression levels to find the best balance between file size and image quality.
- Maintain Aspect Ratio: Always maintain the aspect ratio to prevent your photos from appearing stretched or distorted.
- Batch Processing: Use batch processing to compress multiple photos at once, saving time and effort.
- Check File Size Before Sending: Always check the final file size of the compressed photos to ensure they meet the email attachment limits.
- Consider Mail Drop: If compression still doesn’t reduce the file size enough, consider using Mail Drop to send the photos.
Compressing photos on your iPhone before emailing is a simple yet effective way to manage file sizes, improve upload and download speeds, and enhance the overall sharing experience. Whether you use the automatic compression in the Mail app or opt for the advanced features of third-party apps, compressing your photos can make a significant difference. Visit dfphoto.net for more photography and file management tips.
6. How Do I Scan a Document and Email It as a Photo From My iPhone?
Scanning documents and emailing them as photos or PDFs from your iPhone is a convenient way to digitize and share paperwork. Here’s a comprehensive guide on how to accomplish this using the built-in Notes app and the Mail app.
Why Scan Documents with Your iPhone?
- Convenience: No need for a separate scanner; your iPhone is always with you.
- Portability: Scan documents on the go, wherever you are.
- Efficiency: Quickly digitize and share documents without the hassle of traditional scanning methods.
- Quality: Modern iPhones have excellent cameras that produce high-quality scans.
Method 1: Using the Notes App to Scan and Email
The Notes app on your iPhone has a built-in document scanner that’s easy to use and produces high-quality scans.
- Open the Notes App:
- Launch the Notes app on your iPhone.
- Create a New Note:
- Tap the New Note icon (usually a square with a pen) to create a new note.
- Access the Document Scanner:
- Tap the Camera icon above the keyboard.
- Select Scan Documents from the options.
- Scan the Document:
- Position your iPhone over the document. The scanner will automatically detect the edges and capture the image.
- If automatic scanning doesn’t work, you can manually capture the image by tapping the Shutter button (white circle).
- Adjust the corners of the scan if necessary by dragging the circles at each corner.
- Adjust Scan Settings:
- After scanning, you can adjust the scan settings:
- Color Filter: Choose between Color, Grayscale, Black & White, or Photo.
- Retake: Tap the Retake button to rescan the document if needed.
- After scanning, you can adjust the scan settings:
- Save the Scan:
- Tap Keep Scan to save the scanned page.
- If you have multiple pages, repeat the scanning process for each page.
- Tap Save when you’ve scanned all the pages.
- Share the Scanned Document:
- In the note, tap the Share icon (square with an arrow pointing upwards).
- Choose Mail from the share options. This will open a new email draft with the scanned document attached as a PDF.
- Compose and Send:
- Enter the recipient’s email address, add a subject, and any message you want to include.
- Tap Send to send the email with the scanned document.
Method 2: Using the Files App to Scan and Email
The Files app also offers a scanning feature, especially useful if you want to save the scanned document directly to your iCloud Drive or local storage.
- Open the Files App:
- Launch the Files app on your iPhone.
- Choose a Location:
- Navigate to the location where you want to save the scanned document (e.g., iCloud Drive, On My iPhone).
- Access the Document Scanner:
- Tap the More icon (three dots in a circle) in the top-right corner.
- Select Scan Documents from the options.
- Scan the Document:
- Position your iPhone over the document. The scanner will automatically detect the edges and capture the image.
- If automatic scanning doesn’t work, you can manually capture the image by tapping the Shutter button.
- Adjust the corners of the scan if necessary.
- Adjust Scan Settings:
- After scanning, you can adjust the scan settings:
- Color Filter: Choose between Color, Grayscale, Black & White, or Photo.
- Retake: Tap the Retake button to rescan the document if needed.
- After scanning, you can adjust the scan settings:
- Save the Scan:
- Tap Keep Scan to save the scanned page.
- Repeat the scanning process for each page.
- Tap Save when you’ve scanned all the pages. The scanned document will be saved as a PDF in the Files app.
- Share the Scanned Document:
- In the Files app, locate the scanned document (PDF).
- Tap and hold on the document to bring up the context menu.
- Select Share from the menu.
- Choose Mail from the share options. This will open a new email draft with the scanned document attached.
- Compose and Send:
- Enter the recipient’s email address, add a subject, and any message you want to include.
- Tap Send to send the email with the scanned document.
Method 3: Using Third-Party Scanning Apps
Several third-party scanning apps offer advanced features like OCR (Optical Character Recognition), automatic edge detection, and cloud storage integration.
- Download a Scanning App:
- Search the App Store for apps like “Adobe Scan,” “Microsoft Lens,” “CamScanner,” or “Genius Scan.”
- Download and install the app of your choice.
- Open the App and Scan the Document:
- Launch the scanning app and follow the on-screen instructions to scan the document.
- Most apps offer automatic edge detection and perspective correction.
- Adjust Scan Settings:
- Adjust the scan settings as needed, such as color correction, brightness, and contrast.
- Some apps offer OCR, which converts the scanned document into editable text.
- Save the Scan:
- Save the scanned document in PDF or image format.
- Choose a location to save the file (e.g., local storage, cloud storage).
- Share the Scanned Document:
- Use the app’s share option to send the scanned document via email.
- Alternatively, save the document to your Files app and use the method described above to share it.
Tips for Best Scanning Results
- Good Lighting: Ensure the document is well-lit to improve scan quality.
- Stable Hand: Hold your iPhone steady while scanning to avoid blurry images.
- Clean Lens: Clean the camera lens before scanning to remove smudges or dirt.
- Flat Surface: Place the document on a flat surface to ensure even scanning.
- Adjust Edges: Take the time to adjust the edges of the scan to ensure the entire document is captured.
Scanning documents and emailing them from your iPhone is a convenient and efficient way to digitize and share paperwork. Whether you use the built-in Notes app, the Files app, or a third-party scanning app, these methods make it easy to manage your documents on the go. For more tips on productivity and photography, visit dfphoto.net.
7. Can I Annotate a Photo on My iPhone Before Sending It via Email?
Yes, you can absolutely annotate a photo on your iPhone before sending it via email. The iPhone offers built-in tools for quick annotations, and there are also third-party apps for more advanced editing.
Why Annotate Photos Before Sending?
- Highlight Important Details: Draw attention to specific elements in the photo.
- Add Context: Provide additional information or explanations directly on the image.
- Give Instructions: Mark up a photo to give clear instructions or feedback.
- Personalize Images: Add fun drawings or text to personalize photos before sharing.
Method 1: Using the Built-In Markup Tool
The built-in Markup tool in the Photos app is the easiest way to annotate photos quickly.
- Open the Photos App:
- Launch the Photos app on your iPhone.
- Select the Photo:
- Tap on the photo you want to annotate.
- Edit the Photo:
- Tap the Edit button in the top-right corner of the screen.
- Access the Markup Tool:
- Tap the Markup icon (a pen inside a circle) in the top-right corner.
- Annotate the Photo:
- Use the Markup tools to annotate the photo. You have several options:
- Pen: Draw freehand lines.
- Highlighter: Highlight sections of the photo.
- Pencil: Create thinner, more precise lines.
- Eraser: Erase your annotations.
- Lasso: Select and move annotations.
- Color Palette: Choose different colors for your annotations.
- Plus (+) Button: Add text, shapes, signatures, or magnify sections.
- Use the Markup tools to annotate the photo. You have several options:
- Save Your Annotations:
- Tap Done in the top-right corner to save your annotations.
- Tap Done again to exit the editing mode.
- Share the Annotated Photo:
- Tap the Share icon (square with an arrow pointing upwards).
- Choose Mail from the share options. This will open a new email draft with the annotated photo attached.
- Compose and Send:
- Enter the recipient’s email address, add a subject, and any message you want to include.
- Tap Send to send the email with the annotated photo.
Method 2: Using the Mail App’s Markup Feature
You can also annotate photos directly within the Mail app before sending them.
- Open the Mail App:
- Launch the Mail app on your iPhone.
- Start a New Email:
- Tap the compose button to start a new email.
- Insert the Photo:
- Tap in the body of the email where you want to insert the photo.
- Tap the Insert Photo or Video option (you might need to tap the arrow to expand the toolbar).
- Select the photo you want to annotate from your library.
- Annotate the Photo:
- Tap on the inserted photo in the email