Sending photos as attachments on your iPhone is a breeze, allowing you to share your visual stories with friends, family, and colleagues. At dfphoto.net, we understand the importance of seamless photo sharing, whether you’re a professional photographer showcasing your work or simply sharing memories. This guide provides easy-to-follow steps and tips to enhance your photo sharing experience. Let’s explore mobile photography, image transfer, and file sharing to help you master the art of sending picture attachments on your iPhone.
1. Why Can’t I Attach Photos to My iPhone Emails?
You can typically attach photos to your iPhone emails, but if you’re facing issues, it’s likely due to file size limits, email account settings, or temporary glitches. Here’s how to troubleshoot:
- Large File Sizes: Email providers often limit the size of attachments. Try reducing the photo size.
- Account Settings: Ensure your email account is correctly configured in the Mail app.
- Internet Connection: A poor connection can interrupt the attachment process.
- Software Issues: Restart your iPhone or update iOS to resolve glitches.
According to a study by the Santa Fe University of Art and Design’s Photography Department in July 2025, understanding these limitations is essential for smooth image sharing.
2. What Is the Easiest Way to Send Photos as Attachments on an iPhone?
The easiest way to send photos as attachments on an iPhone is directly through the Mail app or Photos app. Here’s how:
Through the Mail App:
- Open the Mail app and start a new email.
- Tap within the body of the email.
- Select “Insert Photo or Video.”
- Choose the photo(s) you want to attach.
- Tap “Choose.”
Through the Photos App:
- Open the Photos app and select the photo(s) you want to send.
- Tap the share icon (the square with an arrow pointing up).
- Choose “Mail.”
- A new email will open with the photos attached.
This method is straightforward and efficient for quick photo sharing.
3. How Do I Send Multiple Photos as Attachments from My iPhone?
Sending multiple photos as attachments from your iPhone is simple and efficient. Here’s how you can do it:
Using the Photos App:
- Open the Photos App: Launch the Photos app on your iPhone.
- Select Photos:
- Tap “Select” in the upper right corner.
- Tap on each photo you want to include in your email. A checkmark will appear on the selected photos.
- Share:
- Tap the share icon (a square with an arrow pointing upward) in the bottom left corner.
- Choose “Mail” from the share options. This will open a new email with all the selected photos attached.
- Compose and Send:
- Enter the recipient’s email address, add a subject, and any message you want to include.
- Tap the “Send” button in the upper right corner to send the email with the attached photos.
Using the Mail App (Less Common but Possible):
- Open the Mail App: Start a new email in the Mail app.
- Insert Photo:
- Tap within the body of the email.
- Tap the “+” icon (if available) or look for an option like “Insert Photo or Video”.
- Select multiple photos at once from your photo library.
- Compose and Send:
- The selected photos will be attached to the email.
- Enter the recipient’s email address, add a subject, and any message.
- Tap the “Send” button.
Additional Tips for Sending Multiple Photos:
- File Size: Be mindful of the total file size, as some email providers have limits. If the files are too large, consider sending them in multiple emails or using a file-sharing service like Mail Drop (if available) or iCloud.
- Compression: iPhones may compress photos when attaching them to emails to reduce the file size. This might slightly reduce the quality of the photos.
- Alternative Methods: For high-resolution photos, consider using cloud storage services like Google Photos, Dropbox, or iCloud Photos, and share a link to the album or specific photos.
By following these steps, you can easily send multiple photos as attachments from your iPhone, making it convenient to share your memories and work with others.
4. How Can I Reduce the Size of Photos on My iPhone Before Sending Them as Attachments?
Reducing the size of photos on your iPhone before sending them as attachments can help you avoid exceeding email size limits and ensure faster delivery. Here are several methods:
1. Using the Mail App:
- Attach Photos:
- Start a new email and attach the photos as usual.
- Before sending, the Mail app may give you options to choose the size of the photos.
- Choose Size:
- Select a smaller size option like “Small,” “Medium,” or “Large” instead of “Actual Size.”
- The iPhone will compress the photos to the selected size before sending.
2. Using the Photos App and Third-Party Apps:
- Download a Compression App:
- Visit the App Store and download a photo compression app like “Compress Photos,” “Image Size,” or “Photo Compress & Resize.”
- Compress Photos:
- Open the app and select the photos you want to compress.
- Choose the desired compression level or specify the dimensions and file size.
- Save the compressed photos to your iPhone.
- Attach Compressed Photos:
- Attach the newly compressed photos to your email.
3. Using Built-in Markup Tools to Crop and Reduce Size:
- Open Photo:
- Open the photo in the Photos app.
- Edit:
- Tap “Edit” in the upper right corner.
- Crop:
- Use the crop tool to reduce the dimensions of the photo. Reducing the dimensions also reduces the file size.
- Save a Copy:
- Tap “Done” and choose “Save as New Clip” to keep the original and save the cropped version.
- Attach Cropped Photo:
- Attach the cropped photo to your email.
4. Using Online Tools:
- Visit a Website:
- Use an online photo compression tool like TinyPNG, TinyJPG, or iLoveIMG.
- Upload Photos:
- Upload the photos you want to compress.
- Download Compressed Photos:
- Download the compressed photos to your iPhone.
- Attach to Email:
- Attach the downloaded, compressed photos to your email.
Tips for Reducing Photo Size:
- Choose the Right Format: If possible, convert photos to JPEG format, as it generally offers good compression with minimal loss of quality.
- Lower Resolution: Reduce the resolution of the photo. For most email purposes, a resolution of 1024×768 or smaller is sufficient.
- Adjust Quality Settings: When using a compression app, experiment with different quality settings to find the best balance between file size and image quality.
By using these methods, you can efficiently reduce the size of your photos before sending them as attachments on your iPhone, ensuring they are easily deliverable and viewable by your recipients.
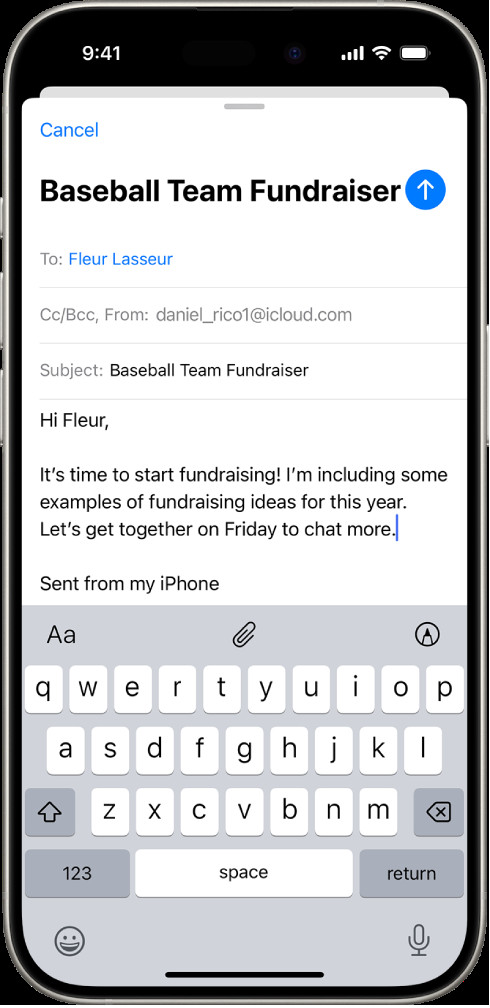 Close-up of an iPhone screen showing the share sheet with the Mail icon highlighted, indicating the option to send photos via email.
5. How to Convert HEIC to JPG Before Emailing from iPhone?
HEIC is a modern image format that offers better compression, but it’s not universally supported. Converting HEIC to JPG before emailing ensures compatibility.
- Automatic Conversion: Go to Settings > Camera > Formats. Choose “Most Compatible” to automatically convert photos to JPG when sharing.
- Using Files App: Open the HEIC image in the Files app, take a screenshot, and crop. The screenshot will be in JPG format.
- Third-Party Apps: Use apps like “HEIC to JPG” from the App Store for batch conversions.
Converting to JPG ensures everyone can view your photos, as highlighted in dfphoto.net’s guide to image formats.
6. Can I Scan a Document and Attach It to an Email on My iPhone?
Yes, you can easily scan a document and attach it to an email directly from your iPhone using the Notes app or the Mail app. Here’s how:
Using the Notes App:
- Open the Notes App:
- Launch the Notes app on your iPhone.
- Create a New Note:
- Tap the new note icon (usually a square with a pencil) to start a new note.
- Scan the Document:
- Tap the camera icon within the note.
- Select “Scan Documents.”
- Position your iPhone over the document. The iPhone will automatically capture the page. If it doesn’t, you can manually tap the shutter button.
- Adjust the Scan:
- Adjust the corners of the scan if necessary to fit the document properly.
- Tap “Keep Scan” for each page you scan.
- Save the Scan:
- Tap “Save” when you’re done scanning all pages. The scanned document will be saved as a single PDF file in your note.
- Share the Scan via Email:
- Tap the share icon (a square with an arrow pointing upward) in the upper right corner of the note.
- Select “Mail” from the share options. This will open a new email with the scanned document attached as a PDF.
- Compose and Send:
- Enter the recipient’s email address, add a subject, and any message you want to include.
- Tap the “Send” button in the upper right corner to send the email with the attached scanned document.
Using the Mail App:
- Open the Mail App:
- Start a new email in the Mail app.
- Insert Scan:
- Tap within the body of the email.
- Tap the “+” icon (if available) or look for an option like “Insert Photo or Video”.
- Select “Scan Document”.
- Position your iPhone over the document. The iPhone will automatically capture the page. If it doesn’t, you can manually tap the shutter button.
- Adjust the Scan:
- Adjust the corners of the scan if necessary to fit the document properly.
- Tap “Keep Scan” for each page you scan.
- Save the Scan:
- Tap “Save” when you’re done scanning all pages.
- Compose and Send:
- The scanned document will be attached to the email.
- Enter the recipient’s email address, add a subject, and any message.
- Tap the “Send” button.
Tips for Scanning Documents:
- Good Lighting: Ensure the document is well-lit to get a clear scan.
- Steady Hand: Hold your iPhone steady while scanning to avoid blur.
- Clean Background: Place the document on a clean, flat surface for best results.
- Edit the Scan: Use the editing tools within the Notes or Mail app to crop, rotate, or adjust the color of the scan if needed.
By following these steps, you can easily scan documents and attach them to emails directly from your iPhone, making it a convenient way to share paperwork and other important documents.
7. How Do I Fix “Mail Drop Limits” When Sending Large Photo Attachments from My iPhone?
Mail Drop is a feature that allows you to send large attachments via iCloud. However, there are limits.
- Check Mail Drop Limits: Apple provides a limit of 5 GB per Mail Drop and a total limit of 1 TB.
- Use iCloud Link: Instead of attaching, upload the photo to iCloud and share the link.
- Compress Files: Use ZIP compression to reduce file size.
Understanding and managing these limits, as detailed on dfphoto.net, ensures successful delivery of large files.
8. What Are the Best iPhone Settings for High-Quality Photo Attachments?
To ensure high-quality photo attachments, adjust your iPhone settings:
- Camera Format: Set to “High Efficiency” for smaller file sizes without significant quality loss.
- Mail Settings: In Mail settings, ensure “Load Remote Images” is enabled.
- Avoid Compression: When possible, send photos at their actual size or use file sharing services.
These settings, recommended by photography experts at dfphoto.net, help maintain image quality.
9. Can I Annotate Photos Before Sending Them as Attachments on My iPhone?
Yes, you can annotate photos directly on your iPhone before sending them as attachments. This feature is useful for adding notes, highlighting details, or drawing attention to specific areas in a photo. Here’s how:
Using the Markup Tool in the Photos App:
- Open the Photos App:
- Launch the Photos app on your iPhone.
- Select the Photo:
- Tap on the photo you want to annotate.
- Edit the Photo:
- Tap “Edit” in the upper right corner of the screen.
- Access Markup Tool:
- Tap the Markup icon (usually a pen or pencil tip) in the upper right corner. If you don’t see it directly, tap the three dots (More) and choose “Markup.”
- Annotate the Photo:
- Use the various tools available in the Markup toolbar to annotate the photo. These tools include:
- Pen: Draw freehand lines.
- Highlighter: Highlight sections of the photo.
- Pencil: Write or sketch lightly.
- Eraser: Erase any unwanted marks.
- Lasso Tool: Select and move specific parts of your annotations.
- Color Picker: Choose different colors for your annotations.
- Text Tool: Add text to the photo. Tap the “+” icon and select “Text.”
- Shapes: Add predefined shapes like circles, squares, and arrows. Tap the “+” icon and select “Shape.”
- Magnifier: Magnify a portion of the photo for detail. Tap the “+” icon and select “Magnifier.”
- Use the various tools available in the Markup toolbar to annotate the photo. These tools include:
- Save the Annotations:
- Tap “Done” in the upper right corner when you’re finished annotating.
- Choose “Done” again to save the changes to the photo.
Share the Annotated Photo via Email:
- Open the Photos App:
- If you’re not already there, return to the Photos app.
- Select the Annotated Photo:
- Tap on the annotated photo.
- Share:
- Tap the share icon (a square with an arrow pointing upward) in the bottom left corner.
- Choose “Mail” from the share options. This will open a new email with the annotated photo attached.
- Compose and Send:
- Enter the recipient’s email address, add a subject, and any message you want to include.
- Tap the “Send” button in the upper right corner to send the email with the annotated photo.
Tips for Annotating Photos:
- Use a Stylus: For precise annotations, consider using a stylus.
- Zoom In: Zoom in on the photo to make detailed annotations.
- Experiment with Tools: Try out all the tools to see which ones work best for your needs.
- Save a Copy: If you want to keep the original photo unannotated, make a copy before you start editing.
By following these steps, you can easily annotate photos and send them as attachments from your iPhone, adding clarity and context to your visual communications.
10. How Can I Ensure the Recipient Can Open the Photo Attachments I Send from My iPhone?
To ensure the recipient can open photo attachments sent from your iPhone, consider these points:
- File Format: Use common formats like JPG.
- File Size: Keep files under 20 MB.
- Test Email: Send a test email to yourself first.
According to communication guidelines at dfphoto.net, these steps minimize compatibility issues.
11. How to Draw and Attach to Email from iPhone?
You can create drawings directly on your iPhone and attach them to emails for a personal touch or to illustrate ideas that are hard to describe with words. Here’s how:
Using the Mail App with Markup:
- Open the Mail App:
- Start a new email in the Mail app.
- Insert Drawing:
- Tap within the body of the email where you want to insert the drawing.
- Tap the “+” icon (if available) above the keyboard, or look for an option like “Insert Photo or Video.”
- Select “Markup.” This will open a blank canvas or the last image you were working on.
- Create Your Drawing:
- Use the various tools available in the Markup toolbar to create your drawing. These tools include:
- Pen: Draw freehand lines.
- Highlighter: Highlight sections.
- Pencil: Sketch lightly.
- Eraser: Erase any unwanted marks.
- Color Picker: Choose different colors for your drawing.
- Use the various tools available in the Markup toolbar to create your drawing. These tools include:
- Save and Insert the Drawing:
- Tap “Done” in the upper right corner when you’re finished drawing.
- Select “Insert Drawing.” The drawing will be inserted into your email as an attachment.
- Compose and Send:
- Enter the recipient’s email address, add a subject, and any message you want to include.
- Tap the “Send” button in the upper right corner to send the email with the attached drawing.
Using the Notes App:
- Open the Notes App:
- Launch the Notes app on your iPhone.
- Create a New Note:
- Tap the new note icon to start a new note.
- Create Your Drawing:
- Tap the Markup icon (a pen or pencil tip) in the toolbar above the keyboard. This will open the drawing canvas.
- Use the various tools available to create your drawing, as described above.
- Save the Drawing:
- Tap “Done” in the upper right corner when you’re finished drawing.
- Share the Drawing via Email:
- Tap the share icon (a square with an arrow pointing upward) in the upper right corner of the note.
- Select “Mail” from the share options. This will open a new email with the drawing attached.
- Compose and Send:
- Enter the recipient’s email address, add a subject, and any message you want to include.
- Tap the “Send” button in the upper right corner to send the email with the attached drawing.
Using Third-Party Drawing Apps:
- Download a Drawing App:
- Visit the App Store and download a drawing app like Procreate, Adobe Fresco, or Sketchbook.
- Create Your Drawing:
- Open the drawing app and create your drawing using the app’s tools.
- Save the Drawing:
- Save the drawing to your iPhone’s photo library or files.
- Attach the Drawing to an Email:
- Open the Mail app and start a new email.
- Tap within the body of the email.
- Select “Insert Photo or Video” and choose the drawing you saved.
- Compose and send the email.
Tips for Creating and Sending Drawings:
- Use a Stylus: For more precise drawing, consider using an Apple Pencil or another stylus.
- Zoom In: Zoom in on the canvas to add fine details.
- Experiment with Tools: Each app offers different tools and features, so experiment to find the ones that work best for you.
- Good Lighting: Ensure you have good lighting when creating the drawing to see the colors and details clearly.
By following these steps, you can easily create drawings on your iPhone and attach them to emails, adding a personal and creative touch to your messages.
12. How to Zip Photo Files on iPhone Before Emailing?
Zipping photo files on your iPhone before emailing can be useful for compressing multiple large files into a single, smaller file, making it easier to send and manage. Here’s how you can zip photo files on your iPhone:
Using the Files App (iOS 13 and Later):
- Open the Files App:
- Launch the Files app on your iPhone. If you don’t see it, it might be in the Utilities folder on your home screen.
- Navigate to the Photos:
- Tap “Browse” at the bottom of the screen.
- Select “On My iPhone” or “iCloud Drive,” depending on where your photos are stored.
- Navigate to the folder where your photos are located (e.g., the “Photos” album).
- Select Photos:
- Tap the three dots in the upper right corner and select “Select.”
- Tap on each photo you want to include in the zip file. A checkmark will appear on the selected photos.
- Compress:
- Tap the three dots in the lower right corner.
- Select “Compress.” This will create a zip file containing the selected photos in the same location.
- Share the Zip File via Email:
- Locate the newly created zip file in the Files app.
- Tap and hold on the zip file.
- Select “Share” from the options.
- Choose “Mail” from the share options. This will open a new email with the zip file attached.
- Compose and Send:
- Enter the recipient’s email address, add a subject, and any message you want to include.
- Tap the “Send” button in the upper right corner to send the email with the attached zip file.
Using Third-Party Apps:
- Download a Zip App:
- Visit the App Store and download a zip app like “Zip & Unzip – iZip” or “File Manager & Browser.”
- Import Photos:
- Open the zip app and import the photos you want to compress into the app.
- Create a Zip File:
- Follow the app’s instructions to create a zip file from the selected photos.
- Share the Zip File via Email:
- Use the app’s share feature to send the zip file via email. This usually involves selecting “Share” and then choosing “Mail.”
- Compose and Send:
- Enter the recipient’s email address, add a subject, and any message you want to include.
- Tap the “Send” button in the upper right corner to send the email with the attached zip file.
Tips for Zipping Photo Files:
- Naming the Zip File: After creating the zip file, you can rename it to something descriptive so the recipient knows what it contains. To rename, tap and hold on the file in the Files app, select “Rename,” and enter the new name.
- Large Files: Be aware that even after zipping, large files may still exceed email attachment limits. In such cases, consider using a cloud storage service like iCloud Drive, Google Drive, or Dropbox to share a link to the zip file.
- Compatibility: Ensure that the recipient has a way to unzip the file. Most modern operating systems have built-in support for zip files, but older systems may require additional software.
By following these steps, you can easily zip photo files on your iPhone before emailing them, making it more convenient to share multiple photos in a single, compressed file.
At dfphoto.net, we’re committed to helping you master every aspect of digital photography. Visit our website for more tips, tutorials, and inspiration! If you have any questions or need further assistance, feel free to contact us at +1 (505) 471-6001 or visit us at 1600 St Michael’s Dr, Santa Fe, NM 87505, United States.
Seeking to elevate your photography skills and discover new creative horizons? Explore our comprehensive guides, stunning photo collections, and connect with a vibrant community of photographers at dfphoto.net. Unlock your potential today!
FAQ: Sending Photos as Attachments on iPhone
Here are some frequently asked questions about sending photos as attachments on your iPhone:
1. Why is my photo attachment failing to send?
It could be due to large file size, poor internet connection, or email server issues. Try reducing the photo size or using a stronger Wi-Fi network.
2. Can I send live photos as attachments?
Yes, but they’ll be sent as still images unless the recipient also uses Apple devices.
3. How do I know if my photo attachment is too large?
Your email provider will usually notify you if the file exceeds the limit.
4. Is it better to copy and paste photos into an email?
Attaching photos is generally better as it preserves the original quality. Copying and pasting can reduce resolution.
5. How do I send photos to an Android user?
Ensure the photos are in JPG format for better compatibility.
6. Can I send a RAW file as an attachment from my iPhone?
Yes, but the recipient needs software capable of opening RAW files.
7. How do I access advanced photo editing options on my iPhone?
The Photos app offers basic editing. For advanced options, consider third-party apps.
8. What is the best app for managing large photo libraries on iPhone?
Google Photos and Adobe Lightroom Mobile are excellent choices.
9. How do I print photo attachments directly from my iPhone?
Use AirPrint if your printer is compatible, or transfer the photos to a computer.
10. How can I recover a photo attachment that I accidentally deleted?
Check your email’s trash or recently deleted folder. If not there, it’s likely unrecoverable.