Sending a photo to email involves more than just attaching a file; it’s about preserving image quality, understanding file formats, and choosing the right method for your needs. This guide will delve into the various aspects of emailing photos, ensuring your images arrive looking their best. At dfphoto.net, we’re passionate about helping you master every aspect of photography, from capture to sharing.
Here’s what we will cover:
- Understanding Image File Formats
- Resizing Photos for Email
- Emailing Photos Directly from Your Device
- Using Cloud Services to Share Photos
- Troubleshooting Common Issues
- Maintaining Photo Quality
- Copyright Considerations
- Emailing Photos from Different Devices
- Tips for Professional Photographers
- Advanced Metadata Handling
We’ll explore different methods, best practices, and address common challenges, providing you with the knowledge to confidently share your visual stories. Discover the art of photo sharing and more at dfphoto.net, your ultimate resource for all things photography! Let’s explore the nuances of image sharing, including metadata, compression, and optimal formats for online display.
1. What Are The Best Image File Formats For Emailing Photos?
The best image file formats for emailing photos are JPEG (or JPG) and PNG. JPEG is the most common due to its efficient compression, balancing file size and image quality, while PNG is better for images with text or graphics that require lossless compression to maintain sharpness.
Let’s delve deeper into these formats and others you might encounter:
- JPEG (Joint Photographic Experts Group): This is the go-to format for most photographers and everyday users. JPEG uses lossy compression, which means some image data is discarded to reduce file size. The level of compression can be adjusted, allowing you to control the balance between file size and image quality. According to Popular Photography, JPEG is ideal for photographs because it can efficiently store images with smooth gradients and a wide range of colors.
- PNG (Portable Network Graphics): PNG employs lossless compression, ensuring that no image data is lost during compression. This makes it perfect for images with sharp lines, text, or graphics, where preserving detail is crucial. PNG files are typically larger than JPEGs, but they are essential when quality is paramount.
- GIF (Graphics Interchange Format): While GIFs are widely used for animated images, they are not ideal for photographs due to their limited color palette (256 colors). GIFs use lossless compression but are best suited for simple graphics and logos.
- TIFF (Tagged Image File Format): TIFF is a lossless format commonly used in professional photography and printing. It preserves all image data, resulting in very large file sizes. TIFF is not recommended for emailing due to its size but is excellent for archiving and high-quality editing.
- HEIC (High Efficiency Image Container): This is Apple’s modern image format, offering better compression than JPEG while maintaining similar image quality. However, HEIC files may not be universally supported, so converting them to JPEG before emailing is often necessary.
Choosing the right format depends on your specific needs. For general photo sharing, JPEG strikes a good balance between quality and file size. If you need to preserve every detail, opt for PNG, but be mindful of the larger file size.
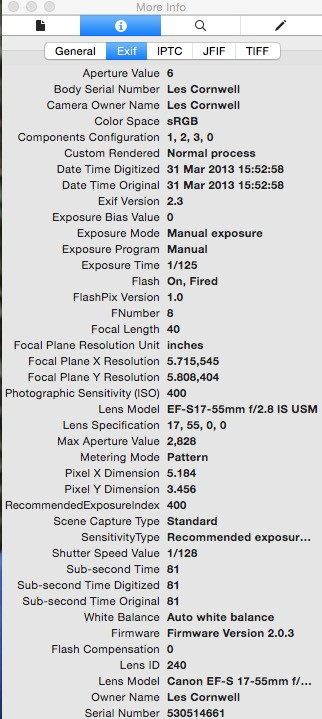 EXIF data displayed in Preview on macOS Yosemite, showing detailed information about the image
2. How Do You Resize Photos For Emailing To Avoid Large Attachments?
To resize photos for emailing and avoid large attachments, use image editing software or online tools to reduce the dimensions and file size of the image. Aim for a resolution around 1600×1200 pixels for a good balance between detail and manageable file size.
Here’s a step-by-step guide:
- Choose Your Tool:
- Image Editing Software: Programs like Adobe Photoshop, GIMP (free), or even the built-in image editors on your computer (like Preview on macOS or Photos on Windows) can be used.
- Online Resizing Tools: Websites like TinyPNG, iLoveIMG, or ResizePixel offer quick and easy resizing without needing to install any software.
- Open Your Image: Open the photo you want to resize in your chosen tool.
- Resize the Dimensions:
- Image Editing Software: Look for options like “Image Size” or “Resize.” Enter the new dimensions, ensuring the “Constrain Proportions” or “Maintain Aspect Ratio” box is checked to prevent distortion.
- Online Tools: Most online tools have straightforward interfaces where you can enter the desired width and height.
- Adjust the Quality/Compression (for JPEG):
- Image Editing Software: When saving as JPEG, you’ll usually see a quality setting (e.g., a slider from 0 to 100 or a Low/Medium/High option). A setting of 60-80% typically provides a good balance.
- Online Tools: Some online tools allow you to adjust the compression level. Experiment to find a good balance between file size and image quality.
- Save the Resized Image: Save the resized image with a new name to avoid overwriting the original. Choose JPEG for most photos, or PNG if you need to preserve sharp details in graphics or text.
- Check the File Size: Ensure the resized image is a reasonable size for emailing. As a general guideline, aim for under 2MB per image.
- Attach to Email: Attach the resized image to your email.
Why is resizing important?
- Faster Sending and Receiving: Smaller files are quicker to upload and download, making the process smoother for both you and the recipient.
- Avoid Bouncing Emails: Many email providers have limits on the size of attachments. Resizing helps ensure your email doesn’t exceed these limits and get bounced back.
- Conserve Storage: Smaller files take up less space in your sent items and in the recipient’s inbox.
- Better Viewing Experience: Large images can be slow to load and difficult to view on some devices. Resizing ensures the image is appropriately sized for screens.
Pro Tip: Consider creating different sizes for different purposes. For example, you might want a high-resolution version for printing and a smaller, email-friendly version for sharing online.
By following these steps, you can easily resize your photos for emailing, ensuring they are delivered quickly and efficiently without sacrificing too much quality.
3. How Can I Email Photos Directly From My Phone Or Camera?
You can email photos directly from your phone or camera by using the built-in email functionality on your device or by connecting your camera to your phone or computer. Most smartphones allow you to select photos from your gallery and share them via email. For cameras, you may need to use a Wi-Fi connection or transfer the photos to a computer first.
Here’s a detailed breakdown of how to do this from different devices:
From Your Smartphone (iOS or Android)
- Open the Photos App:
- iOS (iPhone): Open the “Photos” app.
- Android: Open the “Gallery” or “Photos” app (depending on your device).
- Select the Photos:
- Tap on the photo(s) you want to email.
- For multiple photos, you might need to tap a “Select” button first and then choose the photos.
- Share the Photos:
- Look for the “Share” icon (usually a square with an arrow pointing upwards or three connected dots).
- Tap the “Share” icon.
- Choose Email:
- From the share options, select “Mail” (iOS) or “Gmail” or your preferred email app (Android).
- This will open a new email with the selected photos attached.
- Compose and Send:
- Enter the recipient’s email address, subject, and any message you want to include.
- Tap the “Send” button.
From Your Camera (with Wi-Fi)
Many modern cameras come with built-in Wi-Fi capabilities that allow you to directly transfer photos to your smartphone or tablet for easy sharing.
- Enable Wi-Fi on Your Camera:
- Go to the camera’s menu and find the Wi-Fi settings.
- Enable Wi-Fi and connect to your home or a nearby Wi-Fi network.
- Install Camera’s Companion App:
- Most camera manufacturers have a companion app (e.g., Canon Camera Connect, Nikon Wireless Mobile Adapter Utility, Sony Imaging Edge Mobile).
- Download and install the app on your smartphone or tablet.
- Connect Camera to App:
- Follow the app’s instructions to connect your camera to your device. This usually involves scanning a QR code displayed on the camera’s screen.
- Transfer Photos:
- Once connected, you can browse the photos on your camera through the app.
- Select the photos you want to email and transfer them to your device.
- Email from Your Device:
- Follow the steps in the “From Your Smartphone” section above to email the photos.
From Your Camera (without Wi-Fi)
If your camera doesn’t have Wi-Fi, you’ll need to transfer the photos to a computer first.
- Connect Camera to Computer:
- Use a USB cable to connect your camera to your computer.
- Alternatively, you can remove the memory card from the camera and insert it into a card reader connected to your computer.
- Transfer Photos to Computer:
- Your computer should recognize the camera or memory card as a storage device.
- Open the device and copy the photos to a folder on your computer.
- Email from Computer:
- Open your email client (e.g., Gmail, Outlook, Apple Mail).
- Compose a new email and attach the photos from the folder where you saved them.
- Enter the recipient’s email address, subject, and message, then send.
Tips for Emailing Photos from Devices
- Resize Photos: Before emailing, especially from a camera, resize the photos to a more manageable size to avoid large attachments.
- Check Email Limits: Be aware of the attachment size limits of your email provider. If you need to send many large photos, consider using a cloud service.
- Use Wi-Fi: When transferring photos from your camera to your phone or computer, use a Wi-Fi connection to avoid using up your mobile data.
- Organize Photos: Keep your photos organized in folders on your devices to easily find and email them when needed.
By following these steps, you can easily email photos directly from your phone or camera, making it convenient to share your visual stories with others.
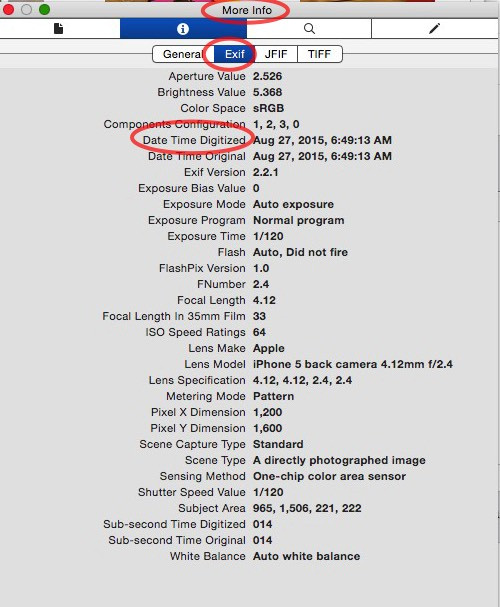 Screenshot of Preview's Info window showing EXIF data
4. How Do Cloud Services Help In Sharing Photos Via Email?
Cloud services help in sharing photos via email by allowing you to upload your images to a central online location and then send a link to the recipient. This avoids the limitations of email attachment sizes and makes it easier to share large numbers of high-resolution photos.
Here’s how you can leverage cloud services for sharing photos:
Popular Cloud Services for Photo Sharing
- Google Photos:
- How it Works: Google Photos automatically backs up your photos from your devices to the cloud. You can then create albums and share them with others via a link.
- Benefits: Generous free storage (up to 15GB shared with other Google services), easy integration with Android devices, automatic organization, and facial recognition.
- Email Integration: You can directly share photos and albums from Google Photos to email contacts.
- Dropbox:
- How it Works: Dropbox is a versatile cloud storage service that allows you to upload and share files of any type. You can create shared folders or generate links to individual photos.
- Benefits: Cross-platform compatibility, file versioning, and robust sharing controls.
- Email Integration: Easily copy and paste shareable links into your emails.
- Microsoft OneDrive:
- How it Works: OneDrive is Microsoft’s cloud storage service, integrated with Windows and Microsoft Office. You can upload photos and share them via links.
- Benefits: Seamless integration with Windows, Office apps, and Xbox.
- Email Integration: Similar to Dropbox, you can generate and paste shareable links into emails.
- iCloud Photos:
- How it Works: iCloud Photos syncs your photos across all your Apple devices. You can create shared albums and invite others to view and contribute.
- Benefits: Tight integration with the Apple ecosystem, automatic syncing, and easy sharing with other Apple users.
- Email Integration: Share photos and albums directly from the Photos app via email.
- SmugMug:
- How it Works: SmugMug is a dedicated photo-sharing platform designed for professional photographers. It offers customizable galleries, e-commerce options, and advanced privacy controls.
- Benefits: High-quality image display, professional features, and excellent customer support.
- Email Integration: Share galleries and individual photos via email with custom branding.
Steps to Share Photos Via Cloud Services
- Upload Your Photos:
- Choose a cloud service that suits your needs and upload your photos to it.
- Organize the photos into folders or albums for easy sharing.
- Generate a Shareable Link:
- Most cloud services allow you to generate a shareable link for a folder, album, or individual photo.
- Adjust the permissions if necessary (e.g., “view only” or “edit”).
- Compose Your Email:
- Open your email client and compose a new email.
- Enter the recipient’s email address, subject, and a message.
- Paste the Shareable Link:
- Copy the shareable link from the cloud service and paste it into the body of your email.
- Provide a brief description of what the recipient will find at the link.
- Send the Email:
- Review your email and send it.
Benefits of Using Cloud Services for Photo Sharing
- Bypass Attachment Size Limits: Avoid the restrictions of email attachment sizes by sharing a link to your photos in the cloud.
- Share Large Numbers of Photos: Easily share entire albums or collections of photos without worrying about individual file sizes.
- Maintain High Quality: Cloud services typically preserve the original resolution of your photos, ensuring the recipient sees them in the best possible quality.
- Collaborate with Others: Some cloud services allow recipients to add their own photos to shared albums, making it easy to collaborate on projects.
- Control Access: Set permissions to control who can view or edit your photos.
Tips for Effective Cloud-Based Photo Sharing
- Organize Your Photos: Before uploading, organize your photos into logical folders or albums to make them easier to share and navigate.
- Choose the Right Service: Select a cloud service that meets your specific needs in terms of storage, features, and pricing.
- Protect Your Privacy: Be mindful of the privacy settings when sharing photos, especially if they contain sensitive information.
- Inform Recipients: Provide clear instructions to the recipients on how to access and view the shared photos.
- Consider Compression: If storage is a concern, consider compressing your photos before uploading them to the cloud.
By using cloud services, you can overcome the limitations of email attachments and share your photos with ease, maintaining high quality and providing a seamless experience for the recipients.
5. What Are Common Issues When Emailing Photos And How To Troubleshoot Them?
Common issues when emailing photos include large file sizes, incorrect file formats, email size limits, and metadata problems. To troubleshoot, resize photos, convert to JPEG, check email provider limits, and ensure metadata is correctly embedded.
Here’s a detailed guide to troubleshooting these issues:
1. Large File Sizes
Issue: The email exceeds the attachment size limit of your email provider, causing it to bounce back or take a very long time to send.
Troubleshooting Steps:
- Resize Photos:
- Use image editing software or online tools to reduce the dimensions of the photos.
- Aim for a resolution around 1600×1200 pixels for a good balance between detail and manageable file size.
- Compress Photos:
- Use compression tools like TinyPNG or JPEGmini to reduce the file size without significantly affecting image quality.
- Use Cloud Services:
- Upload the photos to a cloud service like Google Photos, Dropbox, or OneDrive and share a link in the email.
2. Incorrect File Formats
Issue: The recipient can’t open the photos because they are in an unsupported file format.
Troubleshooting Steps:
- Convert to JPEG:
- JPEG is the most universally supported image format. Use image editing software or online converters to convert the photos to JPEG before emailing.
- Consider PNG for Specific Cases:
- If the photos contain graphics, text, or require transparency, PNG might be a better option. However, ensure the recipient’s email client supports PNG.
- Inform the Recipient:
- If you must send photos in a less common format, inform the recipient and provide instructions on how to open them.
3. Email Size Limits
Issue: Email providers have limits on the total size of an email, including attachments. Exceeding this limit can prevent the email from being sent.
Troubleshooting Steps:
- Check Email Provider Limits:
- Familiarize yourself with the attachment size limits of your email provider (e.g., Gmail: 25MB, Outlook: 20MB).
- Split into Multiple Emails:
- If you have many photos to send, split them into multiple emails, each with a smaller number of attachments.
- Zip the Photos:
- Compress the photos into a ZIP file to reduce the overall size. Be aware that some email providers may block ZIP files for security reasons.
- Use Cloud Services:
- As mentioned earlier, cloud services are an excellent way to bypass email size limits.
4. Metadata Problems
Issue: The recipient doesn’t see the correct date, time, location, or other metadata associated with the photos.
Troubleshooting Steps:
- Ensure Metadata is Embedded:
- When exporting or saving photos, make sure the option to include metadata (EXIF, IPTC) is checked.
- Use Software that Preserves Metadata:
- Some image editing software may strip metadata when saving or exporting photos. Use software known to preserve metadata, such as Adobe Photoshop or Lightroom.
- Check Metadata in Preview:
- Before sending, open the photos in an image viewer like Preview (macOS) or Photos (Windows) and check if the metadata is displayed correctly.
- Send Original Files:
- If metadata is critical, consider sending the original, unedited files, as they are more likely to contain all the metadata.
5. Display Issues
Issue: The photos appear distorted, cropped, or rotated incorrectly in the email or on the recipient’s device.
Troubleshooting Steps:
- Check Aspect Ratio:
- Ensure the aspect ratio of the photos is compatible with the recipient’s device or email client.
- Rotate Photos Correctly:
- Rotate the photos to the correct orientation before sending.
- Avoid Excessive Editing:
- Excessive editing or manipulation of the photos can sometimes cause display issues. Try sending the original files or less heavily edited versions.
6. Security Concerns
Issue: The recipient is hesitant to open the photos due to security concerns (e.g., fear of viruses or malware).
Troubleshooting Steps:
- Use Reputable Services:
- Share photos via reputable cloud services or email providers known for their security measures.
- Inform the Recipient:
- Let the recipient know that the photos are coming from a trusted source and that you have taken precautions to ensure they are safe.
- Scan for Viruses:
- Before sending, scan the photos with a reputable antivirus program to ensure they are free from malware.
7. Email Client Compatibility
Issue: The photos look different depending on the email client used by the recipient (e.g., different color rendering or layout issues).
Troubleshooting Steps:
- Use Standard Formats:
- Stick to standard image formats like JPEG and PNG to ensure compatibility across different email clients.
- Test with Multiple Clients:
- If possible, test sending the photos to different email clients (e.g., Gmail, Outlook, Apple Mail) to see how they appear.
- Optimize for Web:
- When saving photos for email, choose the “Optimize for Web” option in your image editing software to ensure they are displayed correctly in web-based email clients.
By following these troubleshooting steps, you can address common issues when emailing photos and ensure that your images are delivered correctly and look their best on the recipient’s end.
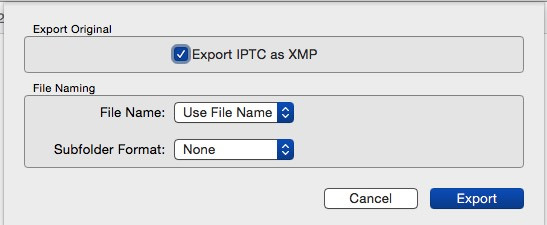 Screenshot showing the option to include an .xmp file with IPTC metadata when exporting from Photos
6. How Can You Maintain Photo Quality When Emailing?
You can maintain photo quality when emailing by resizing images appropriately, using the correct file format, and avoiding excessive compression. Always aim to strike a balance between file size and visual quality to ensure your photos look their best without being too large to send.
Here’s a detailed guide on how to achieve this:
1. Choose the Right File Format
- JPEG (or JPG): This is the most common format for photographs because it offers a good balance between file size and image quality. JPEG uses lossy compression, which means some image data is discarded to reduce file size. However, with careful settings, the loss in quality can be minimal.
- PNG: This format uses lossless compression, which means no image data is lost during compression. PNG is ideal for images with sharp lines, text, or graphics where preserving detail is crucial. However, PNG files are typically larger than JPEGs.
- TIFF: This is a lossless format commonly used in professional photography. It preserves all image data, resulting in very large file sizes. TIFF is not recommended for emailing due to its size.
Recommendation: For most photographs, JPEG is the best choice. For images with text or graphics, PNG may be preferable.
2. Resize Images Appropriately
- Why Resize? Large, high-resolution images can be very large in file size, making them difficult to email and view on some devices. Resizing reduces the file size while maintaining acceptable image quality.
- Ideal Dimensions: For emailing, a resolution of around 1600×1200 pixels is often sufficient. This provides a good balance between detail and manageable file size.
- How to Resize:
- Image Editing Software: Use programs like Adobe Photoshop, GIMP, or even the built-in image editors on your computer.
- Online Tools: Websites like TinyPNG, iLoveIMG, or ResizePixel offer quick and easy resizing.
Steps to Resize:
- Open your image in your chosen tool.
- Look for options like “Image Size” or “Resize.”
- Enter the new dimensions, ensuring the “Constrain Proportions” or “Maintain Aspect Ratio” box is checked.
- Save the resized image with a new name to avoid overwriting the original.
3. Avoid Excessive Compression
- JPEG Compression: When saving as JPEG, you’ll usually see a quality setting (e.g., a slider from 0 to 100 or a Low/Medium/High option). A setting of 60-80% typically provides a good balance.
- Compression Tools: Tools like TinyPNG and JPEGmini use intelligent lossy compression to reduce file size while minimizing the impact on image quality.
Tips for Compression:
- Experiment: Try different compression settings to find the best balance between file size and image quality.
- Inspect: Carefully inspect the compressed image to ensure there are no noticeable artifacts or loss of detail.
- Avoid Re-compressing: Each time you save a JPEG, it undergoes another round of compression, which can further degrade the image quality. Avoid re-compressing JPEGs unnecessarily.
4. Preserve Metadata
- What is Metadata? Metadata is information embedded in the image file, such as the date, time, location, camera settings, and copyright information.
- Why Preserve It? Metadata can be important for organizing, searching, and providing context for your photos.
- How to Preserve It:
- When exporting or saving photos, make sure the option to include metadata (EXIF, IPTC) is checked.
- Use software that is known to preserve metadata.
5. Use Cloud Services
- Benefits: Cloud services like Google Photos, Dropbox, and OneDrive allow you to share photos without significantly reducing their quality.
- How to Use: Upload your photos to the cloud service and share a link in the email. This allows the recipient to view the photos in their original resolution.
6. Calibrate Your Monitor
- Why Calibrate? A properly calibrated monitor ensures that you are accurately seeing the colors and details in your photos.
- How to Calibrate: Use a hardware calibration tool or follow the instructions in your operating system to calibrate your monitor.
7. Consider the Recipient’s Display
- Different Devices: Be aware that the recipient may be viewing the photos on a different type of display (e.g., a smartphone, tablet, or computer monitor) with different color and brightness settings.
- Test: If possible, test sending the photos to yourself and viewing them on different devices to see how they appear.
8. Avoid Over-Editing
- Subtlety: Over-editing can introduce artifacts and reduce the overall quality of the image. Use editing tools sparingly and focus on making subtle adjustments.
- Originals: Always keep a copy of the original, unedited photo so you can revert to it if necessary.
By following these guidelines, you can maintain the quality of your photos when emailing, ensuring that your images look their best on the recipient’s end.
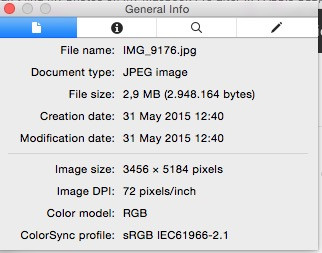 User interface of Preview showing the Inspector window with EXIF data
7. What Are The Copyright Considerations When Emailing Photos?
Copyright considerations when emailing photos include respecting the photographer’s rights, obtaining permission for use, and understanding fair use principles. Always ensure you have the right to share a photo, whether it’s one you took yourself or one you’re sharing that belongs to someone else.
Here’s a detailed breakdown of the copyright considerations:
1. Understanding Copyright Basics
- What is Copyright? Copyright is a legal right granted to the creator of original works of authorship, including photographs. It gives the copyright holder exclusive rights to control how the work is used, copied, distributed, and displayed.
- Who Owns the Copyright? Typically, the photographer who took the photo owns the copyright. If the photo was taken as part of employment, the employer may own the copyright.
- Duration of Copyright: In the United States, for works created after 1977, copyright generally lasts for the life of the author plus 70 years. For corporate works, the term is typically 95 years from publication or 120 years from creation, whichever expires first.
2. Respecting the Photographer’s Rights
- Permission is Required: Unless you own the copyright to a photo or have explicit permission from the copyright holder, you generally need permission to use, copy, or share it.
- Attribution: Even with permission, it’s good practice to give credit to the photographer by including their name and copyright information.
- Non-Commercial Use: Even if your use is non-commercial, you still need permission unless the use falls under an exception like fair use.
3. Obtaining Permission
- Contact the Photographer: The easiest way to obtain permission is to contact the photographer directly and ask for it.
- Licensing Agreements: Some photographers use licensing agreements (e.g., Creative Commons licenses) that specify the terms under which their work can be used.
- Stock Photo Agencies: If you want to use a photo from a stock photo agency (e.g., Getty Images, Shutterstock), you’ll need to purchase a license that grants you the right to use the photo in certain ways.
4. Fair Use
- What is Fair Use? Fair use is a legal doctrine that allows limited use of copyrighted material without permission for purposes such as criticism, commentary, news reporting, teaching, scholarship, or research.
- Four Factors: The determination of whether a particular use is fair use depends on four factors:
- The purpose and character of the use: Is it commercial or non-profit? Is it transformative (i.e., does it add new expression or meaning)?
- The nature of the copyrighted work: Is it factual or creative? Is it published or unpublished?
- The amount and substantiality of the portion used: How much of the work is used? Is the portion used the “heart” of the work?
- The effect of the use on the potential market for or value of the copyrighted work: Does the use harm the market for the original work?
- Fair Use is Limited: Fair use is a complex legal doctrine, and it’s not always clear whether a particular use qualifies. If in doubt, it’s best to seek permission.
5. Copyright and Emailing Photos
- Sharing Your Own Photos: If you took the photos yourself, you generally have the right to email them to others. However, be mindful of privacy concerns if the photos contain images of other people.
- Sharing Photos You Didn’t Take: If you want to email photos that you didn’t take, you need to ensure that you have the right to do so. This could be because you have permission from the copyright holder, the photos are licensed under a Creative Commons license, or the use falls under fair use.
- Commercial Use: If you’re using the photos for commercial purposes (e.g., promoting a business), you’ll typically need a commercial license.
6. Best Practices
- Obtain Permission: When in doubt, obtain permission from the copyright holder before emailing photos you didn’t take.
- Attribute Photos: Give credit to the photographer whenever possible.
- Respect Licensing Agreements: If you’re using photos under a Creative Commons license, follow the terms of the license.
- Be Aware of Fair Use: Understand the limitations of fair use and seek legal advice if you’re unsure whether a particular use qualifies.
- Include Copyright Information: When emailing your own photos, include your name and copyright information to protect your rights.
- Watermarks: Consider adding watermarks to your photos to deter unauthorized use.
- Terms of Service: Always adhere to the terms of service of email and cloud storage providers.
7. Risks of Copyright Infringement
- Legal Action: Copyright infringement can lead to legal action, including lawsuits for damages and injunctions to stop the infringing activity.
- DMCA Takedown Notices: Copyright holders can send DMCA takedown notices to online service providers, requiring them to remove infringing content.
- Reputational Harm: Copyright infringement can damage your reputation and credibility.
By understanding and respecting copyright law, you can ensure that you’re emailing photos legally and ethically.
8. How Does The Process Of Emailing Photos Differ Between Devices?
The process of emailing photos differs between devices primarily due to variations in operating systems, built-in apps, and device-specific features. While the core concept remains the same, the steps and options available can vary significantly between smartphones, tablets, and computers.
Here’s a detailed comparison of how emailing photos differs across various devices:
1. Smartphones (iOS and Android)
- iOS (iPhone/iPad):
- Photos App: The primary way to email photos is through the “Photos” app.
- Share Sheet: Select the photos, tap the “Share” icon, and choose “Mail” to open a new email with the photos attached.
- Mail App: Alternatively, you can open the “Mail” app, compose a new email, and insert photos from the photo library.
- Resizing Options: iOS may offer options to resize the photos before sending (Small, Medium, Large, Actual Size).
- Cloud Integration: Easy integration with iCloud Photos for sharing via links.
- Android:
- Gallery/Photos App: Similar to iOS, you can email photos directly from the “Gallery” or “Photos” app.
- Share Menu: Select the photos, tap the “Share” icon, and choose “Gmail” or your preferred email app.
- Email App: You can also compose a new email in your email app and attach photos from the gallery.
- Resizing Options: Android may offer options to resize the photos before sending.
- Cloud Integration: Easy integration with Google Photos for sharing via links.
Key Differences:
- Share Sheet/Menu: The specific wording and icons for the share options may vary between iOS and Android.
- Email App Integration: Android offers more flexibility in choosing which email app to use for sharing.
- Cloud Integration: Both iOS and Android have seamless integration with their respective cloud services (iCloud Photos and Google Photos).
2. Tablets (iOS and Android)
- iOS (iPad):
- The process is nearly identical to that on iPhones.
- Photos are managed through the “Photos” app, and sharing is done via the share sheet.
- The larger screen size can make it easier to select and manage photos.
- Android Tablets:
- The process is similar to that on Android phones.
- Photos are managed through the “Gallery” or “Photos” app.
- Sharing is done via the share menu.
Key Differences:
- The primary difference is the screen size, which can affect the ease of use.
3. Computers (Windows and macOS)
- Windows:
- Photos App: You can email photos directly from the “Photos” app.
- File Explorer: Right-click on the photo(s) in File Explorer, select “Share,” and choose “Mail.”
- Email Client: Open your email client (e.g., Outlook, Thunderbird), compose a new email, and attach the photos from your computer.
- Resizing Options: Windows may offer options to resize the photos before sending.
- macOS:
- Photos App: You can email photos directly from the “Photos” app.
- Finder: Right-click on the photo(s) in Finder, select “Share,” and choose “Mail.”
- Email Client: Open your email client (e.g., Apple Mail, Outlook, Thunderbird), compose a new email, and attach the photos from your computer.
- Resizing Options: macOS may offer options to resize the photos before sending.
Key Differences:
- File Management: Windows uses File Explorer, while macOS uses Finder for file management.
- Right-Click Menu: The options in the right-click menu may vary slightly between Windows and macOS.
- Built-In Apps: The built-in email clients (Mail on macOS and Mail on Windows) have different interfaces and features.
4. Digital Cameras
- Wi-Fi Enabled Cameras:
- Some cameras have built-in