Sending a photo from your iPhone to email is a straightforward process, allowing you to share memories and professional work seamlessly. At dfphoto.net, we’re dedicated to helping you master this essential skill, along with many other photography tips and tricks to enhance your visual communications. This guide provides comprehensive steps, troubleshooting tips, and advanced techniques to ensure your photos reach their destination without a hitch, fostering better image transfers and photography sharing.
Here’s what we’ll cover in this comprehensive guide:
- Understanding the basics of attaching photos to emails on your iPhone.
- Step-by-step instructions for sending photos using different methods.
- Troubleshooting common issues you might encounter.
- Advanced tips and tricks for optimizing photo quality and file size.
- Alternative methods for sharing large photo files.
1. Why Can’t I Just Drag And Drop Photos From My iPhone To Email?
You can’t directly drag and drop photos from your iPhone to an email because of iOS’s security and operational design. iOS operates within a “sandboxed” environment, isolating applications and preventing direct file manipulation between them for security reasons, as noted in Apple’s iOS Security Guide. To share photos, you must use the share functionality built into the Photos app or other apps that have access to your photo library, thus ensuring secure photography sharing.
Here’s a breakdown of why this limitation exists and how you can work around it:
- Security: iOS is designed with security as a top priority. Direct file access between apps could create vulnerabilities.
- Sandboxing: Each app runs in its own isolated environment, preventing it from directly accessing files of other apps.
- User Experience: Apple provides a consistent and controlled user experience through its share sheets and APIs.
Workarounds
Despite this limitation, there are several ways to easily share photos from your iPhone to email:
- Using the Photos App: The most straightforward method is to use the built-in Photos app.
- Third-Party Apps: Apps like Dropbox or Google Photos can facilitate sharing.
- Cloud Services: Using iCloud or other cloud services allows you to create shareable links.
2. What Are The Basic Steps To Send A Photo From My iPhone To Email?
Sending a photo from your iPhone to email is a simple process that can be done in a few steps through photo sharing. Here’s how to do it:
- Open the Photos App:
- Locate and tap the Photos app icon on your iPhone’s home screen. This opens your photo library, ready for photography sharing.
- Select the Photo(s):
- Browse through your albums or the “Recents” tab to find the photo you want to send.
- Tap the photo to open it.
- To select multiple photos, tap the “Select” button in the upper-right corner and then tap each photo you want to include.
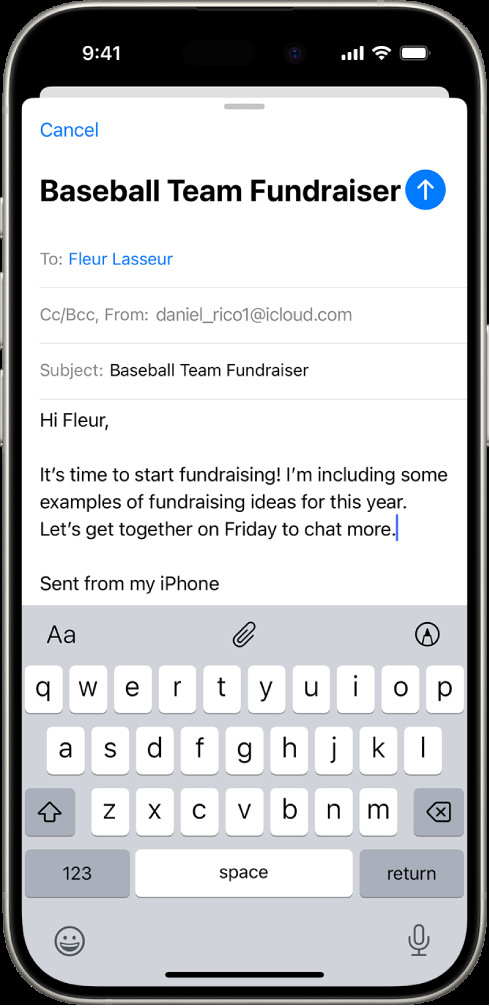
- Tap the Share Button:
- Once you have selected your photo(s), tap the share button. This is the square icon with an arrow pointing upwards, typically found in the lower-left corner of the screen.
 Share button on iPhone for sending photos to email
- Once you have selected your photo(s), tap the share button. This is the square icon with an arrow pointing upwards, typically found in the lower-left corner of the screen.
- Choose the Mail App:
- In the share sheet that appears, scroll through the app icons until you find the “Mail” icon.
- Tap the “Mail” icon to create a new email with the selected photo(s) attached.
- Compose Your Email:
- A new email draft will open with the photo(s) automatically attached.
- Enter the recipient’s email address in the “To” field.
- Add a subject to your email in the “Subject” field.
- Type your message in the body of the email.
- Send the Email:
- Once you’re satisfied with your email, tap the “Send” button, which is usually a paper airplane icon in the upper-right corner of the screen.
- Your email with the attached photo(s) will be sent to the recipient.
3. Can I Resize A Photo Before Sending It From My iPhone To Save Data?
Yes, you can resize a photo before sending it from your iPhone to save data, though the method isn’t directly built into the Mail app. When you send a photo via email from the Photos app, iOS offers options to resize the image, balancing quality and file size for photography sharing.
Here’s how you can do it:
- Select Photos and Tap Share:
- Open the Photos app, select the photo(s) you want to send, and tap the share button (the square with an arrow pointing up).
- Choose Mail:
- Select the “Mail” option from the share sheet to create a new email with the selected photos.
- Image Size Options:
- Before the email is composed, iOS will present you with several size options for the attached images:
- Small: Reduces the file size significantly, ideal for saving data and sending quickly.
- Medium: A balance between file size and image quality.
- Large: Keeps the image at a high resolution while still compressing it slightly.
- Actual Size: Sends the image at its original, uncompressed size.
- Before the email is composed, iOS will present you with several size options for the attached images:
- Select Your Preferred Size:
- Choose the size that best fits your needs. If you’re concerned about data usage or the recipient’s download speed, “Small” or “Medium” are good choices. If image quality is paramount, “Large” or “Actual Size” might be better, though they will result in larger file sizes.
- Compose and Send:
- After selecting the size, the email composition window will appear. Fill in the recipient’s email address, subject, and any message you want to include, then send the email.
4. What If I Don’t See The Mail Option In The Share Sheet?
If you don’t see the Mail option in the share sheet on your iPhone, it usually means that the Mail app is not properly set up with an email account, preventing seamless photography sharing. You need to ensure that at least one email account is configured in the Mail app settings.
Here’s how to troubleshoot and resolve this issue:
-
Check If An Email Account Is Set Up:
- Open the Settings app on your iPhone.
- Scroll down and tap “Mail.”
- Tap “Accounts.”
- If you see “No Accounts,” you need to add an email account. If you see accounts listed, proceed to the next steps to ensure they are properly configured.
-
Add An Email Account (If None Exists):
- In the “Accounts” section, tap “Add Account.”
- Choose your email provider (iCloud, Google, Yahoo, Outlook, or “Other” for less common providers).
- Follow the on-screen instructions to enter your email address and password.
- Ensure that the “Mail” toggle is enabled for the account you just added.
-
Verify Account Settings (If An Account Exists):
- If you already have an account listed, tap on it to verify the settings.
- Ensure that the “Mail” toggle is enabled. If it’s off, turn it on.
- Check the “Account Information” section to ensure that your email address, password, and incoming/outgoing mail server settings are correct. Incorrect settings can prevent the Mail app from functioning properly.
-
Restart Your iPhone:
- Sometimes, simply restarting your iPhone can resolve minor software glitches.
- Press and hold either volume button and the side button until the power-off slider appears.
- Drag the slider to turn off your iPhone.
- After a few seconds, press and hold the side button again until you see the Apple logo.
-
Reset Network Settings:
- If the issue persists, you can try resetting your network settings. This will reset your Wi-Fi passwords, cellular settings, and VPN settings, but it can sometimes resolve connectivity issues that affect the Mail app.
- Open the Settings app on your iPhone.
- Tap “General.”
- Scroll down and tap “Transfer or Reset iPhone.”
- Tap “Reset.”
- Tap “Reset Network Settings.” You may need to enter your passcode.
-
Update iOS:
- Ensure that your iPhone is running the latest version of iOS. Software updates often include bug fixes that can resolve issues with built-in apps.
- Open the Settings app on your iPhone.
- Tap “General.”
- Tap “Software Update.”
- If an update is available, download and install it.
5. What Is Mail Drop And How Does It Help With Large Photo Files?
Mail Drop is an Apple service that allows you to send large files, including photos and videos, via email without exceeding the size limits imposed by email providers. When you send an email with attachments that are too large, Mail Drop automatically uploads the files to iCloud and includes a link in the email that recipients can use to download the attachments, facilitating effective photography sharing.
Here’s a detailed explanation of how Mail Drop works and its benefits:
How Mail Drop Works:
- Automatic Activation: Mail Drop is automatically enabled on iPhones, iPads, and Macs when you use the Mail app with an iCloud account.
- File Upload to iCloud: When you send an email with large attachments (typically over 20MB), the Mail app uploads these files to iCloud.
- Link Insertion: Instead of sending the actual files, Mail Drop inserts a link in the email. This link allows recipients to download the files directly from iCloud.
- Recipient Access: Recipients can click the link to download the attachments, even if they don’t use Apple devices. The files can be downloaded on any device with a web browser.
- Temporary Storage: The files remain available on iCloud for 30 days, giving recipients ample time to download them. After 30 days, the files are removed from iCloud.
Benefits of Using Mail Drop:
- Bypass Size Limits: Most email providers have size limits on attachments (e.g., 25MB). Mail Drop allows you to send files up to 5GB in size, far exceeding these limits.
- Convenience: Mail Drop is integrated directly into the Mail app, so you don’t need to use separate file-sharing services.
- Compatibility: Recipients don’t need Apple devices or software to download the files. A web browser is sufficient.
- Efficiency: By sending a download link instead of the actual files, Mail Drop reduces the size of the email itself, making it faster to send and receive.
- Cost-Effective: Mail Drop uses your iCloud storage, which comes with 5GB of free storage. If you need more, you can upgrade your iCloud storage plan.
6. Are There Alternative Apps To Send Photos Via Email From iPhone?
Yes, there are several alternative apps you can use to send photos via email from your iPhone, especially if you want more control over file sizes, compression, or additional features. These apps often provide functionalities beyond the native Mail app, enhancing your options for photography sharing.
Here are some popular alternatives:
- Google Photos:
- Overview: Google Photos is a versatile photo storage and sharing app. It allows you to back up your photos to the cloud and share them easily via email.
- How to Use:
- Upload your photos to Google Photos.
- Select the photo(s) you want to share.
- Tap the share button.
- Choose “Create link” and copy the link.
- Paste the link into an email using any email app.
- Pros:
- Free storage up to 15GB (shared with other Google services).
- Automatic backup of photos.
- Easy link sharing.
- Cons:
- Requires a Google account.
- Shared storage with other Google services.
- Dropbox:
- Overview: Dropbox is a cloud storage service that allows you to store and share files, including photos.
- How to Use:
- Upload your photos to Dropbox.
- Select the photo(s) you want to share.
- Tap the share button.
- Create a shareable link and copy it.
- Paste the link into an email.
- Pros:
- Easy file management and organization.
- Shareable links for easy distribution.
- Cons:
- Limited free storage (2GB).
- Requires a Dropbox account.
- WeTransfer:
- Overview: WeTransfer is a file-sharing service specifically designed for sending large files.
- How to Use:
- Go to the WeTransfer website or use the WeTransfer app.
- Add the photo(s) you want to send.
- Enter your email address and the recipient’s email address.
- Click “Transfer.”
- WeTransfer will send an email to the recipient with a download link.
- Pros:
- Simple and easy to use.
- No account required for sending files.
- Can send files up to 2GB for free.
- Cons:
- Recipients must download the files; no direct viewing.
- Files are only available for a limited time (usually 7 days).
- iCloud Drive:
- Overview: iCloud Drive is Apple’s cloud storage service, integrated with iOS.
- How to Use:
- Upload your photos to iCloud Drive.
- In the Files app, locate the photo(s) you want to share.
- Tap and hold the file, then select “Share.”
- Choose “Add People” to create a shareable link.
- Copy the link and paste it into an email.
- Pros:
- Integrated with iOS.
- Easy to use for Apple users.
- Cons:
- Requires an iCloud account.
- Recipients may need an Apple device for optimal viewing.
- File Sharing Apps with Email Integration:
- Overview: Some file-sharing apps, like Send Anywhere, are designed specifically for transferring files between devices and offer direct email integration.
- How to Use:
- Upload your photos to the app.
- Select the photo(s) you want to share.
- Choose the email option within the app.
- The app will create an email with a link to download the files.
- Pros:
- Fast and efficient file transfer.
- Often includes additional security features.
- Cons:
- May require both sender and receiver to have the app installed for certain features.
7. How Do I Scan A Document And Send It Via Email From My iPhone?
Scanning a document and sending it via email from your iPhone is a convenient way to share physical documents digitally, contributing to photography sharing when the document includes images. The Notes app provides a built-in document scanner, making the process straightforward.
Here’s how to do it:
- Open the Notes App:
- Locate and tap the Notes app icon on your iPhone.
- Create a New Note:
- Tap the new note icon (usually a square with a pencil) to start a new note.
- Access the Document Scanner:
- In the new note, tap the camera icon above the keyboard.
- Choose “Scan Documents” from the options that appear.
- Scan the Document:
- Position your iPhone over the document you want to scan. The camera will automatically detect the edges of the document and capture the image.
- If automatic scanning doesn’t work, you can manually take a photo of the document by tapping the shutter button (the white circle).
- Adjust the corners of the scan, if necessary, to ensure the entire document is included and properly aligned.
- Tap “Keep Scan” to save the scanned page.
- Scan Additional Pages (If Needed):
- If you have multiple pages to scan, repeat the process for each page.
- The scanned pages will be added to the same document.
- Save the Scanned Document:
- Once you have scanned all the necessary pages, tap “Save.” The scanned document will be saved as a PDF file in the note.
- Share the Scanned Document via Email:
- In the note containing the scanned document, tap the share button (the square with an arrow pointing upwards).
- Choose “Mail” from the share sheet. This will create a new email with the scanned document attached as a PDF file.
- Compose Your Email:
- A new email draft will open with the scanned document attached.
- Enter the recipient’s email address in the “To” field.
- Add a subject to your email in the “Subject” field.
- Type your message in the body of the email, if needed.
- Send the Email:
- Once you’re satisfied with your email, tap the “Send” button (usually a paper airplane icon) in the upper-right corner of the screen.
- Your email with the scanned document attached will be sent to the recipient.
8. What Are The Best Practices For Capturing High-Quality Photos On My iPhone For Emailing?
Capturing high-quality photos on your iPhone for emailing involves understanding your device’s camera capabilities and employing best practices to maximize image quality. High-quality images are essential for effective photography sharing.
Here are some key tips:
- Clean the Lens:
- Before taking any photos, make sure your iPhone’s camera lens is clean. Use a soft, lint-free cloth to gently wipe away any smudges or fingerprints.
- Use Natural Light:
- Whenever possible, take photos in natural light. Avoid harsh direct sunlight, which can cause overexposure and harsh shadows. Overcast days or shaded areas provide softer, more even lighting.
- Focus Properly:
- Tap on the screen to focus on your subject. This ensures that the subject is sharp and clear.
- For moving subjects, tap and hold on the screen to lock the focus.
- Use HDR (High Dynamic Range):
- HDR mode combines multiple exposures to capture a wider range of tones, resulting in better detail in both the bright and dark areas of the photo.
- Enable HDR in the Camera app settings or directly in the camera interface.
- Adjust Exposure:
- After focusing, you can adjust the exposure by sliding your finger up or down on the screen. This allows you to brighten or darken the image as needed.
- Use Grid Lines:
- Enable grid lines in the Camera app settings to help you compose your shots according to the rule of thirds. This can improve the balance and visual appeal of your photos.
- Shoot in Good Resolution:
- Ensure that your camera is set to capture photos at the highest possible resolution. Go to Settings > Camera > Formats and choose “Most Compatible” for JPEG format or “High Efficiency” for HEIF format (which offers better compression).
- Avoid Digital Zoom:
- Digital zoom degrades image quality. Instead of zooming in, try to get closer to your subject physically. If you must zoom, use it sparingly.
- Keep Your iPhone Stable:
- Hold your iPhone steady when taking photos to avoid blur. Use both hands and brace yourself against a stable surface if possible.
- Consider using a tripod or a smartphone stabilizer for even greater stability, especially in low-light conditions.
- Use Portrait Mode (for People):
- If you’re taking photos of people, use Portrait mode to create a shallow depth of field effect, blurring the background and making the subject stand out.
- Edit Photos After Taking Them:
- Use the built-in Photos app or a third-party photo editing app to enhance your photos after you’ve taken them. Adjust brightness, contrast, saturation, and sharpness to improve the overall look of the image.
- Use Burst Mode for Action Shots:
- For capturing action shots or moving subjects, use Burst mode by pressing and holding the shutter button. This takes a rapid sequence of photos, increasing your chances of capturing the perfect moment.
- Disable Live Photos If Not Needed:
- Live Photos capture a few seconds of video along with the still image, which can increase file size. If you don’t need the Live Photo feature, disable it to save storage space.
- Consider Using Third-Party Camera Apps:
- Explore third-party camera apps like Camera+ or ProCamera, which offer more advanced controls and features than the built-in Camera app. These apps can give you greater flexibility and control over your photography.
- Shoot in RAW Format (If Supported):
- Some iPhones support shooting in RAW format, which captures more image data and provides greater flexibility for editing. However, RAW files are larger than JPEGs, so use this option if you plan to do extensive post-processing.
9. How Can I Annotate A Photo On My iPhone Before Sending It Via Email?
Annotating a photo on your iPhone before sending it via email allows you to add notes, drawings, and highlights directly to the image, making it easier to communicate specific details or provide feedback, which enhances photography sharing. The built-in Markup tool in the Photos app makes this process simple and efficient.
Here’s how to annotate a photo before emailing it:
- Open the Photos App and Select the Photo:
- Locate and tap the Photos app icon on your iPhone.
- Browse through your albums or the “Recents” tab to find the photo you want to annotate.
- Tap the photo to open it.
- Tap the Edit Button:
- In the upper-right corner of the screen, tap the “Edit” button. This will open the photo in editing mode.
- Access the Markup Tool:
- In the editing interface, tap the Markup icon. This icon looks like a pen tip or a marker, usually located in the upper-right corner or the bottom of the screen.
- Use the Markup Tools:
- The Markup toolbar provides various tools for annotating your photo:
- Pen: Draw freehand lines.
- Marker: Highlight areas with a semi-transparent stroke.
- Pencil: Create thinner, more precise lines.
- Eraser: Erase any unwanted annotations.
- Lasso: Select and move annotations.
- Color Picker: Choose different colors for your annotations.
- Plus (+) Button: Add text, shapes, signatures, and more.
- The Markup toolbar provides various tools for annotating your photo:
- Annotate Your Photo:
- Use your finger or an Apple Pencil (if you have one) to draw, write, or highlight directly on the photo.
- To add text:
- Tap the plus (+) button in the Markup toolbar.
- Choose “Text.”
- A text box will appear on the photo. Tap the text box to enter your text.
- Use the formatting options to change the font, size, and color of the text.
- To add shapes:
- Tap the plus (+) button in the Markup toolbar.
- Choose “Shape” and select the shape you want to add (e.g., rectangle, circle, arrow).
- Adjust the size, position, and color of the shape.
- To add a signature:
- Tap the plus (+) button in the Markup toolbar.
- Choose “Signature.”
- If you have previously saved a signature, it will appear. If not, you can create a new signature by signing on the screen.
- Position and resize the signature as needed.
- Undo and Redo:
- If you make a mistake, use the undo (curved arrow pointing left) and redo (curved arrow pointing right) buttons to correct your annotations.
- Save Your Annotations:
- Once you’re finished annotating the photo, tap “Done” in the upper-right corner of the screen.
- Choose “Save” to save the annotated photo to your Photos app.
- Share the Annotated Photo via Email:
- Open the Photos app and select the annotated photo.
- Tap the share button (the square with an arrow pointing upwards).
- Choose “Mail” from the share sheet.
- A new email draft will open with the annotated photo attached.
- Compose your email and send it to the recipient.
10. What Security Measures Should I Consider When Sending Photos Via Email?
When sending photos via email, it’s important to consider security measures to protect your privacy and the privacy of others. Email is generally not a secure method for transmitting sensitive information, but there are steps you can take to minimize risks and ensure safe photography sharing.
Here are some key security considerations:
- Avoid Sending Sensitive Photos:
- Do not send photos that contain highly sensitive or personal information via email. This includes photos of confidential documents, personal identification, or anything that could lead to identity theft or fraud.
- Use Encryption (If Possible):
- If you need to send sensitive photos, consider using email encryption. S/MIME (Secure/Multipurpose Internet Mail Extensions) is a common encryption standard supported by many email clients, including Apple Mail.
- To use S/MIME, you and the recipient must have digital certificates installed on your devices.
- Password Protect Sensitive Files:
- If you must send sensitive photos, compress them into a password-protected ZIP file before sending. This adds an extra layer of security, as the recipient will need the password to access the photos.
- To create a password-protected ZIP file on your iPhone:
- Use a third-party app like “Zip & Unzip – File Manager” from the App Store.
- Select the photos you want to compress.
- Create a ZIP file and set a strong password.
- Send the ZIP file via email and communicate the password to the recipient through a separate, secure channel (e.g., phone call, text message).
- Use Secure File Sharing Services:
- Consider using secure file sharing services like WeTransfer, Dropbox, Google Drive, or iCloud Drive, which offer encryption and additional security features.
- These services allow you to share a link to the photos rather than sending the photos directly in the email.
- Set expiration dates and passwords for shared links to further protect your files.
- Verify Recipient’s Email Address:
- Double-check the recipient’s email address to ensure you are sending the photos to the correct person. Sending sensitive photos to the wrong email address can have serious consequences.
- Be Aware of Phishing and Malware:
- Be cautious of phishing emails or emails containing suspicious links or attachments. Do not open or download attachments from unknown or untrusted sources, as they may contain malware.
- Use a Strong Email Password:
- Use a strong, unique password for your email account and enable two-factor authentication (2FA) to add an extra layer of security.
- Review Email Security Settings:
- Review the security settings of your email account to ensure that they are configured to provide the best possible protection. This includes enabling encryption, setting up spam filters, and monitoring login activity.
- Remove Metadata from Photos:
- Photos contain metadata (EXIF data) that includes information such as the date, time, and location the photo was taken. Remove this metadata before sending photos via email to protect your privacy.
- To remove metadata on your iPhone:
- Use a third-party app like “Metapho” or “Exif Metadata.”
- Select the photo(s) you want to share.
- Remove the metadata and save the cleaned photo(s).
- Send the cleaned photo(s) via email.
- Inform Recipients About Security Precautions:
- When sending sensitive photos, inform the recipient about the security precautions you have taken and advise them to take similar precautions to protect the photos on their end.
- Regularly Update Your Devices and Software:
- Keep your iPhone and all software up to date with the latest security patches to protect against known vulnerabilities.
- Use a VPN on Public Wi-Fi:
- When sending photos via email on public Wi-Fi networks, use a virtual private network (VPN) to encrypt your internet traffic and protect your data from eavesdropping.
FAQ
1. Why are my photos blurry when I email them from my iPhone?
Photos may appear blurry due to compression. When you email photos, your iPhone often reduces the file size to make them easier to send. To avoid this, choose the “Actual Size” option when prompted to select the image size before sending.
2. Can I send Live Photos via email?
Yes, you can send Live Photos via email. When you share a Live Photo, it is typically sent as a still image. To ensure the recipient receives the Live Photo as a video, you can save it as a video first and then attach the video file to your email.
3. How do I send multiple photos in one email on my iPhone?
To send multiple photos in one email, open the Photos app, tap “Select” in the upper-right corner, select all the photos you want to send, tap the share button, and choose “Mail.” The selected photos will be attached to a new email.
4. What is the maximum file size I can send via email on my iPhone?
The maximum file size you can send via email depends on your email provider. Generally, most providers limit attachments to 20-25MB. For larger files, use Mail Drop (if you have an iCloud account) or a file-sharing service like WeTransfer or Dropbox.
5. How do I use Mail Drop on my iPhone?
Mail Drop is automatically enabled for iCloud users. When you attempt to send an email with attachments larger than 20MB, the Mail app will automatically offer to use Mail Drop. The files are uploaded to iCloud, and a download link is sent to the recipient.
6. Can I send photos to multiple recipients at once?
Yes, you can send photos to multiple recipients at once. When composing your email, simply enter multiple email addresses in the “To” field, separated by commas.
7. How do I remove location data from photos before sending them?
To remove location data from photos, use a third-party app like Metapho or Exif Metadata. These apps allow you to strip the EXIF data (including location data) from your photos before sharing them.
8. Why can’t I see the entire photo in the email preview?
Email previews may not display the entire photo due to size constraints or email client settings. The recipient will be able to see the full photo once they download it.
9. How do I ensure my photos look good on other devices?
To ensure your photos look good on other devices, use a standard image format like JPEG and avoid sending extremely high-resolution images that may not be properly displayed on smaller screens.
10. Is it safe to send personal photos via email?
Sending personal photos via email is generally not considered secure. If you must send personal photos, consider using encryption or a secure file-sharing service with password protection.
By following these guidelines, you’ll be well-equipped to send photos from your iPhone to email effectively and securely. Ready to elevate your photography skills further? Visit dfphoto.net for more in-depth tutorials, tips, and inspiration to help you capture and share stunning images. Explore our resources, connect with a community of passionate photographers, and discover new ways to express your creativity through the lens. Your journey to mastering the art of photography starts here at dfphoto.net.
For additional assistance or inquiries, feel free to reach out to us:
Address: 1600 St Michael’s Dr, Santa Fe, NM 87505, United States
Phone: +1 (505) 471-6001
Website: dfphoto.net