Attaching photos to emails on your iPhone is a common task. This article from dfphoto.net guides you through the simple steps to send photos as attachments on your iPhone, ensuring your visual content reaches its destination effortlessly by understanding different attachment methods and troubleshooting tips. In this guide, we’ll cover sending images and visual files, attaching files via mail drop, and using image compression.
1. How Do I Attach A Photo, Video, Or Document To An Email On My iPhone?
You can easily attach a photo, video, or document to an email directly from the Mail app on your iPhone. Here’s how:
-
Open the Mail App: Start by opening the Mail application on your iPhone.
-
Compose a New Email or Reply: Tap the compose icon to start a new email or open an existing email and tap reply.
-
Tap to Insert: In the body of the email, tap where you want to insert the attachment.
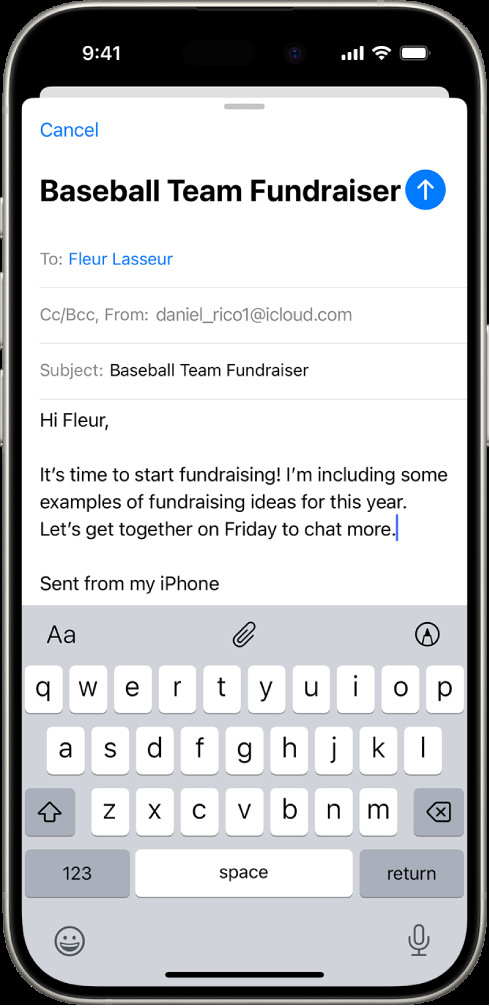 Draft email composition with attachment options visible above the keyboard, showcasing the iPhone's user-friendly interface for adding files.
 -
Access Attachment Options: Tap above the keyboard.
-
Choose Your File Type:
- Attach a Document: Tap the Attach File icon and locate the document in the Files app. You can browse through Recent, Shared, or Browse to find your file.
- Attach a Photo or Video: Tap the Photo/Video icon and choose a photo or video from your library. Tap Done to return to the email.
- Take a New Photo or Video: Tap the Take Photo or Video icon to open the camera. Take your photo or video, then tap Use Photo or Use Video to insert it. If you’re not satisfied, tap Retake.
By following these steps, you can easily attach photos, videos, and documents to your emails on your iPhone, making it simple to share visual content and important files with your contacts. The iPhone’s intuitive interface ensures a smooth attachment process, whether you’re sending a quick snapshot or a crucial document.
2. How Do I Scan A Document And Attach It To An Email On My iPhone?
Scanning and attaching a document to an email on your iPhone is a seamless way to share physical documents in a digital format. Here’s how you can do it:
-
Open the Mail App: Launch the Mail app on your iPhone.
-
Start a New Email or Reply: Tap the compose icon to create a new email or open an existing one and tap reply.
-
Tap to Insert: In the email body, tap where you want to insert the scanned document.
-
Access Attachment Options: Tap above the keyboard.
-
Select Scan Document: Tap the Scan Document option. Your camera will open, ready to scan.
-
Position Your Document: Hold your iPhone over the document. The iPhone will automatically capture the page.
- Manual Capture: If you prefer to capture the page manually, tap the Take Picture button or press a volume button.
- Flash Option: Toggle the flash on or off by tapping the flash icon.
-
Edit the Scan: After capturing, you can edit the scan to improve its quality.
- Crop the Image: Tap the Crop button to adjust the borders.
- Apply a Filter: Tap the Filter icon to enhance the contrast and clarity.
- Rotate the Image: Tap the Rotate button to correct the orientation.
- Delete the Scan: If you’re not satisfied, tap the Delete icon to discard the scan and try again.
-
Scan Additional Pages: Tap Retake or Done to either rescan the current page or save it. For multi-page documents, scan each additional page.
-
Save the Scanned Document: Once you have scanned all the necessary pages, tap Save. The scanned document will be inserted into your email as a PDF attachment.
This method transforms your iPhone into a portable scanner, perfect for digitizing receipts, contracts, and other important papers on the go. The scanned document is saved as a PDF, making it easy to share and view on any device.
3. How Do I Create And Attach A Drawing To My Email On An iPhone?
Creating and attaching a drawing to your email on an iPhone is a fun way to personalize your messages and illustrate ideas. Here’s how to do it:
- Open the Mail App: Start by opening the Mail app on your iPhone.
- Compose a New Email or Reply: Tap the compose icon to start a new email or open an existing email and tap reply.
- Tap to Insert: In the body of the email, tap where you want to insert the drawing.
- Access Attachment Options: Tap above the keyboard to reveal additional options.
- Insert Drawing: Tap the Insert Drawing button. This will open a drawing canvas.
- Use the Markup Toolbar: At the bottom of the screen, you’ll see the Markup toolbar with various drawing tools and colors.
- Choose a Tool: Select a pen, marker, pencil, or other drawing tool.
- Pick a Color: Choose your desired color from the palette.
- Draw: Use your finger to write or draw on the screen.
- Edit Your Drawing: You can undo, redo, or erase parts of your drawing as needed.
- Insert the Drawing: When you’re satisfied with your drawing, tap Done. Then, tap Insert Drawing to add it to your email as an attachment.
This feature is great for adding a personal touch to your emails, whether you’re sketching out a quick design, annotating an image, or just doodling for fun. Your drawing is added as an attachment, making it easy for recipients to view and download.
4. What Are Some Tips For Sending Photos As Attachments On An iPhone?
Sending photos as attachments on your iPhone can be a breeze if you follow a few helpful tips. Here’s a breakdown to ensure your photos are sent efficiently and effectively:
4.1 Compressing Images
Compressing images before sending them can significantly reduce file sizes, making them easier to email and quicker to download. Here’s how:
- Using the Mail App:
- Select Images: In the Mail app, select the images you want to attach.
- Choose Size: Before sending, you’ll be prompted to choose a size: Small, Medium, Large, or Actual Size. Select “Medium” or “Small” to compress the images.
- Using Third-Party Apps:
- Image Size: This app allows you to resize images easily. Open the app, select your photo, and choose a smaller size. Then, share the resized photo via email.
- Compress Photos & Pictures: This app offers various compression levels. Select your images, choose a compression level, and save the compressed photos to your camera roll. You can then attach these smaller files to your email.
4.2 Using Mail Drop For Large Files
Mail Drop is Apple’s solution for sending large files that exceed email size limits. Here’s how to use it:
-
Attach Your Files: Attach the large photo or video to your email as you normally would.
-
Mail Drop Prompt: If the file is too large, Mail will automatically prompt you to use Mail Drop.
-
Send via Mail Drop: Confirm that you want to use Mail Drop. Your file will be uploaded to iCloud, and a link will be sent to the recipient.
Note: Mail Drop has a limit of 5 GB per email, and files are available for 30 days.
4.3 Converting Images To Different Formats
Converting images to different formats can also reduce file sizes. Here’s how:
- Convert to JPEG: If your image is in a format like PNG, converting it to JPEG can significantly reduce the size while maintaining acceptable quality.
- Using Online Converters:
- Go to a Converter Website: Use a site like Zamzar or OnlineConvert.
- Upload Your Image: Upload the image you want to convert.
- Select JPEG: Choose JPEG as the output format.
- Convert and Download: Convert the image and download the smaller JPEG file, which you can then attach to your email.
4.4 Sending Multiple Photos Efficiently
When sending multiple photos, consider these tips:
- Zip Files: For sending a large number of photos, compress them into a zip file.
- Use the Files App: In the Files app, select all the photos you want to send.
- Compress: Tap the three dots in the corner and choose “Compress.” This creates a zip file.
- Attach to Email: Attach the zip file to your email.
- Cloud Storage: Upload the photos to a cloud storage service and share a link.
- Upload: Upload your photos to services like Google Photos, Dropbox, or iCloud Photos.
- Create a Shareable Link: Generate a shareable link for the album or folder containing the photos.
- Email the Link: Send the link in your email.
4.5 Checking Email Size Limits
Different email providers have different size limits for attachments. Be aware of these limits:
- Gmail: 25 MB
- iCloud Mail: 20 MB
- Yahoo Mail: 25 MB
- Outlook: 20 MB
If your attachments exceed these limits, use Mail Drop or cloud storage to send your files.
4.6 Using Third-Party Apps For Better Management
Several third-party apps can help you manage and send photos more efficiently:
- Dropbox: Allows you to upload photos and share links, bypassing email attachment limits.
- Google Photos: Offers easy sharing options and automatic backup of your photos.
- WeTransfer: A simple file-sharing service that allows you to send large files without requiring the recipient to create an account.
By implementing these tips, you can ensure your photos are sent efficiently, without compromising quality or exceeding email size limits. Whether it’s compressing images, using Mail Drop, or converting file formats, these techniques will make sending photos from your iPhone a seamless experience.
5. What Are The Limitations Of Email Attachments On iPhones?
While sending photos as attachments on your iPhone is convenient, there are limitations to be aware of. These limitations can affect how you share visual content and important files. Here’s a detailed look at the common constraints and how to work around them:
5.1 File Size Limits
One of the primary limitations is the maximum file size allowed by email providers. Exceeding these limits can prevent your email from being sent. Here are the standard file size limits for popular email services:
- Gmail: 25 MB
- iCloud Mail: 20 MB
- Yahoo Mail: 25 MB
- Outlook: 20 MB
When you attach photos or videos, especially high-resolution ones, they can quickly exceed these limits. This is where techniques like compressing images or using Mail Drop become essential.
5.2 Attachment Number Limits
Some email providers may also limit the number of attachments you can include in a single email. While this is less common than file size limits, it can still be a factor, especially when sending a large batch of photos.
5.3 Internet Connection Speed
The speed of your internet connection can significantly impact the time it takes to upload and send large attachments. A slow or unstable connection can lead to timeouts or failed uploads. To mitigate this:
- Use Wi-Fi: Whenever possible, use a stable Wi-Fi connection instead of cellular data.
- Avoid Peak Times: Try sending large attachments during off-peak hours when network traffic is lower.
5.4 Recipient’s Email Client Compatibility
Not all email clients and devices handle attachments in the same way. Some recipients may experience issues opening or downloading certain file types due to compatibility issues. To minimize this risk:
- Use Common Formats: Stick to widely supported formats like JPEG for images and PDF for documents.
- Inform Recipients: If you’re sending a less common file type, let the recipient know in advance and suggest a program they can use to open it.
5.5 Mail Drop Limitations
While Mail Drop is a great solution for sending large files, it has its own limitations:
- File Size Limit: Mail Drop has a limit of 5 GB per email.
- Availability: Files are available for 30 days, after which they are removed from iCloud.
- Compatibility: Recipients need a compatible email client to access Mail Drop files.
5.6 Data Usage
Sending large attachments over a cellular network can consume a significant amount of data, potentially leading to overage charges. To avoid this:
- Monitor Data Usage: Keep track of your data usage in the Settings app.
- Use Wi-Fi: Always prefer Wi-Fi when sending large files to conserve cellular data.
5.7 Security Concerns
Email attachments can sometimes pose security risks. Malicious files can be disguised as harmless photos or documents. To stay safe:
- Scan Attachments: Before opening attachments from unknown senders, scan them with a reputable antivirus app.
- Be Cautious: Be wary of suspicious emails or attachments that seem out of character.
5.8 Storage Limitations On The Recipient’s End
The recipient’s email account may have limited storage space. If their mailbox is full, they may not be able to receive your email with the attachment.
5.9 Overcoming Limitations
Understanding these limitations can help you plan ahead and choose the most appropriate method for sending photos and files. Whether it’s compressing files, using Mail Drop, or opting for cloud storage, there are many ways to ensure your attachments reach their destination without issues.
6. How To Troubleshoot Common Issues When Sending Photos As Attachments On iPhone?
Encountering issues while sending photos as attachments on your iPhone can be frustrating, but most problems have straightforward solutions. Here’s a guide to troubleshooting common issues:
6.1 Email Not Sending
Problem: The email remains in your outbox and doesn’t send.
Possible Causes and Solutions:
- Network Connectivity:
- Check Internet Connection: Ensure you have a stable internet connection. Try switching between Wi-Fi and cellular data to see if the issue persists.
- Restart Router: If you’re on Wi-Fi, restart your router to refresh the connection.
- Email Account Settings:
- Verify Account Settings: Go to Settings > Mail > Accounts and check that your email account settings are correct. Re-enter your password if necessary.
- Re-Add Account: Delete and re-add your email account to ensure the settings are properly configured.
- Server Issues:
- Check Server Status: Sometimes, email providers experience server outages. Check the provider’s website or social media for any reported issues.
- Try Again Later: If there’s a server issue, wait a while and try sending the email again later.
- Large Attachments:
- Compress Photos: Reduce the size of your photos by compressing them before attaching.
- Use Mail Drop: For very large files, use Mail Drop to send a link instead of attaching the file directly.
6.2 Attachment Size Exceeds Limit
Problem: The email app warns that the attachment exceeds the maximum allowed size.
Possible Causes and Solutions:
- Attachment Too Large:
- Compress Photos: Use the Mail app’s built-in compression options (Small, Medium, Large) when attaching photos.
- Third-Party Apps: Use apps like Image Size or Compress Photos & Pictures to further reduce file sizes.
- Use Mail Drop:
- Send via Mail Drop: If the file is still too large after compression, use Mail Drop to send a link to the file.
6.3 Recipient Can’t Open Attachment
Problem: The recipient reports they can’t open the attachment.
Possible Causes and Solutions:
- File Format Issues:
- Use Common Formats: Save photos in JPEG format and documents in PDF format, as these are widely supported.
- Convert Files: If the original file is in a less common format, convert it to a more universal format before sending.
- Corrupted File:
- Resend the File: The file may have been corrupted during transmission. Try resending it.
- Check Original File: Ensure the original file on your iPhone is not corrupted. Open it to verify.
- Recipient’s Software:
- Suggest Software: Advise the recipient to download the appropriate software to open the file (e.g., Adobe Acrobat Reader for PDF files).
6.4 Slow Upload Speed
Problem: Attachments take a very long time to upload.
Possible Causes and Solutions:
- Network Speed:
- Check Internet Speed: Use a speed test app to check your internet upload speed.
- Switch Networks: Try switching to a faster Wi-Fi network or using cellular data if it’s faster.
- Background Processes:
- Close Apps: Close unnecessary apps running in the background to free up bandwidth.
- Pause Syncing: Pause any ongoing syncing processes (e.g., iCloud Photos) that may be consuming bandwidth.
- Time of Day:
- Avoid Peak Times: Send large attachments during off-peak hours when network traffic is lower.
6.5 Email App Crashing
Problem: The Mail app crashes when trying to attach photos.
Possible Causes and Solutions:
- App Issues:
- Update the App: Ensure you’re using the latest version of the Mail app.
- Restart the App: Close the Mail app completely and reopen it.
- Reinstall the App: If the problem persists, delete the Mail app and reinstall it from the App Store.
- Storage Issues:
- Check Storage: Ensure your iPhone has enough free storage space. Delete unnecessary files and apps to free up space.
- iOS Version:
- Update iOS: Make sure your iPhone is running the latest version of iOS, as updates often include bug fixes.
6.6 Mail Drop Issues
Problem: Problems using Mail Drop, such as failed uploads or recipients unable to access the files.
Possible Causes and Solutions:
- File Size Limit:
- Stay Below Limit: Ensure your total attachment size is below the 5 GB limit.
- iCloud Issues:
- Check iCloud Status: Verify that iCloud is working correctly and that you’re signed in with the correct Apple ID.
- Restart Device: Restart your iPhone to resolve any temporary iCloud issues.
- Recipient Issues:
- Compatibility: Ensure the recipient’s email client is compatible with Mail Drop.
- Check Spam Folder: Advise the recipient to check their spam or junk folder for the Mail Drop link.
By systematically addressing these common issues, you can troubleshoot and resolve most problems encountered when sending photos as attachments on your iPhone.
7. What Are Some Alternative Methods For Sharing Photos From My iPhone?
If you’re encountering limitations with email attachments or simply prefer other methods, there are several alternative ways to share photos from your iPhone. These methods often offer more flexibility, higher file size limits, and additional features. Here’s a rundown of the best alternatives:
7.1 Cloud Storage Services
Cloud storage services are excellent for sharing large numbers of photos or high-resolution images. They allow you to upload your photos to the cloud and share a link with your recipients.
- Google Photos:
- Pros: Unlimited storage for photos (with slight compression), easy sharing options, automatic backup, and integration with other Google services.
- How to Use: Upload your photos to Google Photos, create an album, and share the album link.
- Dropbox:
- Pros: Versatile file storage, easy sharing, and collaboration features.
- How to Use: Upload your photos to Dropbox, create a shared link, and send the link to your recipients.
- iCloud Photos:
- Pros: Seamless integration with Apple devices, automatic syncing, and easy sharing options.
- How to Use: Enable iCloud Photos, create a shared album, and invite people to view it.
- Microsoft OneDrive:
- Pros: Integration with Microsoft services, generous storage options, and easy sharing.
- How to Use: Upload your photos to OneDrive, create a shareable link, and send the link to your recipients.
7.2 File Transfer Services
File transfer services are designed for sending large files quickly and easily, without requiring the recipient to create an account.
- WeTransfer:
- Pros: Simple and straightforward, no account needed for recipients, supports large files.
- How to Use: Go to the WeTransfer website or app, upload your photos, enter your email and the recipient’s email, and send.
- Send Anywhere:
- Pros: Fast file transfer, multiple sharing options, and secure file transfer.
- How to Use: Upload your photos to Send Anywhere, and choose a sharing method (link, email, or direct transfer).
7.3 Social Media Platforms
Social media platforms are great for sharing photos with a large audience or specific groups of people.
- Facebook:
- Pros: Easy sharing with friends and family, album creation, and privacy settings.
- How to Use: Upload your photos to Facebook, create an album, and set the privacy settings as desired.
- Instagram:
- Pros: Visually focused platform, filters and editing tools, and easy sharing with followers.
- How to Use: Upload your photos to Instagram, add filters and captions, and share with your followers.
- Twitter:
- Pros: Quick sharing with a wide audience, ideal for sharing individual photos or links to albums.
- How to Use: Upload your photos to Twitter and add a caption.
- Flickr:
- Pros: High-quality image storage, sharing with photography communities, and organization tools.
- How to Use: Upload your photos to Flickr, organize them into albums, and share with your contacts or the public.
7.4 Messaging Apps
Messaging apps are convenient for sharing photos with individual contacts or small groups.
- iMessage:
- Pros: Seamless integration with iOS, high-quality image sharing, and end-to-end encryption.
- How to Use: Open iMessage, select a contact, and attach your photos.
- WhatsApp:
- Pros: Widely used, supports various file types, and easy group sharing.
- How to Use: Open WhatsApp, select a contact or group, and attach your photos.
- Telegram:
- Pros: Secure messaging, supports large files, and cloud storage.
- How to Use: Open Telegram, select a contact or group, and attach your photos.
7.5 Using Airdrop
AirDrop is an excellent option for quickly sharing photos with nearby Apple devices.
- Pros: Fast and easy file transfer, no internet connection required, and high-quality image sharing.
- How to Use: Enable AirDrop in Control Center, select the photos you want to share, tap the share icon, and choose the recipient’s device.
By exploring these alternative methods, you can find the most convenient and effective way to share your photos from your iPhone, whether you’re sending a few snapshots or a large collection of high-resolution images.
8. What Are The Best Practices For Managing Photos On My iPhone?
Managing photos effectively on your iPhone ensures you can quickly find, share, and protect your precious memories. Here are some best practices to keep your photo library organized and optimized:
8.1 Organizing Photos
- Use Albums:
- Create Albums: Organize your photos into albums based on events, trips, people, or themes.
- Smart Albums: Utilize smart albums that automatically group photos based on criteria like location, date, or people.
- Keywords and Captions:
- Add Keywords: Use keywords to tag photos for easy searching.
- Write Captions: Add descriptive captions to provide context and details about each photo.
- Facial Recognition:
- Name Faces: Use the Photos app’s facial recognition feature to identify and name people in your photos.
8.2 Backing Up Photos
- iCloud Photos:
- Enable iCloud Photos: Automatically back up your entire photo library to iCloud.
- Optimize Storage: Choose “Optimize iPhone Storage” to save space on your device while keeping high-resolution photos in the cloud.
- Google Photos:
- Use Google Photos: Back up your photos to Google Photos for free (with slight compression) or subscribe for original quality storage.
- External Hard Drives:
- Regular Backups: Periodically back up your photos to an external hard drive for added security.
- Third-Party Services:
- Explore Options: Consider other cloud storage services like Dropbox or OneDrive for additional backup options.
8.3 Optimizing Storage
- Delete Duplicates:
- Identify Duplicates: Use apps like Gemini Photos to find and delete duplicate photos.
- Manual Review: Regularly review your photo library and delete any unnecessary duplicates.
- Compress Photos:
- Reduce File Size: Compress large photos to save storage space without significantly impacting quality.
- Clear Cache:
- Clear App Cache: Regularly clear the cache of apps that store photos to free up space.
8.4 Privacy and Security
- Hidden Album:
- Use Hidden Album: Move sensitive photos to the Hidden album for added privacy.
- Password Protection:
- Secure Albums: Use third-party apps to password-protect specific albums.
- Be Careful Sharing:
- Review Permissions: Always review sharing permissions before sharing photos on social media or cloud services.
8.5 Editing Photos
- Use Built-In Tools:
- Explore Features: Utilize the Photos app’s built-in editing tools to enhance your photos.
- Third-Party Apps:
- Powerful Editing: Use apps like Adobe Lightroom Mobile or VSCO for more advanced editing capabilities.
- Non-Destructive Editing:
- Preserve Originals: Ensure your editing process is non-destructive, allowing you to revert to the original photo if needed.
8.6 Regularly Reviewing and Culling
- Schedule Reviews:
- Set Reminders: Set regular reminders to review your photo library and delete unwanted photos.
- Be Ruthless:
- Delete Blurry Shots: Delete blurry, poorly composed, or redundant photos.
- Prioritize Quality:
- Keep The Best: Focus on keeping only the best shots that truly capture your memories.
8.7 Sharing Photos
- Choose The Right Method:
- Email Attachments: Use email for sending a few photos.
- Cloud Services: Use cloud services for sharing large albums.
- Messaging Apps: Use messaging apps for quick sharing with contacts.
- Compress Before Sending:
- Reduce File Size: Compress photos before sharing to ensure they send quickly and don’t consume excessive data.
By following these best practices, you can maintain an organized, efficient, and secure photo library on your iPhone. Regular maintenance and thoughtful management will help you preserve your memories and easily access them whenever you want.
9. How Can dfphoto.net Enhance My Photography Skills?
Dfphoto.net is your ultimate online resource for enhancing photography skills, offering a wealth of knowledge, inspiration, and community support. Whether you’re a beginner or a seasoned photographer, dfphoto.net provides the tools and resources you need to take your photography to the next level. Here’s how:
9.1 Extensive Learning Resources
Dfphoto.net offers a vast library of tutorials, guides, and articles covering various aspects of photography. You can explore topics such as:
- Basic Photography Techniques: Learn about aperture, shutter speed, ISO, and composition.
- Advanced Techniques: Master skills like HDR photography, long exposure, and panoramic shots.
- Post-Processing: Discover how to use software like Adobe Photoshop and Lightroom to enhance your images.
- Genre-Specific Guides: Find specialized guides for portrait, landscape, street, and wildlife photography.
9.2 Expert Tips and Advice
Benefit from the expertise of professional photographers and industry experts who share their insights and tips on dfphoto.net. You can learn about:
- Gear Reviews: Get unbiased reviews of cameras, lenses, and accessories to make informed purchasing decisions.
- Shooting Techniques: Discover new approaches to capturing stunning images in different environments.
- Business of Photography: Learn how to market your work, build a portfolio, and monetize your photography skills.
9.3 Inspirational Content
Dfphoto.net showcases stunning photographs from talented photographers around the world, providing a constant source of inspiration. You can:
- Browse Galleries: Explore curated galleries featuring exceptional images across various genres.
- Follow Featured Photographers: Discover and follow photographers whose work resonates with you.
- Participate in Contests: Submit your own photos to contests and challenges for a chance to gain recognition and feedback.
9.4 Community Engagement
Connect with a vibrant community of photography enthusiasts on dfphoto.net. You can:
- Join Forums: Participate in discussions, ask questions, and share your knowledge with other photographers.
- Share Your Work: Upload your photos to the site and receive constructive feedback from the community.
- Attend Events: Find local photography meetups, workshops, and exhibitions.
9.5 Portfolio Building
Dfphoto.net provides tools and resources to help you build a professional portfolio to showcase your best work. You can:
- Create a Profile: Set up a profile to display your photos, biography, and contact information.
- Curate Your Best Images: Select and present your strongest images in a visually appealing manner.
- Get Feedback: Receive critiques and suggestions from other photographers to improve your portfolio.
9.6 Staying Updated With Trends
Keep up with the latest trends and technologies in the world of photography through dfphoto.net. You can:
- Read News Articles: Stay informed about new camera releases, software updates, and industry events.
- Follow Bloggers: Subscribe to blogs and newsletters to receive insights and inspiration directly to your inbox.
- Explore Emerging Styles: Discover new and innovative approaches to photography.
9.7 Personalized Learning Paths
Dfphoto.net can help you create a personalized learning path tailored to your specific interests and goals. You can:
- Identify Your Goals: Determine what you want to achieve with your photography, whether it’s mastering a new technique or pursuing a professional career.
- Create a Plan: Develop a step-by-step plan with specific learning objectives and milestones.
- Track Your Progress: Monitor your progress and adjust your plan as needed to stay on track.
9.8 Networking Opportunities
Dfphoto.net offers opportunities to connect with other photographers, collaborate on projects, and expand your professional network. You can:
- Connect With Peers: Reach out to photographers whose work you admire and build relationships.
- Collaborate on Projects: Participate in joint projects to expand your skills and create new opportunities.
- Find Mentors: Seek guidance and advice from experienced photographers.
By taking advantage of the resources and opportunities available on dfphoto.net, you can enhance your photography skills, expand your creative horizons, and connect with a supportive community of fellow enthusiasts.
10. What Are Some Of The Latest Trends In Photography In The USA?
The photography landscape in the USA is continuously evolving, influenced by technological advancements, cultural shifts, and creative innovations. Keeping up with the latest trends can help photographers stay relevant, inspired, and competitive. Here’s a look at some of the hottest trends in photography in the USA:
10.1 Mobile Photography
The rise of smartphones with advanced camera capabilities has transformed photography, making it more accessible and spontaneous.
- Smartphone Cameras:
- High-Quality Images: Smartphones now offer impressive image quality, rivaling traditional cameras in many situations.
- Editing Apps: Mobile editing apps like VSCO, Snapseed, and Adobe Lightroom Mobile provide powerful tools for enhancing photos on the go.
- Social Media Integration:
- Instant Sharing: Mobile photography is seamlessly integrated with social media platforms, allowing for instant sharing of photos and stories.
- Influencer Culture: Mobile photography plays a significant role in influencer marketing, with many content creators relying on smartphones for their visual content.
10.2 Drone Photography
Drones have opened up new perspectives and creative possibilities in photography, allowing for aerial shots that were once difficult to achieve.
- Aerial Views:
- Stunning Landscapes: Drone photography provides breathtaking aerial views of landscapes, cityscapes, and natural wonders.
- Unique Perspectives: Drones offer unique perspectives for capturing events, real estate, and architectural subjects.
- Regulations and Safety:
- FAA Guidelines: Drone photographers must adhere to FAA guidelines and regulations to ensure safe and responsible operation.
- Insurance: Many drone photographers carry liability insurance to protect against potential accidents or damages.
10.3 Virtual Reality (VR) And 360° Photography
Virtual reality and 360° photography offer immersive experiences that transport viewers to another place and time.
- Immersive Experiences:
- VR Headsets: VR headsets allow viewers to explore 360° photos and videos in a fully immersive environment.
- Interactive Content: 360° photography is used in various applications, including real estate tours, travel experiences, and educational content.
- Technical Requirements:
- Specialized Equipment: Capturing VR and 360° content requires specialized cameras and equipment.
- Editing and Stitching: Post-processing involves stitching together multiple images to create a seamless 360° view.
10.4 Sustainable Photography
With growing awareness of environmental issues, sustainable photography practices are gaining popularity.
- Eco-Friendly Practices:
- Minimal Impact: Sustainable photographers strive to minimize their environmental impact by using eco-friendly equipment, reducing travel, and respecting wildlife.
- Ethical Considerations: Ethical considerations include obtaining permits, avoiding disturbance of natural habitats, and promoting conservation.
- Documenting Environmental Issues:
- Raising Awareness: Photography is used to document environmental issues such as climate change, deforestation, and pollution.
- Promoting Conservation: Photographers collaborate with conservation organizations to raise awareness and promote sustainable practices.
10.5 Authentic Storytelling
Consumers are increasingly drawn to authentic and relatable content, leading to a rise in storytelling through photography.