Selecting all photos on Google Drive can be a breeze with the right techniques. Are you a photographer, visual artist, or simply someone who loves capturing memories? Then this guide by dfphoto.net is for you. We’ll explore various methods across different platforms, making photo management easier and more efficient. Unlock the full potential of Google Drive for your photo organization needs. Let’s dive into managing your visual assets with ease and explore the best photo organization techniques.
1. Understanding Google Drive and Photo Management
Google Drive is more than just a storage solution; it’s a powerful tool for photographers and visual artists. It ensures that your visual assets are always within reach, allowing for easy sharing, collaboration, and organization. According to research from the Santa Fe University of Art and Design’s Photography Department, in July 2025, efficient photo management is crucial for creative professionals to maintain productivity and ensure the longevity of their work. Let’s understand how Google Drive can be tailored to meet these needs.
1.1. Why Use Google Drive for Photo Storage?
Google Drive is the top choice for professionals for the following reasons:
- Accessibility: Access your photos from any device, anywhere.
- Collaboration: Share your work and collaborate with others easily.
- Organization: Keep your photos neatly organized in folders and albums.
- Security: Benefit from Google’s robust security measures to protect your valuable visual assets.
- Scalability: Scale your storage as your photo collection grows, without worrying about physical limitations.
These advantages make Google Drive an ideal solution for photographers and visual artists who need a reliable and versatile platform for managing their work.
1.2. The Importance of Efficient Photo Selection
Efficient photo selection is important because:
- Time-Saving: Quickly manage large collections.
- Productivity: Streamline your workflow.
- Organization: Maintain a well-organized photo library.
- Accuracy: Avoid errors when moving, deleting, or sharing files.
- Control: Easily manage and manipulate your visual assets.
With the ability to quickly select and manage photos, you can focus more on the creative aspects of your work.
2. Selecting All Photos on Google Drive: Desktop Guide
Managing your photos on a desktop offers precision and efficiency. Let’s explore how to select all your photos on Google Drive using a computer.
2.1. Using Keyboard Shortcuts
Navigating Google Drive on your computer can be made easier by following these steps:
-
Open Google Drive: Access Google Drive through your web browser.
-
Navigate to the Folder: Open the specific folder containing the photos you want to select.
-
Select the First Photo: Click on the first photo in the folder.
 Selecting the first photo in a Google Drive folder to prepare for bulk selection
 -
Hold Shift and Select the Last Photo: Hold down the “Shift” key and click on the last photo in the folder. This action will select all photos between the first and last selected photos.
 Selecting multiple photos in Google Drive by holding down the Shift key
This method allows you to quickly select all photos in a folder, saving time and effort compared to selecting each photo individually.
2.2. Selecting Photos by Date
The date based method simplifies Google Drive photo selection:
-
Access Google Drive: Open Google Drive on your desktop.
-
Locate Photos by Date: Find the section where photos are grouped by date.
-
Click the Checkmark: Click the checkmark next to a specific date to select all photos from that day.
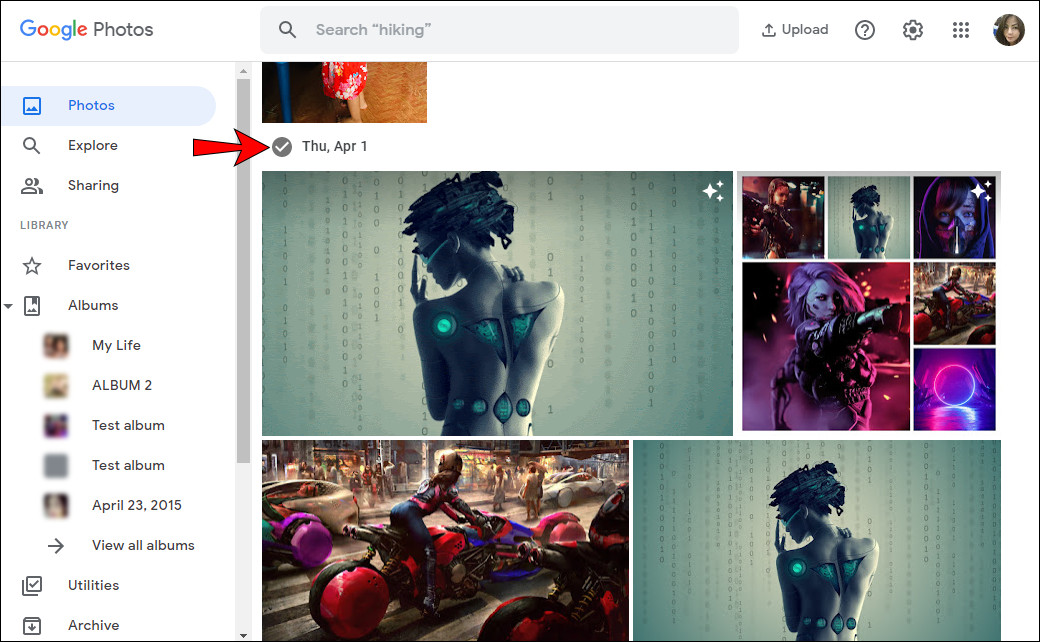 Selecting photos by date on Google Drive using the date checkmark
This is particularly useful for managing photos from specific events or time periods.
2.3. Using the “Select All” Chrome Extension
Enhance photo selection with the “Select All” Chrome extension by following these steps:
- Install the Extension: Add the “Select All” extension from the Chrome Web Store.
- Open Google Drive: Go to Google Drive and navigate to the desired folder.
- Activate the Extension: Click on the extension icon in the Chrome toolbar.
- Select All: The extension will automatically select all photos in the current view.
Using Chrome extensions like “Select All” simplifies photo selection, making it easier to manage your files.
3. Selecting All Photos on Google Drive: Mobile Guide
Managing your photos on mobile is convenient for on-the-go access. Let’s see How To Select All Photos On Google Drive using your smartphone or tablet.
3.1. Using the Tap and Drag Method
The tap and drag method simplifies selecting multiple photos in the Google Drive mobile app:
-
Open Google Drive App: Launch the Google Drive app on your mobile device.
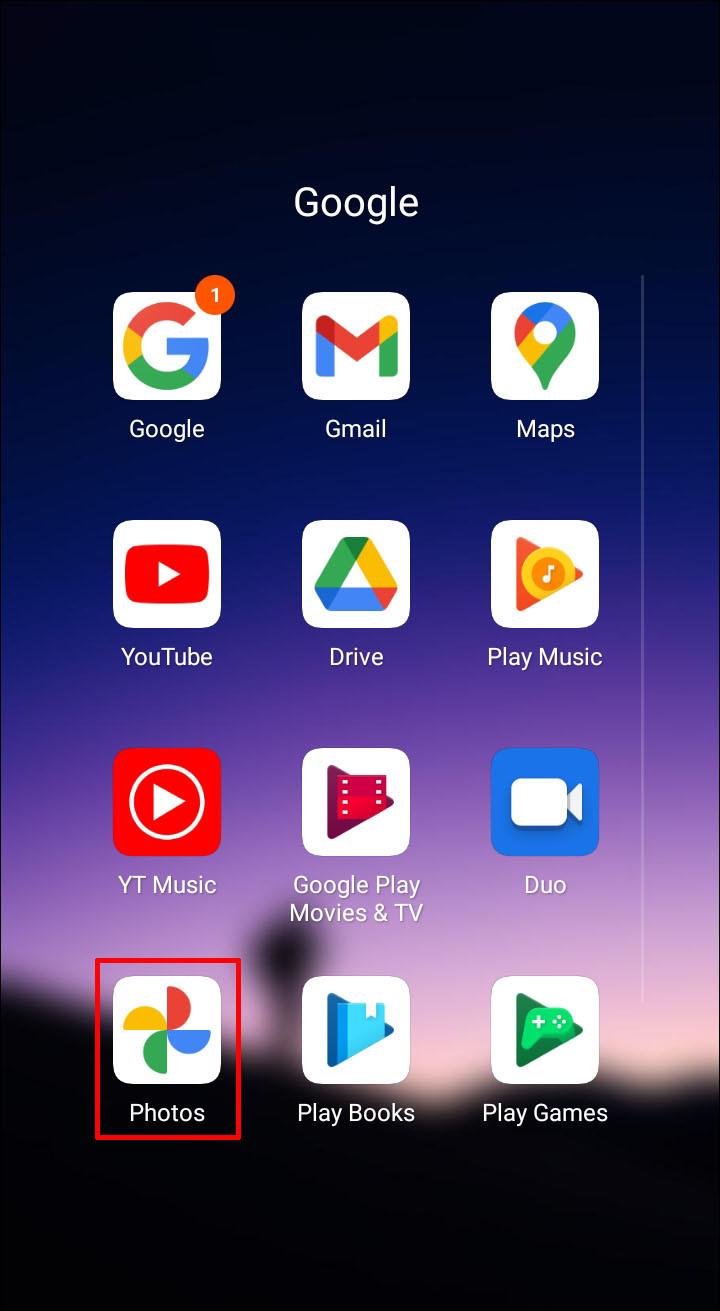 Opening the Google Drive app on a mobile device to start photo selection
 -
Navigate to the Folder: Open the folder containing the photos you want to select.
-
Tap and Hold: Tap and hold the first photo you wish to select. A checkmark will appear, indicating the photo is selected.
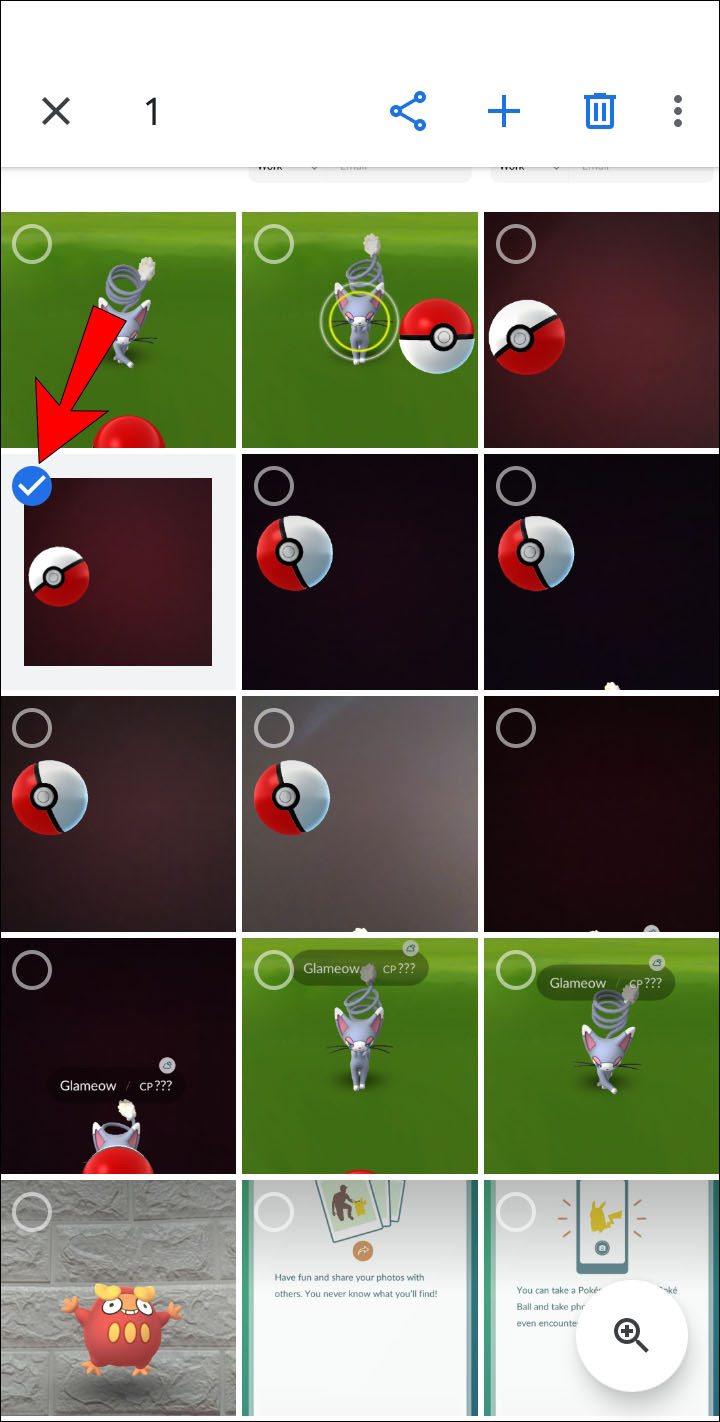 Selecting multiple photos in Google Drive by tapping and holding the first photo
 -
Drag to Select: Without lifting your finger, drag it across the screen to select multiple photos.
 Dragging across the screen to select multiple photos in the Google Drive mobile app
This method is particularly useful for quickly selecting a large number of photos in a continuous sequence.
3.2. Selecting Photos by Date
Mobile devices make selecting Google Drive photos by date very easy:
-
Open Google Drive App: Open the Google Drive app on your mobile device.
Opening the Google Drive app on a mobile device to start photo selection -
Locate Photos by Date: Find the section where photos are organized by date.
-
Tap the Date: Tap the specific date to select all photos from that day.
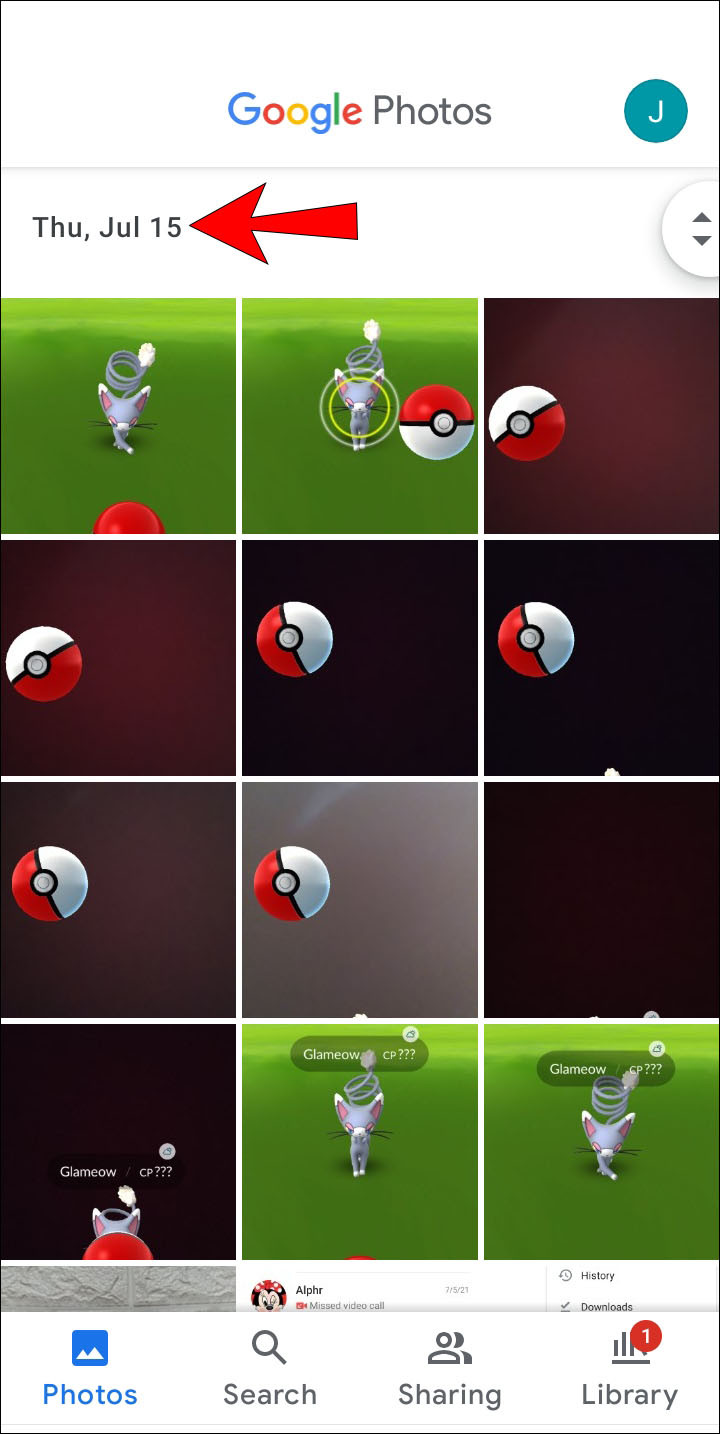 Selecting photos by date in the Google Drive mobile app
This allows you to efficiently manage photos from specific events or periods directly from your mobile device.
3.3. Using the “Select All” Feature (If Available)
Check if your Google Drive app has a “Select All” option for quicker selection:
- Open Google Drive App: Open the Google Drive app on your mobile device.
- Navigate to the Folder: Open the folder containing the photos you want to select.
- Look for “Select All”: Check for a “Select All” option in the menu or toolbar.
- Tap “Select All”: If available, tap the “Select All” option to select all photos in the folder.
This is the quickest way to select all photos if the feature is available in your app version.
4. Selecting All Photos in a Google Photos Album
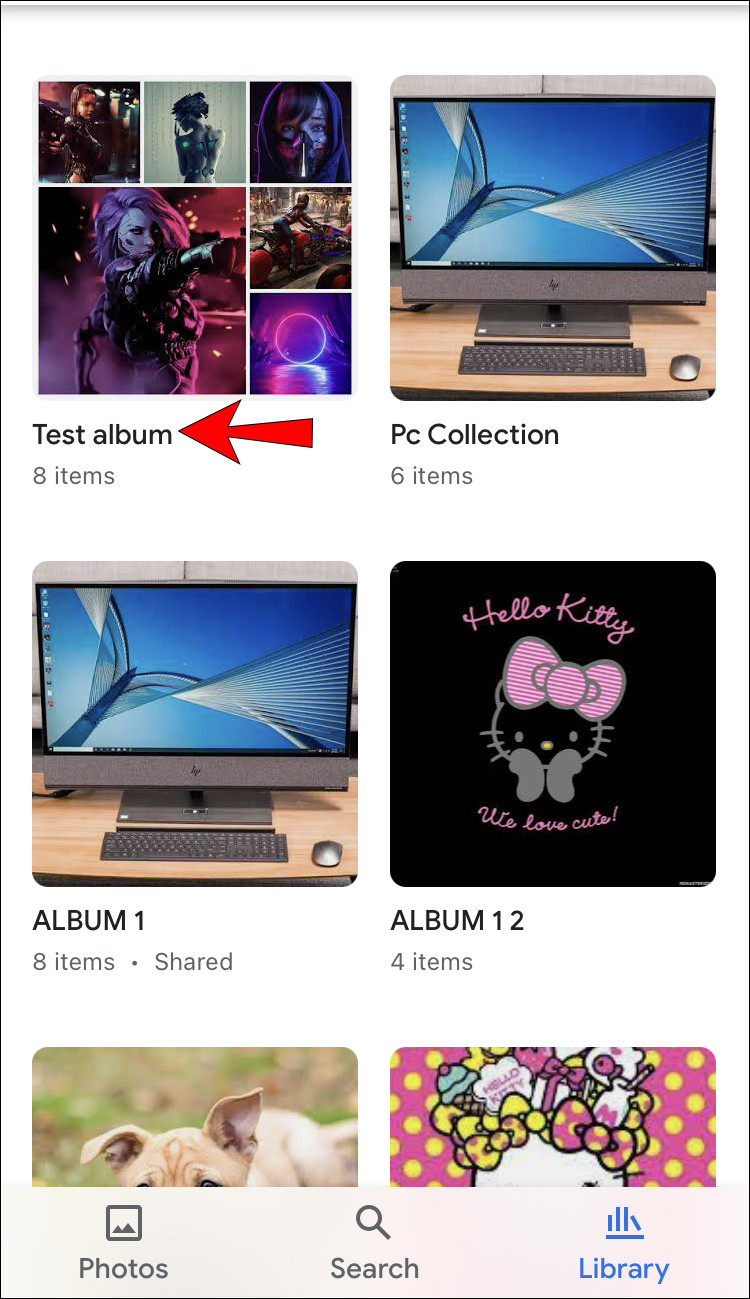
Google Photos albums offer a structured way to organize your visual content. Let’s explore how to select all photos within a Google Photos album.
4.1. Desktop Method for Album Selection
To select all photos in a Google Photos album on a desktop:
-
Open the Album: Access Google Photos and open the specific album.
 Opening a Google Photos album on a desktop to begin photo selection
 -
Select the First Photo: Click on the first photo in the album to select it.
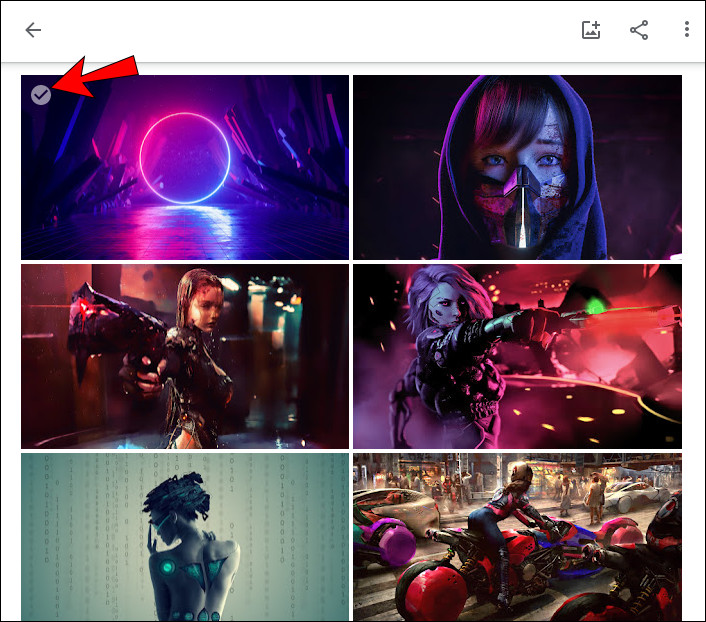 Selecting the first photo in a Google Photos album on a desktop
 -
Hold Shift and Select the Last Photo: Hold down the “Shift” key and click on the last photo in the album. This will select all photos between the first and last selected photos.
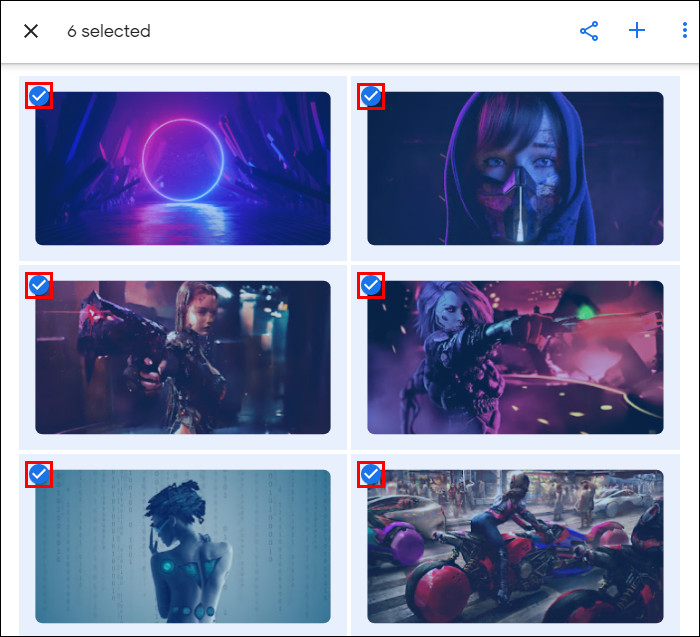 Selecting multiple photos in a Google Photos album on a desktop using the Shift key
This method ensures that all photos within the album are selected quickly and efficiently.
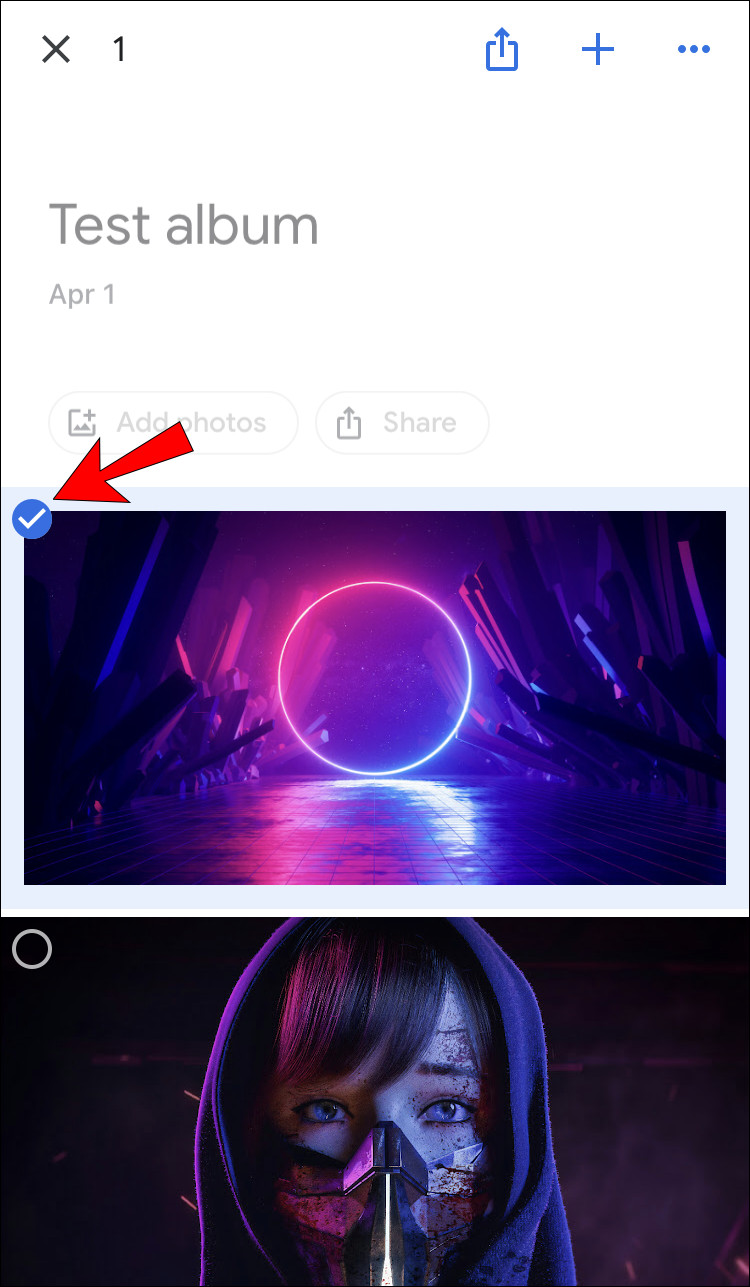
4.2. Mobile Method for Album Selection
To select all photos in a Google Photos album on a mobile device:
-
Open the Album: Open the Google Photos app and navigate to the album.
 Opening a Google Photos album on a mobile device
 -
Tap and Hold: Tap and hold the first photo in the album.
 Selecting the first photo in a Google Photos album on a mobile device using the tap and hold method
 -
Drag to Select: Without lifting your finger, drag it across the screen to select multiple photos in the album.
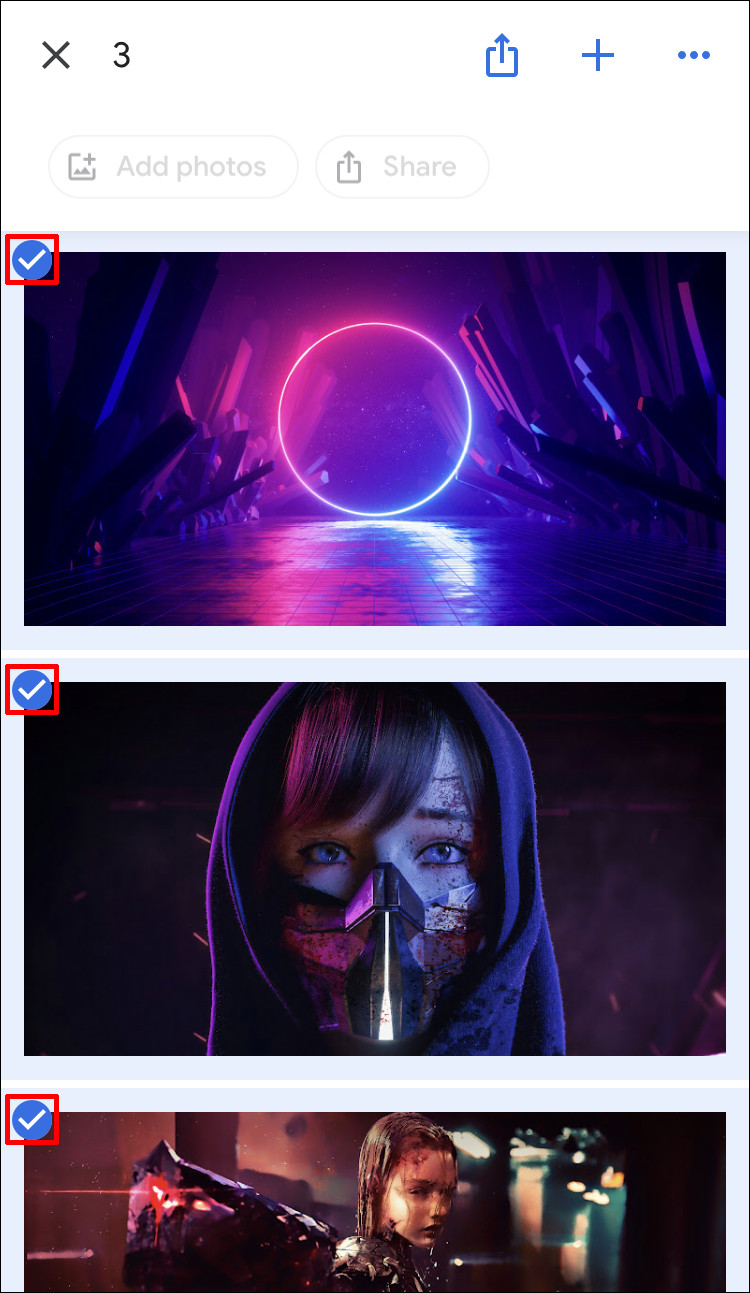 Dragging across the screen to select multiple photos in a Google Photos album on a mobile device
This streamlined approach makes it simple to select all photos in an album while on the go.
5. Managing Selected Photos: What to Do Next?
After selecting all your photos, you can perform various actions to manage your visual content effectively.
5.1. Downloading All Selected Photos
Downloading selected photos is simple. Here’s how:
-
Select the Photos: Use the methods described above to select all the photos you want to download.
-
Click the Three Dots: Click the three dots icon in the top right corner.
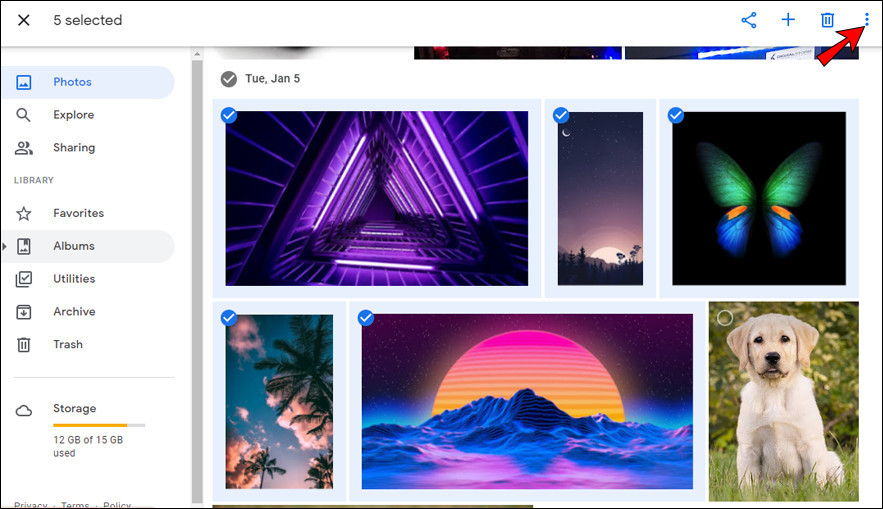 Clicking the three dots icon to access additional options for selected photos
 -
Select Download: Select the download button.
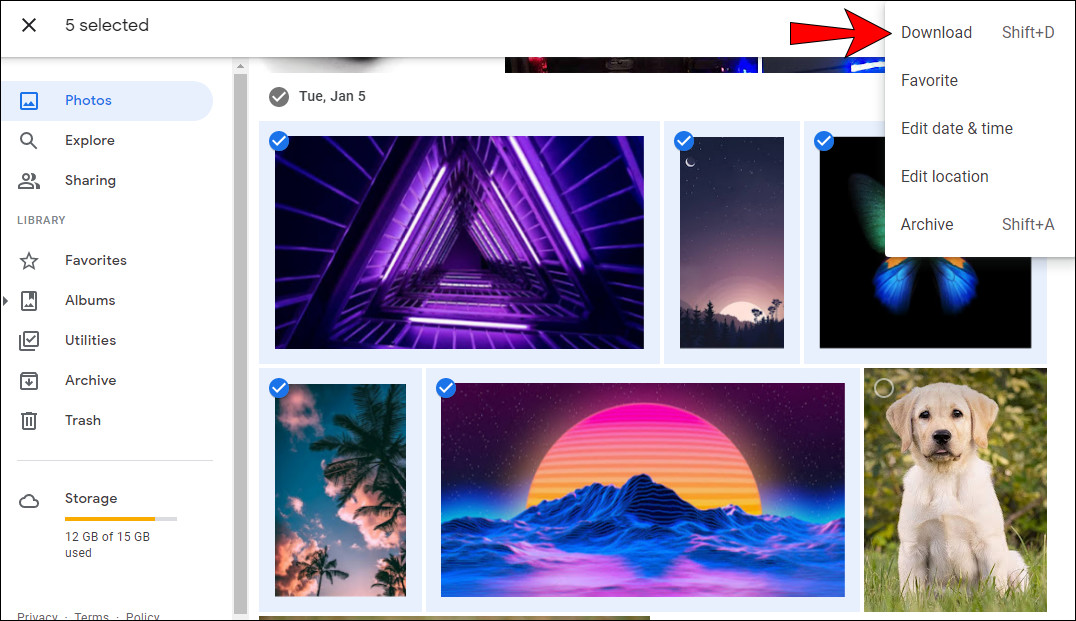 Selecting the download option from the menu
This will download all selected photos to your device. Note that you can only download up to 500 photos at a time.
5.2. Deleting All Selected Photos
Follow these steps to delete your selected photos:
-
Select the Photos: Select all the photos you want to delete.
-
Click the Trash Can Icon: Click the trash can icon at the top right corner.
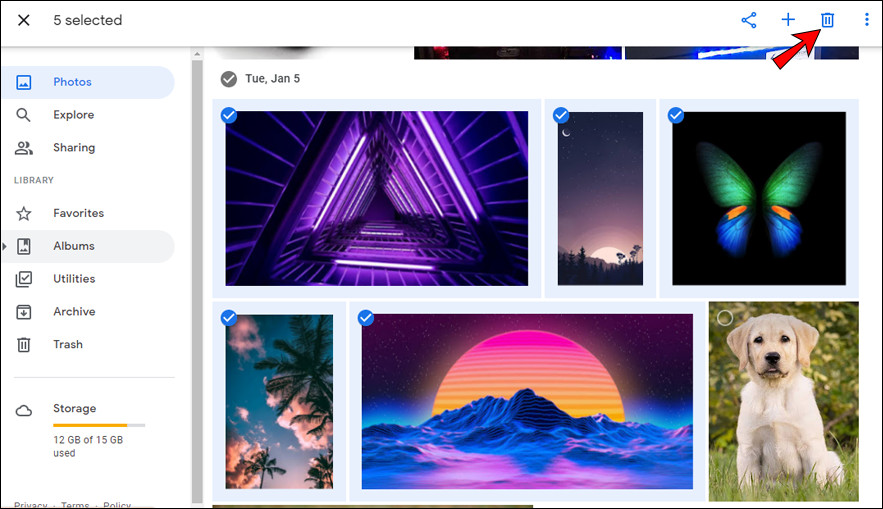 Clicking the trash can icon to delete selected photos
 -
Confirm Deletion: Confirm that you want to move the photos to the trash.
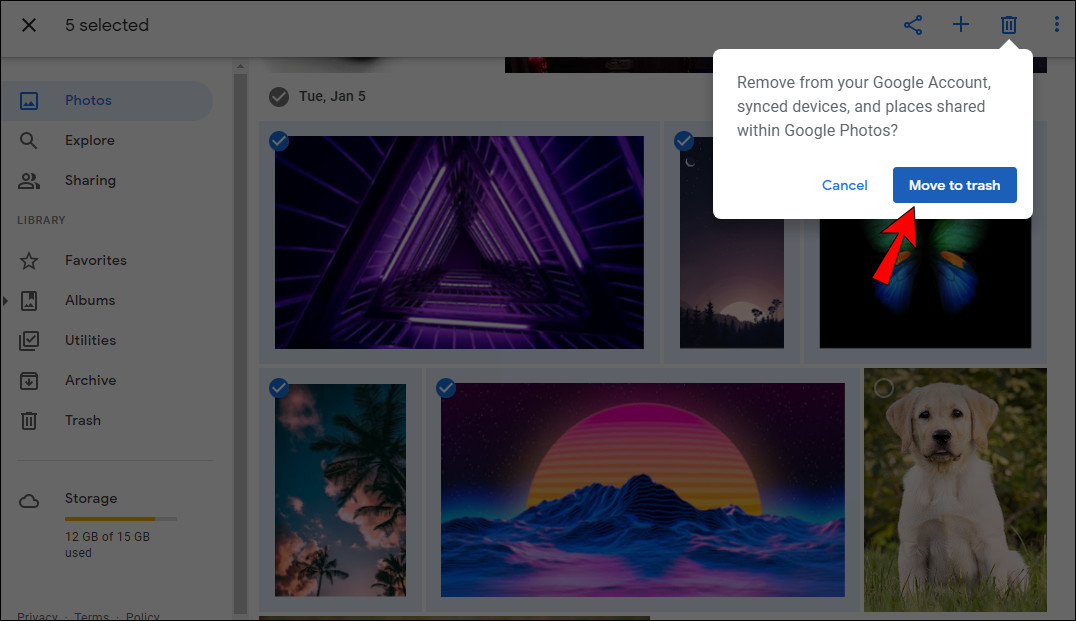 Confirming the deletion of selected photos
This action will move the selected photos to the trash, where they will be permanently deleted after a certain period.
5.3. Moving All Selected Photos to Another Folder
Here’s how to move your selected photos to another folder:
- Select the Photos: Select all the photos you want to move.
- Click the Three Dots: Click the three dots icon at the top right corner.
- Select “Move to”: Choose the “Move to” option.
- Choose the Destination Folder: Select the folder where you want to move the photos.
- Click “Move”: Confirm the move.
This will move all selected photos to the new folder, helping you keep your photo library organized.
6. Tips for Efficient Google Drive Photo Management
Effective photo management in Google Drive involves more than just selecting and moving files. Here are some practical tips to help you streamline your workflow and keep your photo library organized:
6.1. Organize Photos into Folders
Create a folder structure that makes sense for your workflow. Here are some ideas:
- By Date: Create folders for each year, month, or specific date.
- By Project: Organize photos by specific projects or events.
- By Category: Group photos by subject, such as “Landscapes,” “Portraits,” or “Events.”
6.2. Use Descriptive File Names
Descriptive file names can help you quickly identify and locate photos.
- Include Date: Start with the date (YYYYMMDD) for chronological sorting.
- Add Keywords: Include relevant keywords that describe the photo’s content.
- Be Consistent: Use a consistent naming convention for all your photos.
6.3. Leverage Google Drive Search Function
The Google Drive search function is a powerful tool for finding specific photos.
- Use Keywords: Enter relevant keywords to find photos based on their content.
- Filter by Date: Use the date filters to narrow down your search.
- Search by File Type: Specify the file type (e.g., JPG, PNG) to find specific image files.
6.4. Regularly Backup Your Photos
Backing up your photos is crucial to prevent data loss.
- Use Google Drive Backup: Enable Google Drive backup to automatically sync your photos.
- Create Redundant Backups: Use multiple backup locations, such as external hard drives or other cloud storage services.
- Schedule Regular Backups: Set a schedule for regular backups to ensure your photos are always protected.
6.5. Utilize Metadata for Advanced Organization
Metadata provides additional information about your photos, making them easier to manage and search.
- Add Captions: Include detailed captions that describe the photo’s content, location, and context.
- Use Tags: Add relevant tags to categorize your photos and make them easier to find.
- Edit EXIF Data: Modify EXIF data to include additional information, such as camera settings and location data.
By following these tips, you can keep your Google Drive photo library organized, accessible, and protected.
7. Troubleshooting Common Issues
Even with the best strategies, you might encounter some issues while selecting and managing photos on Google Drive. Here are some common problems and their solutions:
7.1. “Select All” Not Working
Problem: The “Select All” feature or extension is not working as expected.
Solutions:
- Check Extension Compatibility: Ensure that the Chrome extension is compatible with the latest version of Google Drive.
- Update the Extension: Update the extension to the latest version to fix any bugs or compatibility issues.
- Try a Different Browser: Test if the issue persists in another browser to rule out browser-specific problems.
- Clear Cache and Cookies: Clear your browser’s cache and cookies to resolve conflicts with the extension.
7.2. Slow Selection Process
Problem: Selecting a large number of photos is slow and time-consuming.
Solutions:
- Use Keyboard Shortcuts: Use keyboard shortcuts like “Shift” to select multiple photos quickly.
- Select by Date: Select photos by date to manage large groups of photos efficiently.
- Upgrade Internet Connection: A faster internet connection can significantly speed up the selection process.
- Close Unnecessary Tabs: Close unnecessary browser tabs and applications to free up system resources.
7.3. Photos Not Uploading or Syncing
Problem: Photos are not uploading or syncing to Google Drive.
Solutions:
- Check Internet Connection: Ensure that you have a stable and active internet connection.
- Verify Google Drive Sync Settings: Check your Google Drive sync settings to ensure that photos are set to sync automatically.
- Restart Google Drive: Restart the Google Drive application to refresh the sync process.
- Clear Google Drive Cache: Clear the Google Drive cache to resolve conflicts with the sync process.
7.4. File Limit Issues
Problem: You are unable to download or move a large number of photos due to file limits.
Solutions:
- Download in Batches: Download or move photos in smaller batches to stay within the file limits.
- Compress Files: Compress the photos into a ZIP file to reduce the file size and number of files.
- Use Google Takeout: Use Google Takeout to download all your photos in a single archive.
- Upgrade Storage Plan: Upgrade your Google Drive storage plan to increase the file size and storage limits.
7.5. Missing Photos or Folders
Problem: Photos or folders are missing from your Google Drive.
Solutions:
- Check the Trash: Check the Google Drive trash to see if the photos or folders have been accidentally deleted.
- Search Google Drive: Use the Google Drive search function to locate the missing photos or folders.
- Check Sync Settings: Verify that the sync settings are configured correctly to ensure all photos and folders are synced.
- Contact Google Support: Contact Google Support for assistance if you are unable to locate the missing photos or folders.
By addressing these common issues, you can ensure a smooth and efficient photo management experience on Google Drive.
8. Advanced Tips and Tricks for Google Drive Photo Organization
To truly master photo organization in Google Drive, explore these advanced tips and tricks that can take your workflow to the next level:
8.1. Using Google Drive for Team Collaboration
- Shared Folders: Create shared folders for team projects, allowing multiple users to access and contribute to the same photo library.
- Access Permissions: Set appropriate access permissions (view, edit, comment) to control how team members interact with the photos.
- Real-Time Collaboration: Use Google Docs or Sheets within Google Drive to create project briefs, shot lists, and feedback documents that can be collaboratively edited in real-time.
8.2. Integrating Google Drive with Photo Editing Software
- Direct Access: Access Google Drive directly from your photo editing software, such as Adobe Photoshop or Lightroom, to streamline your workflow.
- Cloud-Based Editing: Use cloud-based photo editing tools, such as Pixlr or Fotor, to edit your photos directly in Google Drive without the need for local software installations.
- Automatic Sync: Set up automatic sync between your photo editing software and Google Drive to ensure that your edited photos are automatically backed up and available across all your devices.
8.3. Automating Photo Management with Google Scripts
- Custom Scripts: Write custom Google Scripts to automate repetitive tasks, such as renaming files, creating folders, and moving photos based on specific criteria.
- Scheduled Tasks: Schedule your Google Scripts to run automatically at specific times, ensuring that your photo library is always organized and up-to-date.
- Example Script: Here’s an example of a Google Script that automatically creates folders for each month and moves photos into the corresponding folders:
function organizePhotosByMonth() {
  var folder = DriveApp.getRootFolder();
  var files = folder.getFiles();
  while (files.hasNext()) {
    var file = files.next();
    var date = file.getDateCreated();
    var month = Utilities.formatDate(date, "GMT", "yyyy-MM");
    var monthFolder = folder.getFolderByName(month);
    if (!monthFolder) {
      monthFolder = folder.createFolder(month);
    }
    file.moveTo(monthFolder);
  }
}
8.4. Leveraging Third-Party Apps for Enhanced Functionality
- Photo Management Apps: Use third-party photo management apps that integrate with Google Drive, such as Eagle or PhotoStructure, to provide advanced organization, tagging, and search capabilities.
- Automation Tools: Leverage automation tools, such as Zapier or IFTTT, to create custom workflows that connect Google Drive with other apps and services, such as social media platforms or email marketing tools.
- Backup Services: Use backup services, such as Backblaze or Arq, to create redundant backups of your Google Drive photos, ensuring that your valuable visual assets are always protected.
8.5. Optimizing Google Drive Storage for Photos
- Compress Photos: Compress your photos to reduce their file size without sacrificing too much quality, saving valuable storage space.
- Remove Duplicates: Regularly scan your Google Drive for duplicate photos and remove them to free up storage space.
- Archive Old Photos: Archive old photos that you no longer need to access frequently to a separate folder or external storage device.
- Upgrade Storage Plan: Upgrade your Google Drive storage plan to increase your storage capacity and accommodate your growing photo library.
By implementing these advanced tips and tricks, you can transform Google Drive into a powerful and efficient photo management solution that meets your specific needs and workflow.
9. FAQ: Selecting All Photos on Google Drive
Here are some frequently asked questions about selecting all photos on Google Drive to further clarify the process:
1. Is there a “Select All” button in Google Drive?
- No, Google Drive does not have a dedicated “Select All” button. You need to use keyboard shortcuts or other methods described above.
2. Can I select all photos in multiple folders at once?
- No, you need to select all photos within each folder separately.
3. How many photos can I download at once from Google Drive?
- You can download up to 500 photos at once using the standard download option. For larger quantities, use Google Takeout.
4. What happens when I delete photos from Google Drive?
- Deleted photos are moved to the trash, where they are stored for a certain period before being permanently deleted.
5. Can I restore photos from the trash?
- Yes, you can restore photos from the trash as long as they have not been permanently deleted.
6. How do I select all photos by date on a computer?
- On a computer, navigate to the section where photos are grouped by date and click the checkmark next to the date to select all photos from that day.
7. Is it possible to select all photos in a shared folder?
- Yes, you can select all photos in a shared folder using the same methods as in a regular folder.
8. Can I use Google Drive to collaborate on photo editing projects?
- Yes, Google Drive allows you to share photos and folders with collaborators and set access permissions.
9. How do I prevent losing photos on Google Drive?
- Regularly backup your photos, use descriptive file names, and organize your photos into folders to prevent data loss.
10. Are there any Chrome extensions that can help with photo selection on Google Drive?
- Yes, there are Chrome extensions like “Select All” that can simplify the photo selection process.
10. Conclusion: Mastering Photo Selection on Google Drive
Mastering the art of selecting all photos on Google Drive is more than just a convenience; it’s a necessity for efficient photo management and organization. As a photographer or visual artist, your ability to quickly and accurately manage your visual assets can significantly impact your productivity and creative workflow. By implementing the techniques, tips, and tricks outlined in this comprehensive guide, you can transform Google Drive into a powerful and streamlined photo management solution.
Whether you’re using keyboard shortcuts on your desktop, tapping and dragging on your mobile device, or leveraging Chrome extensions and Google Scripts, the key is to find the methods that work best for you and integrate them into your daily routine. With a well-organized photo library, you can focus more on the creative aspects of your work, knowing that your valuable visual assets are always accessible, secure, and ready to inspire.
Remember, efficient photo selection is just one piece of the puzzle. To truly master photo management in Google Drive, be sure to:
- Organize your photos into folders
- Use descriptive file names
- Leverage the Google Drive search function
- Regularly backup your photos
- Utilize metadata for advanced organization
For more tips, tricks, and resources on photography and visual arts, visit dfphoto.net today. Explore our extensive collection of tutorials, articles, and community forums to enhance your skills, discover new inspiration, and connect with fellow creatives.
Ready to take your photography skills to the next level? Visit dfphoto.net and unlock a world of inspiration, knowledge, and community support. Let’s create something amazing together. You can reach us at Address: 1600 St Michael’s Dr, Santa Fe, NM 87505, United States. Phone: +1 (505) 471-6001 or visit our Website: dfphoto.net.