Are you struggling to view and manage your photos efficiently on your Mac? Understanding how to see photos on Mac is essential for photographers and visual enthusiasts alike. At dfphoto.net, we offer comprehensive solutions to help you organize, view, and share your images seamlessly, ensuring you get the most out of your visual content.
1. What Are The Default Methods To See Photos On Mac?
Yes, you can use the Photos app, Finder, or Preview to view photos on your Mac. Each method offers different functionalities and benefits for managing and viewing your images.
- Photos App: The Photos app is the default application for managing and viewing photos on macOS. It offers a user-friendly interface with features like facial recognition, albums, and iCloud synchronization.
- Finder: You can also view photos directly in Finder by navigating to the folder where your images are stored. Finder provides a simple way to browse and preview photos without opening a dedicated application.
- Preview: Preview is another built-in macOS application that allows you to quickly view and edit photos. It supports various image formats and offers basic editing tools like cropping and rotating.
2. How Do I Use The Photos App To View My Images?
Using the Photos app is an intuitive way to see and manage your images on a Mac. Here’s how you can make the most of it.
Step-by-Step Guide:
- Import Photos: Open the Photos app and import your images by dragging and dropping them into the window, or by using the “File > Import” option.
- Organize Your Photos: Use albums and folders to categorize your photos. You can create new albums by clicking the “+” button and dragging photos into them.
- View Photos: Double-click any photo to view it in full screen. Use the arrow keys to navigate between images.
- Use Smart Albums: Smart Albums automatically organize photos based on criteria you set, such as date, location, or keywords.
- Utilize the “Memories” Feature: The Photos app creates “Memories,” which are collections of photos and videos based on events, locations, or people. This feature can help you rediscover old photos and create slideshows.
Benefits of Using the Photos App:
- Facial Recognition: Automatically identifies and groups photos of the same people.
- iCloud Integration: Seamlessly syncs your photos across all your Apple devices.
- Editing Tools: Offers a range of editing tools for enhancing your images.
- Organization: Simplifies photo management with albums, folders, and smart albums.
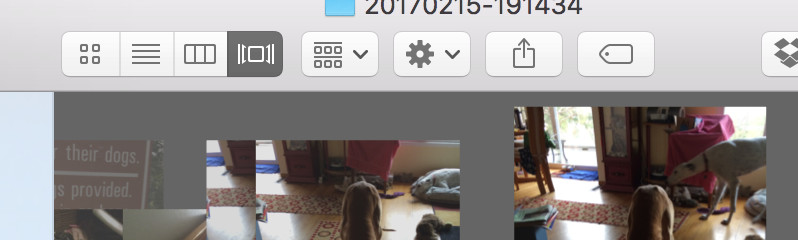
3. How Can I Quickly Preview Photos Using Finder?
Finder offers a quick and easy way to preview photos without opening them in a separate application. Here’s how to do it.
Step-by-Step Guide:
- Open Finder: Navigate to the folder containing your photos.
- Select Photos: Select the photo you want to preview.
- Use Quick Look: Press the spacebar to activate Quick Look, which displays a large preview of the selected photo.
- Navigate Photos: Use the arrow keys to browse through other photos in the folder while in Quick Look.
- View Slideshow: Click the “Slideshow” button in Quick Look to view all photos in the folder as a slideshow.
Tips for Efficient Use:
- Customize Finder: Adjust the Finder view settings to display thumbnails of your photos for easier browsing.
- Use Column View: Column View in Finder allows you to navigate through folders while seeing a preview of the selected photo in the rightmost column.
- Batch Preview: Select multiple photos and press the spacebar to preview them all at once in Quick Look.
4. What Are The Best Practices For Organizing Photos On Mac?
Organizing your photos effectively can save you time and frustration. Here are some best practices to keep your photo library in order.
Effective Organization Techniques:
- Consistent Naming Conventions: Use descriptive names for your photo files that include the date, location, and event.
- Folder Structure: Create a logical folder structure based on year, month, and event. For example, “2024 > Summer Vacation > Beach Trip.”
- Tagging and Keywords: Add tags and keywords to your photos to make them searchable. Use descriptive tags like “sunset,” “beach,” or “family.”
- Use Smart Albums: Create Smart Albums in the Photos app to automatically group photos based on specific criteria.
- Regularly Backup Your Photos: Use Time Machine or iCloud to back up your photo library regularly to prevent data loss.
- Utilize Third-Party Apps: Consider using third-party photo management apps like Adobe Lightroom or Capture One for more advanced organization features.
 Finder showing Package Contents with Masters folder selected
5. Can I Access Photos Directly From The Photos Library In Finder?
While it’s possible to access the Photos Library in Finder, it’s generally not recommended due to the complex structure of the library.
Explanation:
- Complex Structure: The Photos Library is a database that stores photos in a specific structure that is not meant for direct access.
- Potential for Data Loss: Modifying or deleting files directly in the Photos Library can lead to data loss or corruption of your photo library.
- Supported Methods: It is recommended to use the Photos app or export photos for accessing and managing your images.
- Hidden Masters Folder: Inside the Photos Library, you can find a “Masters” folder, but directly accessing it can still be risky.
Alternative Methods:
- Export Photos: Use the “File > Export” option in the Photos app to export copies of your photos to a folder on your Mac.
- Media Browser: Use the Media Browser to access your Photos Library from other applications like iMovie or Final Cut Pro.
6. What If I Want To Use Third-Party Software To View And Manage Photos?
Using third-party software can provide advanced features for viewing and managing your photos. Several options are available, each with its unique benefits.
Popular Third-Party Options:
- Adobe Lightroom: A professional photo management and editing tool with advanced organization, editing, and sharing features.
- Capture One: Another professional-grade photo editing software known for its superior image quality and tethered shooting capabilities.
- Google Photos: A cloud-based photo storage and management service with automatic backup and organization features.
- DigiKam: An open-source photo management application with advanced tagging and organization features.
Benefits of Third-Party Software:
- Advanced Editing Tools: More sophisticated editing capabilities compared to the Photos app.
- Better Organization: Advanced tagging, keyword, and metadata management features.
- Workflow Integration: Seamless integration with other creative applications.
- Cloud Storage: Options for cloud-based backup and synchronization.
7. How Can I View Photos From My iPhone On My Mac?
Viewing photos from your iPhone on your Mac is straightforward, thanks to Apple’s ecosystem.
Methods for Viewing iPhone Photos on Mac:
- iCloud Photos: Enable iCloud Photos on both your iPhone and Mac to automatically sync your photos across devices.
- AirDrop: Use AirDrop to wirelessly transfer photos from your iPhone to your Mac.
- USB Connection: Connect your iPhone to your Mac using a USB cable and import photos using the Photos app or Image Capture.
- My Photo Stream: If you have an older setup, My Photo Stream automatically uploads your most recent photos to your Mac.
Step-by-Step Guide for iCloud Photos:
- Enable iCloud Photos on iPhone: Go to Settings > Photos and turn on iCloud Photos.
- Enable iCloud Photos on Mac: Open the Photos app on your Mac, go to Preferences > iCloud, and check the iCloud Photos box.
- Wait for Sync: Allow some time for your photos to sync between your iPhone and Mac.
8. How Do I Deal With Duplicate Photos On My Mac?
Duplicate photos can clutter your photo library and waste storage space. Here’s how to identify and remove them.
Methods for Finding and Removing Duplicates:
- Photos App (Limited): The Photos app does not have a built-in duplicate finder.
- Third-Party Duplicate Finders: Use third-party apps like Gemini 2, PhotoSweeper, or Duplicate File Finder to scan your photo library for duplicates.
- Manual Review: Manually review your photo library and identify duplicate photos.
Step-by-Step Guide Using Gemini 2:
- Download and Install Gemini 2: Download Gemini 2 from the Mac App Store or the developer’s website.
- Scan Your Photo Library: Open Gemini 2 and select your Photos Library to scan for duplicates.
- Review Duplicates: Gemini 2 will display a list of duplicate photos. Review the list and select the duplicates you want to remove.
- Remove Duplicates: Click the “Remove” button to delete the selected duplicates.
9. Can I Edit Photos Directly From Finder?
You can perform basic edits on photos directly from Finder using the Preview app.
Step-by-Step Guide:
- Open Photo in Preview: Right-click the photo in Finder and select “Open with > Preview.”
- Access Editing Tools: Click the “Show Markup Toolbar” button to access editing tools like crop, rotate, adjust color, and annotate.
- Make Edits: Use the editing tools to make the desired changes to your photo.
- Save Changes: Click “File > Save” to save the changes to the photo.
Limitations of Editing in Preview:
- Basic Tools: Preview offers only basic editing tools compared to dedicated photo editing software.
- Non-Destructive Editing: Preview’s editing is non-destructive, meaning the original photo is preserved, and edits are saved as a separate layer.
10. What Are The Best Ways To Share Photos From My Mac?
Sharing photos from your Mac is easy and offers various options depending on your needs.
Methods for Sharing Photos:
- Email: Share photos directly from the Photos app or Finder via email.
- Social Media: Share photos to social media platforms like Facebook, Twitter, and Instagram.
- AirDrop: Use AirDrop to share photos with nearby Apple devices.
- iCloud Photo Sharing: Create shared albums in the Photos app and invite others to view and contribute.
- Third-Party Services: Use third-party services like Dropbox, Google Photos, or SmugMug to share your photos.
Step-by-Step Guide for Sharing via Email:
- Select Photos: Select the photos you want to share in the Photos app or Finder.
- Share Option: Click the “Share” button and select “Mail.”
- Compose Email: An email window will open with the selected photos attached. Add the recipient’s email address and compose your message.
- Send Email: Click the “Send” button to send the email with the attached photos.
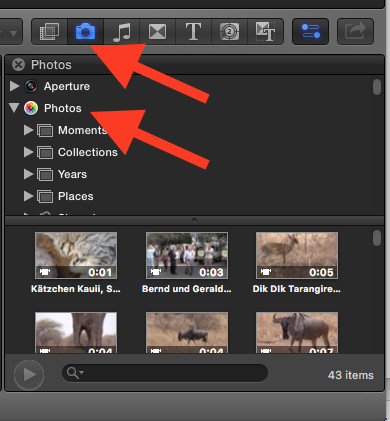 User browsing Photos Library in Final Cut Pro X
11. Understanding Photo File Formats on Mac
Understanding different photo file formats can help you manage and optimize your images on a Mac.
Common Photo File Formats:
| File Format | Description | Use Cases |
|---|---|---|
| JPEG/JPG | A widely used format known for its efficient compression, making it ideal for web use and general photography. | Web images, social media, general photography |
| PNG | A lossless format that preserves image quality, making it suitable for graphics with text or sharp lines. | Logos, graphics with text, images requiring transparency |
| TIFF | A high-quality format often used in professional photography and printing, offering lossless compression or no compression. | Archiving, professional photography, printing |
| HEIC | Apple’s modern image format that offers better compression than JPEG while maintaining image quality. | Default format for iPhone photos, efficient storage |
| RAW | Contains unprocessed data captured by the camera sensor, providing maximum flexibility for editing and adjustments. | Professional photography, extensive editing |
| GIF | Supports animation and is commonly used for simple animated images on the web. | Animated images, simple graphics |
| PSD | Adobe Photoshop’s native format, which supports layers and advanced editing features. | Complex image editing in Photoshop |
| WebP | A modern image format developed by Google that provides superior lossless and lossy compression for images on the web. | Web images, optimized for online use |
| AVIF | A modern image format based on the AV1 video codec, offering high compression efficiency and image quality. | Web images, video frames |
| DNG | A publicly available archival format for raw files, ensuring that photographers will be able to access their files in the future. | Archiving raw files, ensuring future access |
| HEIF | A versatile image container format for individual images and image sequences, as well as storing image-related data. | Storing images and related data |
| SVG | A vector image format that uses XML to describe images. It is resolution-independent and can be scaled without losing quality. | Logos, icons, illustrations |
| BMP | A raster graphics image file format used to store digital images, independent of display devices, especially on Microsoft Windows and OS/2 operating systems. | Storing digital images |
| HDR/EXR | High Dynamic Range image formats which can represent a greater range of luminance levels than standard digital imaging techniques. | Capturing high-contrast scenes, special effects in visual effects (VFX) and computer-generated imagery (CGI) |
| PPM/PGM/PBM | Simple image formats typically used for educational purposes. PPM (Portable Pixmap) is for color images, PGM (Portable Graymap) is for grayscale images, and PBM (Portable Bitmap) is for binary images. | Educational purposes, simple image processing tasks |
12. Optimizing Photo Storage on Your Mac
Efficient photo storage is crucial for maintaining your Mac’s performance and preventing storage issues. Here’s how to optimize photo storage effectively.
Strategies for Optimizing Photo Storage:
- Use iCloud Photos: Store your photos in iCloud to free up space on your Mac. Enable the “Optimize Mac Storage” option to keep smaller, optimized versions on your Mac while storing full-resolution photos in the cloud.
- External Hard Drives: Move your photo library to an external hard drive to free up space on your Mac’s internal storage.
- Cloud Storage Services: Use cloud storage services like Google Photos, Dropbox, or OneDrive to store and backup your photos.
- Compress Photos: Compress large photo files to reduce their file size without significantly impacting image quality.
- Delete Unnecessary Photos: Regularly review your photo library and delete duplicate or unnecessary photos.
Step-by-Step Guide for Moving Photo Library to External Hard Drive:
- Connect External Drive: Connect your external hard drive to your Mac.
- Locate Photo Library: Locate your Photo Library in the “Pictures” folder.
- Copy Photo Library: Drag and drop the Photo Library to your external hard drive.
- Open Photo Library from External Drive: Hold down the Option key while opening the Photos app and select the Photo Library on your external drive.
13. Backing Up Your Photo Library
Regularly backing up your photo library is essential to prevent data loss. Here’s how to back up your photos effectively.
Backup Methods:
- Time Machine: Use Time Machine, macOS’s built-in backup utility, to back up your entire system, including your photo library, to an external hard drive.
- iCloud Photos: Enable iCloud Photos to automatically backup your photos to the cloud.
- Third-Party Backup Services: Use third-party backup services like Backblaze or Carbonite to backup your photo library to the cloud.
- Manual Backup: Manually copy your photo library to an external hard drive or other storage device.
Step-by-Step Guide for Backing Up with Time Machine:
- Connect External Drive: Connect an external hard drive to your Mac.
- Open Time Machine Preferences: Go to System Preferences > Time Machine.
- Select Backup Disk: Click “Select Backup Disk” and choose your external hard drive.
- Enable Automatic Backups: Turn on the “Back Up Automatically” option.
- Start Backup: Time Machine will automatically start backing up your system, including your photo library.
14. Troubleshooting Common Photo Viewing Issues on Mac
Encountering issues while viewing photos on your Mac can be frustrating. Here are some common problems and how to troubleshoot them.
Common Issues and Solutions:
| Issue | Solution |
|---|---|
| Photos not displaying correctly | Ensure your macOS and Photos app are up to date. Restart your Mac. Check for corrupted photo files. |
| Photos app crashing | Update macOS and the Photos app. Repair the Photo Library by holding down Option and Command while opening the Photos app, then selecting “Repair.” |
| iCloud Photos not syncing | Verify that iCloud Photos is enabled on both your Mac and iPhone. Check your iCloud storage and ensure you have enough space. Ensure you are signed in to the same Apple ID on all devices. |
| Slow photo loading | Optimize your Photo Library by enabling “Optimize Mac Storage” in iCloud Photos settings. Close unnecessary applications to free up system resources. Upgrade your Mac’s storage if it is full. |
| Cannot import photos from iPhone | Ensure your iPhone is unlocked and trusts your Mac. Use a different USB cable or port. Restart both your iPhone and Mac. |
| Duplicate photos | Use third-party duplicate finder apps like Gemini 2 or PhotoSweeper to identify and remove duplicate photos. |
| Corrupted Photo Library | Repair the Photo Library by holding down Option and Command while opening the Photos app, then selecting “Repair.” If repairing doesn’t work, restore your Photo Library from a Time Machine backup. |
| Incompatible file format | Convert the photo to a compatible format like JPEG or PNG using Preview or a third-party image converter. |
| Thumbnail previews not showing | Clear Finder’s cache by running the command qlmanage -r cache in Terminal. Restart your Mac. |
| Missing or deleted photos | Check the “Recently Deleted” album in the Photos app. Restore your Photo Library from a Time Machine backup or iCloud backup. |
| Photos app using too much storage | Enable “Optimize Mac Storage” in iCloud Photos settings to keep smaller, optimized versions of your photos on your Mac and store full-resolution photos in iCloud. Consider moving your Photo Library to an external hard drive. |
15. Tips for Improving Your Photo Viewing Experience
Enhance your photo viewing experience on your Mac with these helpful tips.
Tips for Better Photo Viewing:
- Calibrate Your Display: Calibrate your Mac’s display to ensure accurate color representation.
- Use Full Screen Mode: View photos in full screen mode to minimize distractions.
- Customize the Photos App: Adjust the Photos app settings to suit your preferences.
- Use Keyboard Shortcuts: Learn keyboard shortcuts for navigating and editing photos quickly.
- Create Slideshows: Create slideshows to enjoy your photos in a dynamic and engaging way.
16. How to Integrate Photos with Other Apple Apps
Seamless integration with other Apple apps enhances the photo management experience on a Mac. Here’s how to integrate your photos effectively.
Integration with Apple Apps:
- iMovie and Final Cut Pro: Access your Photo Library directly from iMovie and Final Cut Pro for video editing projects.
- Pages, Keynote, and Numbers: Insert photos into your documents, presentations, and spreadsheets.
- Mail: Share photos directly from the Photos app via email.
- Messages: Send photos to your contacts via Messages.
Step-by-Step Guide for Using Photos in iMovie:
- Open iMovie: Open iMovie and create a new project or open an existing one.
- Access Photo Library: Click the “Media” button and select “Photos Library” from the sidebar.
- Browse Photos: Browse your Photo Library and select the photos you want to use in your iMovie project.
- Drag Photos to Timeline: Drag the selected photos to the timeline to add them to your movie.
17. Leveraging Metadata for Photo Management
Metadata provides valuable information about your photos, making them easier to manage and search. Here’s how to leverage metadata effectively.
Understanding Metadata:
- What is Metadata? Metadata is data that describes other data. In the context of photos, metadata includes information such as date taken, location, camera settings, and keywords.
- Types of Metadata: Common metadata types include EXIF (Exchangeable Image File Format), IPTC (International Press Telecommunications Council), and XMP (Extensible Metadata Platform).
How to Use Metadata:
- View Metadata: View metadata in the Photos app by selecting a photo and pressing Command + I to open the Info panel.
- Add Keywords and Tags: Add keywords and tags to your photos to make them searchable.
- Use Smart Albums: Create Smart Albums in the Photos app based on metadata criteria such as date, location, or keywords.
18. The Future of Photo Management on Mac
The future of photo management on Mac is likely to involve advancements in AI, cloud integration, and user experience. Here’s what you can expect.
Expected Advancements:
- AI-Powered Organization: AI will play a greater role in automatically organizing and tagging photos.
- Enhanced Cloud Integration: Seamless integration with cloud services for backup, storage, and sharing.
- Improved Editing Tools: More advanced and intuitive editing tools for enhancing your photos.
- Better User Experience: User-friendly interfaces and streamlined workflows for managing your photo library.
19. Understanding RAW vs. JPEG
Choosing between RAW and JPEG formats is essential for photographers. Here’s a breakdown of the key differences and when to use each.
RAW Format:
- Definition: RAW files contain unprocessed data captured directly from the camera’s sensor.
- Advantages:
- Maximum image quality
- Greater flexibility for editing and adjustments
- Wider dynamic range
- Disadvantages:
- Larger file sizes
- Require specialized software for viewing and editing
JPEG Format:
- Definition: JPEG (Joint Photographic Experts Group) is a compressed image format that reduces file size by discarding some image data.
- Advantages:
- Smaller file sizes
- Widely compatible with devices and software
- Easy to share and view
- Disadvantages:
- Loss of image quality due to compression
- Less flexibility for editing and adjustments
When to Use RAW vs. JPEG:
- RAW:
- Professional photography
- Extensive editing and post-processing
- Situations where image quality is critical
- JPEG:
- Everyday photography
- Sharing photos online
- Situations where storage space is limited
20. Advanced Editing Techniques on Mac
Mastering advanced editing techniques can transform your photos from ordinary to extraordinary. Here are some techniques to elevate your photo editing skills on a Mac.
Advanced Editing Techniques:
- Layered Editing: Use software like Adobe Photoshop or Affinity Photo to work with layers, allowing for non-destructive editing and complex adjustments.
- Masking: Create masks to selectively apply edits to specific areas of your photo.
- Color Grading: Adjust the colors in your photos to create a specific mood or style.
- Frequency Separation: Separate the texture and color information in your photos to retouch skin and remove blemishes without affecting overall image quality.
- Dodging and Burning: Lighten (dodge) or darken (burn) specific areas of your photo to enhance contrast and create depth.
21. Using Shortcuts to Manage Photos on Mac
Utilizing shortcuts can significantly speed up photo management on your Mac.
Useful Shortcuts:
| Shortcut | Action |
|---|---|
| Command + I | Show Info panel |
| Spacebar | Quick Look preview |
| Command + Delete | Move to Trash |
| Command + Shift + Delete | Empty Trash |
| Command + C | Copy |
| Command + V | Paste |
| Command + Z | Undo |
| Command + Shift + Z | Redo |
| Command + A | Select All |
| Command + N | New Album |
| Command + Shift + N | New Smart Album |
| Command + Option + I | Adjust date and time |
| Command + Shift + E | Export |
| Command + Comma (,) | Open Photos Preferences |
| Command + Q | Quit Photos |
| Shift + Command + K | Add keywords |
| Command + L | Add a location |
| Command + F | Search |
| Option + Click on Adjustments | Reset adjustments |
| Option + Click on Retouch tool | Show the size of the Retouch tool |
| Command + Plus Sign (+) | Zoom in |
| Command + Minus Sign (-) | Zoom out |
| Command + 0 (zero) | Fit image to screen |
| Arrow keys | Navigate between photos |
| Command + Arrow Keys | Navigate between albums |
| Shift + Arrow Keys | Select multiple photos |
| Command + Option + Shift + E | Export unmodified original |
| Command + Control + T | Batch title change |
| Command + Y | Start a slideshow |
| Fn + Up/Down Arrow | Page Up/Down |
| Command + Option + Click & Drag | Drag photos between albums without copying |
| Right click + Show Package Contents | Access the file system structure of the Photos library |
22. Creating Photo Albums & Slideshows on Mac
Photo albums and slideshows are great for organizing and sharing memories.
Creating Albums:
- Open Photos App: Open the Photos app on your Mac.
- Create New Album: Click the “+” button in the sidebar and select “Album” or “Smart Album”.
- Name Album: Enter a name for your album.
- Add Photos: Drag photos from your library into the new album.
Creating Slideshows:
- Select Photos: Select the photos you want to include in the slideshow.
- Create Slideshow: Right-click the selected photos and choose “Slideshow”.
- Customize Settings: Customize the slideshow settings, such as theme, music, and duration.
- Play Slideshow: Click the “Play” button to start the slideshow.
23. How To Recover Lost Photos on Mac
Accidental deletion of photos is a common issue. Here’s how to recover lost photos on your Mac.
Recovery Methods:
- Recently Deleted Album: Check the “Recently Deleted” album in the Photos app, where deleted photos are stored for 30 days.
- Time Machine Backup: Restore your Photo Library from a Time Machine backup.
- iCloud Backup: Restore photos from iCloud if you have iCloud Photos enabled.
- Data Recovery Software: Use data recovery software like Disk Drill or EaseUS Data Recovery Wizard to scan your Mac for deleted photos.
Step-by-Step Guide for Restoring from Time Machine:
- Open Time Machine: Open Time Machine from the menu bar or Finder.
- Navigate to Backup: Navigate to a backup date before the photos were deleted.
- Locate Photo Library: Locate your Photo Library in the “Pictures” folder.
- Restore Photo Library: Select the Photo Library and click the “Restore” button.
24. Understanding Photo Library Permissions
Proper photo library permissions are essential for maintaining the integrity and accessibility of your photos on a Mac. Here’s what you need to know.
Importance of Permissions:
- Access Control: Permissions control who can access and modify your Photo Library.
- Prevent Data Loss: Correct permissions prevent unauthorized access and accidental deletion or modification of your photos.
How to Manage Permissions:
- Locate Photo Library: Locate your Photo Library in the “Pictures” folder.
- Get Info: Right-click the Photo Library and select “Get Info.”
- Sharing & Permissions: Scroll down to the “Sharing & Permissions” section.
- Adjust Permissions: Adjust the permissions for each user listed, such as Read & Write or Read only.
- Apply Changes: Click the lock icon to make changes and enter your administrator password.
25. Best External Displays for Photo Viewing on Mac
An external display can significantly enhance your photo viewing and editing experience on a Mac. Here are some top recommendations.
Recommended External Displays:
- Apple Pro Display XDR: A high-end display with exceptional color accuracy and brightness.
- LG UltraFine 5K Display: A 5K display that offers excellent image quality and compatibility with Macs.
- BenQ PhotoVue SW Series: A range of professional displays designed for photographers with features like hardware calibration and wide color gamut.
- Dell UltraSharp Series: A popular choice for its color accuracy, sharpness, and ergonomic design.
- EIZO ColorEdge Series: Known for their high-quality color management and precise image reproduction.
26. Maintaining a Clean Desktop
Keeping your desktop organized is key to maintaining productivity and reducing distractions. Here are some tips for keeping a clean desktop.
Tips for Maintaining a Clean Desktop:
- Regularly Organize Files: Take a few minutes each day to organize files and folders on your desktop.
- Use Stacks: Enable Stacks in Finder to automatically group files of the same type.
- Create Folders: Create folders for different projects or categories of files.
- Limit Desktop Icons: Keep only essential icons on your desktop.
- Use Cloud Storage: Store files in cloud services like iCloud Drive or Dropbox instead of on your desktop.
27. Exploring Panoramic Photos on Mac
Panoramic photos offer a wide-angle view, capturing more of a scene than a standard photo. Here’s how to explore panoramic photos on your Mac.
Viewing Panoramic Photos:
- Open in Photos App: Open panoramic photos in the Photos app.
- Zoom and Scroll: Zoom in and scroll horizontally to view the entire panorama.
- Quick Look: Use Quick Look in Finder to preview panoramic photos.
Creating Panoramic Photos:
- Use iPhone Camera: Use the Panorama mode on your iPhone camera to capture panoramic photos.
- Third-Party Apps: Use third-party apps like Adobe Photoshop or PTGui to stitch together multiple photos into a panorama.
28. Using iCloud Photo Library with Multiple Devices
If you use multiple Apple devices like iPhones and iPads, iCloud Photo Library can ensure all photos are available in once central location across all devices.
Set Up:
- Enable iCloud Photos on All Devices: Go to Settings (or System Preferences) > Photos and turn on iCloud Photos.
- Sign into the Same Apple ID: Ensure all devices are signed into the same Apple ID.
- Choose Storage Option: Decide whether to “Optimize Storage” or “Download and Keep Originals” on each device based on your storage needs.
- Wait for Sync: Photos will sync across devices whenever they are connected to Wi-Fi.
Benefits:
- Access the same library of photos on iPhones, iPads, and Macs.
- All edits and albums will also sync across devices.
- If “Optimize Storage” is selected, device storage will not be overburdened.
29. How To Optimize Photos for Sharing Online
When sharing photos online, optimizing them is important to reduce load times, use less data, and make sure they appear as intended.
Optimization Tips:
- Resize Images: Scale down the image to an appropriate size for web use. A width between 1200 to 2000 pixels is often sufficient.
- Compress Images: Reduce the file size by adjusting the image quality. JPEGs can be compressed effectively with minimal visible loss.
- Remove Unnecessary Metadata: Reducing the amount of metadata will also reduce file size.
- Use Web-Friendly Formats: JPEG for photographs and PNG for graphics with text or transparency.
- Preview and Test: Always preview your images after optimization to ensure they still look good.
30. Printing Photos from Mac
Printing photos from your Mac allows you to create physical copies of your favorite memories, whether at home or at a local shop.
Printing Photos:
- Select the Photos: Select one or more photos from the Photos app, Finder, or Preview.
- Open Print Dialog: Click File > Print (or press Command + P).
- Adjust Print Settings:
- Select your printer.
- Choose the paper size and type.
- Adjust layout options (like number of photos per page).
- Set quality settings.
- Print: Click the “Print” button to send the job to the printer.
- Alternatively, Use a Local Print Shop: Export photos and take them to a local printing shop for professional-quality prints.
At dfphoto.net, we are dedicated to helping you master your photography skills and create stunning visuals. Explore our website for more tutorials, tips, and inspiration.
Address: 1600 St Michael’s Dr, Santa Fe, NM 87505, United States.
Phone: +1 (505) 471-6001
Website: dfphoto.net
FAQ: How To See Photos in Mac
1. How do I view photos on my Mac?
You can see photos on your Mac using the Photos app, Finder, or Preview. The Photos app is best for organization, Finder for quick previews, and Preview for basic edits.
2. How do I import photos into the Photos app on my Mac?
To import photos, open the Photos app and drag and drop images into the window, or use “File > Import” from the menu.
3. Can I organize photos in the Photos app?
Yes, you can organize photos using albums, folders, and Smart Albums. Smart Albums automatically group photos based on criteria like date or keywords.
4. How can I quickly preview photos in Finder?
Select a photo in Finder and press the spacebar to use Quick Look, which displays a large preview.
5. Is it safe to access the Photos Library directly in Finder?
It’s generally not recommended because the complex structure of the library can lead to data loss. Use the Photos app or export photos instead.
6. What are the best third-party apps for managing photos on Mac?
Popular options include Adobe Lightroom, Capture One,