Accessing your cherished memories stored in iCloud Photos on your Windows PC is a breeze. This guide provides a step-by-step walkthrough on how to set up iCloud Photos on your PC, view your photos and videos, and manage your photo library seamlessly.
Setting Up iCloud Photos on Your Windows PC
Before you can access your iCloud Photos on your PC, ensure iCloud is set up on your iPhone, iPad, or Mac. You should also have iCloud Photos enabled and be signed in with your Apple ID.
- Download and Install iCloud for Windows: Download iCloud for Windows from the official Apple website and install it on your PC.
- Sign in with Your Apple ID: Launch iCloud for Windows and sign in using your Apple ID credentials.
- Enable iCloud Photos: Locate the “Photos” option and click the arrow next to it. Check the box to enable “iCloud Photos”.
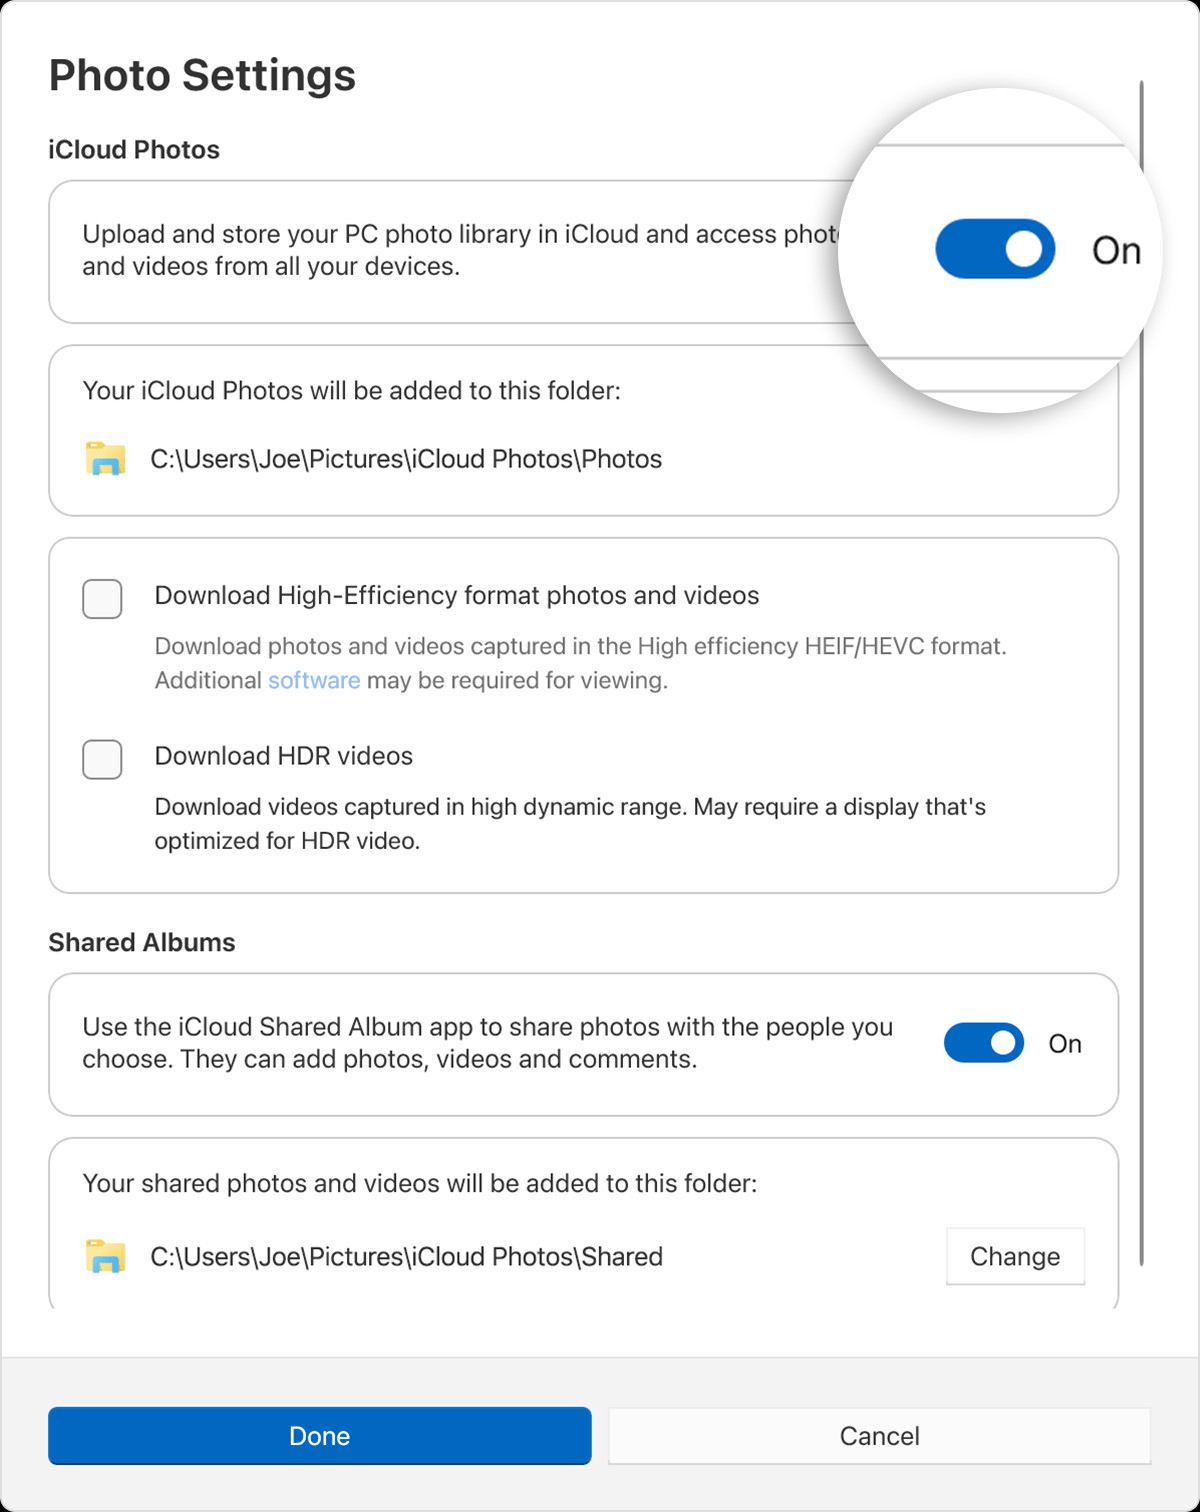 Enabling iCloud Photos in iCloud for Windows settings.
 - Choose Download Preferences (Optional): In newer versions of iCloud for Windows, you can click “Advanced” to specify whether you want to download photos and videos in high-efficiency format or original quality. This helps manage storage space on your PC. You can also enable “Shared Albums” here.
- Confirm Settings: Click “Done” to save your settings.
Locating Your iCloud Photos on Your PC
Once iCloud Photos is set up, your photos and videos will be stored in a dedicated folder on your PC: C:\Users\[user name]\Pictures\iCloud Photos\Photos.
Accessing iCloud Photos in Windows 11
- Open the Microsoft Photos App: Launch the pre-installed Photos application.
- Select iCloud Photos: In the left-hand navigation pane, you should see “iCloud Photos” listed as a source. Click on it to browse your photos and videos.
Accessing iCloud Photos in Windows 10 or Later
- Use File Explorer: Open File Explorer.
- Navigate to iCloud Photos: In the Navigation pane, click on “iCloud Photos” to access your photo library directly.
Downloading and Managing Your iCloud Photos
New photos and videos added to iCloud Photos will automatically appear on your PC.
- Downloading Individual Files: Double-click a thumbnail to download the full-resolution file from iCloud.
- Keeping Files Locally: Right-click on selected photos or videos in File Explorer and choose “Always keep on this device” to ensure they are always available offline.
Uploading Photos and Videos to iCloud from Your PC
Adding photos and videos from your PC to iCloud Photos is simple:
- Open iCloud Photos in File Explorer: Navigate to the iCloud Photos folder using File Explorer.
- Locate the Photos to Upload: Open a separate File Explorer window and find the photos and videos you want to add to iCloud.
- Drag and Drop: Simply drag and drop the selected files into the iCloud Photos folder. They will be automatically uploaded to iCloud.
Deleting Photos and Videos
Deleting a photo or video in File Explorer or the Microsoft Photos app will also remove it from iCloud Photos and all your synced devices.
Conclusion
Viewing your iCloud photos on your PC offers a convenient way to access and manage your entire photo library. By following these simple steps, you can seamlessly integrate iCloud Photos into your Windows workflow, ensuring your precious memories are always within reach.