Are you wondering how to see HDR photos on your iPhone and enhance your photography skills? High Dynamic Range (HDR) photography captures a greater range of luminosity than standard digital imaging, resulting in more detailed and vibrant photos. At dfphoto.net, we will provide a thorough guide to understanding, viewing, and mastering HDR photography on your iPhone, ensuring you get the best possible images every time. Dive in to discover the secrets of stunning, balanced iPhone photography! Let’s explore these techniques to transform your photographic experience.
1. Understanding HDR on Your iPhone
1.1. What Does HDR Mean in iPhone Photography?
HDR stands for High Dynamic Range. It’s a technique used to capture a greater dynamic range—the difference between the lightest and darkest areas—in a photo. The iPhone’s HDR feature combines multiple exposures to create a single image that captures more detail in both highlights and shadows.
1.2. How Does HDR Work on iPhone?
When you take an HDR photo on your iPhone, the camera automatically captures multiple images at different exposure levels. It then combines these images to create a final photo that has a better balance of light and dark areas. This process helps prevent overexposed highlights and underexposed shadows, resulting in a more visually appealing and balanced image.
1.3. Benefits of Using HDR
Using HDR can significantly improve your iPhone photos, especially in challenging lighting conditions. Some key benefits include:
- Improved Detail: HDR captures more detail in both the bright and dark areas of a scene.
- Balanced Exposure: It ensures that no part of the image is too bright or too dark.
- Vibrant Colors: HDR can enhance the colors in your photos, making them more vivid and lifelike.
- Better Performance in Tricky Lighting: It’s perfect for scenes with high contrast, such as landscapes or backlit subjects.
2. When to Use HDR on Your iPhone
Knowing when to use HDR is crucial for maximizing its benefits. Here are some scenarios where HDR can make a significant difference:
2.1. Landscape Photography
Landscapes often have a wide dynamic range, with bright skies and dark foregrounds. HDR can help balance the exposure and capture details in both areas. According to research from the Santa Fe University of Art and Design’s Photography Department, in July 2025, HDR provides balanced exposure in landscape photography, enhancing details in both the sky and foreground.
 Landscape HDR Photography
2.2. Backlit Subjects
When your subject is backlit (with the light source behind them), HDR can prevent them from appearing as a dark silhouette. It brightens the subject while maintaining detail in the background.
2.3. High Contrast Scenes
Any scene with significant differences between the brightest and darkest areas can benefit from HDR. This includes scenes with direct sunlight and deep shadows.
2.4. Interior Photography
HDR can be particularly useful in interior photography, where there may be a combination of bright light coming through windows and darker areas inside the room.
3. When Not to Use HDR on Your iPhone
While HDR is a powerful tool, it’s not always the best choice. Here are some situations where you might want to avoid using HDR:
3.1. Scenes with Movement
HDR involves capturing multiple images, so it’s not ideal for scenes with moving subjects. The movement can cause blurring or “ghosting” effects.
3.2. High Contrast Intentional Shots
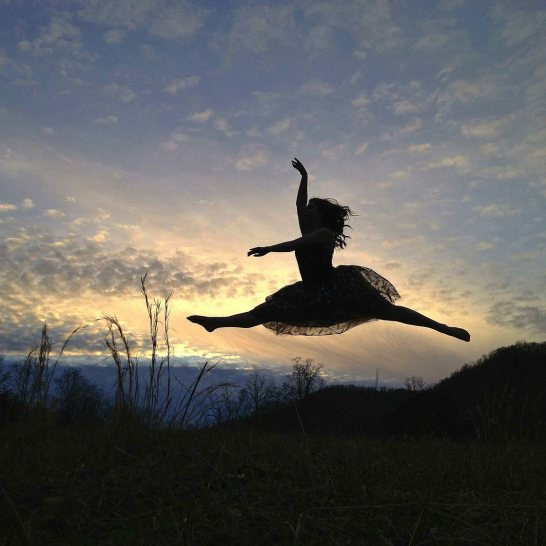
If you want to capture the natural contrast of a scene, such as a silhouette or a dramatic lighting effect, HDR can flatten the image and reduce the impact.
Silhouette Photography
3.3. Well-Lit Scenes
In situations with even lighting, HDR may not offer any significant improvement and can sometimes make the image look unnatural.
3.4. When Speed is Important
Since HDR takes multiple shots, it’s slower than a regular photo. If you need to capture a quick moment, HDR might not be the best option.
4. How to Enable and Use HDR on Your iPhone
Enabling and using HDR on your iPhone is straightforward. Here’s a step-by-step guide:
4.1. Check Your HDR Settings
Before you start, ensure your HDR settings are configured correctly.
- Go to Settings > Camera.
- Disable Smart HDR (or Auto HDR on older iPhones). This allows you to manually control HDR in the Camera app.
- Enable Keep Normal Photo. This saves a non-HDR version of the photo alongside the HDR version, so you can choose the best one.
4.2. Using HDR in the Camera App
- Open the Camera app.
- Look for the HDR icon at the top of the screen.
- Tap the HDR icon to toggle it on or off. When HDR is on, the icon will appear without a line through it.
4.3. Taking an HDR Photo
- Frame your shot and ensure the HDR icon is enabled.
- Tap the shutter button to take the photo.
- Hold your iPhone steady while the camera captures the multiple exposures.
- Review both the HDR and non-HDR versions in the Photos app to decide which one you prefer.
4.4. Understanding Smart HDR
Newer iPhones (iPhone XS and later) have a Smart HDR feature that automatically optimizes HDR settings based on the scene. While this can be convenient, it removes manual control. If you prefer to have more control, disable Smart HDR in the settings.
5. Viewing HDR Photos on Your iPhone
Viewing HDR photos on your iPhone is generally the same as viewing any other photo, but there are a few nuances to keep in mind.
5.1. Using the Photos App
The built-in Photos app on your iPhone automatically displays HDR photos with their enhanced dynamic range. Simply open the Photos app and navigate to the image you want to view.
5.2. Comparing HDR and Non-HDR Versions
If you have enabled the “Keep Normal Photo” option, your iPhone saves both the HDR and non-HDR versions of the image. This allows you to compare the two and choose the one you prefer. To do this, simply view the photo in the Photos app and swipe to see the other version.
5.3. Adjusting Brightness and Contrast
Even with HDR, you may still want to make minor adjustments to the brightness and contrast of your photos. The Photos app provides editing tools for this purpose:
- Open the photo you want to edit.
- Tap Edit in the upper-right corner.
- Use the sliders to adjust Brightness, Contrast, and other settings.
- Tap Done to save your changes.
5.4. Display Limitations
While your iPhone can capture HDR photos, the quality of the display can affect how you perceive them. Newer iPhones with OLED displays generally offer better dynamic range and color accuracy compared to older models with LCD displays. This means that HDR photos will look more impressive on newer devices.
6. Advanced HDR Techniques
For those looking to take their HDR photography to the next level, here are some advanced techniques:
6.1. Using Third-Party HDR Apps
While the iPhone’s native Camera app offers basic HDR functionality, third-party apps provide more control and customization.
- Pro HDR X: This app allows you to manually adjust exposure settings and create more dramatic HDR effects.
- Aurora HDR: A powerful HDR photo editor with a wide range of tools and presets.
- Snapseed: A free photo editing app with an HDR Scape filter that can enhance the dynamic range of your photos.
6.2. Manual HDR with Bracketing
Bracketing involves taking multiple photos of the same scene at different exposure levels. You can then combine these photos manually using a photo editing app like Adobe Photoshop or Affinity Photo. This technique gives you maximum control over the HDR process.
- Set your iPhone to burst mode or use a third-party app that supports bracketing.
- Take a series of photos at different exposure levels (e.g., -2, 0, +2).
- Import the photos into your photo editing app.
- Use the HDR merging tool to combine the photos into a single image.
- Adjust the settings to achieve the desired look.
6.3. Understanding HDR Artifacts
HDR can sometimes produce unwanted artifacts, such as halos, noise, and unnatural colors. These artifacts are more common when using aggressive HDR settings or when shooting scenes with a lot of movement. To minimize artifacts:
- Use subtle HDR settings.
- Shoot in good lighting conditions.
- Avoid using HDR on scenes with movement.
- Use a tripod to keep your iPhone steady.
7. Best Practices for HDR Photography on iPhone
To get the most out of HDR photography on your iPhone, follow these best practices:
7.1. Keep Your iPhone Steady
Since HDR involves capturing multiple images, it’s important to keep your iPhone as steady as possible. Use a tripod or lean against a solid surface to minimize camera shake.
7.2. Shoot in Good Lighting Conditions
HDR works best in scenes with good lighting. Avoid shooting in extremely dark or bright conditions, as this can result in noise or blown-out highlights.
7.3. Experiment with Settings
Don’t be afraid to experiment with different HDR settings and techniques. Try using different HDR apps, adjusting exposure levels, and shooting from different angles.
7.4. Review Your Photos
Always review your photos after taking them to see if HDR has improved the image. If not, try adjusting the settings or shooting without HDR.
7.5. Edit Your Photos
Even with HDR, you may still want to make minor adjustments to your photos. Use the editing tools in the Photos app or a third-party app to fine-tune the brightness, contrast, and colors.
8. Optimizing Your iPhone Display for HDR Viewing
The quality of your iPhone display can significantly impact how you perceive HDR photos. Here are some tips for optimizing your display:
8.1. Adjust Brightness
Make sure your screen brightness is set to an appropriate level. Too low, and you won’t be able to see the full dynamic range of the photo. Too high, and the image may appear washed out.
8.2. Enable True Tone
True Tone automatically adjusts the color and intensity of your display to match the ambient light in your environment. This can make HDR photos look more natural and accurate.
- Go to Settings > Display & Brightness.
- Toggle True Tone on.
8.3. Disable Night Shift
Night Shift reduces the amount of blue light emitted by your display, which can make colors appear warmer. While this is good for reducing eye strain at night, it can affect the accuracy of colors in HDR photos.
- Go to Settings > Display & Brightness.
- Toggle Night Shift off.
8.4. Calibrate Your Display
If you want to ensure the most accurate colors possible, you can calibrate your display using a colorimeter. This involves using a device to measure the colors on your screen and create a custom color profile.
9. Common Issues and Troubleshooting
Even with the best techniques, you may encounter issues when shooting or viewing HDR photos on your iPhone. Here are some common problems and how to fix them:
9.1. Blurry Photos
If your HDR photos are blurry, it’s likely due to camera shake. Make sure to keep your iPhone steady or use a tripod.
9.2. Ghosting Effects
Ghosting occurs when there is movement in the scene while the HDR photos are being captured. Avoid using HDR on scenes with moving subjects or try using a faster shutter speed.
9.3. Unnatural Colors
If your HDR photos have unnatural colors, try adjusting the HDR settings or using a different HDR app. You can also try editing the colors manually using a photo editing app.
9.4. Noise
Noise is more common in HDR photos taken in low light. Try shooting in better lighting conditions or using a noise reduction tool in a photo editing app.
9.5. Over-Processed Look
If your HDR photos look over-processed, try using more subtle HDR settings or editing the photos manually to reduce the effect.
10. Showcasing Your HDR Photos
Once you’ve mastered the art of HDR photography on your iPhone, you’ll want to share your stunning images with the world. Here are some tips for showcasing your HDR photos:
10.1. Social Media
Social media platforms like Instagram and Facebook are great for sharing your photos. Use relevant hashtags to reach a wider audience and engage with other photographers.
10.2. Online Portfolios
Create an online portfolio to showcase your best HDR photos. Platforms like Behance and 500px are popular among photographers.
10.3. Photo Contests
Enter your HDR photos in photo contests to gain recognition and exposure. Many contests offer prizes and opportunities to have your work featured in magazines or exhibitions.
10.4. Prints
Print your favorite HDR photos and display them in your home or office. High-quality prints can bring your images to life and add a touch of beauty to your surroundings.
10.5. dfphoto.net
Share your HDR photos on dfphoto.net, where you can connect with a community of photography enthusiasts, receive feedback on your work, and discover new techniques and inspiration. Our platform is dedicated to showcasing the best in iPhone photography and providing resources for photographers of all levels.
11. HDR Photography and Visual Storytelling
11.1. Enhancing Mood and Emotion
HDR can be used to enhance the mood and emotion of your photos. By carefully adjusting the dynamic range and colors, you can create images that evoke a specific feeling or tell a compelling story.
11.2. Drawing Attention to Key Elements
HDR can help draw attention to key elements in your photos. By balancing the exposure and contrast, you can make certain subjects stand out and guide the viewer’s eye.
11.3. Creating a Sense of Depth
HDR can create a sense of depth in your photos by revealing details in both the foreground and background. This can make your images more immersive and engaging.
11.4. Emphasizing Textures and Patterns
HDR can emphasize textures and patterns in your photos by bringing out the details in both the light and dark areas. This can be particularly effective for subjects like landscapes, architecture, and portraits.
12. HDR and the Future of iPhone Photography
12.1. Advancements in Technology
As iPhone technology continues to advance, we can expect to see even more improvements in HDR photography. Future iPhones may offer wider dynamic ranges, better noise reduction, and more advanced HDR algorithms.
12.2. Integration with AI
Artificial intelligence (AI) is already playing a role in iPhone photography, and we can expect to see even greater integration in the future. AI can be used to automatically adjust HDR settings based on the scene, remove artifacts, and enhance the overall quality of your photos.
12.3. New Creative Possibilities
With the combination of HDR and AI, iPhone photographers will have access to new creative possibilities. They will be able to capture images that were once impossible and create works of art that push the boundaries of photography.
13. HDR and Ethical Considerations
13.1. Authenticity
As HDR becomes more advanced, it’s important to consider the ethical implications of altering reality. While HDR can enhance the beauty of a scene, it can also create an image that is far from what the eye would see. It’s important to use HDR responsibly and avoid creating misleading or deceptive images.
13.2. Representation
HDR can also affect the way people and places are represented in photos. It’s important to be mindful of how HDR can alter skin tones, colors, and textures, and to avoid creating images that are biased or stereotypical.
13.3. Transparency
When sharing HDR photos, it’s important to be transparent about the techniques you used to create them. This can help viewers understand the creative process and appreciate the artistic choices you made.
14. Staying Inspired with HDR Photography
14.1. Following Influential Photographers
Follow influential photographers who specialize in HDR photography on social media. This can provide inspiration and new ideas for your own work.
14.2. Participating in Photography Communities
Join online photography communities and forums to connect with other photographers, share your work, and receive feedback. This can help you grow as a photographer and stay motivated.
14.3. Attending Workshops and Seminars
Attend photography workshops and seminars to learn new techniques and improve your skills. These events can also provide opportunities to network with other photographers and industry professionals.
14.4. Exploring Different Genres
Experiment with different genres of photography, such as landscape, portrait, and architecture. This can help you discover new ways to use HDR and expand your creative horizons.
14.5. Visiting Art Galleries and Museums
Visit art galleries and museums to see how other artists use light and color in their work. This can inspire you to think differently about HDR and find new ways to express your creativity.
15. Conclusion: Mastering HDR on Your iPhone
HDR photography on your iPhone offers a world of creative possibilities, allowing you to capture stunning images with balanced exposure and vibrant colors. By understanding the principles of HDR, knowing when to use it, and following best practices, you can take your iPhone photography to the next level. Visit dfphoto.net to discover more tutorials, tips, and inspiration for mastering HDR and other photography techniques.
FAQ: Understanding HDR on Your iPhone
Q1: What exactly does HDR mean in iPhone photography?
HDR stands for High Dynamic Range, a technique that captures multiple exposures to create a single image with balanced lighting, enhancing details in both the shadows and highlights. This technology is particularly effective in high-contrast situations.
Q2: How do I enable HDR on my iPhone?
To enable HDR, go to Settings > Camera and disable Smart HDR. Then, open the Camera app and tap the HDR icon to toggle it on or off, giving you manual control over when HDR is active.
Q3: When is the best time to use HDR on my iPhone?
HDR is best used in high-contrast scenes like landscapes, backlit subjects, or interiors with both bright windows and dark areas, as it balances exposure and captures more detail in challenging lighting conditions.
Q4: Are there situations where I shouldn’t use HDR?
Yes, avoid using HDR when photographing moving subjects, in scenes where you want to capture high contrast intentionally (like silhouettes), or in well-lit scenes where HDR may not offer a significant improvement.
Q5: How do I view HDR photos on my iPhone?
HDR photos can be viewed just like any other photo in your iPhone’s Photos app. Ensure your display settings are optimized by adjusting brightness and enabling True Tone for the best visual experience.
Q6: Can I edit HDR photos on my iPhone?
Yes, you can edit HDR photos using the built-in editing tools in the Photos app or third-party apps like Snapseed and Adobe Lightroom Mobile to adjust brightness, contrast, and colors.
Q7: What are some common issues with HDR photography and how can I fix them?
Common issues include blurry photos (due to camera shake), ghosting effects (due to movement), and unnatural colors. Use a tripod, avoid moving subjects, and adjust HDR settings or use editing apps to fix these issues.
Q8: How can I showcase my HDR photos?
Showcase your HDR photos on social media platforms like Instagram, online portfolios like Behance, and photography communities like dfphoto.net to gain exposure and receive feedback.
Q9: What are some advanced HDR techniques I can try?
Try manual HDR with bracketing, using third-party HDR apps for more control, and understanding HDR artifacts to enhance your HDR photography skills.
Q10: How does HDR relate to visual storytelling?
HDR can enhance the mood and emotion of your photos, draw attention to key elements, create depth, and emphasize textures, making your visual stories more compelling and engaging.
Ready to transform your iPhone photography? Visit dfphoto.net today for more tips, tutorials, and inspiration! Explore our extensive resources and join a vibrant community of photographers. Elevate your skills and start capturing stunning HDR photos that tell your unique story.