Saving photos to your iPad is straightforward. This dfphoto.net guide offers various methods to ensure your cherished memories are always with you, covering everything from direct downloads to cloud syncing for photographers and visual artists alike. Dive in to discover how to effortlessly manage your visual content.
1. Why Can’t I Save Photos Directly to My iPad?
You might not be able to save photos directly to your iPad due to several reasons. It’s typically related to permission settings, network connectivity, or the format of the image. Let’s explore the reasons:
- Permissions: Check if the app or website you’re using has permission to access your photos. Go to Settings > Privacy > Photos and ensure the app is enabled.
- Network Issues: A weak or unstable internet connection can prevent images from downloading properly. Ensure you’re connected to a reliable Wi-Fi network.
- Image Format: Some image formats might not be fully compatible with iOS. Common formats like JPEG and PNG should work fine, but less common formats might cause issues.
- Storage Space: If your iPad is running low on storage, it might not be able to save new photos. Check your available storage in Settings > General > iPad Storage.
- Website Restrictions: Some websites may have security settings that prevent direct image downloads. In such cases, try taking a screenshot instead.
- Software Glitches: Sometimes, a simple restart of your iPad can resolve temporary software glitches that prevent saving photos.
- Restrictions Enabled: Check if there are any restrictions enabled that might prevent saving photos. Go to Settings > Screen Time > Content & Privacy Restrictions > Photos and make sure the settings allow saving.
If you’re still encountering issues, try a different browser or app to see if the problem persists.
2. What Are the Easiest Ways to Save Photos to My iPad?
The easiest ways to save photos to your iPad include direct downloads, using iCloud, AirDrop, or iTunes. Each method offers a convenient way to transfer and store your images, depending on where the photos are coming from. Let’s explore these options:
2.1. Direct Download
When browsing online, simply tap and hold the image, then select “Save Image” to save directly to your Photos app.
2.2. iCloud Photos
Enable iCloud Photos in Settings > Photos to automatically sync photos across all your Apple devices.
2.3. AirDrop
For transferring photos from another Apple device, use AirDrop by selecting the photos, tapping the share icon, and choosing your iPad.
2.4. iTunes/Finder
Connect your iPad to your computer and use iTunes (or Finder on newer macOS versions) to sync photos from your computer to your iPad.
2.5. Email
Email the photos to yourself and then save them from the email attachment directly to your iPad.
2.6. Third-Party Cloud Services
Use services like Google Photos or Dropbox to upload photos from any device and then access them on your iPad.
2.7. Using a USB Adapter
If you have a USB adapter for your iPad, you can directly import photos from a USB drive or SD card.
2.8. Copy and Paste
In some apps, you can copy a photo and then paste it directly into another app or document.
By using these methods, you can easily manage and save your photos to your iPad, ensuring they are always accessible.
3. How Do I Save Photos from a Website to My iPad?
Saving photos from a website to your iPad is typically a straightforward process. You can do this by tapping and holding the image, which will bring up a menu with a “Save Image” option. Here’s a detailed guide:
- Open the Website:
- Use Safari or your preferred browser on your iPad to navigate to the webpage containing the photo you want to save.
- Tap and Hold the Image:
- Locate the photo on the webpage.
- Tap and hold your finger on the image for a few seconds. This action should trigger a context menu to appear.
- Select “Save Image”:
- In the context menu, look for an option that says “Save Image.”
- Tap “Save Image.” The photo will be saved to your iPad’s Photos app, specifically in the “Camera Roll” or “Recents” album.
- Check Your Photos App:
- Open the Photos app on your iPad.
- Navigate to the “Albums” tab and look for the “Recents” or “Camera Roll” album.
- You should find the saved photo there.
3.1. Troubleshooting
If you don’t see the “Save Image” option, consider these possibilities:
- Website Restrictions: Some websites disable direct image saving to protect their content. In such cases, you might need to take a screenshot instead.
- Image Format Issues: Ensure the image is in a compatible format like JPEG or PNG.
- Browser Issues: Try using a different browser like Chrome or Firefox to see if the issue persists.
3.2. Alternative Method: Taking a Screenshot
If the “Save Image” option isn’t available, you can take a screenshot:
- Position the Image:
- Make sure the image is clearly visible on your iPad screen.
- Take a Screenshot:
- Press the Power button and the Volume Up button simultaneously (for iPads without a Home button).
- For iPads with a Home button, press the Power button and the Home button simultaneously.
- Edit the Screenshot (Optional):
- After taking the screenshot, a thumbnail will appear in the corner of your screen. Tap it to edit the screenshot, crop out any unnecessary parts, and save the edited version.
By following these steps, you can easily save photos from websites to your iPad, ensuring you have access to the images you need.
4. How Do I Save Photos from Email to My iPad?
Saving photos from email to your iPad is a straightforward process that allows you to keep important images directly on your device. Here’s how to do it:
- Open the Email:
- Use the Mail app (or your preferred email app) on your iPad to open the email containing the photo you want to save.
- Locate the Attachment:
- Find the attached photo within the email. It usually appears as a thumbnail or an icon indicating an image file.
- Tap the Attachment:
- Tap the photo attachment to preview it. This will open the image within the email app.
- Save the Photo:
- Once the photo is open, tap the Share icon (usually a square with an arrow pointing upwards).
- In the Share menu, scroll through the options until you find “Save Image.”
- Tap “Save Image.” The photo will be saved to your iPad’s Photos app, typically in the “Recents” or “Camera Roll” album.
- Check Your Photos App:
- Open the Photos app on your iPad.
- Navigate to the “Albums” tab and look for the “Recents” or “Camera Roll” album.
- You should find the saved photo there.
4.1. Troubleshooting
If you encounter any issues while saving photos from email, consider the following:
- Email App Compatibility: Ensure you are using a compatible email app that supports saving attachments. The built-in Mail app works well, but third-party apps like Gmail or Outlook should also work.
- Attachment Size: Very large attachments might take longer to download and save. Ensure you have a stable internet connection.
- Storage Space: If your iPad is running low on storage, it might not be able to save new photos. Check your available storage in Settings > General > iPad Storage.
4.2. Alternative Method: Using Third-Party Apps
Some email apps may not have a direct “Save Image” option. In such cases, you can use third-party apps:
- Open the Attachment:
- Tap the photo attachment to preview it within the email app.
- Share to a Third-Party App:
- Tap the Share icon.
- Look for options like “Copy to Photos” or “Save to Files.”
- If you choose “Save to Files,” you can save the photo to your iCloud Drive or another cloud storage service connected to your iPad.
- Access the Photo:
- If you saved to “Files,” open the Files app to access the photo.
- From the Files app, you can then save the photo to your Photos app if needed.
By following these steps, you can easily save photos from email to your iPad, ensuring you have quick access to important images.
5. How Can I Transfer Photos from My iPhone to My iPad?
Transferring photos from your iPhone to your iPad is simple and can be done through several methods, including iCloud Photos, AirDrop, and iTunes/Finder. Each option offers a convenient way to keep your photo library synchronized and accessible across your devices.
5.1. iCloud Photos
iCloud Photos automatically syncs your photo library across all your Apple devices. Here’s how to set it up:
- Enable iCloud Photos on Both Devices:
- On both your iPhone and iPad, go to Settings > Photos.
- Toggle the “iCloud Photos” switch to the on position.
- Ensure Sufficient iCloud Storage:
- Make sure you have enough storage in your iCloud account to accommodate all your photos and videos. You can check and manage your storage by going to Settings > [Your Name] > iCloud > Manage Storage.
- Wait for Sync:
- Once enabled, your photos and videos will start syncing to iCloud. This process may take some time, depending on the size of your library and the speed of your internet connection.
- Access Photos on Your iPad:
- After the sync is complete, open the Photos app on your iPad. You should see all the photos and videos from your iPhone in your iPad’s photo library.
5.2. AirDrop
AirDrop allows you to wirelessly transfer photos and videos between nearby Apple devices. Here’s how to use it:
- Enable AirDrop on Both Devices:
- On both your iPhone and iPad, swipe down from the top-right corner to open Control Center (or swipe up from the bottom on older devices).
- Tap and hold the Wi-Fi or Bluetooth card to expand it.
- Tap the AirDrop icon and choose “Everyone” or “Contacts Only.” If you choose “Contacts Only,” make sure both devices are signed in to iCloud and that you are in each other’s contacts.
- Select Photos on Your iPhone:
- Open the Photos app on your iPhone.
- Select the photos and videos you want to transfer.
- Tap the Share icon (a square with an arrow pointing upwards).
- Share via AirDrop:
- In the Share menu, tap the AirDrop icon.
- Your iPad should appear in the list of available devices. Tap on your iPad’s name.
- Accept on Your iPad:
- Your iPad will receive a notification asking if you want to accept the incoming files. Tap “Accept.”
- The photos and videos will be saved to your iPad’s Photos app.
5.3. iTunes/Finder
You can also transfer photos from your iPhone to your iPad using iTunes (or Finder on newer macOS versions). Here’s how:
- Connect Your iPhone to Your Computer:
- Use a USB cable to connect your iPhone to your computer.
- Open iTunes/Finder:
- If you’re using macOS Mojave or earlier, open iTunes.
- If you’re using macOS Catalina or later, open Finder.
- Select Your iPhone:
- In iTunes, click on the iPhone icon when it appears.
- In Finder, your iPhone will appear in the sidebar under “Locations.”
- Sync Photos:
- In iTunes, click on “Photos” in the sidebar.
- In Finder, click on “Photos” in the top menu.
- Choose to sync photos from a folder on your computer.
- Select the photos you want to transfer and click “Apply” or “Sync.”
- Access Photos on Your iPad:
- After the sync is complete, disconnect your iPhone.
- Connect your iPad to your computer and repeat the process, selecting the same folder of photos to sync to your iPad.
- The photos will be available in the Photos app on your iPad.
5.4. Third-Party Cloud Services
Services like Google Photos or Dropbox can also be used to transfer photos. Upload photos from your iPhone to the cloud service and then access them on your iPad by logging into the same account.
By using these methods, you can easily transfer photos from your iPhone to your iPad, ensuring your memories are always accessible on both devices.
6. How Do I Manage Storage on My iPad After Saving Many Photos?
After saving many photos to your iPad, managing storage becomes crucial to ensure your device continues to run smoothly. Here are several strategies to help you manage storage effectively:
6.1. Check Storage Usage
The first step is to understand how much storage your photos are consuming.
- Go to Settings:
- Open the Settings app on your iPad.
- Navigate to General:
- Tap on “General.”
- Select iPad Storage:
- Tap on “iPad Storage.”
- Here, you’ll see a breakdown of how much storage each app and type of content is using. Photos will be listed under “Photos.”
6.2. Optimize iPad Storage
iOS offers a built-in feature to optimize photo storage by keeping smaller, optimized versions on your device while storing the full-resolution originals in iCloud.
- Go to Settings:
- Open the Settings app on your iPad.
- Navigate to Photos:
- Tap on “Photos.”
- Enable Optimize iPad Storage:
- Choose “Optimize iPad Storage.” This will automatically replace full-resolution photos with smaller versions when storage is low.
6.3. Delete Unnecessary Photos and Videos
Regularly review your photo library and delete any photos or videos you no longer need.
- Open the Photos App:
- Open the Photos app on your iPad.
- Select Photos to Delete:
- Tap “Select” in the top-right corner.
- Tap on each photo or video you want to delete.
- Delete Selected Items:
- Tap the trash can icon in the bottom-right corner.
- Confirm the deletion.
6.4. Use iCloud Photos Efficiently
If you use iCloud Photos, ensure your photos are properly synced and consider deleting them from your iPad after they’ve been backed up to iCloud.
- Verify iCloud Sync:
- Make sure all your photos are synced to iCloud before deleting them from your iPad.
- Delete from iPad:
- After verifying, delete the photos from your iPad to free up space.
6.5. Transfer Photos to External Storage
Consider transferring photos to an external storage device, such as a USB drive or an external hard drive, to free up space on your iPad.
- Use a Lightning to USB Adapter:
- Connect a Lightning to USB adapter to your iPad.
- Connect External Storage:
- Plug in your USB drive or external hard drive.
- Use the Files App:
- Open the Files app and navigate to the Photos app.
- Select the photos you want to transfer and copy them to the external storage device.
6.6. Compress Photos
Compressing photos can reduce their file size without significantly affecting their quality.
- Use Third-Party Apps:
- Download a photo compression app from the App Store, such as “Image Size” or “Compress Photos & Pictures.”
- Compress Photos:
- Use the app to compress selected photos before saving them to your iPad.
6.7. Backup and Delete
Regularly back up your photos to a computer or cloud service and then delete them from your iPad.
- Backup Photos:
- Connect your iPad to your computer and use iTunes (or Finder) to back up your photos.
- Alternatively, use a cloud service like Google Photos or Dropbox to back up your photos.
- Delete from iPad:
- After backing up, delete the photos from your iPad to free up space.
6.8. Regularly Clear the “Recently Deleted” Album
Photos you delete from your iPad are moved to the “Recently Deleted” album, where they remain for 30 days before being permanently deleted. Manually clear this album to free up space immediately.
- Open the Photos App:
- Open the Photos app on your iPad.
- Go to Albums:
- Tap the “Albums” tab.
- Select “Recently Deleted”:
- Scroll down and tap on “Recently Deleted.”
- Delete Permanently:
- Tap “Select” in the top-right corner.
- Tap “Delete All” to permanently delete all items, or select individual items to delete.
By following these strategies, you can effectively manage storage on your iPad, even with a large photo library, ensuring your device remains efficient and responsive.
7. What Are the Best Apps for Managing Photos on My iPad?
Managing photos on your iPad can be greatly enhanced with the right apps. Here are some of the best apps available for organizing, editing, and backing up your photos:
7.1. Apple Photos
The built-in Photos app on iPad offers robust features for managing your photo library.
- Features:
- Organization: Automatically organizes photos by date, location, and albums.
- Editing: Offers basic to advanced editing tools, including filters, adjustments, and cropping.
- iCloud Integration: Seamlessly syncs photos across all your Apple devices.
- Sharing: Easily share photos via AirDrop, email, and social media.
- Pros:
- Free and pre-installed on iPad.
- User-friendly interface.
- Excellent integration with the Apple ecosystem.
- Cons:
- Limited advanced editing features compared to dedicated photo editing apps.
7.2. Adobe Lightroom Mobile
Adobe Lightroom Mobile is a powerful photo editing and management app for serious photographers.
- Features:
- Advanced Editing: Offers a wide range of professional editing tools, including exposure, contrast, color correction, and selective adjustments.
- Organization: Allows you to organize photos into albums and use keywords for easy searching.
- Cloud Sync: Syncs photos and edits across all your devices with Adobe Creative Cloud.
- RAW Support: Supports editing RAW files from DSLR cameras.
- Pros:
- Professional-grade editing tools.
- Excellent organization features.
- Cloud syncing capabilities.
- Cons:
- Requires an Adobe Creative Cloud subscription.
- Can be overwhelming for beginners.
7.3. Google Photos
Google Photos is a free photo storage and management service with powerful features.
- Features:
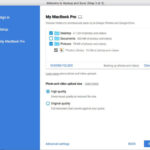
- Unlimited Storage: Offers free unlimited storage for “high quality” photos (compressed).
- Automatic Backup: Automatically backs up photos from your iPad to the cloud.
- Organization: Organizes photos by date, location, and automatically generated albums.
- Search: Powerful search capabilities using keywords, locations, and even objects in the photos.
- Pros:
- Free storage.
- Automatic backup.
- Excellent search features.
- Cons:
- Compresses photos if using the free unlimited storage option.
- Requires a Google account.
7.4. VSCO
VSCO is a popular photo editing app known for its film-like presets and creative tools.
- Features:
- Presets: Offers a wide range of high-quality presets for quick and easy editing.
- Editing Tools: Includes basic to advanced editing tools, such as exposure, contrast, and color adjustments.
- Community: Allows you to share your photos with the VSCO community and discover new inspiration.
- Pros:
- Beautiful presets.
- Creative editing tools.
- Inspiring community.
- Cons:
- Many presets and features require a VSCO membership.
7.5. Snapseed
Snapseed is a free, professional-grade photo editing app developed by Google.
- Features:
- Advanced Editing: Offers a wide range of editing tools, including selective adjustments, healing brush, and perspective correction.
- Filters: Includes a variety of filters and effects.
- RAW Support: Supports editing RAW files from DSLR cameras.
- Pros:
- Free to use.
- Professional-grade editing tools.
- User-friendly interface.
- Cons:
- Can be overwhelming for beginners due to the number of features.
7.6. Dropbox
Dropbox is a versatile cloud storage service that can be used to back up and manage your photos.
- Features:
- Cloud Storage: Stores photos and files in the cloud, accessible from any device.
- Automatic Backup: Automatically backs up photos from your iPad.
- Sharing: Easily share photos with others via links.
- Pros:
- Reliable cloud storage.
- Easy sharing options.
- Cons:
- Limited free storage.
- Requires a paid subscription for more storage.
7.7. Darkroom
Darkroom is a powerful photo and video editor with a focus on non-destructive editing and workflow efficiency.
- Features:
- Non-Destructive Editing: Edits are saved as instructions, allowing you to revert to the original photo at any time.
- Batch Processing: Edit multiple photos at once.
- RAW Support: Supports editing RAW files from DSLR cameras.
- Pros:
- Non-destructive editing.
- Efficient workflow.
- Cons:
- Some features require a subscription.
By using these apps, you can effectively manage, edit, and back up your photos on your iPad, ensuring your memories are always safe and accessible.
8. How Do I Save High-Resolution Photos to My iPad?
Saving high-resolution photos to your iPad ensures that you retain the best possible image quality. Here’s how to do it using various methods:
8.1. iCloud Photos
Using iCloud Photos is a seamless way to keep high-resolution versions of your photos on your iPad, provided you have enough iCloud storage.
- Enable iCloud Photos:
- Go to Settings > Photos.
- Toggle “iCloud Photos” to the on position.
- Choose “Download and Keep Originals”:
- Select “Download and Keep Originals” instead of “Optimize iPad Storage.” This ensures that the full-resolution versions of your photos are stored on your iPad.
- Ensure Sufficient iCloud Storage:
- Make sure you have enough storage in your iCloud account to accommodate all your high-resolution photos and videos. You can check and manage your storage by going to Settings > [Your Name] > iCloud > Manage Storage.
8.2. AirDrop
AirDrop allows you to transfer photos from another Apple device (like an iPhone or Mac) to your iPad without compressing the image quality.
- Enable AirDrop on Both Devices:
- On both devices, swipe down from the top-right corner to open Control Center (or swipe up from the bottom on older devices).
- Tap and hold the Wi-Fi or Bluetooth card to expand it.
- Tap the AirDrop icon and choose “Everyone” or “Contacts Only.” If you choose “Contacts Only,” make sure both devices are signed in to iCloud and that you are in each other’s contacts.
- Select Photos on the Sending Device:
- Open the Photos app on the sending device.
- Select the high-resolution photos you want to transfer.
- Tap the Share icon (a square with an arrow pointing upwards).
- Share via AirDrop:
- In the Share menu, tap the AirDrop icon.
- Your iPad should appear in the list of available devices. Tap on your iPad’s name.
- Accept on Your iPad:
- Your iPad will receive a notification asking if you want to accept the incoming files. Tap “Accept.”
- The high-resolution photos will be saved to your iPad’s Photos app.
8.3. iTunes/Finder
You can use iTunes (or Finder on newer macOS versions) to sync high-resolution photos from your computer to your iPad.
- Connect Your iPad to Your Computer:
- Use a USB cable to connect your iPad to your computer.
- Open iTunes/Finder:
- If you’re using macOS Mojave or earlier, open iTunes.
- If you’re using macOS Catalina or later, open Finder.
- Select Your iPad:
- In iTunes, click on the iPad icon when it appears.
- In Finder, your iPad will appear in the sidebar under “Locations.”
- Sync Photos:
- In iTunes, click on “Photos” in the sidebar.
- In Finder, click on “Photos” in the top menu.
- Choose to sync photos from a folder on your computer containing the high-resolution photos.
- Ensure that the option to sync photos in full resolution is selected (this is usually the default).
- Click “Apply” or “Sync.”
- Access Photos on Your iPad:
- After the sync is complete, disconnect your iPad.
- The high-resolution photos will be available in the Photos app on your iPad.
8.4. Using a USB Adapter
If you have a USB adapter for your iPad, you can directly import high-resolution photos from a USB drive or SD card.
- Connect the Adapter:
- Plug the USB adapter into your iPad’s Lightning or USB-C port.
- Connect the Storage Device:
- Plug the USB drive or SD card into the adapter.
- Open the Photos App:
- The Photos app should automatically open and display the photos on the storage device. If it doesn’t, open the Photos app and tap on the “Import” tab.
- Import Photos:
- Select the high-resolution photos you want to import and tap “Import Selected” or “Import All.”
- Choose whether to keep the photos on the storage device or delete them after importing.
- Access Photos on Your iPad:
- The imported high-resolution photos will be available in the Photos app on your iPad.
8.5. Third-Party Cloud Services
Services like Google Photos or Dropbox can be used to upload and store high-resolution photos, but ensure that you configure the settings to upload the original quality.
- Upload to Cloud Service:
- Upload your high-resolution photos to Google Photos or Dropbox from your computer or another device.
- In the settings of the cloud service, ensure that you select the option to upload photos in their original quality.
- Access on Your iPad:
- Install the Google Photos or Dropbox app on your iPad.
- Log in to your account.
- Access your high-resolution photos from the app.
By following these methods, you can ensure that you save high-resolution photos to your iPad, preserving their quality and detail.
9. How Can I Edit Photos on My iPad After Saving Them?
Editing photos on your iPad after saving them is a great way to enhance their appearance and create stunning visuals. Here’s how you can edit photos using various methods and apps:
9.1. Using the Built-In Photos App
The Photos app on your iPad offers a range of editing tools that are easy to use and perfect for quick adjustments.
- Open the Photos App:
- Open the Photos app on your iPad.
- Select the Photo:
- Tap on the photo you want to edit.
- Tap “Edit”:
- Tap the “Edit” button in the top-right corner of the screen.
- Use the Editing Tools:
- Adjust: Use the Adjust tool to modify various aspects of the photo, such as:
- Exposure: Adjust the overall brightness of the photo.
- Brilliance: Enhance the highlights and shadows.
- Highlights: Adjust the brightness of the brightest parts of the photo.
- Shadows: Adjust the brightness of the darkest parts of the photo.
- Contrast: Adjust the difference between the bright and dark areas.
- Brightness: Another way to adjust the overall brightness.
- Black Point: Set the darkest point in the photo.
- Saturation: Adjust the intensity of the colors.
- Vibrance: Adjust the intensity of the more muted colors.
- Warmth: Adjust the color temperature.
- Tint: Adjust the green-to-magenta balance.
- Sharpness: Increase or decrease the sharpness of the image.
- Definition: Enhance the details and textures.
- Noise Reduction: Reduce graininess in the photo.
- Vignette: Add a dark or light edge effect.
- Filters: Apply pre-set filters to quickly change the look and feel of your photo.
- Crop: Crop the photo to focus on a specific area, straighten the horizon, or adjust the aspect ratio.
- Adjust: Use the Adjust tool to modify various aspects of the photo, such as:
- Save Your Edits:
- Tap “Done” to save your changes. If you don’t like the edits, you can tap “Cancel” to revert to the original photo.
- Revert to Original:
- If you want to undo your edits later, open the photo, tap “Edit,” and then tap “Revert” to go back to the original version.
9.2. Using Third-Party Photo Editing Apps
For more advanced editing, consider using third-party photo editing apps like Adobe Lightroom Mobile, VSCO, or Snapseed.
- Download and Install an App:
- Download a photo editing app from the App Store, such as Adobe Lightroom Mobile, VSCO, or Snapseed.
- Open the App:
- Open the photo editing app on your iPad.
- Import the Photo:
- Import the photo you want to edit into the app. This usually involves tapping an “Open” or “+” button and selecting the photo from your Photos app.
- Use the Editing Tools:
- Each app offers a different set of editing tools. Here’s a brief overview:
- Adobe Lightroom Mobile: Offers professional-grade editing tools, including sliders for exposure, contrast, highlights, shadows, color correction, and selective adjustments.
- VSCO: Known for its film-like presets and creative tools, including filters, adjustments, and the ability to share your photos with the VSCO community.
- Snapseed: A free app with a wide range of editing tools, including selective adjustments, healing brush, and perspective correction.
- Each app offers a different set of editing tools. Here’s a brief overview:
- Save Your Edits:
- Once you’re satisfied with your edits, save the photo. Most apps will give you the option to save a copy of the edited photo to your Photos app, while preserving the original.
9.3. Non-Destructive Editing
Some photo editing apps, like Darkroom, offer non-destructive editing, which means that your edits are saved as instructions, allowing you to revert to the original photo at any time.
- Open the Photo in a Non-Destructive Editor:
- Open the photo in an app like Darkroom.
- Make Your Edits:
- Use the app’s editing tools to adjust the photo to your liking.
- Save Your Changes:
- The app will save your edits without altering the original photo. You can always go back and revert to the original or modify your edits.
9.4. Using Presets and Filters
Presets and filters can be a quick and easy way to enhance your photos with a specific look and feel.
- Choose an App with Presets:
- Apps like VSCO and Adobe Lightroom Mobile offer a wide range of presets and filters.
- Apply a Preset:
- Select a preset or filter that you like and apply it to your photo.
- Adjust as Needed:
- You can further adjust the settings to fine-tune the look of the photo.
By using these methods, you can effectively edit photos on your iPad after saving them, ensuring that your images look their best.
10. What Are Common Issues When Saving Photos to an iPad and How to Fix Them?
Saving photos to an iPad is generally straightforward, but sometimes issues can arise. Here are some common problems and their solutions:
10.1. “Fetching Image Failed” Error
Problem: When trying to save an image from a website, you might