In today’s digital age, photos are more than just images; they are precious memories. Ensuring these memories are safely stored and easily accessible is crucial. Google Drive offers a robust and user-friendly solution for this. Whether you are looking to back up your photos, free up space on your devices, or simply have them organized in the cloud, understanding How To Save Photos To Google Drive is an essential skill. This guide will walk you through the process, ensuring you can securely store and manage your photos across all your devices.
Why Save Photos to Google Drive?
Before diving into the steps, let’s understand why Google Drive is an excellent choice for your photo storage needs.
- Secure Backup: Google Drive acts as a safe repository for your photos, protecting them from device loss, damage, or theft.
- Accessibility from Anywhere: Access your photos from any device – smartphone, tablet, or computer – as long as you have an internet connection.
- Easy Sharing: Effortlessly share your photos with friends and family, whether it’s a single image or an entire album.
- Organization: Google Drive allows you to organize your photos into folders, making it easy to find and manage your growing photo library.
- Free Storage (Up to 15GB): Google offers 15GB of free storage, which is often sufficient for starting users, and you can always upgrade for more space if needed.
Now, let’s explore the step-by-step process of saving your photos to Google Drive.
Step-by-Step Guide: Saving Photos to Google Drive
The process of uploading photos to Google Drive is straightforward, regardless of the device you are using. Here’s a detailed guide for computers and smartphones.
Step 1: Access Google Drive
To begin, you need to access Google Drive. You can do this either through a web browser on your computer or via the Google Drive application on your smartphone or tablet.
On a Computer (Web Browser):
- Open your web browser. Ensure you are using an updated browser like Chrome, Firefox, Safari, or Edge for optimal performance.
- Navigate to drive.google.com. Type this address into your browser’s address bar and press Enter.
- Sign in to your Google Account. If you are not already signed in, you will be prompted to enter your Gmail email address and password. If you don’t have a Google account, you’ll need to create one.
On a Smartphone (Google Drive App):
- Download the Google Drive App. If you haven’t already, download the Google Drive app from the App Store (for iPhones and iPads) or the Google Play Store (for Android devices).
- Open the Google Drive App. Locate the Drive icon on your home screen or app drawer and tap to open it.
- Sign in to your Google Account. If you are not already signed in, the app will guide you through the sign-in process using your Gmail account credentials.
 Access Google Drive on Browser
Step 2: Create a Folder (Optional but Recommended)
Creating folders is highly recommended for keeping your Google Drive organized, especially when dealing with numerous photos. A well-organized folder structure will make it easier to find and manage your photos in the long run.
- Locate the “New” button. On the Google Drive website (browser) or app, find the “New” button, typically located in the top-left corner on the web or the bottom-right corner in the app (represented by a “+” sign).
- Select “Folder”. Click or tap on the “New” button, and from the dropdown menu, choose “Folder”.
- Name your folder. A dialog box will appear prompting you to name your new folder. Choose a descriptive name such as “Photos,” “Family Vacation 2023,” “Phone Backups,” or any name that helps you categorize your images.
- Click “Create”. Press Enter on your computer or tap “Create” on your smartphone to finalize folder creation. Your new folder will now appear in your Google Drive.
 Create New Folder in Google Drive
Step 3: Uploading Photos: Multiple Methods
Google Drive offers several convenient methods to upload your photos, depending on your device and workflow.
Method 1: Uploading Photos from an Android Phone
- Open the Google Drive app on your Android device.
- Navigate to your desired folder. If you created a specific folder for photos, open it. Otherwise, you can upload directly to your “My Drive” root directory.
- Tap the “+” icon. Look for the “+” icon, usually at the bottom right corner, and tap it.
- Select “Upload”. From the options that appear, choose “Upload”.
- Browse to your photos. This will open your phone’s file manager or gallery. Navigate to the location where your photos are stored, typically in folders like “Camera,” “Downloads,” or “Pictures.”
- Select the photos. Tap on the photos you wish to upload. You can select multiple photos by tapping and holding on the first photo, then tapping on others to add them to your selection.
- Tap “Upload”. Once you have selected all the desired photos, tap “Upload” to begin the upload process. You will see an upload progress indicator, and the photos will appear in your Google Drive folder once completed.
Method 2: Uploading Photos from an iPhone or iPad
- Launch the Google Drive app on your iPhone or iPad.
- Go to your target folder. Open the folder where you want to save your photos, or stay in “My Drive” for general upload.
- Tap the “+” icon. Tap the “+” icon located at the bottom right.
- Choose “Upload”. Select “Upload” from the available options.
- Access your Photo Library. Google Drive will request access to your photos if it’s your first time. Grant the necessary permissions to access your iPhone’s photo library.
- Select photos to upload. Browse through your photo albums (like “Recents,” “Camera Roll,” etc.) and tap to select the photos you want to upload. You can select multiple images.
- Tap “Upload”. Tap “Upload” to start uploading the selected photos to Google Drive.
Method 3: Uploading Photos from a Computer (Web Browser)
- Open your web browser and go to drive.google.com.
- Navigate to your folder. Open the folder where you want to save your photos within Google Drive, or stay in “My Drive”.
- Click the “New” button. Click on the “New” button on the top left.
- Select “File upload” or “Folder upload”.
- “File upload” is for uploading individual photos or a selection of photo files.
- “Folder upload” is for uploading an entire folder of photos from your computer.
- Locate and select photos or folder. A file explorer window will appear. Navigate to the location of the photos on your computer’s hard drive.
- For “File upload”, select the specific photo files. You can select multiple files by holding down Ctrl (Cmd on Mac) or Shift while clicking.
- For “Folder upload”, select the folder containing your photos.
- Click “Open” or “Upload”. Click “Open” (for file upload) or “Upload” (for folder upload) to begin the upload process. You will see the upload progress in the bottom right corner of your browser window.
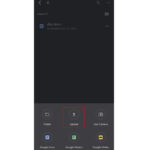
Method 4: Uploading Photos from Google Photos to Google Drive
If your photos are already in Google Photos and you wish to also save them to Google Drive, you can easily do so:
- Open Google Photos. Go to photos.google.com in a web browser or open the Google Photos app.
- Select the photos. Choose the photos you want to save to Google Drive. You can select multiple photos.
- Click the “Share” button. Look for the “Share” icon (it usually looks like an upward-pointing arrow or three connected dots) and click or tap it.
- Choose “Save to Drive”. From the share options, select “Save to Drive”.
- Choose a folder (optional). You can choose to save the photos to your main “My Drive” or select a specific folder within Google Drive. Click “Save” to complete the process.
Managing Your Photos in Google Drive
Once your photos are uploaded, Google Drive offers several tools to manage them effectively:
- Organize with Folders and Subfolders: Create a hierarchical folder structure to categorize your photos by date, event, location, or any system that works for you. For instance, you could have a main “Photos” folder, with subfolders for each year, and further subfolders for specific events within each year.
- Rename Files for Clarity: While Google Drive often retains the original filenames, renaming files to be more descriptive can be helpful. Right-click on a photo file and select “Rename” to give it a more meaningful name.
- Share Photos and Folders: To share photos, right-click on a file or folder and select “Share”. You can then enter the email addresses of people you want to share with and choose their permission level (view, comment, or edit). You can also create shareable links to send to others.
- Access from Any Device: Remember, once your photos are in Google Drive, you can access them from any device by simply logging into your Google account and opening Google Drive.
Tips for Efficient Photo Management in Google Drive
- Regularly Backup Photos: Make it a habit to regularly upload new photos to Google Drive to ensure continuous backup.
- Utilize Google Drive’s Search Feature: Google Drive has a powerful search function. Use keywords to quickly find specific photos or folders.
- Check Storage Limits: Keep an eye on your Google Drive storage usage. Google provides 15GB of free storage shared across Gmail, Google Drive, and Google Photos. If you need more space, consider upgrading to Google One for additional storage options.
- Consider Google One for Enhanced Features: Google One offers not only extra storage but also additional benefits like enhanced support and family sharing options.
Conclusion
Saving your photos to Google Drive is a smart move for anyone looking to secure their memories, access them from anywhere, and easily share them with others. Whether you are using a computer, Android phone, or iPhone, the process is user-friendly and efficient. By following this comprehensive guide, you can confidently save photos to Google Drive and take advantage of its robust features for photo storage and management. Start safeguarding your precious memories today!