Transferring photos and videos from your iPhone to your computer is a common task. Whether you want to back up your precious memories, free up space on your device, or edit them on a larger screen, there are several simple and efficient methods to accomplish this. This guide provides step-by-step instructions on How To Save Photos From Iphone To Computer using different techniques, including direct import with a USB cable, iCloud Photos, and third-party apps.
Using a USB Cable to Import Photos to Mac
Connecting your iPhone to your Mac with a USB cable offers a straightforward way to import photos and videos. Here’s how:
-
Connect and Allow Access: Plug your iPhone into your Mac using a USB cable. If prompted, click “Allow” on your Mac to grant access to your device. You might also need to unlock your iPhone and trust the computer.
-
Open Photos App: Launch the Photos application on your Mac.
-
Import Screen: The Photos app should automatically display an Import screen showing all the photos and videos on your iPhone. If it doesn’t appear, click your iPhone’s name in the Photos sidebar.
-
Import Options: Choose an existing album or create a new one to store the imported photos. You can selectively import photos or import all new photos.
-
Complete Import: Select the desired photos and click “Import Selected” or click “Import All New Photos.” Wait for the transfer to finish, then disconnect your iPhone.
 Mac screen displaying photos available for import
Transferring Photos to a Windows PC
Importing photos to your Windows PC involves using the Apple Devices app:
-
Install Apple Devices App: Download and install the Apple Devices app from the Microsoft Store.
-
Connect and Unlock: Connect your iPhone to your PC with a USB cable. Unlock your iPhone and “Trust” the computer if prompted.
-
Import with Microsoft Photos: Refer to Microsoft’s support documentation for detailed instructions on importing photos using the Windows Photos app. This usually involves selecting your iPhone in File Explorer and copying the photos directly.
Leveraging iCloud Photos for Seamless Transfer
iCloud Photos provides a seamless way to access your photos and videos across all your Apple devices and even on a PC.
-
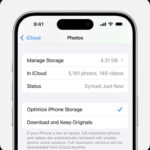
Enable iCloud Photos: Ensure iCloud Photos is enabled in your iPhone’s settings. This will automatically upload your photos to iCloud.
-
Access on Computer: On your Mac, iCloud Photos will sync your photos with the Photos app. On a Windows PC, you can download iCloud for Windows to access and download your photos. You can also access them through iCloud.com.
Additional Tips for Transferring Photos
- Full-Resolution Downloads: If using iCloud Photos, ensure you download the original, full-resolution images before importing to a PC to avoid potential compatibility issues.
- Video Rotation: Some videos imported from iPhone to Windows might have incorrect rotation. Using iTunes or a video editing software can correct this.
- File Format Compatibility: For optimal compatibility with Windows, consider changing your iPhone camera settings to capture photos in JPEG format. This can be done in Settings > Camera > Formats > Most Compatible.
By following these methods, you can efficiently save your iPhone photos to your computer for safekeeping, editing, or sharing. Choose the method that best suits your needs and technical proficiency.
