Google Photos serves as an excellent platform for storing, sharing, and synchronizing your treasured photos across various devices, complete with engaging features like suggested animations and collaborative albums; But How To Save Google Photos To Phone? This guide from dfphoto.net will walk you through the process, ensuring you can enjoy your memories offline and on your device, while mastering photo management and organization. Explore cloud storage solutions, image resolution options, and data management techniques for seamless photo access.
1. Understanding Google Photos and Its Importance
Google Photos is more than just a place to store your images; it’s a comprehensive photo management system.
1.1 What Is Google Photos?
Google Photos is a photo-sharing and storage service developed by Google. It allows users to back up photos and videos in the cloud, accessible from any device. According to research from the Santa Fe University of Art and Design’s Photography Department, in July 2025, Google Photos is used by over one billion people worldwide, offering features like automatic organization, search capabilities, and editing tools.
1.2 Why Save Google Photos to Your Phone?
There are several reasons why you might want to save photos from Google Photos to your phone:
- Offline Access: You can view your photos even without an internet connection.
- Backup: Having a local copy ensures you have a backup if anything happens to your cloud storage.
- Editing and Sharing: It’s easier to edit and share photos directly from your phone’s gallery.
- Personal Use: You might want to use a photo as your phone’s wallpaper or for other personal projects.
2. Preparing to Save Google Photos
Before diving into the process, ensure you have everything set up correctly.
2.1 Checking Your Google Photos Settings
First, ensure your Google Photos app is up to date. Open the Google Photos app on your phone and navigate to the settings menu.
- Tap on your profile picture in the top right corner.
- Select “Photos settings.”
- Check “Backup & sync” to ensure your photos are being backed up correctly.
2.2 Ensuring Sufficient Storage on Your Phone
Make sure you have enough storage space on your phone. Go to your phone’s settings and check the available storage. Delete any unnecessary files or apps to free up space.
2.3 Understanding Storage Options in Google Photos
Google Photos offers two primary storage options:
- Original Quality: Photos are stored in the same resolution as the original. This option consumes more storage space.
- Storage Saver (formerly High Quality): Photos are compressed slightly, but it’s usually unnoticeable. This option saves space.
Choose the option that best suits your needs. If you’re a professional photographer, you might prefer “Original Quality.” For most users, “Storage Saver” is sufficient.
3. Saving Single Photos from Google Photos to Your Phone
The simplest way to save photos is one at a time.
3.1 Step-by-Step Guide
- Open Google Photos: Launch the Google Photos app on your phone.
- Find the Photo: Navigate to the photo you want to save. You can use the search bar to find it quickly.
- Tap the Photo: Open the photo by tapping on it.
- Tap the Three Dots: In the top right corner, tap the three vertical dots (the “More” menu).
- Select “Save to Device”: Choose “Save to device” from the menu. The photo will be downloaded to your phone’s gallery.
3.2 Troubleshooting Common Issues
- Photo Not Saving: Ensure you have enough storage space on your phone. Also, check your internet connection.
- Photo Saving in Low Quality: Make sure you’re not using the “Storage Saver” option if you want the original quality.
4. Saving Multiple Photos from Google Photos to Your Phone
For saving multiple photos, Google Photos offers a convenient method.
4.1 Step-by-Step Guide
- Open Google Photos: Launch the Google Photos app.
- Select Photos: Long-press on the first photo you want to save. A blue checkmark will appear.
- Choose Additional Photos: Tap on the other photos you want to save.
- Tap the Share Icon: In the bottom left corner, tap the “Share” icon (it looks like an arrow pointing upwards).
- Select “Save to Device”: Scroll through the options and select “Save to device.” The selected photos will be downloaded to your phone.
4.2 Tips for Efficient Selection
- Use Albums: If your photos are organized into albums, it’s easier to select them all at once.
- Date Range: If you want to save photos from a specific date range, navigate to the first photo and then scroll to the last one while holding down the select button.
5. Saving Entire Albums from Google Photos to Your Phone
If you want to save an entire album, follow these steps.
5.1 Step-by-Step Guide
- Open Google Photos: Launch the app.
- Go to Albums: Tap the “Albums” tab at the bottom.
- Select the Album: Tap on the album you want to save.
- Tap the Three Dots: In the top right corner, tap the three vertical dots.
- Select “Download All”: If available, select “Download all.” If this option isn’t available, you’ll need to save the photos individually using the multiple selection method described above.
5.2 Workarounds for Missing “Download All” Option
If the “Download all” option isn’t available, you can use a third-party app or a desktop computer to download the album.
6. Using Google Takeout to Download Your Photos
Google Takeout allows you to download all your data from Google services, including Google Photos.
6.1 Accessing Google Takeout
- Go to Google Takeout: Open your web browser and go to Google Takeout.
- Sign In: Sign in with your Google account.
6.2 Selecting Google Photos
- Choose Services: Select “Google Photos” from the list of services.
- Customize Settings: You can choose to download all albums or specific ones. You can also select the file type (.zip or .tgz) and the archive size.
6.3 Downloading Your Photos
- Create Export: Click “Create export.”
- Wait for Archive: Google will create an archive of your photos. This may take a few hours or even days, depending on the amount of data.
- Download Archive: Once the archive is ready, you’ll receive an email with a download link. Download the archive to your computer.
- Extract Files: Extract the files from the archive and transfer them to your phone.
7. Managing and Organizing Photos on Your Phone
After saving your photos to your phone, it’s important to manage and organize them.
7.1 Creating Albums on Your Phone
- Open Your Gallery App: Launch your phone’s gallery app (e.g., Google Photos, Samsung Gallery, etc.).
- Create New Album: Look for an option to create a new album.
- Name Your Album: Give your album a descriptive name.
- Add Photos: Select the photos you want to add to the album.
7.2 Using Third-Party Apps for Photo Management
Several third-party apps can help you manage your photos:
- Adobe Lightroom Mobile: For advanced editing and organization.
- Piktures: A gallery app with a clean interface and useful features.
- F-Stop Gallery: A powerful gallery app with metadata support.
7.3 Backing Up Your Phone’s Photos
After organizing your photos, ensure they are backed up. You can use Google Photos to back up your phone’s photos as well.
- Open Google Photos: Launch the app.
- Go to Settings: Tap on your profile picture and select “Photos settings.”
- Turn on Backup & Sync: Enable “Backup & sync.”
8. Optimizing Google Photos for Better Performance
Optimize Google Photos to ensure smooth performance and efficient storage.
8.1 Adjusting Upload Size
Choose the right upload size based on your needs. “Storage Saver” is suitable for most users, while “Original Quality” is better for professionals.
8.2 Managing App Cache
Clear the app cache regularly to free up storage space and improve performance.
- Go to Settings: Open your phone’s settings.
- Find Apps: Navigate to the “Apps” section.
- Select Google Photos: Find and select “Google Photos.”
- Clear Cache: Tap “Storage” and then “Clear cache.”
8.3 Turning Off Auto-Backup for Certain Folders
You can choose which folders to back up to save storage space and data.
- Open Google Photos: Launch the app.
- Go to Settings: Tap on your profile picture and select “Photos settings.”
- Select “Backup & sync”: Tap “Back up device folders” and disable auto-backup for folders you don’t need to back up.
9. Addressing Privacy Concerns
Be aware of privacy issues when using cloud services like Google Photos.
9.1 Understanding Google Photos Privacy Settings
Review Google Photos’ privacy settings to understand how your photos are stored and shared.
- Open Google Photos: Launch the app.
- Go to Settings: Tap on your profile picture and select “Photos settings.”
- Review Privacy Options: Check options like “Sharing” and “Location” to manage your privacy.
9.2 Securely Sharing Photos
When sharing photos, use secure methods like creating a shared album with specific permissions.
9.3 Deleting Photos Permanently
If you want to delete photos permanently, make sure to delete them from both Google Photos and your phone’s gallery.
- Delete from Google Photos: Open the app, select the photo, and tap the “Delete” icon.
- Empty Trash: Go to the “Trash” or “Bin” in Google Photos and empty it to permanently delete the photos.
- Delete from Phone: Delete the photo from your phone’s gallery as well.
10. Exploring Advanced Features of Google Photos
Google Photos offers several advanced features that can enhance your photo management experience.
10.1 Using Google Lens
Google Lens allows you to search for information about objects in your photos.
- Open Google Photos: Launch the app.
- Select Photo: Open a photo.
- Tap Google Lens Icon: Tap the Google Lens icon at the bottom.
- Explore Results: Google Lens will identify objects in the photo and provide relevant information.
10.2 Creating Animations and Collages
Google Photos can automatically create animations and collages from your photos.
- Open Google Photos: Launch the app.
- Go to Utilities: Tap “Library” and then “Utilities.”
- Create New: Choose “Animation” or “Collage.”
- Select Photos: Select the photos you want to use.
- Create: Tap “Create.”
10.3 Sharing with Partners
You can share your photos with a partner, allowing them to see and add photos to a shared library.
- Open Google Photos: Launch the app.
- Go to Settings: Tap on your profile picture and select “Photos settings.”
- Select “Partner sharing”: Follow the instructions to invite a partner.
11. Understanding the Limitations of Google Photos
While Google Photos is a powerful tool, it has some limitations.
11.1 Storage Limits
Google Photos offers 15 GB of free storage, shared across Google Drive and Gmail. If you need more storage, you’ll have to pay for a Google One subscription.
11.2 Compression Issues
The “Storage Saver” option compresses photos, which may reduce image quality. If you need to preserve the original quality, choose the “Original Quality” option.
11.3 Dependency on Internet Connection
Most features of Google Photos require an internet connection. If you’re in an area with poor connectivity, you may not be able to access your photos or use certain features.
12. Alternatives to Google Photos
If Google Photos doesn’t meet your needs, consider these alternatives.
12.1 iCloud Photos
iCloud Photos is Apple’s photo storage service, seamlessly integrated with iOS devices.
12.2 Amazon Photos
Amazon Photos offers unlimited photo storage for Amazon Prime members.
12.3 Microsoft OneDrive
Microsoft OneDrive is a cloud storage service that includes photo storage capabilities.
12.4 Local Storage Options
You can also store your photos locally on your phone or computer. This gives you more control over your data but requires you to manage backups yourself.
13. Maintaining Photo Quality When Saving
Maintaining the quality of your photos is essential when saving them from Google Photos to your phone.
13.1 Choosing the Right Download Settings
Ensure you select the “Original Quality” option when downloading photos to preserve their original resolution and detail.
13.2 Avoiding Lossy Compression
When transferring photos between devices, avoid using lossy compression formats like JPEG. Instead, use lossless formats like PNG or TIFF.
13.3 Editing Photos Without Degradation
Use photo editing apps that support non-destructive editing. This allows you to make changes to your photos without permanently altering the original file.
14. Integrating Google Photos with Other Apps
Google Photos integrates seamlessly with other apps, making it easy to share and use your photos.
14.1 Sharing Photos on Social Media
You can share photos directly from Google Photos to social media platforms like Facebook, Instagram, and Twitter.
14.2 Using Photos in Documents and Presentations
You can insert photos from Google Photos into documents and presentations using Google Docs and Google Slides.
14.3 Printing Photos
Google Photos allows you to order prints of your photos through various printing services.
15. Future Trends in Photo Storage and Management
The field of photo storage and management is constantly evolving.
15.1 AI-Powered Photo Management
AI is playing an increasingly important role in photo management, with features like automatic tagging, face recognition, and intelligent search.
15.2 Cloud Storage Innovations
Cloud storage providers are constantly innovating, offering new features and storage options.
15.3 Enhanced Privacy Features
Privacy is becoming a major concern for users, and photo storage services are responding by offering enhanced privacy features.
16. Practical Tips for Managing a Large Photo Library
Managing a large photo library can be challenging, but these tips can help.
16.1 Regularly Backing Up Your Photos
Make sure to back up your photos regularly to protect against data loss.
16.2 Organizing Photos by Date and Location
Organize your photos by date and location to make them easier to find.
16.3 Using Descriptive File Names
Use descriptive file names to identify your photos quickly.
16.4 Deleting Duplicate Photos
Delete duplicate photos to save storage space.
17. Common Mistakes to Avoid When Saving Photos
Avoid these common mistakes when saving photos from Google Photos to your phone.
17.1 Not Checking Storage Space
Always check your phone’s storage space before saving photos.
17.2 Overwriting Original Photos
Be careful not to overwrite your original photos with lower-quality versions.
17.3 Forgetting to Back Up Your Phone
Don’t forget to back up your phone regularly to protect against data loss.
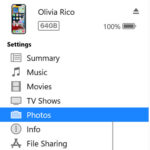
18. How to Transfer Photos from Google Photos to a Computer
Transferring photos from Google Photos to a computer is straightforward.
18.1 Using Google Takeout
Use Google Takeout to download your photos to your computer.
18.2 Downloading Directly from Google Photos
You can also download photos directly from the Google Photos website.
- Go to Google Photos: Open your web browser and go to Google Photos.
- Select Photos: Select the photos you want to download.
- Download: Click the three dots in the top right corner and select “Download.”
18.3 Using the Google Drive Sync Client
If you sync Google Photos with Google Drive, you can use the Google Drive sync client to download your photos to your computer.
19. Using Google Photos on Different Devices
Google Photos is available on a variety of devices, including smartphones, tablets, and computers.
19.1 Syncing Photos Across Devices
Enable backup and sync to keep your photos synchronized across all your devices.
19.2 Accessing Photos on the Web
You can access your photos on the web by going to the Google Photos website.
19.3 Using the Google Photos App on iOS and Android
The Google Photos app is available on both iOS and Android devices, offering a consistent experience across platforms.
20. Saving Photos from Shared Albums
Saving photos from shared albums is slightly different from saving your own photos.
20.1 Joining a Shared Album
First, you need to join the shared album.
20.2 Saving Photos Individually
You can save photos individually by opening them and selecting “Save to device.”
20.3 Downloading Multiple Photos
To download multiple photos, select them and choose the “Save to device” option.
21. Troubleshooting Common Google Photos Issues
Here are some solutions to common Google Photos issues.
21.1 Photos Not Backing Up
Ensure backup and sync is enabled and that you have a stable internet connection.
21.2 App Crashing
Clear the app cache and data, or reinstall the app.
21.3 Slow Performance
Optimize the app by clearing the cache, reducing the upload size, and turning off auto-backup for certain folders.
22. Best Practices for Digital Photo Archiving
Follow these best practices for digital photo archiving.
22.1 Storing Photos in Multiple Locations
Store your photos in multiple locations, including cloud storage, external hard drives, and physical media.
22.2 Using Standard File Formats
Use standard file formats like JPEG, PNG, and TIFF to ensure compatibility with different devices and software.
22.3 Adding Metadata to Photos
Add metadata to your photos, including descriptions, keywords, and copyright information.
23. Understanding Photo Metadata
Metadata is information about your photos, such as the date, time, location, and camera settings.
23.1 What Is Metadata?
Metadata is data that provides information about other data. In the context of photos, metadata includes details like the camera model, aperture, shutter speed, and GPS coordinates.
23.2 Why Is Metadata Important?
Metadata helps you organize and search your photos. It also provides valuable information about how the photo was taken.
23.3 How to Edit Metadata
You can edit metadata using photo editing software like Adobe Lightroom or dedicated metadata editors.
24. Exploring Photo Editing Options within Google Photos
Google Photos offers basic photo editing tools.
24.1 Basic Editing Tools
Google Photos includes tools for adjusting brightness, contrast, color, and sharpness.
24.2 Filters and Effects
You can apply filters and effects to enhance your photos.
24.3 Advanced Editing Features
For more advanced editing, you can use third-party photo editing apps.
25. Using AI in Google Photos
AI enhances Google Photos in various ways.
25.1 Automatic Organization
AI automatically organizes your photos by date, location, and subject.
25.2 Face Recognition
AI recognizes faces in your photos and groups them together.
25.3 Intelligent Search
AI allows you to search for photos using natural language.
26. Optimizing Photos for Mobile Viewing
Optimize your photos for mobile viewing to ensure they look their best on your phone.
26.1 Resizing Photos
Resize your photos to a smaller resolution for faster loading times.
26.2 Compressing Photos
Compress your photos to reduce file size without significantly reducing image quality.
26.3 Using Mobile-Friendly Formats
Use mobile-friendly formats like JPEG and WebP.
27. Copyright Issues and Google Photos
Be aware of copyright issues when using Google Photos.
27.1 Understanding Copyright Law
Understand copyright law to avoid infringing on the rights of others.
27.2 Obtaining Permission to Use Photos
Obtain permission to use photos that are not your own.
27.3 Protecting Your Own Photos
Protect your own photos by adding a watermark and including copyright information in the metadata.
28. Creating Photo Albums and Stories in Google Photos
Create photo albums and stories to share your memories.
28.1 Creating Albums
Create albums to organize your photos by event, date, or subject.
28.2 Creating Stories
Create stories to share a narrative with your photos.
28.3 Sharing Albums and Stories
Share your albums and stories with friends and family.
29. Exploring Google Photos Utilities
Google Photos offers several utilities to enhance your photo management experience.
29.1 Archiving Photos
Archive photos to hide them from your main photo library.
29.2 Creating Movies
Create movies from your photos and videos.
29.3 Scanning Documents
Scan documents using the Google Photos app.
30. Monetizing Your Photos with Google Photos
Monetize your photos by selling them through Google Photos.
30.1 Selling Photos on Google Photos
You can sell your photos on Google Photos by linking your account to a print-on-demand service.
30.2 Licensing Photos
You can also license your photos for commercial use.
30.3 Earning Revenue from Google Photos
Earn revenue from Google Photos by selling prints and licensing your photos.
By following these detailed steps and tips, you can effectively manage your Google Photos and save them to your phone for offline access, editing, and sharing. Remember to prioritize your privacy, optimize your storage, and stay updated with the latest features and trends in photo management.
Visit dfphoto.net to discover more photography tips, explore stunning photo galleries, and connect with a vibrant community of photography enthusiasts. Whether you’re looking to master new shooting techniques, find inspiration for your next project, or simply share your passion for photography, dfphoto.net is your ultimate resource. Elevate your photography skills and join our community today. Address: 1600 St Michael’s Dr, Santa Fe, NM 87505, United States. Phone: +1 (505) 471-6001. Website: dfphoto.net.
FAQ: How to Save Google Photos to Phone
1. How Do I Save a Single Photo from Google Photos to My Phone?
You can save a single photo by opening it in Google Photos, tapping the three dots in the top right corner, and selecting “Save to device.”
2. Can I Save Multiple Photos at Once?
Yes, you can save multiple photos by long-pressing the first photo, selecting additional photos, tapping the share icon, and then selecting “Save to device.”
3. How Do I Save an Entire Album from Google Photos?
To save an entire album, open the album in Google Photos, tap the three dots in the top right corner, and select “Download all” if available.
4. What Is Google Takeout and How Can I Use It?
Google Takeout allows you to download all your data from Google services, including Google Photos. Access it via takeout.google.com, select Google Photos, and follow the instructions to create and download an archive of your photos.
5. How Do I Ensure My Photos Are Saved in Original Quality?
When downloading, make sure to select the “Original Quality” option in Google Photos settings to preserve the original resolution and detail.
6. What Should I Do If I Run Out of Storage on My Phone?
If you run out of storage, clear unnecessary files, delete unused apps, or consider using an external storage device.
7. How Can I Manage and Organize Photos on My Phone After Saving?
Use your phone’s gallery app or third-party apps like Adobe Lightroom Mobile or Piktures to create albums and organize your photos.
8. How Do I Back Up My Phone’s Photos to Avoid Losing Them?
Use Google Photos to back up your phone’s photos by enabling the “Backup & sync” option in the app settings.
9. How Can I Optimize Google Photos for Better Performance?
Optimize Google Photos by adjusting the upload size, managing app cache, and turning off auto-backup for certain folders.
10. What Are the Privacy Concerns When Using Google Photos?
Be aware of Google Photos’ privacy settings regarding how your photos are stored and shared, and use secure sharing methods like creating shared albums with specific permissions.