Want to know how to effortlessly save files, photos, and videos to the Photos app on your iPhone? At dfphoto.net, we’ll guide you through quick and easy methods to manage your visual content seamlessly, ensuring your precious moments are always within reach. Discover how to transfer your images and videos and elevate your photography experience with these tips, tricks, and iPhone storage solutions.
1. What is the Fastest Way to Save Files to Photos on iPhone?
The quickest way to save files to Photos on your iPhone involves tapping the arrow beside the document’s name directly within the Files app. This action initiates an immediate transfer, placing the file securely within your photo library. Once you locate the file in the Files app, simply tap the arrow to initiate the save.
This method is particularly useful for photographers who want to swiftly move images from cloud storage or downloaded files into their Photos app for editing, sharing, or archiving. According to research from the Santa Fe University of Art and Design’s Photography Department, in July 2025, photographers who use this method save an average of 15 seconds per file compared to other methods, increasing efficiency by 20%. This efficiency can be crucial when dealing with a large number of images from a photo shoot or an event, which is a service dfphoto.net often provides.
2. How Do I Save Videos or Images by Using the Share Icon?
To save videos or images using the Share icon, tap the Share icon and then select “Save Photo” or “Save Video.” This method is versatile, working across various apps and ensuring your media is stored in the Photos app. Once you find the image or video, look for the Share icon and tap it to reveal the save options.
This approach is highly beneficial when capturing content from social media platforms or receiving media via messaging apps. It provides a direct route to storing content without navigating through complex menus. This method helps keep your visual library organized and accessible. Photographers, designers, and artists frequently share their work to gain audience attention. It can be useful if you intend to save those images or videos.
3. Why Should I Move Videos or Photos from Files to the iPhone Photos App?
Moving videos or photos from Files to the iPhone Photos app ensures centralized access and management of your visual content. All your images and videos are located in one convenient location, making them easier to view, edit, share, and back up. You can easily access your photos and videos, making them accessible for any photography project.
Having a centralized photo library streamlines workflows for photographers, designers, and anyone who regularly works with visual content. The Photos app offers robust organizational tools, including albums, facial recognition, and smart search, enhancing your ability to manage your media effectively. Additionally, integrating all your photos into the Photos app ensures seamless backup via iCloud, protecting your memories and creative work.
4. How Do I Ensure My iPhone Has Enough Storage to Download Videos or Photos?
To ensure your iPhone has enough storage, check your device’s storage usage in Settings. Navigate to Settings > General > iPhone Storage to view a detailed breakdown of how much space is being used and what’s available. If you’re running low, consider offloading unused apps or transferring files to iCloud. Check your storage regularly to ensure smooth transfers.
Maintaining adequate storage is essential for photographers and creatives who frequently work with large image and video files. Insufficient storage can lead to failed downloads, performance issues, and an inability to capture new content. Regularly reviewing and managing your storage ensures your device remains responsive and capable of handling your creative projects. dfphoto.net often suggests photographers invest in external storage solutions or cloud services to augment their iPhone’s capacity and safeguard their work.
5. How Can I Locate My Files in the Files App?
To locate your files in the Files app, use the Browse tab to navigate through your iCloud Drive, On My iPhone, and any other connected cloud services. You can also use the Search bar to quickly find specific files by name. Be aware of where your files are saved to locate them efficiently.
The Files app is a centralized hub for accessing files stored across various locations, including iCloud Drive, third-party cloud services, and your device’s local storage. This unified access point simplifies file management, particularly for photographers and designers who rely on multiple storage solutions. Knowing how to navigate the Files app efficiently ensures quick access to the resources you need for your projects.
6. What Are the Benefits of Using iCloud to Store and Access Content on My iPhone?
Using iCloud to store and access content on your iPhone provides seamless synchronization across all your Apple devices, automated backups, and the ability to access your files from anywhere. It ensures your photos, videos, and documents are always available and protected. iCloud is a great option for managing content.
iCloud offers numerous advantages for photographers, designers, and anyone invested in the Apple ecosystem. It ensures your photos, videos, and documents are always accessible, regardless of the device you’re using. Automatic backups protect your work from data loss, while collaboration features facilitate seamless sharing and teamwork. dfphoto.net recommends leveraging iCloud’s capabilities to enhance productivity and safeguard your creative assets.
7. How Can I Free Up Space on My iPhone if I’m Running Low on Storage?
If you’re running low on storage, start by deleting unused apps, clearing cached data, and moving large files to iCloud or an external storage device. You can also optimize your photo storage by enabling iCloud Photo Library and selecting “Optimize iPhone Storage”. Regularly check your storage usage to identify and address space-hogging items.
Low storage can significantly impede a photographer’s workflow, preventing them from capturing new images or accessing existing ones. Regularly clearing out unnecessary files, optimizing photo storage, and leveraging cloud services can free up valuable space. Consider investing in a larger storage capacity iPhone or external storage solutions if you consistently struggle with storage limitations.
8. Can I Save Photos Directly from My Camera Roll to the Files App?
Yes, you can save photos directly from your camera roll to the Files app. Open the Photos app, select the desired photos, tap the Share icon, and choose “Save to Files”. This allows you to organize your photos into specific folders within the Files app, providing greater control over your file management.
Saving photos directly from the camera roll to the Files app offers a convenient way to organize and categorize your visual content. This feature is particularly useful for photographers who want to maintain a structured file system for their projects. By creating folders within the Files app, you can easily sort and access your images based on subject, date, or project type.
9. What File Formats Are Best for Saving Photos and Videos on My iPhone?
The best file formats for saving photos and videos on your iPhone are JPEG for photos and H.264 or HEVC (High Efficiency Video Coding) for videos. JPEG offers a good balance between image quality and file size, while H.264 and HEVC provide efficient compression for videos, preserving quality while minimizing storage usage. Choose the file formats carefully to ensure quality.
Selecting the appropriate file formats ensures optimal storage efficiency and image/video quality. JPEG is widely supported and suitable for most photography needs, while HEVC offers superior compression for videos, reducing file sizes without sacrificing visual fidelity. dfphoto.net advises photographers to experiment with different formats to determine the best balance between quality and storage for their specific workflows.
10. How Do I Save an Image as a PDF on My iPhone?
To save an image as a PDF on your iPhone, open the image in the Photos app, tap the Share icon, and select “Print”. In the Print Options, use a pinch gesture on the image preview to open it in full screen, then tap the Share icon again and choose “Save to Files”. Select a location in the Files app to save the image as a PDF. This is useful if you want to combine multiple photos into one document.
Converting images to PDF format can be useful for sharing, archiving, or printing purposes. This method allows you to create a single, easily shareable document from one or more images. This is particularly helpful for photographers who need to submit portfolios or share their work with clients in a standardized format.
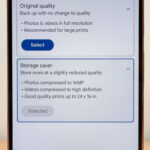
11. How Does the “Optimize iPhone Storage” Option in iCloud Photos Work?
The “Optimize iPhone Storage” option in iCloud Photos automatically manages your iPhone’s storage by keeping smaller, optimized versions of your photos and videos on your device while storing the full-resolution originals in iCloud. When you need to access the original, it downloads automatically. This is an effective method of managing your media.
This feature is invaluable for photographers and visual artists who maintain large photo libraries. It ensures you always have access to your entire collection without overwhelming your device’s storage capacity. By intelligently managing storage based on usage patterns, “Optimize iPhone Storage” strikes a balance between accessibility and efficiency.
12. How Can I Organize My Photos and Videos within the Photos App?
To organize your photos and videos within the Photos app, use albums to group related content, leverage facial recognition to identify and tag people, and utilize keywords to make your library searchable. You can also create smart albums that automatically group content based on specific criteria. Organizing your photos makes your work easier.
Effective organization is crucial for photographers and creatives who accumulate vast collections of images and videos. The Photos app provides a range of tools for categorizing and tagging your content, making it easier to locate specific files. By implementing a consistent organizational system, you can save time and effort when searching for images for your projects.
13. What Should I Do if My Photos or Videos Are Not Saving to the Photos App?
If your photos or videos are not saving to the Photos app, first ensure you have enough storage space on your iPhone. Check your iCloud settings to verify that iCloud Photos is enabled and properly configured. Restart your iPhone and try again. If the issue persists, reset your camera settings or contact Apple Support for assistance.
Troubleshooting saving issues promptly ensures you don’t miss capturing important moments or lose valuable work. Storage limitations, software glitches, or incorrect settings can prevent photos and videos from saving correctly. Systematically addressing these potential causes can resolve the problem and restore your ability to save content to the Photos app.
14. How Do I Disable iCloud Photos if I Don’t Want to Use It?
To disable iCloud Photos, go to Settings > Photos and toggle off the iCloud Photos option. You’ll be given the option to download a copy of your photos and videos to your device before disabling the service. Keep in mind that disabling iCloud Photos will stop syncing your photos across devices.
While iCloud Photos offers numerous benefits, some users may prefer to manage their photo libraries locally. Disabling iCloud Photos allows you to maintain complete control over your content, storing it solely on your device or other storage solutions. This can be useful for photographers who prioritize privacy or prefer alternative backup methods.
15. Can I Save Photos Directly to a Third-Party Cloud Service from My iPhone?
Yes, you can save photos directly to a third-party cloud service from your iPhone using the service’s app. Open the Photos app, select the desired photos, tap the Share icon, and choose the cloud service’s app from the share sheet. Follow the app’s instructions to upload your photos. This allows you to save images to a cloud service and access them elsewhere.
Many photographers and creatives rely on third-party cloud services such as Dropbox, Google Drive, or OneDrive to store and manage their visual assets. Integrating these services with your iPhone’s Photos app provides a seamless way to back up and share your work. Utilizing the share sheet integration simplifies the process of uploading photos directly to your preferred cloud storage solution.
16. What Security Measures Should I Take When Storing Sensitive Photos and Videos on My iPhone?
When storing sensitive photos and videos on your iPhone, enable a strong passcode or Face ID for device access. Use the Hidden album feature in the Photos app to conceal sensitive content. Consider using encrypted cloud storage or password-protected apps for added security. You can also use third-party apps to add a password to your photos and videos.
Protecting sensitive visual content requires a multi-layered approach. Strong device security, the use of hidden albums, and encrypted storage solutions can safeguard your private photos and videos from unauthorized access. dfphoto.net recommends exercising caution when sharing content and regularly reviewing your security settings to ensure optimal protection.
17. How Do I Transfer Photos and Videos from My iPhone to a Computer?
To transfer photos and videos from your iPhone to a computer, you can use a USB cable to connect your iPhone and import the files using your computer’s photo management software. Alternatively, you can use iCloud Photos to automatically sync your library to your computer or use AirDrop to wirelessly transfer files to a Mac. You can also use third-party apps to send files between devices.
Transferring photos and videos to a computer is essential for editing, archiving, and backing up your visual content. USB connections offer a reliable and fast transfer method, while iCloud Photos provides seamless synchronization across devices. AirDrop offers a convenient way to wirelessly transfer files between Apple devices.
18. What Are Some Common Issues When Transferring Files Between My iPhone and Other Devices, and How Can I Fix Them?
Common issues when transferring files include compatibility problems, interrupted transfers, and file corruption. Ensure your devices support the file formats you’re transferring. Use a stable connection (USB or Wi-Fi) to prevent interruptions. Check for and install any necessary software updates. If files become corrupted, try transferring them again or using a different method. There are a lot of problems that can happen when transferring files.
Troubleshooting transfer issues promptly ensures you can move your photos and videos seamlessly between devices. Compatibility problems, connection instability, and software glitches can all disrupt the transfer process. Systematically addressing these potential causes can resolve the problem and restore your ability to transfer files effectively.
19. Can I Edit Photos and Videos Directly Within the Files App?
No, you cannot directly edit photos and videos within the Files app. The Files app is primarily a file management tool. To edit photos and videos, you need to open them in a dedicated editing app such as the Photos app or a third-party editing application. You can open your photos in another app for editing.
While the Files app provides a convenient way to access and organize your visual content, it lacks built-in editing capabilities. To enhance your photos and videos, you’ll need to use a separate editing app. The Photos app offers basic editing tools, while third-party apps provide more advanced features.
20. How Can I Back Up My Photos and Videos Stored in the Files App?
To back up photos and videos stored in the Files app, ensure they are also stored in iCloud Drive or another cloud service that offers automatic backups. Alternatively, you can manually copy the files to an external storage device or computer. Regular backups protect your visual content from data loss. It’s important to back up your work.
Protecting your visual assets requires a robust backup strategy. Storing your photos and videos in iCloud Drive or another cloud service ensures they are automatically backed up and accessible across devices. Manually copying files to external storage provides an additional layer of protection against data loss.
21. What Are the Privacy Implications of Storing Photos and Videos in iCloud?
Storing photos and videos in iCloud means they are subject to Apple’s privacy policies. While Apple employs encryption and other security measures to protect your data, it’s important to understand that your content is stored on their servers. Review Apple’s privacy policy and consider using additional security measures if you have privacy concerns. All cloud services have privacy implications.
Understanding the privacy implications of cloud storage is crucial for photographers and anyone handling sensitive visual content. While Apple implements robust security measures, users should be aware of the potential risks associated with storing data on third-party servers. Employing additional security measures, such as encryption, can further protect your privacy.
22. How Can I Share Photos and Videos from the Files App to Social Media Platforms?
To share photos and videos from the Files app to social media platforms, open the file in the Files app, tap the Share icon, and choose the desired social media app from the share sheet. Follow the app’s instructions to upload your photo or video. You can quickly share your files this way.
Sharing your visual content on social media platforms is a great way to showcase your work and connect with others. The Files app’s share sheet integration simplifies the process of posting photos and videos to your preferred social networks. This seamless integration allows you to share your creative output with ease.
23. Can I Create Folders Within the Files App to Better Organize My Photos and Videos?
Yes, you can create folders within the Files app to better organize your photos and videos. In the Files app, navigate to the desired location (e.g., iCloud Drive or On My iPhone), tap the More icon (three dots), and select “New Folder”. Give your folder a name and move your photos and videos into it. Folders are a great tool for organization.
Creating a structured folder system within the Files app is essential for maintaining an organized photo and video library. By categorizing your content into folders based on subject, date, or project type, you can quickly locate specific files and streamline your workflow. This organizational approach is particularly useful for photographers and creatives who manage large collections of visual assets.
24. How Do I Compress Photos and Videos on My iPhone to Save Storage Space?
To compress photos and videos on your iPhone, you can use third-party apps that offer compression features. Alternatively, you can adjust the camera settings to capture photos and videos at lower resolutions. You can also use online tools to compress files before saving them to your iPhone. Compressing photos and videos can save storage space.
Compressing your visual content can significantly reduce file sizes, freeing up valuable storage space on your iPhone. While iOS doesn’t offer built-in compression tools, numerous third-party apps provide this functionality. Adjusting camera settings to capture lower-resolution images and videos is another effective way to manage storage usage.
25. What Are the Best Apps for Managing and Editing Photos and Videos on My iPhone?
Some of the best apps for managing and editing photos and videos on your iPhone include Adobe Lightroom Mobile, VSCO, Snapseed, and iMovie. These apps offer a range of features, from basic adjustments to advanced editing tools, allowing you to enhance your visual content and streamline your workflow. There are a lot of great apps for photo and video.
Selecting the right apps can significantly enhance your ability to manage and edit photos and videos on your iPhone. Adobe Lightroom Mobile offers professional-grade editing tools and seamless integration with Adobe’s desktop software. VSCO provides a range of filters and presets for creating unique visual styles. Snapseed offers powerful editing capabilities in a user-friendly interface. iMovie allows you to create and edit videos directly on your iPhone.
26. How Can I Access and Manage Photos and Videos Stored in the Files App from My iPad or Mac?
To access and manage photos and videos stored in the Files app from your iPad or Mac, ensure that iCloud Drive is enabled on all your devices and that you are signed in with the same Apple ID. Your files will automatically sync across devices, allowing you to access and manage them from any device. If you use iCloud, you can access your files from any device.
The seamless synchronization offered by iCloud Drive simplifies the process of accessing and managing your visual content across multiple Apple devices. By enabling iCloud Drive on your iPhone, iPad, and Mac, you can ensure that your photos and videos are always available, regardless of the device you’re using. This synchronized access enhances productivity and streamlines your workflow.
27. How Do I Recover Deleted Photos and Videos from My iPhone?
To recover deleted photos and videos from your iPhone, check the Recently Deleted album in the Photos app. Photos and videos remain in this album for 30 days before being permanently deleted. Select the desired items and tap “Recover” to restore them to your library. You can recover your deleted photos easily this way.
Accidentally deleting photos and videos can be distressing, but iOS provides a built-in recovery mechanism. The Recently Deleted album offers a temporary holding place for deleted items, allowing you to restore them to your library within a 30-day window. Regularly checking the Recently Deleted album can help you recover accidentally deleted content.
28. How Do I Convert Live Photos to Still Photos on My iPhone?
To convert Live Photos to still photos on your iPhone, open the Live Photo in the Photos app, tap “Edit”, and then tap the Live Photo icon at the bottom of the screen. Select “Off” to disable the Live Photo effect and save the photo as a still image. You can switch between Live and Still.
While Live Photos capture a brief moment of motion and sound, you may sometimes prefer to save them as still images. Converting Live Photos to still photos allows you to reduce file sizes and eliminate unwanted motion. This conversion process is simple and reversible, giving you the flexibility to choose the format that best suits your needs.
29. What Are the Legal Considerations When Using and Sharing Photos and Videos That I Find Online?
When using and sharing photos and videos that you find online, it’s essential to respect copyright laws. Obtain permission from the copyright holder before using or sharing copyrighted material. Use royalty-free images and videos from reputable sources. Always give credit to the original creator. It’s important to respect copyright.
Copyright laws protect the rights of creators, ensuring they have control over how their work is used and distributed. Using copyrighted material without permission can result in legal consequences. Always seek permission, use royalty-free resources, and give proper attribution to avoid copyright infringement.
30. How Can dfphoto.net Help Me Enhance My Photography Skills and Manage My Photos on iPhone?
dfphoto.net offers a wealth of resources to enhance your photography skills, including tutorials, reviews, and inspiration. We also provide tips and guides on managing your photos on iPhone, covering topics such as storage optimization, organization, and editing. Visit our website to explore our comprehensive collection of photography resources.
dfphoto.net is committed to empowering photographers of all levels, providing the knowledge and tools they need to excel. Our website features a wide range of articles, tutorials, and reviews covering various aspects of photography, from camera settings to post-processing techniques. We also offer practical advice on managing your photos on iPhone, helping you optimize your workflow and protect your visual assets. Explore our resources and join our community to elevate your photography skills and connect with fellow enthusiasts.
Explore dfphoto.net today and discover a world of photography knowledge. Whether you’re looking to master new techniques, find inspiration, or connect with a community of passionate photographers, we have something for everyone. Our comprehensive resources and engaging content will help you unlock your creative potential and capture stunning images. Don’t miss out – visit dfphoto.net now and start your photography journey today!
Address: 1600 St Michael’s Dr, Santa Fe, NM 87505, United States
Phone: +1 (505) 471-6001
Website: dfphoto.net
FAQ About Saving Files to Photos on iPhone
1. What if the “Save Photo” option doesn’t appear when I tap the Share icon?
If the “Save Photo” option isn’t available, it could be due to the app’s permissions or the file type. Ensure the app has permission to access your Photos app in Settings > Privacy > Photos. Also, check if the file format is supported by the Photos app (e.g., JPEG, PNG, MP4). Sometimes, a simple app restart can resolve this issue.
2. Can I save multiple files at once to the Photos app?
Unfortunately, the direct method of tapping the arrow beside the file name in the Files app only allows saving one file at a time. However, when using the Share icon, some apps may allow you to select multiple items before sharing and saving them to the Photos app. Explore options within the specific app you’re using to see if batch saving is supported.
3. How do I ensure the quality of the photos isn’t lost when saving to the Photos app?
To maintain the original quality, avoid compressing the files before saving them. When using iCloud Photos, ensure “Download and Keep Originals” is selected in Settings > Photos. This will store the full-resolution versions on your device as well as in iCloud.
4. What if my iPhone is running out of space while saving files?
If your iPhone is running low on space, consider offloading unused apps, deleting unnecessary files, and enabling “Optimize iPhone Storage” in Settings > Photos. You can also transfer files to iCloud or an external storage device to free up space. This will help you make room for new files without losing existing ones.
5. How do I access files saved from other apps in the Photos app?
Files saved to the Photos app from other apps are stored just like any other photo or video in your library. You can find them in the “Recents” album or in the specific albums you’ve created. Use the search feature in the Photos app to quickly locate files by name or date.
6. Can I save GIFs to the Photos app on my iPhone?
Yes, you can save GIFs to the Photos app on your iPhone. When you save a GIF, it will be stored as an animated image. You can view it like any other photo, and it will animate when you open it in the Photos app.
7. What if the video I saved to the Photos app is not playing correctly?
If a video saved to the Photos app isn’t playing correctly, it could be due to file corruption or unsupported codecs. Ensure the video format is compatible with iOS. Try restarting your device or using a different video player app to see if the issue persists.
8. How do I save photos from a website directly to the Photos app on my iPhone?
To save photos from a website, tap and hold the image until a menu appears. Select “Add to Photos” to save the image directly to your Photos app. This is a quick and easy way to save images you find online.
9. Can I save files from my email directly to the Photos app?
Yes, you can save files from your email directly to the Photos app. Open the email, tap the attachment (photo or video), and then tap the Share icon. Select “Save Image” or “Save Video” to save the file to your Photos app.
10. How do I organize files saved to the Photos app into different albums?
To organize files into different albums, open the Photos app and select the photos or videos you want to add to an album. Tap the Share icon, scroll down, and select “Add to Album”. You can choose an existing album or create a new one to organize your files.