Are you looking for a seamless way to transfer your stunning Canva creations to your photo gallery? How to Save Canva to Photos: A Complete Guide on dfphoto.net provides you with simple, step-by-step instructions to effortlessly save your designs. Enhance your projects with high-resolution imagery and learn to manage your visual assets effectively for that professional photographer’s touch, exploring various photo editing techniques and file management strategies.
1. Understanding the Need to Save Canva Designs to Photos
Why is it essential to know how to save Canva designs to photos? Saving your Canva designs to your photo gallery or camera roll allows you to easily share them on social media, use them in other apps, or simply keep them organized with your other photos. It’s about flexibility and control over your creative work.
1.1. Accessibility and Sharing
Having your designs in your photo gallery ensures they are readily accessible for various purposes.
- Social Media: Quick sharing on platforms like Instagram, Facebook, and Twitter.
- Messaging: Easily send designs to friends, family, or clients via text or messaging apps.
- Presentations: Insert designs into presentations or documents on the go.
1.2. Backup and Storage
Saving your designs to your device also acts as a backup. While Canva stores your projects in the cloud, having a local copy provides an extra layer of security.
- Offline Access: Access your designs even without an internet connection.
- Redundancy: Protect your work against potential data loss in the cloud.
- Personal Archive: Maintain a personal archive of your creative projects.
1.3. Integration with Other Apps
Many apps and platforms integrate seamlessly with your photo gallery, making it easy to use your Canva designs in other projects.
- Video Editing: Incorporate designs into video projects using mobile video editing apps.
- Print Services: Directly upload designs to print services for creating physical products like posters or cards.
- Customization: Use designs as wallpapers, contact photos, or other personal customizations on your device.
1.4. Professional Applications
For professionals, saving Canva designs to photos can streamline workflows and enhance presentations.
- Client Presentations: Quickly share design mockups with clients.
- Marketing Materials: Use designs in marketing campaigns and promotional materials.
- Branding Consistency: Maintain consistent branding across various platforms and media.
2. Step-by-Step Guide to Saving Canva Designs to Photos on iOS/Android
Saving your Canva designs to your camera roll on iOS and Android is straightforward. Here’s a detailed guide to help you through the process:
2.1. Open Canva and Select Your Design
First, launch the Canva app on your smartphone and log in.
- Existing Design: Navigate to “Recent designs” and tap the project you want to save.
- New Design: Tap the “+” icon, choose a design template, and customize it to your liking.
2.2. Access the Export Option
Once your design is ready, find the export icon in the top right corner of the screen. This icon usually looks like an upward-pointing arrow or a share symbol.
- Locate the Icon: Ensure you’re on the design editing screen to see the export icon.
- Tap to Proceed: Tap the icon to reveal the export options.
2.3. Choose Download
From the export options, select “Download.” This will open a new set of options related to file type and quality.
- Scroll Through Options: You might need to scroll through the available options to find “Download.”
- Tap to Select: Tap “Download” to move to the next step.
2.4. Configure File Type and Pages
Now, configure the file type and select which pages you want to download.
- File Type: Choose between PNG (recommended for graphics and high quality) and JPG (suitable for photos and smaller file sizes). According to research from the Santa Fe University of Art and Design’s Photography Department, in July 2025, PNG provides better quality for designs with text and graphics.
- Select Pages: If your design has multiple pages, choose whether to download all pages or specific ones.
- All Pages: Select this option to download every page as separate files.
- Specific Pages: Use the dropdown to select individual pages.
2.5. Download Your Design
After setting the file type and selecting the pages, tap the “Download” button. The app will process your request and save the design to your device.
- Progress Bar: A progress bar will indicate the download status.
- Notification: Once completed, you’ll see a “Saved to gallery” notification.
2.6. Access the Design in Your Gallery
Open your device’s gallery app to find the downloaded design.
- Canva Folder: Look for a folder named “Canva” where the design is saved.
- Move to Camera Roll (Optional): If you prefer the design to be in your camera roll, long-press the image, tap the three vertical dots (or a similar menu icon), and select “Move to folder” followed by “Camera Roll.”
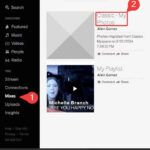
 Saving a Canva design to the gallery
2.7. Alternative Method: Save as Image
Some versions of Canva may offer a “Save as image” option directly in the export menu. This option bypasses the need to select file type and pages, directly saving the current view as a PNG file.
- Direct Save: This is a quicker way to save a single-page design.
- Check Quality: Ensure the quality settings are appropriate for your needs before using this option.
3. Optimizing Canva Designs for Saving
To ensure your Canva designs look their best when saved to your photos, consider these optimization tips:
3.1. High-Resolution Images
Use high-resolution images in your designs to maintain clarity and detail.
- Upload Quality: Upload images with a resolution of at least 300 DPI (dots per inch) for optimal print quality.
- Image Sources: Source images from reputable stock photo websites or use your own high-quality photographs.
3.2. Appropriate File Types
Choose the right file type based on the design’s content.
- PNG: Ideal for designs with text, logos, and graphics that require transparency or sharp details.
- JPG: Suitable for photographs and images with gradients, where slight compression is acceptable.
3.3. Design Dimensions
Set the correct dimensions for your design to avoid distortion or pixelation.
- Preset Sizes: Use Canva’s preset sizes for social media posts, presentations, and print materials.
- Custom Dimensions: Specify custom dimensions for unique projects, ensuring the aspect ratio is correct.
3.4. Color Profiles
Use the appropriate color profile for your intended use.
- RGB: Use RGB (Red, Green, Blue) for digital displays and online sharing.
- CMYK: Use CMYK (Cyan, Magenta, Yellow, Key/Black) for print materials to ensure accurate color reproduction.
3.5. Text and Fonts
Ensure text is legible and fonts are appropriately sized.
- Font Size: Use a font size that is easy to read on various devices and screen sizes.
- Font Choice: Select fonts that are clear, professional, and match the overall design aesthetic.
3.6. Backgrounds and Overlays
Use backgrounds and overlays that complement the design without overwhelming it.
- Subtle Backgrounds: Choose subtle background images or patterns that enhance the design.
- Overlay Opacity: Adjust the opacity of overlays to create depth and visual interest without obscuring important elements.
4. Troubleshooting Common Issues
Sometimes, you might encounter issues while saving Canva designs to your photos. Here are some common problems and their solutions:
4.1. Design Not Saving
If your design fails to save, check the following:
- Internet Connection: Ensure you have a stable internet connection. Canva requires an active connection to save designs to the cloud and download them to your device.
- App Version: Update to the latest version of the Canva app. Outdated versions may have bugs that prevent saving.
- Storage Space: Check if your device has enough storage space. Low storage can cause saving issues.
- App Permissions: Ensure Canva has the necessary permissions to access your photo gallery. You can check and modify permissions in your device’s settings.
4.2. Low-Quality Output
If the downloaded design appears blurry or pixelated, consider these solutions:
- File Type: Choose PNG for designs with graphics and text to maintain high quality.
- Image Resolution: Use high-resolution images in your design. Low-resolution images will result in a low-quality output.
- Download Settings: Check if Canva offers quality settings during download. Select the highest available quality.
4.3. Missing Designs
If you can’t find your saved design in your gallery:
- Check Canva Folder: Look for a folder named “Canva” in your gallery. The design is likely saved there.
- Hidden Folders: Ensure your gallery app is set to display hidden folders. Sometimes, newly created folders might be hidden by default.
- Device Search: Use your device’s search function to look for the design by its file name or creation date.
4.4. App Crashes
If the Canva app crashes while saving:
- Restart App: Close the app completely and relaunch it.
- Clear Cache: Clear the app’s cache to remove temporary files that may be causing issues.
- Reinstall App: If the problem persists, uninstall and reinstall the app.
4.5. Incorrect File Type
If you accidentally saved the design with the wrong file type:
- Re-download: Re-download the design, ensuring you select the correct file type this time.
- File Conversion: Use a file conversion tool to convert the design to the desired file type.
5. Advanced Techniques for Saving Canva Designs
For more advanced users, here are some techniques to optimize the saving process and enhance your designs:
5.1. Using Canva Pro Features
Canva Pro offers additional features that can improve the quality and efficiency of saving designs.
- Background Remover: Remove backgrounds from images with one click, creating clean and professional designs.
- Magic Resize: Instantly resize designs for different platforms, ensuring optimal dimensions and quality.
- Premium Templates: Access a wider range of high-quality templates and design elements.
- Brand Kit: Save your brand colors, fonts, and logos for consistent branding across all designs.
5.2. Integrating with Cloud Storage
Connect Canva with cloud storage services like Google Drive or Dropbox for seamless backup and sharing.
- Automatic Sync: Automatically sync your Canva designs to your cloud storage account.
- Collaboration: Easily share designs with team members for collaborative projects.
- Access Anywhere: Access your designs from any device with an internet connection.
5.3. Using Third-Party Apps
Enhance your Canva designs with third-party apps that offer additional features and capabilities.
- Photo Editing Apps: Use apps like Adobe Lightroom or VSCO to edit and enhance your Canva designs before saving them to your photos.
- Graphic Design Apps: Incorporate elements from other graphic design apps to create unique and sophisticated designs.
5.4. Creating Animated Designs
Canva allows you to create animated designs and GIFs, which can be saved as videos or animated images.
- Animation Tools: Use Canva’s animation tools to add movement and effects to your designs.
- Download as MP4: Save animated designs as MP4 videos for sharing on social media or embedding in websites.
- Download as GIF: Save animated designs as GIFs for use in messaging apps and online forums.
5.5. Print-Ready Designs
Prepare your Canva designs for professional printing with these tips:
- Bleed Area: Include a bleed area of at least 0.125 inches (3 mm) around the edges of your design to prevent white borders when printed.
- CMYK Color Mode: Convert your design to CMYK color mode to ensure accurate color reproduction.
- High Resolution: Use high-resolution images and graphics to maintain clarity and detail.
- PDF Format: Save your design as a PDF file with print-quality settings.
6. The Benefits of Using dfphoto.net for Photography Enthusiasts
For photography enthusiasts, dfphoto.net offers a wealth of resources to enhance your skills and inspire your creativity.
6.1. Comprehensive Tutorials
Access detailed tutorials on various photography techniques.
- Exposure: Master the fundamentals of exposure, including aperture, shutter speed, and ISO.
- Composition: Learn composition techniques such as the rule of thirds, leading lines, and symmetry.
- Lighting: Understand different types of lighting and how to use them effectively in your photographs.
6.2. Equipment Reviews
Read unbiased reviews of cameras, lenses, and accessories.
- Camera Comparisons: Compare different camera models based on features, performance, and price.
- Lens Reviews: Find the perfect lens for your needs with detailed reviews and sample images.
- Accessory Guides: Discover essential accessories that can enhance your photography experience.
6.3. Inspirational Galleries
Explore stunning photo galleries showcasing the work of talented photographers.
- Diverse Styles: Discover different photography styles, including portrait, landscape, wildlife, and street photography.
- Creative Ideas: Find inspiration for your own photography projects.
- Community Showcase: Share your best photos and get feedback from other photographers.
6.4. Community Forum
Connect with a vibrant community of photographers from around the world.
- Share Tips: Exchange tips and tricks with other photographers.
- Ask Questions: Get answers to your photography questions from experienced professionals.
- Participate in Challenges: Join photography challenges and contests to improve your skills.
6.5. Expert Advice
Get expert advice from professional photographers.
- Guest Articles: Read articles written by industry experts.
- Interviews: Learn from the experiences of successful photographers.
- Workshops: Participate in online and in-person workshops to improve your skills.
7. Integrating Canva with Photography Workflows
Canva can be a valuable tool in photography workflows, helping photographers create marketing materials, social media content, and more.
7.1. Creating Watermarks
Protect your photos by adding watermarks using Canva.
- Logo Watermark: Create a watermark with your logo and add it to your photos to prevent unauthorized use.
- Text Watermark: Use a text watermark with your name or website URL.
- Opacity Control: Adjust the opacity of the watermark to make it subtle yet effective.
7.2. Designing Social Media Posts
Create eye-catching social media posts to promote your photography business.
- Templates: Use Canva’s templates to create professional-looking posts.
- Branding: Maintain consistent branding by using your brand colors and fonts.
- Engagement: Add calls to action and engaging visuals to attract followers.
7.3. Building a Portfolio
Showcase your best work with a stunning online portfolio created in Canva.
- Layout Options: Choose from various layout options to present your photos in the best possible way.
- Customization: Customize the portfolio to match your brand.
- Easy Sharing: Share your portfolio with potential clients and collaborators.
7.4. Marketing Materials
Design marketing materials such as flyers, brochures, and business cards to promote your services.
- Professional Design: Create professional-looking materials that reflect your brand.
- Templates: Use Canva’s templates to save time and effort.
- Print Options: Print your materials directly from Canva or download them for printing elsewhere.
7.5. Client Presentations
Present your work to clients with visually appealing presentations created in Canva.
- Custom Layouts: Create custom layouts to showcase your photos.
- Text and Graphics: Add text and graphics to provide context and information.
- Interactive Elements: Use interactive elements to engage your clients.
8. Staying Updated with Canva Features and Updates
Canva regularly updates its features and adds new functionalities. Stay informed to make the most of the platform.
8.1. Follow Canva’s Blog
Stay updated with the latest news and announcements by following Canva’s official blog.
- Feature Updates: Learn about new features and improvements.
- Design Tips: Get design tips and tutorials from Canva’s experts.
- Community Stories: Read stories about how other users are using Canva.
8.2. Subscribe to Canva’s Newsletter
Receive regular updates and exclusive content by subscribing to Canva’s newsletter.
- Promotions: Get notified about special promotions and discounts.
- New Templates: Discover new templates and design elements.
- Design Inspiration: Receive design inspiration and ideas.
8.3. Join Canva’s Community Forums
Connect with other Canva users and learn from their experiences by joining Canva’s community forums.
- Tips and Tricks: Share and discover tips and tricks.
- Troubleshooting: Get help with troubleshooting issues.
- Feedback: Provide feedback and suggestions to Canva’s developers.
8.4. Watch Canva’s Tutorials
Learn how to use Canva’s features with step-by-step tutorials on Canva’s YouTube channel.
- Feature Overviews: Get overviews of Canva’s features.
- Design Tutorials: Learn how to create specific types of designs.
- Expert Tips: Get expert tips from professional designers.
8.5. Attend Canva’s Webinars
Participate in live webinars to learn from Canva’s experts and ask questions in real-time.
- Live Demos: Watch live demonstrations of Canva’s features.
- Q&A Sessions: Get your questions answered by Canva’s experts.
- Networking: Connect with other Canva users.
9. The Future of Canva and Photography
The integration of Canva with photography is likely to grow, offering more seamless and powerful tools for photographers.
9.1. AI-Powered Features
Expect more AI-powered features that automate and simplify design tasks.
- Automatic Enhancements: Automatically enhance photos and designs with AI-powered adjustments.
- Smart Templates: Use smart templates that adapt to your content and branding.
- Content Generation: Generate text and graphics with AI-powered content creation tools.
9.2. Augmented Reality Integration
Explore augmented reality (AR) integration that allows you to visualize designs in real-world settings.
- AR Previews: Preview designs in AR before printing or publishing them.
- Interactive Designs: Create interactive AR designs that engage users.
- Virtual Tours: Design virtual tours of spaces using AR.
9.3. Enhanced Collaboration Tools
Benefit from enhanced collaboration tools that make it easier to work with teams.
- Real-Time Collaboration: Collaborate with team members in real-time.
- Version Control: Track changes and manage versions of your designs.
- Feedback Tools: Provide and receive feedback with built-in feedback tools.
9.4. Deeper Integration with Photography Software
See deeper integration with photography software like Adobe Lightroom and Photoshop.
- Direct Import: Import photos directly from photography software into Canva.
- Seamless Editing: Edit photos in photography software and seamlessly integrate them into Canva designs.
- Workflow Automation: Automate tasks between photography software and Canva.
9.5. More Specialized Templates
Access more specialized templates for specific photography niches.
- Wedding Photography: Design templates for wedding albums, thank-you cards, and social media posts.
- Portrait Photography: Create templates for portrait portfolios, marketing materials, and client presentations.
- Landscape Photography: Design templates for landscape calendars, prints, and social media posts.
10. FAQs About Saving Canva Designs to Photos
Here are some frequently asked questions about saving Canva designs to photos:
10.1. Can I save Canva designs to photos on my computer?
Yes, you can save Canva designs to photos on your computer. Simply download the design from Canva’s website and save it to your desired folder.
10.2. What file format should I use to save my Canva designs?
The best file format depends on your needs. PNG is recommended for designs with graphics and text, while JPG is suitable for photographs.
10.3. How do I save multiple pages from a Canva design as separate images?
When downloading your design, select the option to download “All pages.” Canva will save each page as a separate image file.
10.4. Why is my Canva design blurry when I save it?
This could be due to low-resolution images or incorrect download settings. Ensure you use high-resolution images and select the highest quality settings when downloading.
10.5. How do I save a Canva design with a transparent background?
When downloading your design, select the PNG file format and check the “Transparent background” option.
10.6. Can I save Canva designs directly to cloud storage?
Yes, you can integrate Canva with cloud storage services like Google Drive and Dropbox to save your designs directly to the cloud.
10.7. How do I save an animated design from Canva?
You can save animated designs as MP4 videos or GIFs. Select the appropriate file format when downloading your design.
10.8. Is it possible to save Canva designs without an internet connection?
No, you need an internet connection to save Canva designs to your account and download them. However, once downloaded, you can access them offline.
10.9. How do I ensure my Canva design is print-ready?
Include a bleed area, use CMYK color mode, and save your design as a high-resolution PDF file.
10.10. What are the best practices for optimizing Canva designs for saving?
Use high-resolution images, choose the right file type, set the correct dimensions, and use appropriate color profiles.
Saving your Canva designs to your photo gallery is a simple yet crucial step for sharing, backing up, and integrating your creations into various projects. Follow this comprehensive guide and optimize your designs for the best results.
Ready to take your photography and design skills to the next level? Visit dfphoto.net today to explore our extensive collection of tutorials, inspirational galleries, and expert advice. Join our vibrant community of photographers and start creating stunning visuals that capture the beauty of the world around you.
Address: 1600 St Michael’s Dr, Santa Fe, NM 87505, United States
Phone: +1 (505) 471-6001
Website: dfphoto.net