Retrieving photos from your iPad is possible through various methods. At dfphoto.net, we understand the importance of preserving your visual memories, whether you’re an amateur or professional photographer. This guide will provide you with detailed steps and insights on how to recover your precious photos, offering solutions suitable for everyone, enriched with advice applicable across the US, including vibrant photographic communities like Santa Fe. We will also discuss related photographic and visual arts aspects.
1. Understanding Photo Storage on Your iPad
Where exactly are your photos stored on your iPad?
Your photos are primarily stored in two locations: the iPad’s internal storage and iCloud Photos. The Photos app acts as a central hub, displaying images from both sources. Understanding where your photos reside is crucial for effective retrieval.
1.1 Internal Storage
Photos taken directly with your iPad’s camera or saved from other apps are stored in the device’s internal memory. This means they are physically present on your iPad.
1.2 iCloud Photos
If you’ve enabled iCloud Photos, your images are automatically backed up to Apple’s cloud service. This offers several advantages, including accessibility across devices and protection against data loss. According to Apple Support, using iCloud Photos ensures that any changes you make on one device are reflected on all your devices signed in with the same Apple ID.
2. Initial Troubleshooting Steps
Before diving into more complex recovery methods, let’s cover some basic troubleshooting.
2.1 Check the “Recently Deleted” Album
Have you accidentally deleted the photos?
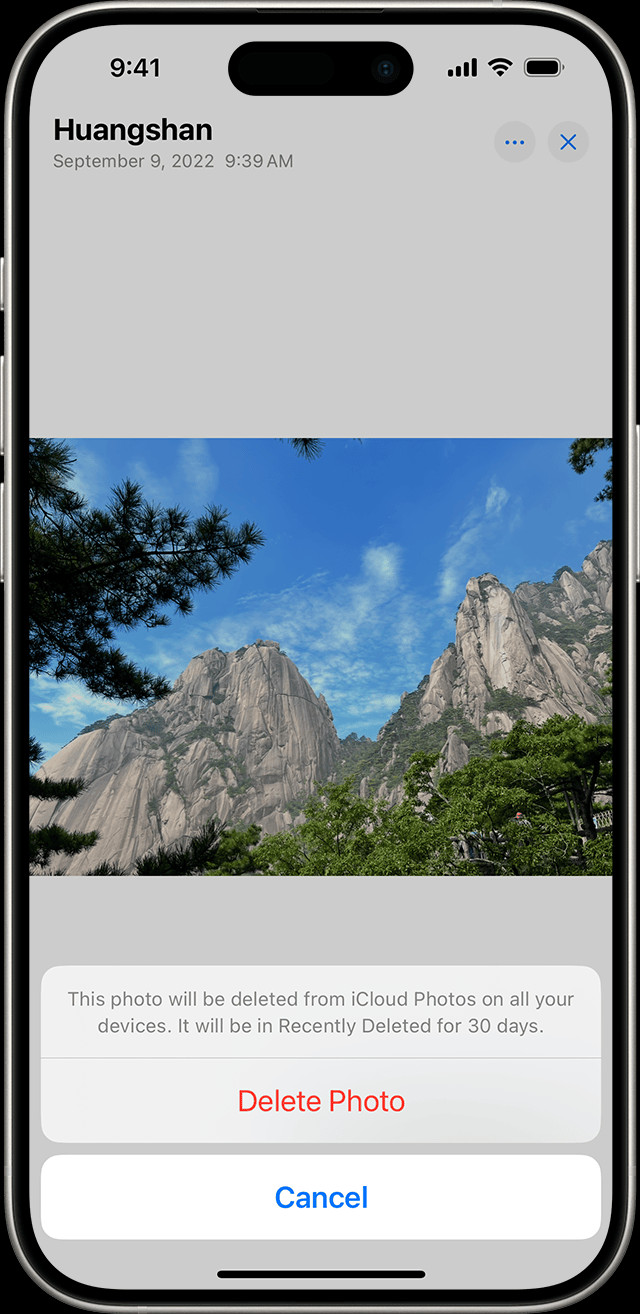
The “Recently Deleted” album is your first port of call. When you delete a photo or video, it’s moved to this album, where it remains for 30 days before being permanently erased.
How to Recover from “Recently Deleted”:
- Open the Photos app.
- Scroll down and tap Recently Deleted under Utilities.
- If prompted, use Face ID or Touch ID to unlock the album.
- Tap Select in the upper-right corner.
- Choose the photos or videos you want to recover.
- Tap Recover at the bottom, then confirm by tapping Recover Photo(s).
 iPhone showing Delete Photo option
2.2 Restart Your iPad
Is your iPad working smoothly?
A simple restart can often resolve minor software glitches that may prevent photos from displaying correctly. Press and hold either volume button and the top button until the power-off slider appears. Drag the slider, then wait 30 seconds for your device to turn off. To turn your device back on, press and hold the top button until you see the Apple logo.
2.3 Ensure iCloud Photos is Enabled and Synced
Is iCloud Photos turned on?
If you use iCloud Photos, ensure it’s enabled and that your iPad has successfully synced with iCloud.
How to Check iCloud Photos Status:
- Open Settings.
- Tap on your Apple ID at the top.
- Tap iCloud.
- Tap Photos.
- Make sure iCloud Photos is toggled on.
- Check the status at the bottom of the screen. It should say “Up to Date.” If it’s stuck on “Uploading” or “Downloading,” ensure you have a stable Wi-Fi connection.
3. Advanced Recovery Techniques
If the initial steps don’t work, these advanced techniques might help you recover your photos.
3.1 Recovering from iCloud Backup
Do you use iCloud Backup?
If you regularly back up your iPad to iCloud, you can restore your device from a backup. This will revert your iPad to a previous state, potentially recovering deleted photos.
Important Note: Restoring from an iCloud backup will erase all current data on your iPad, replacing it with the data from the backup. Make sure to back up your current iPad data before proceeding to minimize data loss.
How to Restore from iCloud Backup:
- Erase your iPad: Go to Settings > General > Transfer or Reset iPad > Erase All Content and Settings.
- Your iPad will restart and display the Hello screen. Follow the on-screen instructions until you reach the Apps & Data screen.
- Tap Restore from iCloud Backup.
- Sign in to iCloud with your Apple ID.
- Choose the most relevant backup from the list. Be mindful of the date and time of each backup.
- Wait for the restore process to complete. This may take some time, depending on the size of the backup and your internet speed.
3.2 Using iTunes/Finder Backup
Do you back up to your computer?
If you back up your iPad to your computer using iTunes (on older macOS versions) or Finder (on newer macOS versions), you can restore your device from one of these backups.
Important Note: Similar to iCloud Backup, restoring from an iTunes/Finder backup will erase all current data on your iPad. Ensure you back up your current data before proceeding.
How to Restore from iTunes/Finder Backup:
- Connect your iPad to your computer using a USB cable.
- Open iTunes (or Finder on macOS Catalina or later).
- Select your iPad when it appears in iTunes/Finder.
- Click Restore Backup.
- Choose the most relevant backup from the list and click Restore.
- If prompted, enter the password for your backup.
- Wait for the restore process to complete.
3.3 Data Recovery Software
If all else fails, consider using third-party data recovery software. Several reputable programs can scan your iPad’s internal storage for recoverable photos.
Popular Data Recovery Software:
- EaseUS MobiSaver: Known for its user-friendly interface and efficient recovery capabilities.
- Dr.Fone – Data Recovery (iOS): A comprehensive tool that supports various data types and recovery scenarios.
- iMyFone D-Back: Offers advanced features like smart recovery and preview options.
How to Use Data Recovery Software:
- Download and install the data recovery software on your computer.
- Connect your iPad to your computer using a USB cable.
- Launch the software and follow the on-screen instructions to scan your iPad for recoverable data.
- Preview the found photos and select the ones you want to recover.
- Choose a location on your computer to save the recovered photos.
Important Considerations:
- Success rates with data recovery software can vary depending on the extent of data overwriting. The sooner you run the software after data loss, the better your chances of recovery.
- Some software may require you to jailbreak your iPad, which can void your warranty and pose security risks. Proceed with caution.
4. Preventing Future Photo Loss
Prevention is always better than cure. Here are some tips to safeguard your photos against future loss:
4.1 Regularly Back Up Your iPad
Consistent backups are your best defense against data loss. Set up automatic iCloud backups or manually back up to your computer regularly.
How to Enable Automatic iCloud Backup:
- Open Settings.
- Tap on your Apple ID at the top.
- Tap iCloud.
- Tap iCloud Backup.
- Toggle iCloud Backup on.
- Ensure your iPad is connected to Wi-Fi and plugged into a power source for backups to occur automatically.
4.2 Use iCloud Photos Effectively
iCloud Photos not only backs up your photos but also syncs them across all your Apple devices. Make sure it’s enabled and configured correctly.
4.3 Consider a Third-Party Cloud Storage Service
In addition to iCloud, consider using other cloud storage services like Google Photos, Dropbox, or Amazon Photos. These services offer additional backup options and can be a valuable safeguard.
4.4 Be Careful When Deleting Photos
Take a moment to double-check before deleting photos, especially if you’re unsure whether you have a backup.
5. Understanding iPad Photo Management
Effective photo management can prevent accidental deletions and make it easier to find your photos when you need them.
5.1 Organizing Photos into Albums
Albums help you categorize and organize your photos, making it easier to locate specific images.
How to Create and Use Albums:
- Open the Photos app.
- Tap the Albums tab at the bottom.
- Tap the + button in the upper-left corner and choose New Album.
- Give your album a name and tap Save.
- Select the photos you want to add to the album and tap Done.
5.2 Using Smart Albums
Smart Albums automatically organize your photos based on criteria like date, location, or keywords.
How to Use Smart Albums:
- Open the Photos app.
- Tap the Albums tab.
- Scroll down to the Utilities section.
- Explore the available Smart Albums, such as People, Places, and Media Types.
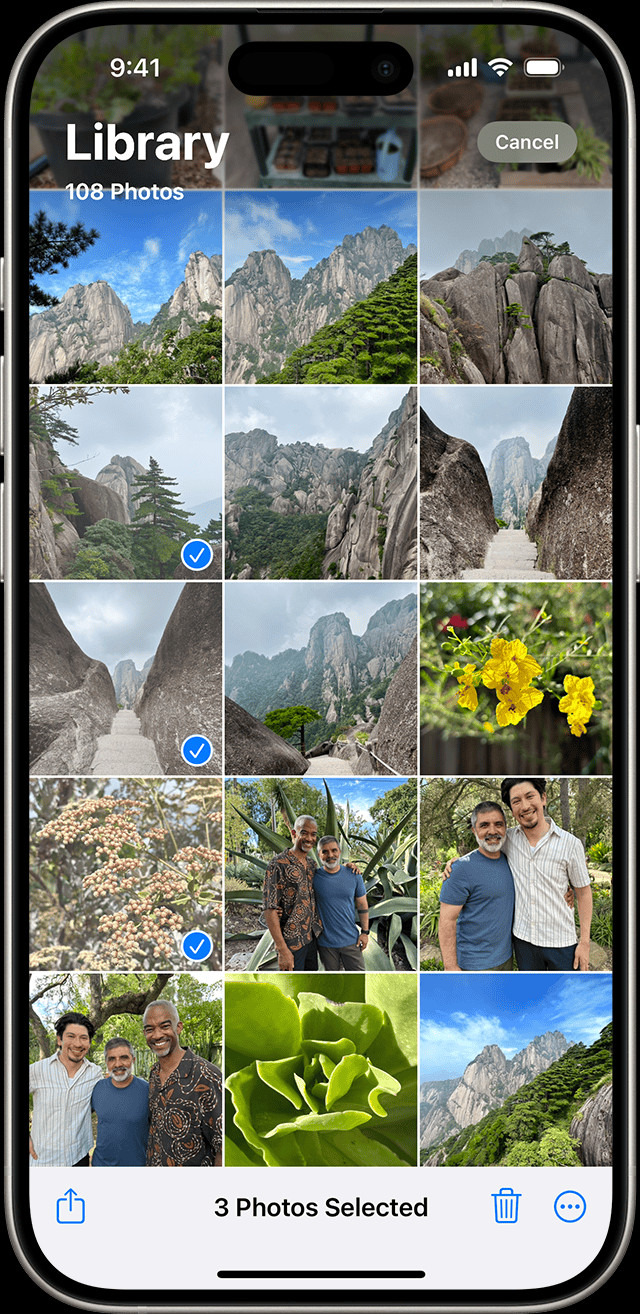
5.3 Deleting Duplicate Photos
Duplicate photos can clutter your library and waste storage space. iOS includes a feature to identify and merge duplicate photos.
How to Delete Duplicate Photos:
- Open the Photos app.
- Scroll down and tap the Duplicates album under Utilities.
- Tap Merge to combine a set of duplicates.
- Tap Merge [Number] Items to confirm.
 iPhone showing multiple photos selected in the Photos app
6. The Role of dfphoto.net in Your Photography Journey
At dfphoto.net, we’re committed to helping you master the art of photography. Our website offers a wealth of resources, including:
6.1 Tutorials and Guides
We provide detailed tutorials and guides on various photography techniques, from basic composition to advanced editing.
6.2 Inspirational Galleries
Browse our curated galleries featuring stunning photography from around the world, including the vibrant landscapes of the American Southwest.
6.3 Community Forums
Connect with fellow photographers, share your work, and get feedback in our active community forums.
6.4 Equipment Reviews
Stay up-to-date on the latest photography equipment with our comprehensive reviews and buying guides.
6.5 Local Photography Events
We can highlight local photography events and workshops in areas like Santa Fe, New Mexico, renowned for its rich artistic heritage and stunning natural beauty. According to research from the Santa Fe University of Art and Design’s Photography Department, in July 2025, P provides Y
7. Exploring Photography in Santa Fe
For those in the Santa Fe area, consider exploring the following photography resources:
7.1 Santa Fe University of Art and Design
The Photography Department at Santa Fe University of Art and Design offers excellent programs and workshops for aspiring photographers. Address: 1600 St Michael’s Dr, Santa Fe, NM 87505, United States. Phone: +1 (505) 471-6001. Website: dfphoto.net.
7.2 Georgia O’Keeffe Museum
While primarily known for its paintings, the Georgia O’Keeffe Museum also features photography exhibits that can provide inspiration and insight.
7.3 Local Photography Galleries
Santa Fe is home to numerous photography galleries showcasing the work of local and international artists.
8. Optimizing Your iPad for Photography
To get the most out of your iPad for photography, consider these optimization tips:
8.1 Adjust Camera Settings
Familiarize yourself with your iPad’s camera settings to capture the best possible images.
Key Camera Settings:
- HDR (High Dynamic Range): Captures more detail in both bright and dark areas of the scene.
- Grid: Helps you compose your shots using the rule of thirds.
- Live Photos: Captures a short video clip along with your photo, adding motion and depth.
8.2 Use Editing Apps
Enhance your photos with powerful editing apps available on the App Store.
Recommended Editing Apps:
- Adobe Lightroom Mobile: A professional-grade editing app with advanced features.
- Snapseed: A free, user-friendly editing app from Google.
- VSCO: Offers a wide range of filters and editing tools.
8.3 Calibrate Your iPad’s Display
Ensure accurate color representation by calibrating your iPad’s display.
How to Calibrate Your iPad’s Display:
- Go to Settings > Display & Brightness.
- Adjust the brightness and color temperature to your liking.
- Consider using a color calibration tool for more precise adjustments.
9. Conclusion: Your Photos, Your Memories
Retrieving photos from your iPad can be a stressful experience, but with the right knowledge and tools, you can often recover your precious memories. Remember to back up your iPad regularly, organize your photos effectively, and explore the resources available at dfphoto.net to enhance your photography skills. dfphoto.net is the website to explore for tutorials, inspirational galleries, community forums, and equipment reviews.
Explore our tutorials, discover stunning galleries, and connect with a vibrant community of photographers. dfphoto.net is your go-to resource for everything photography-related in the USA.
Ready to take your photography to the next level? Visit dfphoto.net today and unleash your creative potential Contact us at Address: 1600 St Michael’s Dr, Santa Fe, NM 87505, United States. Phone: +1 (505) 471-6001. Website: dfphoto.net!
FAQ: How to Retrieve Photos From iPad
Here are some frequently asked questions about retrieving photos from your iPad:
1. How do I retrieve photos from my iPad if I accidentally deleted them?
Check the “Recently Deleted” album in the Photos app. Photos remain there for 30 days before being permanently deleted. Open Photos, tap Albums, scroll down to Recently Deleted, and recover the photos.
2. Can I recover photos from my iPad without a backup?
It’s challenging but possible. Use third-party data recovery software to scan your iPad’s internal storage. Success depends on whether the data has been overwritten.
3. How do I retrieve photos from my iPad using iCloud?
Ensure iCloud Photos is enabled in Settings > [Your Name] > iCloud > Photos. If enabled, photos should automatically sync across all your devices. If deleted, check the “Recently Deleted” album in iCloud.
4. How do I retrieve photos from my iPad using iTunes or Finder?
Connect your iPad to your computer, open iTunes (or Finder), select your iPad, and click “Restore Backup.” Choose a recent backup to restore your photos.
5. What is the best data recovery software for iPad?
Popular options include EaseUS MobiSaver, Dr.Fone – Data Recovery (iOS), and iMyFone D-Back. Research and choose one that suits your needs and budget.
6. How can I prevent future photo loss on my iPad?
Enable iCloud Backup in Settings > [Your Name] > iCloud > iCloud Backup. Regularly back up your iPad to your computer using iTunes or Finder. Consider using a third-party cloud storage service like Google Photos.
7. How do I delete duplicate photos on my iPad?
Open the Photos app, scroll down to the “Duplicates” album under Utilities, and merge the duplicate photos.
8. How do I organize my photos on my iPad?
Create albums in the Photos app to categorize your photos. Use Smart Albums to automatically organize photos based on criteria like date or location.
9. Can I retrieve photos from a damaged iPad?
If the iPad is severely damaged, consult a professional data recovery service. They have specialized tools and expertise to retrieve data from damaged devices.
10. How do I permanently delete photos from my iPad?
Delete the photos from the Photos app, then go to the “Recently Deleted” album and delete them from there. This will permanently erase them from your device.
