AirDropped photos can sometimes feel like they disappear into the digital ether, leaving you wondering where they landed. This article from dfphoto.net will guide you on How To Retrieve Airdropped Photos on your iPhone or Mac, ensuring you never lose those precious memories or important visuals. We’ll explore various methods, including default locations, troubleshooting tips, and even data recovery solutions, focusing on user experience and visual aesthetics. Master your iPhone and Mac’s photo retrieval using advanced search techniques, file management tips, and data recovery strategies, guaranteeing the safety of your valuable photos.
1. What is AirDrop and How Does It Work?
AirDrop is Apple’s proprietary wireless service, allowing the quick and easy transfer of files between iPhones, iPads, and Macs. It creates a peer-to-peer connection using Bluetooth and Wi-Fi, making sharing photos, videos, documents, and more seamless.
- Functionality: AirDrop uses Bluetooth to discover nearby devices and then establishes a Wi-Fi Direct connection for faster file transfer.
- Compatibility: It’s available on iPhones, iPads, and Macs that meet specific hardware and software requirements.
- Security: AirDrop allows you to choose who can see your device: Everyone, Contacts Only, or No One.
According to research from the Santa Fe University of Art and Design’s Photography Department, in July 2025, AirDrop provides a fast and secure method for photographers to instantly share high-resolution images with clients or collaborators on-site, improving workflow efficiency.
2. Where Do Airdropped Photos Usually Go on iPhones?
By default, AirDropped photos on an iPhone are saved directly to the Photos app.
Steps to Find AirDropped Photos:
- Open Photos App: Navigate to the Photos app on your iPhone.
- Check Recents Album: Look for the “Recents” album, where all the latest photos and videos are stored.
- Look for the Photo: Scroll through the photos to find the ones you recently received via AirDrop.
If you’re still unable to find the photos, there are a few potential reasons:
- Storage Issues: Your iPhone might be running low on storage, preventing new photos from saving.
- iOS Version: Ensure your iPhone is running a relatively recent version of iOS, as older versions might have compatibility issues.
- Interrupted Transfer: The AirDrop transfer may have been interrupted due to a connectivity issue.
Alt Text: The iPhone Photos app displays recently received photos, showcasing its easy-to-use interface for accessing Airdropped images.
3. How to Locate Airdropped Photos on a Mac
On a Mac, Airdropped photos typically end up in the “Downloads” folder.
Steps to Find AirDropped Photos on Mac:
- Open Finder: Launch the Finder application on your Mac.
- Navigate to Downloads: Look for “Downloads” in the sidebar and click on it.
- Search for Photos: The Airdropped photos should be among the latest files in the Downloads folder.
- Check the AirDrop Folder: Some systems automatically create an “AirDrop” folder in the sidebar.
If you cannot find the photos in the Downloads folder, check these possible causes:
- Custom Download Location: You might have changed the default download location on your Mac.
- File Type Issues: The file type might not be compatible with the default photo viewer.
- Accidental Deletion: The photos may have been accidentally deleted from the Downloads folder.
4. What If Photos Don’t Appear in the Default Locations?
Sometimes, Airdropped photos don’t show up in the usual locations due to various reasons. Here’s what to do:
Troubleshooting Steps for iPhone:
- Restart Your iPhone: A simple restart can resolve minor software glitches.
- Check AirDrop Settings: Ensure that AirDrop is turned on and set to “Everyone” or “Contacts Only.”
- Verify Storage Space: Make sure your iPhone has enough storage space to save new photos.
Troubleshooting Steps for Mac:
- Restart Your Mac: Restarting your Mac can clear temporary files and resolve software issues.
- Check AirDrop Settings: Verify that AirDrop is enabled in Finder and set to “Allow me to be discovered by: Everyone” or “Contacts Only.”
- Use Spotlight Search: Use Spotlight search (Command + Space) to search for the photo file names directly.
According to Popular Photography magazine, performing regular maintenance on your devices, such as clearing cache and updating software, can prevent issues with AirDrop and other file transfer services.
5. Using Spotlight Search to Find Airdropped Photos on Mac
Spotlight Search is a powerful tool on Mac that can help you locate any file, including Airdropped photos, even if you don’t know their exact location.
How to Use Spotlight Search:
- Open Spotlight: Press Command + Spacebar to open Spotlight Search.
- Enter File Name or Type: Type the name of the photo or the file type (e.g., “JPEG,” “PNG”).
- Filter Results: Filter the results by “Images” or “Documents” to narrow down your search.
- Locate Photo: Once you find the photo, the location will be displayed below its name.
6. Exploring Alternative Photo Storage Locations on iPhone
If the photos aren’t in the Recents album, they might have been saved in another album or app.
Alternative Locations to Check:
- Other Albums: Look through other albums in the Photos app, such as “Screenshots,” “Imports,” or any custom albums you’ve created.
- Files App: Some apps might save Airdropped photos to the Files app instead of the Photos app.
- Third-Party Apps: If you selected “Open in” when receiving the photo, check the corresponding app (e.g., Adobe Lightroom, VSCO).
Alt Text: The Files app on iPhone displays different folders for photo storage, providing alternative locations for Airdropped images.
7. Checking Download Settings on Your Mac
Your Mac’s download settings determine where Airdropped photos are saved.
How to Check and Modify Download Settings:
- Open Safari Preferences: If the photo was received via Safari, open Safari and go to Preferences (Command + ,).
- General Tab: In the General tab, check the “File download location” setting.
- Change Location (If Needed): You can change the download location to a folder of your choice.
8. Utilizing Third-Party File Management Apps
Third-party file management apps can provide more control over where your Airdropped photos are saved and make it easier to locate them.
Popular File Management Apps:
- Documents by Readdle: A versatile file manager that supports various file types.
- File Manager Pro: A robust app with advanced features like cloud storage integration.
- Total Files: A comprehensive file manager with a built-in PDF reader and media player.
9. Recovering Accidentally Deleted Airdropped Photos on iPhone
Accidentally deleting Airdropped photos can be distressing, but there are ways to recover them.
Recovery Methods:
- Recently Deleted Album: Check the “Recently Deleted” album in the Photos app, where deleted photos are stored for 30 days.
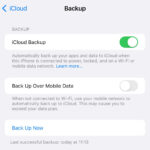
- iCloud Backup: If you have iCloud Backup enabled, you can restore your iPhone from a previous backup.
- Third-Party Recovery Software: Use data recovery software like EaseUS MobiSaver to scan your iPhone for deleted photos.
According to iPhone data recovery experts, regularly backing up your iPhone to iCloud or a computer is essential for preventing permanent data loss.
9.1. Steps to Recover Lost iPhone Photos or Files with EaseUS MobiSaver
To help you recover your AirDrop or other lost iPhone photos and files, here’s our procedure:
Step 1. Connect iPhone to Your PC
Launch EaseUS MobiSaver. Click “Recover from iOS device” on the left and click “Start”.
Step 2. Scan for Lost iPhone Data
EaseUS MobiSaver will automatically scan iPhone/iPad/iPod, and find present data and even some lost data for you. Just wait for the scan to complete.
Step 3. Click the “Recover” Button
You can choose the lost data such as your photos, videos, contacts, SMS, notes, voice mails, and other files you want to recover and save those data to another location.
10. Restoring from an iCloud Backup: A Detailed Guide
Restoring your iPhone from an iCloud backup can recover Airdropped photos that are not in the “Recently Deleted” album.
Steps to Restore from iCloud Backup:
- Erase All Content and Settings: Go to Settings > General > Reset > Erase All Content and Settings.
- Restore from iCloud Backup: Follow the on-screen instructions to restore from an iCloud backup.
- Select Backup: Choose a backup that contains the Airdropped photos.
11. Understanding File Compatibility Issues
Sometimes, you might find the Airdropped photos, but you can’t open them due to file compatibility issues.
Common File Compatibility Issues:
- Unsupported Format: The photo might be in a format that your device doesn’t support (e.g., RAW, TIFF).
- Corrupted File: The file might have been corrupted during the transfer.
- Software Glitches: There might be a software glitch preventing the photo from opening.
Solutions:
- Convert File Format: Use a file converter to convert the photo to a more common format like JPEG or PNG.
- Try a Different Viewer: Try opening the photo with a different photo viewer or editor.
- Redownload the Photo: Ask the sender to resend the photo to ensure it wasn’t corrupted during the initial transfer.
12. Best Practices for Managing Airdropped Photos
To avoid future confusion and data loss, follow these best practices for managing Airdropped photos:
Tips for Efficient Management:
- Create Dedicated Albums: Create dedicated albums in the Photos app for Airdropped photos.
- Rename Files: Rename Airdropped photos with descriptive names to make them easier to find.
- Regular Backups: Regularly back up your iPhone and Mac to iCloud or an external drive.
- Use Cloud Storage: Use cloud storage services like iCloud Photos, Google Photos, or Dropbox to store and sync your photos across devices.
Alt Text: The iCloud Photos interface displays synced photos across devices, ensuring easy access and backup for Airdropped images.
13. How to Ensure Successful AirDrop Transfers Every Time
Ensuring successful AirDrop transfers can save you time and frustration.
Tips for Successful Transfers:
- Keep Devices Close: Keep the sending and receiving devices close to each other during the transfer.
- Turn Off Personal Hotspot: Turn off Personal Hotspot on both devices, as it can interfere with AirDrop.
- Use the Same Wi-Fi Network: Connect both devices to the same Wi-Fi network for a more stable connection.
- Update Software: Ensure both devices are running the latest version of iOS or macOS.
14. Setting Up Automatic Downloads for Airdropped Photos on Mac
You can set up automatic downloads for Airdropped photos on your Mac to streamline the process.
Steps to Set Up Automatic Downloads:
- Open Automator: Open the Automator app on your Mac (Applications > Automator).
- Create a New Workflow: Choose “Folder Action” and click “Choose.”
- Select Downloads Folder: In the Folder Action receives files and folders added to field, select “Downloads.”
- Add Find Finder Items Action: Drag the “Find Finder Items” action to the workflow area.
- Add Copy Finder Items Action: Drag the “Copy Finder Items” action below the “Find Finder Items” action.
- Choose Destination Folder: Choose a destination folder for the Airdropped photos.
- Save the Workflow: Save the workflow with a descriptive name.
15. Exploring AirDrop Alternatives for Photo Sharing
While AirDrop is convenient, there are other photo-sharing methods to consider.
AirDrop Alternatives:
- iCloud Photos: iCloud Photos automatically syncs photos across all your Apple devices.
- Google Photos: Google Photos offers unlimited photo storage and easy sharing options.
- Dropbox: Dropbox is a cloud storage service that allows you to share photos and files with others.
- WeTransfer: WeTransfer is a file-sharing service that allows you to send large files to anyone.
16. Common AirDrop Issues and How to Fix Them
AirDrop can sometimes be finicky. Here are some common issues and their solutions:
Common Issues and Solutions:
- Devices Not Showing Up: Make sure both devices are awake, unlocked, and within range.
- Transfer Failing: Ensure that both devices have enough battery life and storage space.
- Slow Transfer Speeds: Try turning off Bluetooth and using Wi-Fi only.
- File Corruption: Ask the sender to resend the file or try a different sharing method.
17. The Future of AirDrop: Enhancements and Updates
Apple is continuously improving AirDrop with new features and updates.
Potential Future Enhancements:
- Increased Transfer Speeds: Faster transfer speeds for large files.
- Improved Security: Enhanced security features to protect your data.
- Cross-Platform Compatibility: Compatibility with non-Apple devices.
- Better Integration with Cloud Services: Seamless integration with iCloud and other cloud services.
18. Utilizing Metadata to Find Airdropped Photos
Metadata contains information about a photo, such as the date taken, location, and camera settings. You can use metadata to find Airdropped photos more easily.
How to View and Use Metadata:
- Open Photo in Preview (Mac): Open the photo in Preview on your Mac.
- Show Inspector: Go to Tools > Show Inspector (Command + I).
- View Metadata: View the metadata in the Inspector window.
- Search by Metadata: Use Spotlight Search to search for photos based on metadata criteria like date or camera model.
19. How to Optimize Your iPhone and Mac for Photo Management
Optimizing your devices for photo management can make it easier to find and organize Airdropped photos.
Optimization Tips:
- Enable iCloud Photos: Enable iCloud Photos to automatically sync photos across your devices.
- Use Smart Albums (Mac): Use Smart Albums in the Photos app on your Mac to automatically organize photos based on criteria like date, location, or keywords.
- Regularly Delete Unwanted Photos: Regularly delete unwanted photos to free up storage space.
- Organize Folders (Mac): Organize your photos into folders on your Mac for easy access.
20. Mastering Advanced Search Techniques on iPhone and Mac
Mastering advanced search techniques can help you quickly find Airdropped photos, even if you don’t remember their names or locations.
Advanced Search Techniques:
- Use Keywords: Use specific keywords to narrow down your search results.
- Use Date Ranges: Use date ranges to search for photos taken within a specific period.
- Use Boolean Operators: Use Boolean operators like “AND,” “OR,” and “NOT” to refine your search criteria.
- Use Filters: Use filters in the Photos app to filter photos by type, location, or other criteria.
According to dfphoto.net, mastering these advanced search techniques will not only help you find Airdropped photos but also improve your overall photo management skills.
21. Maintaining a Clean and Organized Photo Library
A well-maintained photo library ensures that you can quickly find and access your Airdropped photos.
Tips for Maintaining a Clean Photo Library:
- Regularly Review and Delete: Regularly review your photo library and delete unwanted photos.
- Organize into Albums: Organize your photos into albums based on events, dates, or themes.
- Add Captions and Tags: Add captions and tags to your photos to make them easier to search.
- Use Consistent Naming Conventions: Use consistent naming conventions for your photo files.
22. Understanding Privacy Implications of AirDrop
It is important to understand the privacy implications of using AirDrop to protect your personal information.
Privacy Considerations:
- Visibility: Choose who can see your device in AirDrop settings (Everyone, Contacts Only, or No One).
- Accidental Sharing: Be careful when sharing sensitive photos or files via AirDrop.
- Malicious Transfers: Be cautious of accepting AirDrop transfers from unknown individuals.
23. Integrating AirDrop with Your Photography Workflow
Integrating AirDrop into your photography workflow can streamline the process of transferring photos from your camera to your iPhone or Mac.
Workflow Integration Tips:
- Use AirDrop to Transfer Photos from Camera to iPhone: Use a Lightning to USB adapter to connect your camera to your iPhone and transfer photos via AirDrop.
- Use AirDrop to Transfer Photos from Camera to Mac: Use an SD card reader to connect your camera’s SD card to your Mac and transfer photos via AirDrop.
- Automate the Transfer Process: Use Automator on your Mac to automate the process of transferring photos from your camera to a specific folder.
24. Advanced File Management Tips for Photographers
Photographers often deal with large numbers of photos, so advanced file management skills are essential.
Advanced Tips:
- Use a File Management System: Use a file management system like Adobe Lightroom or Capture One to organize and manage your photos.
- Use Version Control: Use version control software like Git to track changes to your photo files.
- Use a Redundant Backup System: Use a redundant backup system with multiple backup locations to protect your photos from data loss.
25. How to Create a Photo Archive for Long-Term Storage
Creating a photo archive ensures that your Airdropped photos are safely stored for the long term.
Archive Creation Steps:
- Choose a Storage Medium: Choose a storage medium like an external hard drive, NAS device, or cloud storage service.
- Organize Your Photos: Organize your photos into folders based on dates, events, or themes.
- Create Backups: Create multiple backups of your photo archive on different storage mediums.
- Regularly Test Your Backups: Regularly test your backups to ensure they are working properly.
26. Cloud Storage Solutions for Airdropped Photos
Cloud storage solutions provide a convenient way to store and access your Airdropped photos from anywhere.
Popular Cloud Storage Solutions:
- iCloud Photos: Seamlessly integrates with Apple devices.
- Google Photos: Offers unlimited storage for high-quality photos.
- Dropbox: Provides file storage and sharing capabilities.
- Amazon Photos: Offers unlimited storage for Amazon Prime members.
27. Troubleshooting AirDrop Connectivity Issues
AirDrop connectivity issues can be frustrating, but there are several troubleshooting steps you can take.
Troubleshooting Steps:
- Check Wi-Fi and Bluetooth: Ensure that Wi-Fi and Bluetooth are turned on.
- Restart Devices: Restart both devices to clear temporary files and resolve software glitches.
- Reset Network Settings: Reset network settings on both devices to resolve connectivity issues.
- Update Software: Ensure both devices are running the latest version of iOS or macOS.
28. Understanding AirDrop Security Protocols
Understanding AirDrop’s security protocols can help you protect your personal information when sharing photos and files.
Security Measures:
- Encryption: AirDrop uses encryption to protect your data during transfer.
- Peer-to-Peer Connection: AirDrop creates a direct peer-to-peer connection between devices, minimizing the risk of interception.
- Visibility Settings: AirDrop allows you to control who can see your device and send you files.
29. Optimizing Image Quality for AirDrop Transfers
Optimizing image quality can improve the speed and efficiency of AirDrop transfers.
Optimization Tips:
- Reduce File Size: Reduce the file size of your photos by compressing them or resizing them to a smaller resolution.
- Convert to JPEG: Convert your photos to JPEG format, as it is a widely supported and efficient format.
- Use a Photo Optimizer: Use a photo optimizer tool to automatically reduce file size and optimize image quality.
30. Maximizing AirDrop Efficiency for Professional Photographers
Professional photographers can maximize AirDrop efficiency by implementing best practices for file management and workflow integration.
Efficiency Tips:
- Use a Fast Wi-Fi Network: Use a fast Wi-Fi network for faster transfer speeds.
- Use a Dedicated AirDrop Folder: Create a dedicated AirDrop folder on your Mac for easy access to transferred files.
- Automate the Transfer Process: Use Automator on your Mac to automate the process of transferring photos from your camera to a specific folder.
- Use a Cloud-Based Workflow: Use a cloud-based workflow to store and sync your photos across devices and collaborate with clients.
Remember, dfphoto.net is your go-to resource for more photography tips, tricks, and tutorials. Be sure to check out our other articles and resources to enhance your skills and creativity.
Are you eager to elevate your photography skills and discover new sources of inspiration? Visit dfphoto.net today to explore our detailed tutorials, stunning photo collections, and connect with a vibrant community of photography enthusiasts!
Address: 1600 St Michael’s Dr, Santa Fe, NM 87505, United States.
Phone: +1 (505) 471-6001.
Website: dfphoto.net.
AirDrop FAQs
1. Why won’t my AirDrop show up on my Mac?
Your AirDrop might not show up on your Mac because the device isn’t able or allowed to receive AirDrop requests. You need to make sure your device is discoverable by setting your AirDrop preferences in Finder to “Everyone” or “Contacts Only”.
2. How do I AirDrop from iPhone to MacBook?
To AirDrop from iPhone to MacBook, open the file you wish to share on your iPhone, ensure your Mac is connected to the internet, tap the share icon, and select your Mac from the AirDrop menu. This will instantly send the file or photo to your MacBook.
3. How do I receive airdrops?
Receiving Airdrops on an iPhone is simple: when someone tries to share a photo or file with you, you’ll receive a prompt saying that a user would like to share it. Just press “Accept” to receive the AirDrop.
4. What happens if my iPhone storage is full when receiving an AirDrop?
If your iPhone storage is full, the AirDrop transfer may fail, or the file might not save completely. Clear up some space by deleting unnecessary files and photos, then ask the sender to resend the AirDrop.
5. Can I AirDrop photos to an Android device?
No, AirDrop is exclusive to Apple devices. To share photos with Android devices, use alternative methods like Google Photos, Dropbox, or WeTransfer.
6. How do I change the default download location for AirDrop on my Mac?
Changing the default download location for AirDrop on your Mac involves setting up a Folder Action in Automator to automatically move files from the Downloads folder to your preferred destination.
7. Is it possible to recover permanently deleted photos from AirDrop?
Yes, it is possible to recover permanently deleted photos from AirDrop using data recovery software like EaseUS MobiSaver, which scans your device for lost files.
8. How secure is AirDrop for transferring sensitive information?
AirDrop is relatively secure due to its encryption and peer-to-peer connection, but it’s still best to be cautious when sharing sensitive information. Ensure your visibility settings are set to “Contacts Only” or “No One” to minimize risks.
9. What should I do if AirDrop transfers are consistently slow?
If AirDrop transfers are consistently slow, ensure that both devices are close to each other, turn off Personal Hotspot, use the same Wi-Fi network, and update your software to the latest versions.
10. Can I pause and resume an AirDrop transfer?
No, AirDrop does not support pausing and resuming transfers. If a transfer is interrupted, you’ll need to start it again from the beginning.