Losing precious photos on your iPhone can be devastating. Fortunately, there are several ways to restore them. This guide provides step-by-step instructions on how to recover deleted iPhone photos, whether they’re in recently deleted albums, hidden albums, or iCloud.
 alt text: a person holding an iPhone with the photos app open
Recover Photos from the Recently Deleted Album
Accidentally deleted a photo? Don’t panic! Deleted photos are moved to the Recently Deleted album for 30 days before being permanently erased. Here’s how to retrieve them:
On iPhone and iPad:
- Open the Photos app and swipe up.
- Tap “Recently Deleted” in the Utilities section.
- Authenticate with Face ID or Touch ID.
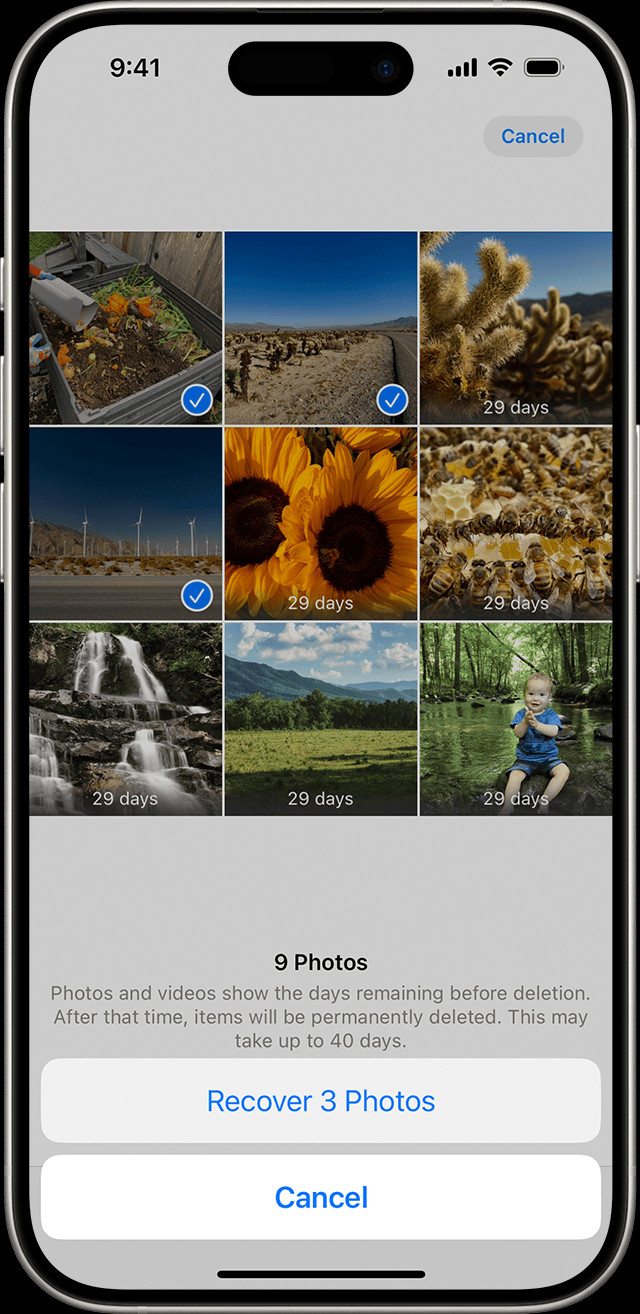
- Tap the photo you want to recover, then tap “Recover.” To recover multiple photos, tap “Select,” choose your photos, tap the “More” button, and then tap “Recover.”
On Mac:
- In Photos, select “Recently Deleted” in the sidebar’s Utilities section (macOS Ventura or later).
- Unlock the album with Touch ID or your password.
- Click the photo and then click “Recover.”
On iCloud.com:
- Sign in to your Apple Account on iCloud.com and open Photos.
- Select “Recently Deleted” in the sidebar (If the sidebar isn’t visible, click “Show Sidebar” in the top left corner).
- Select the photo and click “Recover.”
On Apple Vision Pro:
- Open Photos and tap “Collections” in the sidebar.
- Scroll down to the Utilities section and tap “Recently Deleted.”
- Unlock the album with Optic ID or your passcode.
- Tap and hold a photo, then tap “Recover.” For multiple photos, tap “Select,” choose your photos, tap the “More” button in the top right corner, and tap “Recover.” Confirm by tapping “Recover” again.
Retrieve Photos from the Hidden Album
Hidden photos aren’t deleted, but they’re tucked away in the Hidden album. If you can’t find a photo, ensure the Hidden album is visible in your Photos settings.
On iPhone and iPad:
- Open Photos, swipe up, and tap “Hidden” in the Utilities.
- Authenticate with Face ID or Touch ID.
- Select the photo and tap the “More” button, then tap “Unhide.”
On Mac:
- In Photos, go to View in the menu bar and select “Show Hidden Photo Album.”
- In the sidebar, select “Hidden” and click “View Album.”
- Unlock the album (macOS Ventura or later).
- Select the photo, control-click, and choose “Unhide Photo.” Alternatively, use the menu bar (Image > Unhide Photo) or press Command-L.
On iCloud.com:
- Sign in to iCloud.com, open Photos, and select “Hidden” in the sidebar.
- Click “Show Hidden Photos.” (If no sidebar, click “Show Sidebar” in the top left corner).
- Select the photo, click the “More” button, and then click “Unhide.”
On Apple Vision Pro:
- In Photos, tap “Collections” in the sidebar.
- Scroll down to “Hidden” in the Utilities and tap it.
- Unlock the album.
- Tap and hold a photo, then tap “Unhide.” For multiple photos, tap “Select,” choose your photos, tap “More” in the top right corner, and then tap “Unhide.”
Utilizing iCloud Photos to Restore iPhone Photos
iCloud Photos backs up your photos and videos, making them accessible across your devices.
Enabling iCloud Photos
On iPhone and iPad:
- Go to Settings > [Your Name] > iCloud > Photos.
- Turn on “Sync this [Device]”.
On Mac:
- In Photos, go to Photos > Settings (or Preferences) > iCloud.
- Select “iCloud Photos.”
On Apple Vision Pro:
- Go to Settings > [Your Name] > iCloud > Photos.
- Turn on “Sync this Apple Vision Pro.”
After enabling iCloud Photos, connect to Wi-Fi and allow time for synchronization. Then, check for your missing photos.
Check Your iCloud Shared Photo Library
If you use a Shared Library, some photos might only be visible in specific library views.
Switching Library Views on iPhone and iPad:
- Open the Photos app.
- Tap the profile button in the top right corner.
- Choose “Both Libraries,” “Personal Library,” or “Shared Library.”
Remember to sign in with the same Apple ID on all your devices to ensure your photos and videos stay updated across your Apple ecosystem. Look for the Shared Library icon ![]() alt text: Personal Library icon for photos in your Personal Library.
alt text: Personal Library icon for photos in your Personal Library.