Resizing photos on your Mac can be simple and efficient, whether you’re preparing them for online sharing, archiving, or just saving space. At dfphoto.net, we understand the importance of optimizing your images, and we’re here to guide you through various methods and tools. Let’s explore how to resize photos on your Mac, focusing on user-friendly approaches and powerful software options.
1. Why Resize Photos on Your Mac?
Resizing photos involves adjusting their dimensions (length and breadth in pixels) or file size (MB or KB). Here’s why it’s often necessary:
- Saving Storage Space: High-resolution images consume significant storage. Reducing their size helps free up space on your Mac.
- Faster Uploads: Smaller files upload quicker to websites, social media, and email.
- Website Optimization: Properly sized images improve website loading speed, enhancing user experience.
- Email Attachments: Many email providers limit attachment sizes. Resizing ensures your photos can be sent without issues.
- Printing: Different print sizes require specific resolutions. Resizing ensures optimal print quality.
2. Understanding Image Dimensions and File Size
Before diving into the methods, let’s clarify the key terms:
- Dimensions (Pixels): The width and height of an image, measured in pixels. Reducing dimensions decreases the overall size and resolution.
- File Size (MB/KB): The amount of storage space an image occupies, typically measured in megabytes (MB) or kilobytes (KB). File size depends on dimensions, resolution, and file format.
- Resolution (DPI/PPI): Dots per inch (DPI) or pixels per inch (PPI) refers to the density of pixels in an image. Higher resolution means more detail, but also larger file size.
3. Resizing Photos Using Preview (Built-in Mac App)
Preview is a versatile, built-in application on macOS that can handle basic image resizing tasks. Here’s how to use it:
3.1. Resizing a Single Photo
- Open with Preview:
- Locate the image in Finder.
- Right-click on the image.
- Select “Open With” and choose “Preview.”
- Adjust Size:
- In the Preview menu, click on “Tools” and select “Adjust Size.”
- Enter New Dimensions:
- A pop-up window will appear.
- Enter the desired width or height in pixels. Ensure the “Scale proportionally” box is checked to maintain the aspect ratio.
- You can also change the resolution (DPI) if needed.
- Review and Save:
- Preview will display the new file size.
- Click “OK” to apply the changes.
- Go to “File” and select “Save” to overwrite the original or “Export” to save a copy with a new name.
 Preview Adjust Size Interface
Alt text: Adjusting image dimensions using the Preview app on a Mac.
3.2. Batch Resizing Multiple Photos
Preview can also resize multiple images at once:
- Open All Images:
- Select all the images you want to resize in Finder.
- Right-click and choose “Open With” and select “Preview.”
- All selected images will open in the Preview window, displayed in the left-hand panel.
- Select All Thumbnails:
- In the left-hand panel, select all the image thumbnails. You can use
Cmd + Ato select all.
- In the left-hand panel, select all the image thumbnails. You can use
- Adjust Size:
- Go to “Tools” and select “Adjust Size.”
- Enter the new dimensions or resolution as needed.
- Export Selected Images:
- Go to “File” and select “Export Selected Images.”
- Choose a destination folder and specify the file format and quality.
- Click “Choose” to export the resized images.
3.3. Resizing by Exporting
Preview allows you to resize images while exporting:
- Open the Image: Open the image in Preview.
- Export: Go to “File” and select “Export.”
- Adjust Options: In the export dialog, you can adjust the quality (which affects file size) and choose a different file format (JPEG, PNG, etc.).
- Save: Choose a name and location, then click “Save.”
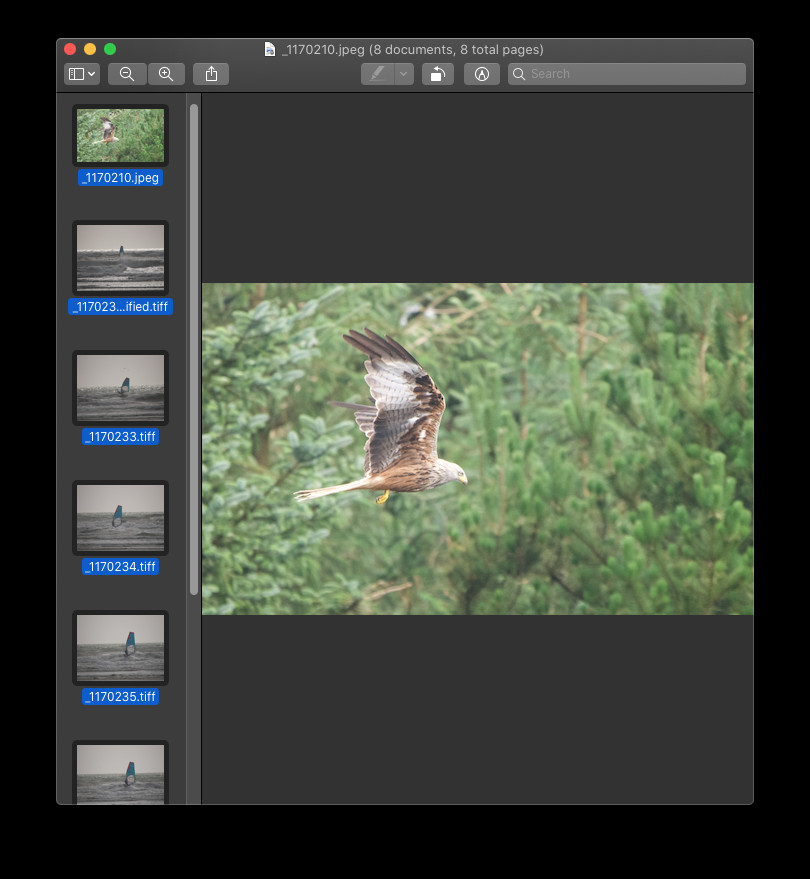
4. Resizing Photos Using Photos App
The Photos app, another built-in macOS application, provides basic resizing options when exporting images.
- Open Photos: Launch the Photos app and select the image(s) you want to resize.
- Export: Go to “File” and select “Export” > “Export [Number] Photos.”
- Choose Size: In the export dialog, you can choose from Small, Medium, Large, or Full Size. You can also customize the dimensions by selecting “Custom” and entering the desired pixel dimensions.
- Adjust Quality: Adjust the “Quality” slider to balance image quality and file size.
- Export: Choose a destination folder and click “Export.”
 Exporting options within the Photos app on macOS
Alt text: Export options for resizing photos in the Photos app on macOS.
5. Using Third-Party Apps for Resizing
For more advanced resizing options, consider using third-party apps. Here are a few popular choices:
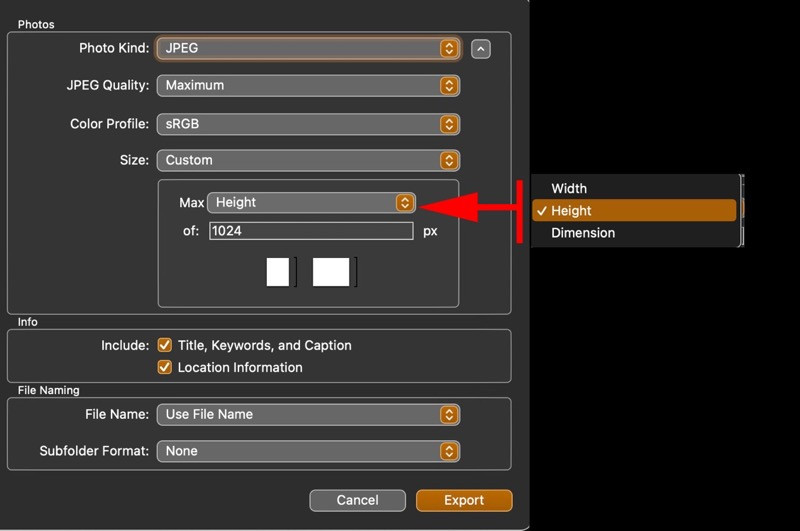
5.1. Resize Master
Resize Master is a user-friendly app available on the App Store specifically designed for batch image resizing.
- Download and Install: Download Resize Master from the App Store and install it on your Mac.
- Open Resize Master: Launch the app.
- Drag and Drop: Drag and drop a folder of images into the Resize Master window.
- Configure Settings: Choose your desired resizing options, such as dimensions, file size, or percentage.
- Resize: Click the “Resize” button to process the images.
 Resize Master interface showing resizing options
Alt text: Resize Master application interface with folder drag and drop feature.
5.2. Adobe Photoshop
Adobe Photoshop is a professional-grade image editing software that offers precise control over resizing and resampling.
- Open Image: Open the image in Photoshop.
- Image Size: Go to “Image” and select “Image Size.”
- Adjust Dimensions: Enter the desired width and height. Ensure “Resample” is checked to change the number of pixels.
- Resampling Method: Choose a resampling method. “Bicubic Automatic” is generally a good choice, but experiment with others for different results.
- Save or Export: Go to “File” and select “Save As” or “Export” to save the resized image.
5.3. GIMP (GNU Image Manipulation Program)
GIMP is a free, open-source image editor that provides many of the same features as Photoshop.
- Open Image: Open the image in GIMP.
- Scale Image: Go to “Image” and select “Scale Image.”
- Adjust Dimensions: Enter the desired width and height.
- Quality Settings: Choose an interpolation method for resampling. “Lanczos” is a good option for high-quality resizing.
- Save or Export: Go to “File” and select “Export As” to save the resized image.
5.4. iMazing HEIC Converter
If you’re dealing with HEIC files (the default image format on newer iPhones), iMazing HEIC Converter is a great tool to resize and convert them to more compatible formats like JPEG.
- Download and Install: Download iMazing HEIC Converter from the iMazing website.
- Open iMazing HEIC Converter: Launch the app.
- Drag and Drop: Drag and drop the HEIC image(s) into the app.
- Adjust Settings: Choose the desired JPEG quality and resizing options.
- Convert: Click the “Convert” button to process the images.
6. Command Line Method: Using sips (Scriptable Image Processing System)
For advanced users comfortable with the command line, macOS offers the sips utility for resizing images.
-
Open Terminal: Open the Terminal app.
-
Basic Resize Command:
To resize an image to a specific width, use the following command:
sips -z [height] [width] input.jpg --out output.jpgReplace
[height]and[width]with the desired dimensions in pixels,input.jpgwith the name of your input file, andoutput.jpgwith the desired name for the resized file.Example:
sips -z 600 800 input.jpg --out output.jpgThis command resizes
input.jpgto 800×600 pixels and saves it asoutput.jpg. -
Batch Resizing with a Script:
To batch resize multiple images, you can use a simple script:
for i in *.jpg; do
    sips -z 600 800 "$i" --out "resized_$i"
done
This script iterates through all JPEG files in the current directory, resizes them to 800×600, and saves them with the prefix “resized_”.
7. Optimizing Images for the Web
When resizing images for the web, consider these additional tips:
- Choose the Right Format: JPEG is best for photos with lots of colors, while PNG is better for images with text or graphics.
- Compress Images: Use online tools like TinyPNG or ImageOptim to further reduce file size without significant quality loss.
- Use Responsive Images: Implement responsive images in your website design to serve different image sizes based on the user’s device.
- Specify Dimensions in HTML: Always include the width and height attributes in your
<img>tags to prevent layout shifts.
8. Tips for Maintaining Image Quality
Resizing images can sometimes lead to quality loss. Here are some tips to minimize this:
- Resize Down, Not Up: Avoid increasing the size of an image, as this can make it look blurry or pixelated.
- Use High-Quality Resampling: When using image editing software, choose a high-quality resampling method like Bicubic or Lanczos.
- Save in High Quality: When saving as JPEG, use a quality setting of 80% or higher to avoid compression artifacts.
- Preserve Metadata: If important, ensure your resizing tool preserves metadata like EXIF data.
9. Resizing for Specific Purposes
- Social Media: Social media platforms often have recommended image sizes. Research these sizes and resize your images accordingly for optimal display.
- Email: Keep email attachments under 5 MB. Resize images to smaller dimensions and compress them to reduce file size.
- Printing: Check the required resolution (DPI) for your desired print size. Resize the image to match these requirements.
10. SEO Benefits of Resizing Images
Resizing images can also positively impact your website’s SEO:
- Faster Page Load Speed: Smaller images contribute to faster page load times, which is a ranking factor for Google.
- Improved User Experience: Fast-loading websites provide a better user experience, leading to lower bounce rates and higher engagement.
- Better Mobile Optimization: Mobile users benefit significantly from optimized images, as they often have slower internet connections.
- Image Search Optimization: Properly sized and optimized images are more likely to appear in Google Image Search results.
11. Common Mistakes to Avoid When Resizing Images
- Enlarging Images Excessively: Avoid increasing the size of images beyond their original resolution, as this results in pixelation and blurriness.
- Ignoring Aspect Ratio: Always maintain the aspect ratio to prevent distortion.
- Over-Compressing Images: Compressing images too much can lead to noticeable quality loss.
- Not Saving a Copy: Always save resized images as a copy to avoid overwriting the original high-resolution files.
12. Case Studies: Real-World Examples
- Photographer Optimizing Portfolio: A professional photographer uses Photoshop to resize and optimize images for their online portfolio, ensuring fast loading times and high-quality display.
- E-commerce Store Improving Page Speed: An e-commerce store resizes product images to smaller dimensions and compresses them, resulting in a significant improvement in page load speed and a boost in search engine rankings.
- Blogger Preparing Images for Social Media: A blogger uses Preview to quickly resize images for various social media platforms, ensuring they meet the recommended dimensions and file size limits.
13. Keeping Up with the Latest Trends
The field of image optimization is constantly evolving. Stay updated with the latest trends and best practices:
- WebP Format: Consider using the WebP image format, which offers better compression than JPEG and PNG.
- AVIF Format: Explore the AVIF image format, which provides even greater compression efficiency.
- Content Delivery Networks (CDNs): Use a CDN to serve images from servers closer to your users, reducing latency and improving load times.
14. Essential Tools and Resources
- dfphoto.net: Explore our website for more in-depth tutorials, tips, and resources on photography and image editing.
- Adobe Photoshop: A professional-grade image editing software with advanced resizing and optimization tools.
Address: 345 Park Avenue San Jose, CA 95110-2704 USA
Phone: 1-408-536-6000 - GIMP: A free, open-source image editor with similar capabilities to Photoshop.
- TinyPNG: An online tool for compressing PNG and JPEG images.
- ImageOptim: A free Mac app for optimizing images.
15. The Role of dfphoto.net in Your Photography Journey
At dfphoto.net, we are committed to providing you with the resources and knowledge you need to excel in photography. From basic techniques to advanced editing skills, we cover it all. Our community is a vibrant hub for photographers of all levels, where you can share your work, get feedback, and find inspiration.
Whether you’re looking to master the art of portrait photography, explore the beauty of landscapes, or simply improve your everyday snapshots, dfphoto.net is here to guide you every step of the way.
Address: 1600 St Michael’s Dr, Santa Fe, NM 87505, United States
Phone: +1 (505) 471-6001
Website: dfphoto.net
16. The Importance of Digital Photography in Santa Fe
Santa Fe, New Mexico, is renowned for its vibrant arts scene and stunning landscapes, making it a hub for digital photography. The city’s unique light and architectural beauty provide endless opportunities for photographers to capture breathtaking images. According to research from the Santa Fe University of Art and Design’s Photography Department, in July 2025, photographers in Santa Fe are increasingly focusing on digital techniques to enhance their creativity and efficiency. This trend underscores the importance of mastering digital image resizing and optimization.
Alt text: The Adobe logo in front of the company headquarters in San Jose, CA.
17. Understanding Image Compression Techniques
Image compression is a crucial aspect of resizing, balancing file size with visual quality. Here’s an overview:
17.1. Lossy Compression
- Description: Lossy compression permanently removes some image data to reduce file size. It’s effective for photos where minor quality loss is acceptable.
- Examples: JPEG is the most common lossy format.
- Use Cases: Suitable for web images, social media, and email attachments where file size is a priority.
17.2. Lossless Compression
- Description: Lossless compression reduces file size without losing any image data. The original quality is fully preserved.
- Examples: PNG and GIF are common lossless formats.
- Use Cases: Best for images with text, graphics, or when preserving fine details is critical.
17.3. Choosing the Right Compression
The choice between lossy and lossless compression depends on the image content and intended use:
- Photos: JPEG (lossy) is generally preferred for photos due to its high compression efficiency.
- Graphics and Text: PNG (lossless) is better for graphics, logos, and images with text to maintain sharpness and clarity.
18. Navigating Copyright and Usage Rights
When working with digital images, it’s crucial to understand copyright and usage rights to avoid legal issues:
18.1. Understanding Copyright
- Definition: Copyright protects the rights of the creator to control how their work is used.
- Implications: You can’t freely use copyrighted images without permission, even if you resize them.
18.2. Creative Commons Licenses
- Description: Creative Commons licenses allow creators to grant specific permissions for others to use their work.
- Types: Different types of Creative Commons licenses dictate whether you can use the image for commercial purposes, modify it, or share it.
18.3. Public Domain Images
- Definition: Public domain images are not protected by copyright and can be used freely.
- Sources: Look for images in the public domain on sites like Wikimedia Commons or Unsplash.
18.4. Best Practices
- Always Check the License: Before using any image, carefully review the license or usage rights.
- Give Credit: When required by the license, provide proper attribution to the creator.
- Obtain Permission: If you want to use an image in a way that’s not permitted by the license, contact the creator and ask for permission.
19. Enhancing Your Skills with dfphoto.net
To further enhance your photography and image editing skills, dfphoto.net offers a range of resources:
19.1. Online Courses
- Description: Structured online courses covering various photography topics, from basic techniques to advanced editing.
- Benefits: Learn at your own pace, with expert instruction and hands-on exercises.
19.2. Workshops
- Description: In-person workshops and seminars led by experienced photographers.
- Benefits: Get personalized feedback, network with other photographers, and learn in a collaborative environment.
19.3. Articles and Tutorials
- Description: A vast library of articles and tutorials covering a wide range of photography and image editing topics.
- Benefits: Access valuable information and step-by-step instructions to improve your skills.
20. The Future of Image Resizing Technology
Image resizing technology is continuously advancing, driven by innovations in AI and machine learning:
20.1. AI-Powered Resizing
- Description: AI algorithms can analyze images and intelligently resize them while preserving details and reducing artifacts.
- Benefits: Achieve higher-quality resized images with minimal effort.
20.2. Super-Resolution Techniques
- Description: Super-resolution algorithms can increase the resolution of images by intelligently adding details.
- Benefits: Enlarge images without significant quality loss.
20.3. Automated Optimization
- Description: Automated tools can analyze images and automatically apply optimal resizing and compression settings.
- Benefits: Streamline the image optimization process and ensure consistent results.
21. Understanding Dithering and Its Impact
Dithering is a technique used to simulate colors that are not available in a particular color palette. It’s often used when reducing the color depth of an image:
21.1. What is Dithering?
- Description: Dithering involves creating the illusion of new colors by mixing existing colors in a pattern.
- Example: If you want to display a shade of green that’s not in your palette, you can use a pattern of alternating green and blue pixels to approximate the desired color.
21.2. When to Use Dithering
- Limited Color Palettes: Dithering is useful when working with images that have a limited color palette, such as GIFs.
- Reducing Color Depth: When reducing the color depth of an image, dithering can help minimize banding and other artifacts.
21.3. Types of Dithering
- Ordered Dithering: Uses a fixed pattern to distribute colors.
- Error Diffusion: Distributes the error caused by color quantization to neighboring pixels, resulting in a more natural-looking image.
- Random Dithering: Uses a random pattern to distribute colors.
22. The Impact of Image Metadata on SEO
Image metadata provides valuable information about an image, which can be used by search engines to understand the content and context:
22.1. What is Image Metadata?
- Description: Image metadata includes information such as the file name, file type, dimensions, color depth, resolution, and more.
- EXIF Data: Exchangeable Image File Format (EXIF) data includes camera settings, date and time, location, and other technical details.
22.2. How Metadata Affects SEO
- File Name: Use descriptive file names that include relevant keywords.
- Alt Text: Provide descriptive alt text for each image to help search engines understand the content.
- Title: Use descriptive titles for images.
- Caption: Add captions to provide additional context.
22.3. Best Practices for Metadata
- Use Descriptive File Names: Use file names that accurately describe the image content.
- Add Alt Text: Provide descriptive alt text for each image to improve accessibility and SEO.
- Include Captions: Add captions to provide additional context and engage users.
23. Exploring Different Image File Formats
Choosing the right image file format is crucial for balancing file size and image quality:
23.1. JPEG (Joint Photographic Experts Group)
- Description: A lossy format that’s ideal for photographs and images with complex colors.
- Pros: High compression efficiency, widely supported.
- Cons: Lossy compression can result in quality loss.
23.2. PNG (Portable Network Graphics)
- Description: A lossless format that’s ideal for graphics, logos, and images with text.
- Pros: Lossless compression preserves image quality, supports transparency.
- Cons: Larger file sizes compared to JPEG.
23.3. GIF (Graphics Interchange Format)
- Description: A lossless format that’s ideal for simple animations and graphics.
- Pros: Supports animation, lossless compression.
- Cons: Limited color palette (256 colors).
23.4. WebP
- Description: A modern image format developed by Google that offers both lossy and lossless compression.
- Pros: Superior compression compared to JPEG and PNG, supports transparency and animation.
- Cons: Not supported by all browsers.
23.5. AVIF (AV1 Image File Format)
- Description: A modern image format based on the AV1 video codec that offers even greater compression efficiency than WebP.
- Pros: Excellent compression, supports a wide range of features.
- Cons: Limited browser support.
24. Leveraging Cloud Services for Image Resizing
Cloud services offer convenient solutions for resizing and optimizing images:
24.1. Cloudinary
- Description: A cloud-based image management platform that provides resizing, optimization, and delivery services.
- Pros: Easy to use, powerful features, integrates with various platforms.
- Cons: Can be expensive for high-volume usage.
24.2. Imgix
- Description: A real-time image processing service that allows you to resize, crop, and optimize images on the fly.
- Pros: Flexible, powerful, integrates with various platforms.
- Cons: Can be expensive for high-volume usage.
24.3. AWS Lambda
- Description: A serverless computing service that allows you to run code without managing servers.
- Pros: Scalable, cost-effective, integrates with other AWS services.
- Cons: Requires technical expertise.
25. Enhancing E-commerce with Optimized Images
Optimized images are crucial for e-commerce success:
25.1. High-Quality Product Images
- Description: Use high-quality product images that showcase the products in detail.
- Benefits: Attract customers, increase sales, reduce returns.
25.2. Multiple Angles and Views
- Description: Provide multiple angles and views of the products to give customers a complete picture.
- Benefits: Improve customer confidence, reduce uncertainty, increase sales.
25.3. Zoom Functionality
- Description: Implement zoom functionality to allow customers to zoom in and examine the products in detail.
- Benefits: Improve customer experience, increase engagement, reduce returns.
25.4. Consistent Image Sizes
- Description: Use consistent image sizes to create a professional and cohesive look.
- Benefits: Improve website aesthetics, enhance user experience, increase brand credibility.
26. Creating Engaging Visuals for Blogs
Visuals are essential for engaging blog readers:
26.1. Eye-Catching Featured Images
- Description: Use eye-catching featured images to attract readers and make your blog posts stand out.
- Benefits: Increase click-through rates, improve engagement, attract more readers.
26.2. Relevant In-Text Images
- Description: Include relevant in-text images to break up the text and illustrate key points.
- Benefits: Improve readability, enhance understanding, increase engagement.
26.3. Infographics and Charts
- Description: Use infographics and charts to present data in a visually appealing and easy-to-understand format.
- Benefits: Improve information retention, enhance engagement, increase shares.
26.4. Optimized Image Sizes
- Description: Optimize image sizes to ensure fast loading times and a seamless user experience.
- Benefits: Improve website performance, reduce bounce rates, increase engagement.
27. The Art of Restoring Old Photos Digitally
Digital photo restoration involves repairing and enhancing old, damaged photos:
27.1. Scanning Old Photos
- Description: Scan old photos at a high resolution to capture as much detail as possible.
- Best Practices: Use a flatbed scanner, clean the photos before scanning, scan at 300-600 DPI.
27.2. Removing Scratches and Blemishes
- Description: Use image editing software to remove scratches, blemishes, and other imperfections.
- Tools: Adobe Photoshop, GIMP, online photo restoration tools.
27.3. Adjusting Contrast and Brightness
- Description: Adjust contrast and brightness to improve the overall appearance of the photo.
- Techniques: Use curves, levels, and other adjustment tools to enhance the image.
27.4. Color Correction
- Description: Correct color casts and restore faded colors.
- Tools: Adobe Photoshop, GIMP, online color correction tools.
27.5. Sharpening
- Description: Sharpen the image to bring out details and make it look more crisp.
- Techniques: Use unsharp mask or smart sharpen filters.
28. Protecting Your Digital Assets
Protecting your digital assets is essential in the digital age:
28.1. Watermarking
- Description: Add a watermark to your images to protect them from unauthorized use.
- Types: Text watermarks, logo watermarks.
28.2. Copyright Notices
- Description: Include copyright notices on your website and in your image metadata.
- Format: © [Year] [Your Name] All Rights Reserved.
28.3. Terms of Use
- Description: Create clear terms of use that outline how your images can be used.
- Content: Specify what users can and cannot do with your images.
28.4. Monitoring and Enforcement
- Description: Monitor your images online to detect unauthorized use and take appropriate action.
- Tools: Google Image Search, TinEye, Copyscape.
29. Exploring the World of Stock Photography
Stock photography provides a convenient way to access high-quality images:
29.1. Stock Photography Websites
- Description: Websites that offer a vast library of stock photos for various purposes.
- Examples: Shutterstock, Getty Images, Adobe Stock, Unsplash, Pexels.
29.2. Licensing Options
- Description: Different licensing options that determine how you can use the images.
- Types: Royalty-free, rights-managed, extended licenses.
29.3. Choosing the Right Images
- Description: Select images that are relevant to your project, high-quality, and visually appealing.
- Considerations: Image quality, relevance, licensing, cost.
30. The Ethical Considerations of Image Manipulation
Image manipulation raises ethical concerns that photographers and image editors need to consider:
30.1. Authenticity
- Description: Maintaining the authenticity of images is crucial in certain contexts, such as journalism and documentary photography.
- Ethical Considerations: Avoid making substantial changes that could mislead viewers or misrepresent reality.
30.2. Transparency
- Description: Be transparent about any manipulations you make to an image.
- Best Practices: Disclose any significant changes you’ve made to the image.
30.3. Consent
- Description: Obtain consent from individuals before using or manipulating their images.
- Ethical Considerations: Respect people’s privacy and autonomy.
FAQ: How to Resize Photos on Mac
1. What is the easiest way to resize a photo on a Mac?
The easiest way to resize a photo on a Mac is by using the built-in Preview app; open the image with Preview, go to “Tools,” select “Adjust Size,” and enter the desired dimensions. Preview will allow you to quickly adjust the image dimensions to your liking.
2. How can I resize multiple photos at once on my Mac?
To resize multiple photos at once, open all the images in Preview, select all thumbnails in the left-hand panel (Cmd+A), go to “Tools,” select “Adjust Size,” and then export the selected images to a new folder. By batch resizing, you can save a considerable amount of time.
3. What is the best app for resizing photos on a Mac?
While Preview is great for basic resizing, Adobe Photoshop and GIMP offer more advanced options; Resize Master is a user-friendly app specifically designed for batch resizing. Depending on your needs and technical skills, you can select the most appropriate app.
4. How do I reduce the file size of a photo on my Mac without losing quality?
To reduce the file size without losing too much quality, export the image as a JPEG with a high-quality setting (80% or higher) or use a lossless format like PNG for graphics; also, consider using online tools like TinyPNG. By choosing the right balance between file size and image quality, you can achieve the desired result.
5. Can I resize photos directly from the Photos app on my Mac?
Yes, you can resize photos by exporting them from the Photos app; select the image, go to “File,” select “Export,” and choose a smaller size option like “Medium” or “Small.” This provides a quick and easy way to resize for various purposes.
6. How do I resize an image using the command line on my Mac?
You can use the sips command in Terminal; for example, sips -z 600 800 input.jpg --out output.jpg resizes the image to 800×600 pixels. The command line interface offers flexibility for advanced users.
7. What image format is best for web use?
JPEG is generally best for photos due to its compression efficiency, while PNG is better for graphics and images with text; consider using WebP for even better compression if browser support is not a concern. By understanding the characteristics of each format, you can optimize your images for the web.
8. How do I maintain the aspect ratio when resizing a photo?
Ensure the “Scale proportionally” box is checked in Preview or your chosen image editing software; this will automatically adjust the other dimension to maintain the aspect ratio. Maintaining the aspect ratio is crucial to prevent distortion.
9. What is the ideal resolution for printing photos?
The ideal resolution for printing photos is typically 300 DPI (dots per inch); resize your image to match the desired print size at this resolution for optimal results. Higher resolution can lead to better print quality.
10. How do I add a watermark to my photos on a Mac?
You can add a watermark using image editing software like Photoshop or GIMP; create a text or logo watermark and overlay it on your image. Watermarking can help protect your images from unauthorized use.
Call to Action
Ready to enhance your photography skills? Visit dfphoto.net today to explore our comprehensive tutorials, stunning photo galleries, and vibrant community. Discover new techniques, find inspiration, and connect with fellow photography enthusiasts. Don’t miss out on the opportunity to elevate your photographic journey! Head over to dfphoto.net now and start exploring!