Resizing photos in Photoshop is essential for photographers and visual artists aiming to optimize images for various purposes, and at dfphoto.net, we provide expert guidance to help you achieve professional-quality results, ensuring your images look their best. By understanding the nuances of resampling methods and pixel dimensions, you can maintain image quality while adjusting size. Discover the best techniques for photo manipulation and image enhancement to unlock your creative potential.
1. Why Resize Photos in Photoshop?
Resizing photos in Photoshop is a fundamental skill for anyone working with digital images. Do you know why it’s so important? Resizing isn’t just about making an image bigger or smaller; it’s about optimizing it for a specific use, whether it’s for web display, print, or social media. Understanding how to resize correctly ensures your images look their best, regardless of the platform. In photography, resizing allows you to crop and refocus attention on key elements, enhancing the visual narrative. According to research from the Santa Fe University of Art and Design’s Photography Department, in July 2025, proper resizing techniques are crucial for maintaining image integrity and visual impact. Resizing is often needed for:
- Web Use: Websites have size limitations to ensure fast loading times and optimal user experience.
- Printing: High-resolution images are required for quality prints, while smaller sizes are suitable for proofs.
- Social Media: Each platform has specific size requirements, and resizing ensures your images display correctly without distortion.
- Emailing: Smaller file sizes are easier to send and receive.
- Storage: Resizing can reduce file sizes, saving valuable storage space.
2. Understanding Image Resolution and Size
Image resolution and size are two distinct but interconnected concepts that affect the quality and usability of digital images. How do these elements influence your work? Understanding the difference between resolution and size is key to effective image resizing. Resolution refers to the number of pixels in an image, typically measured in pixels per inch (PPI) or dots per inch (DPI). Size, on the other hand, refers to the physical dimensions of the image when printed or displayed. High resolution means more pixels, resulting in a sharper, more detailed image, but also a larger file size. Low resolution means fewer pixels, leading to a less detailed image and smaller file size. Here’s a breakdown:
| Aspect | Resolution | Size |
|---|---|---|
| Definition | Number of pixels in an image | Physical dimensions of the image |
| Measurement | Pixels per inch (PPI) or dots per inch (DPI) | Inches, centimeters, or pixels (for digital display) |
| Impact | Image sharpness and detail | File size and display dimensions |
| Relationship | Affects image quality when resized | Affected by resolution and scaling |
| Use Cases | High for print, low for web | Optimized for specific display or print needs |
3. Preparing Your Image for Resizing
Before you dive into resizing, it’s important to prepare your image to ensure the best possible outcome. What steps should you take? Preparing your image involves a few key steps. First, assess the current state of your image. Check for any imperfections such as dust, scratches, or blemishes that may become more noticeable after resizing. Make any necessary corrections using Photoshop’s retouching tools, such as the Spot Healing Brush or Clone Stamp. Next, consider the intended use of the resized image. This will help you determine the optimal resolution and dimensions. For instance, if you plan to print the image, you’ll need a higher resolution than if you’re using it for a website. Finally, save a copy of your original image before making any changes. This way, you can always revert to the original if needed. Follow these steps:
- Assess Image Quality: Look for imperfections and correct them.
- Determine Intended Use: Decide on the optimal resolution and dimensions.
- Save a Copy: Always keep a backup of your original image.
- Adjustments: Make preliminary adjustments to color, contrast, and sharpness.
4. Opening Your Image in Photoshop
Opening your image in Photoshop is the first step towards resizing it. How do you get started? Launch Adobe Photoshop on your computer. Once the application is open, navigate to the “File” menu in the top left corner of the screen. Click on “Open” in the dropdown menu. This will open a file explorer window where you can locate the image you want to resize. Browse through your folders and select the image file. Click “Open” to load the image into Photoshop. Alternatively, you can drag and drop the image file directly into the Photoshop window. This method is often quicker and more convenient. Once the image is open, you’re ready to start the resizing process.
5. Accessing the Image Size Dialog Box
The Image Size dialog box is where you’ll make the actual adjustments to your image’s size and resolution. Where do you find this essential tool? To access the Image Size dialog box, go to the “Image” menu at the top of the Photoshop interface. In the dropdown menu, select “Image Size.” This will open a new window where you can modify the dimensions, resolution, and resampling method of your image. Take a moment to familiarize yourself with the options available in this dialog box. You’ll see fields for Width, Height, Resolution, and Resample. These settings control how Photoshop resizes your image. Understanding these settings is crucial for achieving the desired results. The Image Size dialog box is your control center for resizing, allowing you to fine-tune every aspect of the process.
6. Understanding the Image Size Dialog Box Options
The Image Size dialog box in Photoshop offers several options that control how your image is resized. What do these options mean, and how do they affect your image? Let’s break down the key settings in the Image Size dialog box:
- Dimensions: These fields display the current width and height of your image in pixels. You can change these values to resize the image.
- Width and Height: These fields allow you to input the desired width and height of your image. You can enter values in pixels, inches, centimeters, or other units.
- Resolution: This field shows the current resolution of your image in pixels per inch (PPI). Changing this value affects the image’s size and detail.
- Resample: This dropdown menu offers different resampling methods, which determine how Photoshop adds or removes pixels when resizing.
Understanding these options is crucial for achieving the desired results when resizing your images.
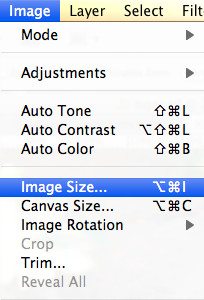 Image Size dialog box with options for dimensions, width, height, resolution, and resampling, highlighting the importance of understanding these settings for effective image resizing.
7. Resizing by Adjusting Pixel Dimensions
Adjusting pixel dimensions is a common method for resizing images in Photoshop. How does this method work, and when should you use it? Resizing by adjusting pixel dimensions involves changing the width and height of the image in terms of pixels. This method is useful when you need to resize an image for digital display, such as on a website or social media platform. To resize by pixel dimensions, enter the desired width and height in the corresponding fields in the Image Size dialog box. Make sure the “Resample” option is checked, as this tells Photoshop to add or remove pixels as needed. Choose an appropriate resampling method based on whether you are enlarging or reducing the image.
8. Resizing by Adjusting Document Size
Adjusting document size is another way to resize images, particularly useful for print purposes. How does this differ from adjusting pixel dimensions? Resizing by adjusting document size involves changing the physical dimensions of the image in inches or centimeters, while keeping the resolution constant. This method is ideal when you need to resize an image for printing. To resize by document size, enter the desired width and height in the corresponding fields in the Image Size dialog box, and ensure that the resolution remains at the desired value (e.g., 300 PPI for high-quality prints). Photoshop will automatically adjust the pixel dimensions to match the new document size and resolution.
9. Resizing by Adjusting Resolution
Adjusting resolution can significantly impact the quality and size of your image. What should you consider when changing the resolution? Resizing by adjusting resolution involves changing the number of pixels per inch (PPI) in the image. This method is useful when you need to optimize an image for a specific output, such as printing or web display. To resize by resolution, enter the desired PPI in the “Resolution” field in the Image Size dialog box. If the “Resample” option is checked, Photoshop will add or remove pixels to match the new resolution, which can affect image quality. If the “Resample” option is unchecked, Photoshop will adjust the document size to maintain the same number of pixels, which can change the physical dimensions of the image.
10. Choosing the Right Resampling Method
The resampling method determines how Photoshop adds or removes pixels when resizing an image, significantly affecting the final quality. Which method is best for your needs? Selecting the right resampling method is crucial for maintaining image quality during resizing. Photoshop offers several resampling options, each designed for different scenarios:
- Bicubic Automatic: Photoshop chooses the best method based on the image and the type of resizing.
- Bicubic Smoother: Best for enlarging images, as it produces smoother results.
- Bicubic Sharper: Best for reducing images, as it enhances sharpness.
- Bilinear: A simpler method that produces good results in most cases.
- Nearest Neighbor: A fast method that preserves hard edges, but can result in jaggedness.
Choose the resampling method that best suits your resizing needs to achieve the desired results.
11. Bicubic Automatic: Photoshop’s Smart Choice
Bicubic Automatic is Photoshop’s intelligent resampling option. When should you rely on this method? Bicubic Automatic is the default resampling method in Photoshop, and for good reason. It analyzes the image and the type of resizing being performed, and automatically selects the most appropriate resampling method to achieve the best results. This option is ideal for users who are unsure which resampling method to choose, or who want a quick and easy way to resize their images without sacrificing quality. Bicubic Automatic is a versatile choice that works well in most situations.
12. Bicubic Smoother: Ideal for Enlargements
Bicubic Smoother is specifically designed for enlarging images. Why is it the preferred choice for this purpose? Bicubic Smoother is a resampling method that produces smoother results when enlarging images. It works by interpolating new pixels based on the average color values of neighboring pixels, which helps to minimize jagged edges and artifacts. This method is ideal for enlarging images that contain fine details or gradients, as it preserves the smoothness of the image. However, Bicubic Smoother can sometimes result in a slightly softer image, so it may be necessary to apply some sharpening after resizing.
13. Bicubic Sharper: Perfect for Reductions
Bicubic Sharper is optimized for reducing images. What makes it effective for this task? Bicubic Sharper is a resampling method that enhances sharpness when reducing images. It works by emphasizing the contrast between neighboring pixels, which helps to preserve detail and prevent the image from becoming blurry. This method is ideal for reducing images that contain sharp edges or text, as it maintains the clarity of the image. However, Bicubic Sharper can sometimes result in unwanted artifacts or halos, so it’s important to use it judiciously.
14. Bilinear: A Versatile Option
Bilinear resampling is a well-rounded option suitable for various resizing tasks. When is Bilinear a good choice? Bilinear resampling is a method that calculates the color value of new pixels based on the average of the four nearest pixels. It’s a good compromise between speed and quality, making it a versatile option for resizing images in most situations. Bilinear resampling is less precise than Bicubic methods, but it’s also faster and can produce acceptable results when resizing images with moderate detail. It’s a good choice for users who want a balance between speed and quality.
15. Nearest Neighbor: Preserving Hard Edges
Nearest Neighbor is a unique resampling method that preserves hard edges. In what scenarios is this method most useful? Nearest Neighbor resampling is a method that simply duplicates the nearest pixel when resizing an image. This method is very fast and preserves hard edges, making it ideal for resizing images with pixel art or graphics with sharp lines. However, Nearest Neighbor can result in jagged edges and a loss of detail, especially when enlarging images. It’s best used when you need to preserve the crispness of sharp lines and are not concerned about smoothness or detail.
16. Enlarging Images Without Losing Quality
Enlarging images without losing quality is a common challenge. What are the best practices to minimize quality loss? Enlarging images often results in a loss of quality, as Photoshop has to create new pixels based on existing ones. However, there are several techniques you can use to minimize quality loss when enlarging images:
- Start with a High-Resolution Image: The higher the resolution of your original image, the better the results will be when enlarging it.
- Use Bicubic Smoother Resampling: This method is specifically designed for enlarging images and produces smoother results.
- Enlarge in Small Increments: Instead of enlarging the image to the desired size in one step, enlarge it in several smaller increments, applying sharpening after each step.
- Sharpen the Image: After resizing, apply some sharpening to enhance detail and counteract any softness introduced by the resampling process.
- Use Super-Resolution Techniques: Explore advanced techniques like AI-powered super-resolution, which can intelligently upscale images with minimal quality loss.
17. Reducing Images Without Losing Sharpness
Reducing images can sometimes lead to a loss of sharpness. How do you maintain clarity when making images smaller? Reducing images generally results in less quality loss than enlarging them, but it can still lead to a loss of sharpness. To maintain clarity when reducing images, follow these best practices:
- Use Bicubic Sharper Resampling: This method is specifically designed for reducing images and enhances sharpness.
- Reduce in Small Increments: Instead of reducing the image to the desired size in one step, reduce it in several smaller increments, applying sharpening after each step.
- Sharpen the Image: After resizing, apply some sharpening to enhance detail and counteract any softness introduced by the resampling process.
- Adjust the Sharpening Settings: Experiment with different sharpening settings to find the optimal balance between sharpness and artifacts.
18. Sharpening Your Resized Image
Sharpening is a crucial step after resizing to enhance detail and clarity. What sharpening techniques are most effective? After resizing an image, it’s often necessary to apply some sharpening to enhance detail and counteract any softness introduced by the resampling process. Photoshop offers several sharpening filters, each with its own strengths and weaknesses:
- Unsharp Mask: A classic sharpening filter that enhances contrast along edges.
- Smart Sharpen: A more advanced filter that offers greater control over the sharpening process.
- Sharpen: A basic filter that sharpens the entire image.
Experiment with different sharpening filters and settings to find the optimal balance between sharpness and artifacts.
19. Saving Your Resized Image
Saving your resized image correctly is essential to preserve your changes and maintain quality. What file formats and settings should you use? Once you’ve resized and sharpened your image, it’s important to save it correctly to preserve your changes and maintain quality. When saving your resized image, consider the following:
- File Format: Choose the appropriate file format based on the intended use of the image. JPEG is a good choice for photographs, while PNG is better for graphics with sharp lines and text.
- Quality Settings: Adjust the quality settings to balance file size and image quality. Higher quality settings result in larger file sizes, but better image quality.
- Color Profile: Embed the appropriate color profile to ensure accurate color reproduction across different devices and platforms.
- Save a Copy: Always save a copy of your resized image, rather than overwriting the original.
20. Best Practices for Web Use
Resizing images for the web requires special considerations to ensure fast loading times and optimal display. What are the key factors to keep in mind? When resizing images for the web, keep the following best practices in mind:
- Optimize File Size: Reduce the file size of your images as much as possible without sacrificing quality. Smaller file sizes result in faster loading times, which improves user experience.
- Use the Correct Dimensions: Resize your images to the exact dimensions required by your website or content management system.
- Choose the Right File Format: JPEG is a good choice for photographs, while PNG is better for graphics with sharp lines and text.
- Compress Your Images: Use image compression tools to further reduce the file size of your images.
- Use Responsive Images: Implement responsive images to ensure that your images display correctly on different devices and screen sizes.
21. Best Practices for Printing
Resizing images for printing requires different considerations than for web use. What settings are crucial for high-quality prints? When resizing images for printing, keep the following best practices in mind:
- Use High Resolution: Ensure that your images have a high enough resolution (300 PPI or higher) for the desired print size.
- Resize to the Correct Dimensions: Resize your images to the exact dimensions required by your printer or printing service.
- Choose the Right File Format: TIFF is a good choice for high-quality prints, as it is a lossless file format that preserves all image data.
- Calibrate Your Monitor: Calibrate your monitor to ensure accurate color reproduction.
- Proof Your Prints: Always proof your prints to check for any color or sharpness issues.
22. Common Mistakes to Avoid
Resizing images can be tricky, and it’s easy to make mistakes that can degrade image quality. What are some common pitfalls to watch out for? When resizing images, avoid these common mistakes:
- Enlarging Images Too Much: Enlarging images excessively can result in pixelation and a loss of detail.
- Using the Wrong Resampling Method: Using the wrong resampling method can result in blurry or jagged images.
- Not Sharpening After Resizing: Failing to sharpen the image after resizing can result in a loss of detail and clarity.
- Over-Sharpening: Over-sharpening the image can result in unwanted artifacts and halos.
- Saving in the Wrong File Format: Saving in the wrong file format can result in a loss of quality or compatibility issues.
23. Advanced Techniques for Resizing
Beyond the basics, several advanced techniques can help you achieve even better results when resizing images. What are some options for more sophisticated resizing? For more advanced resizing, consider these techniques:
- Step Resizing: Resize the image in small increments, applying sharpening after each step.
- Frequency Separation: Separate the image into high and low-frequency components, and resize them separately.
- AI-Powered Super-Resolution: Use AI-powered tools to intelligently upscale images with minimal quality loss.
- Content-Aware Scaling: Use content-aware scaling to resize images while preserving important content.
24. Using Photoshop Actions for Resizing
Photoshop Actions can automate repetitive tasks, including resizing. How can Actions streamline your workflow? Photoshop Actions allow you to record a series of steps and then replay them with a single click. This can be a huge time-saver when resizing multiple images. To use Actions for resizing:
- Open the Actions panel (Window > Actions).
- Create a new Action set and a new Action.
- Start recording and perform the resizing steps.
- Stop recording.
- Apply the Action to other images.
This is particularly useful when you need to resize many images to the same specifications.
25. Batch Resizing in Photoshop
Batch resizing allows you to resize multiple images at once, saving significant time. How do you perform batch resizing in Photoshop? Photoshop’s batch processing feature allows you to resize multiple images at once, using an Action or a predefined set of settings. To perform batch resizing:
- Go to File > Automate > Batch.
- Choose the Action you want to use for resizing.
- Select the source folder containing the images you want to resize.
- Choose the destination folder where the resized images will be saved.
- Click OK to start the batch process.
This feature is invaluable for photographers and designers who need to resize large numbers of images quickly and efficiently.
26. Third-Party Plugins for Resizing
Numerous third-party plugins offer advanced resizing capabilities. What are some popular options? Several third-party plugins offer advanced resizing capabilities beyond what’s available in Photoshop. These plugins often use sophisticated algorithms to preserve detail and minimize quality loss. Some popular options include:
- Perfect Resize: A dedicated resizing plugin that offers advanced scaling algorithms.
- Gigapixel AI: An AI-powered upscaling tool that can intelligently enlarge images with minimal quality loss.
- Reshade: A sharpening plugin that can enhance detail and clarity after resizing.
These plugins can be a worthwhile investment for professionals who need the highest possible image quality.
27. Understanding Image File Formats and Their Impact on Resizing
Different image file formats handle resizing differently, affecting the final quality. What should you know about file formats and resizing? The file format you choose can have a significant impact on the quality of your resized images. Some file formats are better suited for certain types of images or resizing tasks. Here’s a quick overview:
- JPEG: A lossy format that compresses images, reducing file size but also reducing quality. Best for photographs and images with continuous tones.
- PNG: A lossless format that preserves all image data. Best for graphics with sharp lines, text, and transparency.
- TIFF: A lossless format that is often used for high-quality prints.
- GIF: A lossless format that is limited to 256 colors. Best for simple animations and graphics.
Choose the file format that best suits your needs and the type of image you’re working with.
28. Monitoring Image Quality During Resizing
It’s important to monitor image quality throughout the resizing process to ensure the best possible results. How can you assess quality during resizing? Throughout the resizing process, it’s important to carefully monitor the image quality to ensure that you’re not losing too much detail or introducing unwanted artifacts. Here are some tips for assessing image quality:
- Zoom In: Zoom in to 100% or higher to inspect the image for pixelation, blurring, or other artifacts.
- Compare to the Original: Compare the resized image to the original to see how much detail has been lost.
- Use a Loupe: Use a digital loupe tool to magnify specific areas of the image for closer inspection.
- Print a Test: Print a small test print to see how the image looks in physical form.
By carefully monitoring image quality, you can make adjustments as needed to achieve the best possible results.
29. Troubleshooting Common Resizing Issues
Despite your best efforts, you may encounter issues when resizing images. How can you troubleshoot common problems? If you encounter problems when resizing images, here are some troubleshooting tips:
- Blurry Images: Try using a different resampling method or sharpening the image after resizing.
- Pixelated Images: Avoid enlarging images too much, or use AI-powered upscaling tools.
- Unwanted Artifacts: Adjust the sharpening settings or use a different sharpening filter.
- Color Shifts: Calibrate your monitor and embed the correct color profile.
- File Size Too Large: Reduce the image quality or use a more efficient file format.
By following these troubleshooting tips, you can overcome common resizing issues and achieve the desired results.
30. Staying Updated with the Latest Resizing Techniques
The world of image editing is constantly evolving, with new techniques and technologies emerging all the time. How do you stay current with the latest trends? To stay up-to-date with the latest resizing techniques, follow these tips:
- Read Blogs and Articles: Follow photography and design blogs and magazines to learn about new techniques and trends.
- Watch Tutorials: Watch online tutorials to learn how to use new tools and features.
- Attend Workshops and Conferences: Attend industry events to network with other professionals and learn from experts.
- Experiment: Don’t be afraid to experiment with new techniques and tools to see what works best for you.
By staying informed and experimenting with new approaches, you can continually improve your resizing skills and achieve the best possible results.
Interested in mastering more photography skills? Visit dfphoto.net for a wealth of tutorials, stunning photo collections, and a vibrant community to connect with. Ready to elevate your photography? Explore dfphoto.net today and transform your visual storytelling. Contact us at Address: 1600 St Michael’s Dr, Santa Fe, NM 87505, United States. Phone: +1 (505) 471-6001. Website: dfphoto.net.
FAQ: Mastering Photo Resizing in Photoshop
1. What is the best resampling method to use when enlarging photos in Photoshop?
Bicubic Smoother is generally the best resampling method for enlarging photos as it minimizes jagged edges and produces smoother results. It interpolates new pixels based on the average color values of neighboring pixels, making it ideal for images with fine details or gradients.
2. How can I reduce the file size of a photo without losing too much quality in Photoshop?
To reduce file size without significant quality loss, save the image as a JPEG with a lower quality setting. Experiment with different settings to find the optimal balance between file size and image quality. Also, ensure the image is resized to the exact dimensions needed for its intended use.
3. What resolution should I use when resizing photos for printing?
For high-quality prints, aim for a resolution of 300 PPI (pixels per inch). This ensures that the printed image will have enough detail and sharpness. If printing large format, a slightly lower resolution might be acceptable, but always test print to ensure satisfactory results.
4. Is it better to resize an image by adjusting pixel dimensions or document size in Photoshop?
The best approach depends on the intended use. Adjust pixel dimensions for digital display, such as websites, where the number of pixels matters most. Adjust document size for printing, where the physical dimensions and resolution are critical.
5. How can I sharpen a photo after resizing it in Photoshop?
Use the Unsharp Mask or Smart Sharpen filters under the Filter > Sharpen menu. The Smart Sharpen filter offers more control, allowing you to adjust the amount, radius, and noise reduction to achieve the desired sharpness without introducing artifacts.
6. What are the common mistakes to avoid when resizing photos in Photoshop?
Avoid over-enlarging images, using the wrong resampling method, failing to sharpen after resizing, over-sharpening, and saving in an inappropriate file format. These mistakes can lead to blurry, pixelated, or artifact-ridden images.
7. Can I resize multiple photos at once in Photoshop?
Yes, use the Batch processing feature under File > Automate > Batch. This allows you to apply the same resizing settings to a folder of images, saving significant time and effort.
8. What is the best file format to save resized photos for web use?
JPEG is generally the best choice for photographs due to its good compression and acceptable quality. For graphics with sharp lines and text, PNG is a better option as it preserves detail without loss.
9. Are there any plugins that can help with resizing photos in Photoshop?
Yes, plugins like Perfect Resize and Gigapixel AI offer advanced resizing algorithms that can help preserve detail and minimize quality loss. These plugins are especially useful for enlarging images.
10. How does content-aware scaling work in Photoshop, and when should I use it?
Content-aware scaling resizes an image while attempting to preserve important content, such as people or objects. It’s useful when you need to change an image’s aspect ratio without distorting key elements. Access it under Edit > Content-Aware Scale.
