Resizing photos for the web is crucial for maintaining website speed and improving user experience, and at dfphoto.net, we understand the importance of presenting your stunning visuals without sacrificing performance. By optimizing your image dimensions and file size, you ensure faster loading times, enhanced SEO, and ultimately, a more engaging experience for your audience; plus, this is an effective method of search engine optimization, image optimization, and website performance.
1. Why Should I Resize Photos for Web?
Resizing photos for the web offers numerous benefits, impacting everything from user experience to your website’s SEO ranking.
1.1. Improved Page Speed
Every time someone visits your website, their device downloads files from your server. According to a study by Google, 53% of mobile site visitors leave a page that takes longer than three seconds to load. Large image files are often the culprit behind slow loading times. By resizing and compressing images, you reduce the amount of data that needs to be transferred, resulting in faster page load speeds. This leads to a better user experience and reduces bounce rates.
1.2. Enhanced SEO Ranking
Google considers page speed a ranking factor since July 2018. Faster loading websites tend to rank higher in search engine results. Optimizing images is a direct way to improve your website’s speed, which can lead to better search engine visibility. Moreover, images with optimized file sizes and appropriate alt text contribute to a better overall SEO strategy.
1.3. Increased Conversion Rates
Page speed directly influences conversion rates, especially for e-commerce sites. A survey by Unbounce revealed that nearly 70% of consumers say page speed influences their likelihood to buy. If your website takes too long to load, potential customers are likely to abandon their shopping carts. By resizing images, you can speed up your site and improve the chances of converting visitors into customers.
1.4. Better Mobile Experience
Mobile users are particularly sensitive to slow loading times. They often have limited data plans and are on the go. Optimizing images ensures that your website loads quickly on mobile devices, providing a seamless experience. According to a report by Akamai, a delay of just one second in mobile page load time can decrease conversion rates by up to 20%.
1.5. Reduced Bandwidth Usage
Large image files consume significant bandwidth. If you have a website with many images and high traffic, this can lead to increased hosting costs. By resizing and compressing images, you can reduce bandwidth usage and save money on hosting.
2. Do I Really Need to Resize My Images?
Imagine capturing stunning photos on your smartphone, eager to showcase them on your new blog post. The problem arises when you upload them directly to your website. iPhone photos, for example, can range from 1.5MB to 4MB each, and adding just a few of these can significantly bloat your page size.
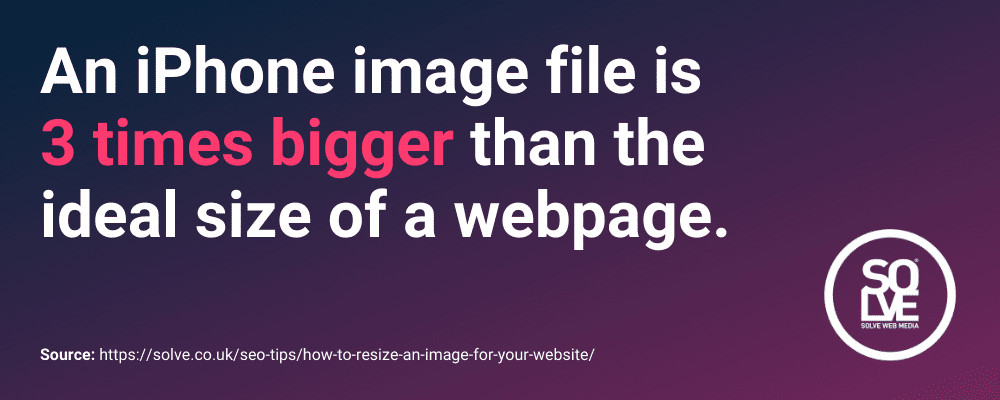 iPhone image resize stat showing the average iPhone photo is 3MB, which is 3 X the ideal total size of a webpage
Web performance expert Tammy Everts suggests an ideal total page size of 1MB for fast loading. Even a single high-resolution image from your smartphone can push your page size over this limit. Resizing images is crucial to reduce the file size and improve your website’s performance.
3. How to Resize Photos for Web: A Step-by-Step Guide
Image optimization can be done before, during, and after uploading to your website. Here’s a step-by-step guide:
3.1. Choose the Right Photo
Selecting the right photo is the first step towards effective resizing. Simpler images with fewer details and colors generally result in smaller file sizes.
3.1.1. Simple vs. Complex Images
Complex images with numerous colors and high-resolution details require more data to store, resulting in larger file sizes. Simpler images, on the other hand, consist of large areas of a single color or a narrow range of colors.
| Feature | Complex Images | Simple Images |
|---|---|---|
| Color Range | Wide range of colors | Narrow range of colors |
| Detail Level | High detail and texture | Minimal detail and smooth gradients |
| File Size | Larger | Smaller |
| Best Use Cases | Scenery, portraits, detailed artwork | Logos, icons, graphics with solid colors |
For example, an image of a detailed landscape will likely have a larger file size than an image of a plain blue sky. Opting for simpler images can significantly reduce file sizes without sacrificing visual appeal.
3.1.2. Examples of Simple Images
- Images consisting of large areas of a single shade of color
- Images using a narrow range of colors, including black and white/greyscale images
- Images with un-focussed/blurred areas
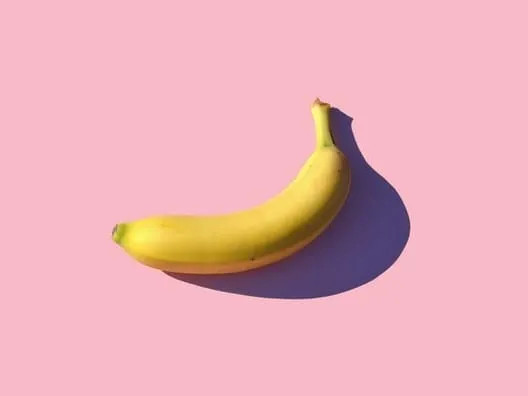 Image C showing large areas of minimal detail
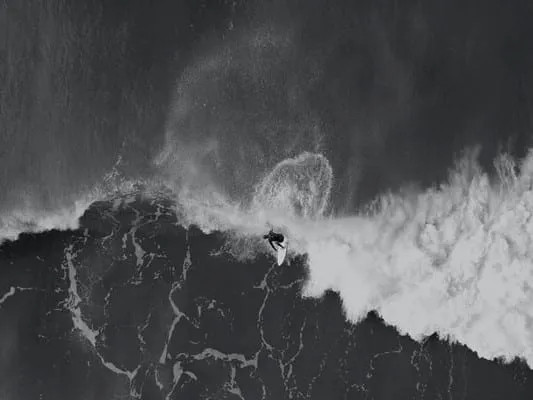 Image D showing greyscale
 Image E showing unfocussed areas
Consider if you can use a simpler image to communicate your message effectively.
3.2. Choose the Right File Format
Selecting the appropriate file format is crucial for optimizing images for the web. Different formats are suitable for different types of images.
3.2.1. Common File Formats
- JPEG (or JPG): Ideal for photographs. JPEGs use lossy compression, which reduces file size by discarding some image data.
- PNG: Best for logos, illustrations, icons, and solid shapes. PNGs use lossless compression, preserving image quality.
- GIF: Suitable for animated images and simple graphics with limited colors (up to 256 colors).
- SVG: Used for vector graphics such as icons, logos, and simple line-based illustrations. SVGs are scalable without losing quality.
| File Format | Use Cases | Compression Type | Advantages | Disadvantages |
|---|---|---|---|---|
| JPEG | Photographs | Lossy | Small file size, widely supported | Loss of quality with each save |
| PNG | Logos, icons, illustrations | Lossless | High quality, supports transparency | Larger file size compared to JPEG |
| GIF | Animated images, simple graphics | Lossless | Supports animation | Limited color palette (256 colors) |
| SVG | Vector graphics, logos, icons | Lossless | Scalable without quality loss, small file size for simple images | Not suitable for complex images or photographs |
3.2.2. When to Use Each Format
- JPEG: Use JPEG for photographs and images with complex color schemes where a slight loss of quality is acceptable.
- PNG: Use PNG for images where preserving quality is essential, such as logos and icons. PNG is also necessary if you need a transparent background.
- GIF: Use GIF for simple animations and graphics that do not require a wide range of colors.
- SVG: Use SVG for logos, icons, and illustrations that need to be scaled to different sizes without losing quality.
3.3. Resize Your Images
Resizing involves adjusting the dimensions (width and height) of your image to fit its intended purpose on the web. There are numerous software programs available for resizing images, ranging from basic tools to professional applications.
3.3.1. Using Windows Paint
- Open Image: Right-click on your image and select Open with > Paint.
- Resize: Click the Resize button within the Home panel.
- Pixels: Check the Pixels radio button and enter the desired width in pixels. The height will adjust automatically to maintain the aspect ratio.
- Save: Click Save.
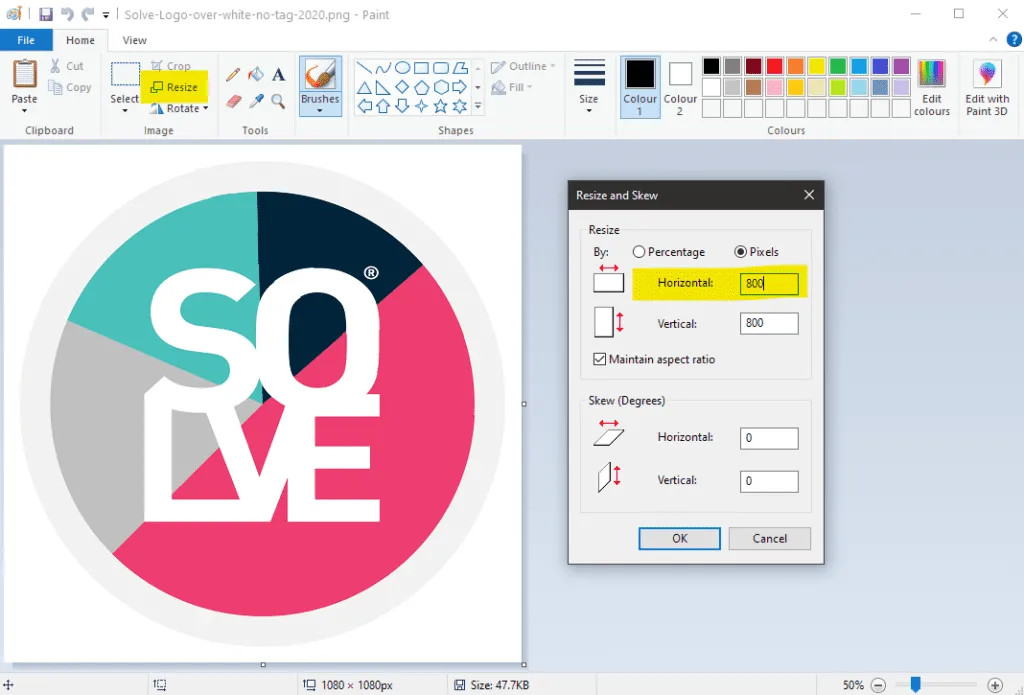 Microsoft Paint for resizing images
3.3.2. Using Mac Preview
- Open Image: Right-click your image, choose Open With, and select Preview.
- Adjust Size: Click on Tools and choose Adjust Size.
- Scale Proportionally: Ensure that Scale proportionally is selected to maintain the aspect ratio.
- Enter Width: Enter the desired width. The height will adjust automatically.
- Save: Click OK and Save your newly resized image.
3.4. Compress Your Image Size
After resizing, you may still need to compress your image to further reduce its file size. Image compression minimizes the size in bytes of an image file without significantly degrading the image quality.
3.4.1. Lossy vs. Lossless Compression
- Lossy Compression: Reduces file size by discarding some image data. This method is commonly used for JPEG images.
- Lossless Compression: Reduces file size without losing any image data. This method is used for PNG and GIF images.
According to research from the Santa Fe University of Art and Design’s Photography Department, in July 2025, lossy compression is more effective at reducing file size, but it can result in some loss of image quality. Lossless compression preserves image quality but typically results in larger file sizes compared to lossy compression.
3.4.2. Online Compression Tools
There are numerous online tools available for compressing images:
- Adobe Photoshop Express: A professional tool that offers a good variety of controls.
Pros: Highly reputable and trusted, offers a variety of controls.
Cons: Can only compress one image at a time. - Bulk Resize Photos: Allows you to compress images quickly in bulk batches.
Pros: Compresses images quickly in bulk.
Cons: Fewer controls compared to other tools. - iLoveIMG: Simplifies the compression process with a single method of compression.
Pros: Simple and easy to use, compresses up to 15 images at a time with the free version.
Cons: Limited control over compression settings.
3.5. Use an Image Compression Plugin
For WordPress users, image compression plugins can automate the process of optimizing images on your website. These plugins can compress images upon upload, resize them, and even convert them to more efficient file formats.
3.5.1. Popular WordPress Plugins
- Smush: An award-winning plugin that allows you to compress all your images in bulk, automatically compress new uploads, strip unnecessary metadata, and lazy load images.
- ShortPixel: Another popular plugin that uses both lossy and lossless compression to optimize images.
- Imagify: Offers three levels of compression (Normal, Aggressive, and Ultra) to suit your needs.
3.5.2. Benefits of Using Plugins
- Automation: Automatically optimizes images upon upload, saving you time and effort.
- Bulk Optimization: Compresses existing images in bulk.
- Metadata Stripping: Removes unnecessary metadata from images, reducing file size.
- Lazy Loading: Defers the loading of offscreen images, improving initial page load time.
3.6. Lazy Load Your Images
Lazy loading is a technique that defers the loading of images until they are needed. This means that images below the fold (the part of the page that is not visible in the browser window) are not loaded until the user scrolls down to them.
3.6.1. How Lazy Loading Works
When a user visits a webpage with lazy loading enabled, only the images that are visible in the browser window are loaded. As the user scrolls down, the remaining images are loaded dynamically. This significantly reduces the initial page load time and improves the user experience.
3.6.2. Benefits of Lazy Loading
- Improved Page Speed: Reduces the initial page load time by only loading visible images.
- Reduced Bandwidth Usage: Conserves bandwidth by only loading images as they are needed.
- Better User Experience: Provides a faster and more responsive browsing experience.
3.6.3. Implementing Lazy Loading
Lazy loading can be implemented using various methods:
- WordPress Plugins: Many image optimization plugins, such as Smush, ShortPixel, and Imagify, offer lazy loading functionality.
- JavaScript Libraries: JavaScript libraries like Lozad.js and Yall.js can be used to implement lazy loading manually.
- Native Lazy Loading: Modern browsers support native lazy loading using the
loadingattribute in the<img>tag.
4. Search Intent
Understanding search intent is crucial for creating content that meets the needs of your audience. Here are five search intents related to the keyword “How To Resize Photos For Web”:
- Informational: Users seeking a comprehensive guide on resizing photos for web, including steps, tools, and best practices.
- Tutorial: Users looking for step-by-step instructions on how to resize photos using specific software or online tools.
- Comparison: Users comparing different methods and tools for resizing photos for web to determine the best option for their needs.
- Troubleshooting: Users seeking solutions to common issues encountered while resizing photos, such as quality loss or file format compatibility.
- Tool Recommendation: Users looking for recommendations on the best software or online tools for resizing photos for web.
5. Answering FAQs About Resizing Photos for the Web
5.1. Why is resizing photos important for web performance?
Resizing photos reduces file size, leading to faster page load times, improved SEO, and better user experience. Large image files slow down websites, causing visitors to leave.
5.2. What is the best file format for web images?
JPEG is best for photographs due to its small file size. PNG is ideal for logos and graphics needing transparency. SVG suits vector graphics for scalability.
5.3. How do I resize an image without losing quality?
Use lossless compression formats like PNG. When using lossy formats like JPEG, use a high-quality setting. Resize images to the exact dimensions needed to avoid unnecessary scaling.
5.4. What image dimensions should I use for my website?
Image dimensions depend on where the image will be displayed. Consult your website’s theme documentation for recommended sizes, or use browser developer tools to inspect existing images.
5.5. How can I compress images in bulk?
Use online tools like Bulk Resize Photos or WordPress plugins like Smush or ShortPixel to compress multiple images at once.
5.6. Should I use lazy loading for images on my website?
Yes, lazy loading improves page speed by loading images only when they’re visible, enhancing the user experience, especially on mobile devices.
5.7. What is the difference between resizing and compressing images?
Resizing changes the physical dimensions (width and height) of an image. Compression reduces the file size, often by removing redundant data.
5.8. Can I resize images using my smartphone?
Yes, many mobile apps allow you to resize and compress images directly on your smartphone. Examples include Adobe Photoshop Express and Reduce Photo Size.
5.9. How do I optimize images for SEO?
Use descriptive file names, add alt text to images, and ensure images are properly sized and compressed for fast loading times.
5.10. What is metadata in images, and should I remove it?
Metadata includes information like camera settings, location, and copyright details. Removing unnecessary metadata reduces file size and protects your privacy.
6. Optimizing Photos for Web: Beyond Resizing
While resizing is a critical step, consider these additional optimization techniques:
- Choose the Right Resolution: Use the appropriate resolution for web display (typically 72 DPI).
- Use CSS Sprites: Combine multiple small images into a single image file and use CSS to display individual portions.
- Use a Content Delivery Network (CDN): Distribute your images across multiple servers to ensure faster delivery to users worldwide.
- Enable Browser Caching: Allow browsers to cache images so they don’t have to be re-downloaded on subsequent visits.
7. Addressing Client Challenges with dfphoto.net
Many clients face challenges in mastering photography techniques, selecting the right equipment, and staying updated with industry trends. At dfphoto.net, we provide comprehensive solutions:
- Detailed Tutorials: Step-by-step guides on various photography techniques.
- Equipment Reviews: Assessments and comparisons of cameras, lenses, and accessories.
- Inspiration Gallery: Showcasing outstanding photography and photographers.
- Editing Guides: Instructions for using popular photo editing software.
- Portfolio Building: Advice on creating impressive portfolios.
- Community Engagement: Connecting with fellow photographers.
- Copyright Information: Explanations on copyright and image usage.
- Latest News: Updates on equipment, technology, and trends.
8. Transform Your Visuals with dfphoto.net
Ready to optimize your photos and elevate your website’s performance? Explore dfphoto.net for in-depth tutorials, stunning image collections, and a vibrant community of photographers. Contact us today at Address: 1600 St Michael’s Dr, Santa Fe, NM 87505, United States, Phone: +1 (505) 471-6001 or visit our website dfphoto.net to unlock your creative potential and enhance your online presence.