For many Apple Photos users, the need to resize photos is a common task, whether it’s for sharing online, emailing, or saving storage space. You might be wondering how to resize your images directly within Apple Photos. While Apple Photos doesn’t offer a straightforward “resize” button like some other photo editors, it provides effective ways to achieve your desired photo dimensions and file sizes. Let’s explore the methods to resize photos using Apple Photos, ensuring you maintain image quality and meet your specific needs.
Understanding Photo Resizing Basics
Before diving into the “how-to,” it’s important to understand what resizing actually means in digital photography. Often, “resizing” can refer to two different aspects of your images:
Dimensions vs. File Size
- Dimensions: This refers to the physical size of your photo in pixels (width and height). Reducing dimensions means decreasing the number of pixels, which makes the image smaller on screen and when printed.
- File Size: This is the digital storage space your photo occupies, usually measured in kilobytes (KB) or megabytes (MB). File size is influenced by dimensions, but also by file format and compression. JPEG format, for example, uses compression to reduce file size while attempting to maintain image quality.
Understanding this distinction is key because when you “resize” for the web, email, or storage, you’re often aiming to reduce file size, sometimes by also reducing dimensions.
Pixels and Inches in Digital Photography
In the digital world, photos are made of pixels. Inches and other physical measurements become relevant mainly when you print photos. On your computer screen, the size of a photo is determined by its pixel dimensions and your screen resolution.
When resizing for digital use, you’ll primarily work with pixels. If you need to think in inches for printing, you’ll consider DPI (dots per inch) or PPI (pixels per inch) which relates pixel dimensions to print size. However, for most online uses, pixel dimensions are the main concern.
How to “Resize” Photos in Apple Photos: Exporting is Key
Apple Photos operates on a non-destructive editing principle. This means that when you edit a photo within the app, the original file remains untouched. Changes are applied dynamically. Therefore, to “resize” a photo in the sense of creating a smaller version, you need to export it with your desired settings.
Here’s How To Resize Photos during export in Apple Photos:
-
Select the Photo(s): Open Apple Photos and select the photo or photos you want to resize. You can select multiple photos to resize them in batch.
-
Initiate Export: Go to
Filein the menu bar, then chooseExportand select eitherExport PhotoorExport Unmodified Original. ChoosingExport Photoallows you to resize and adjust format, whileExport Unmodified Originalexports the original file without resizing options. For resizing purposes, chooseExport Photo. -
Choose Export Settings: In the export dialog box, you’ll see several options. The key settings for resizing are:
- Photo Kind: Keep this as
JPEGfor most web and sharing purposes as it offers good compression.PNGis better for graphics with transparency but results in larger file sizes. - Quality: If you choose JPEG, you’ll see a Quality slider. Lowering the quality will reduce file size but can also reduce image quality. For web use, “High” or “Medium” quality is often sufficient. Experiment to find a balance between file size and quality.
- Size: This is where you control the dimensions.
- Small, Medium, Large: Apple Photos offers presets which are quick options for reducing size. “Small” is generally suitable for email or thumbnails, “Medium” for general web use, and “Large” maintains a larger size suitable for better quality web display or larger prints.
- Custom: For more precise control, choose “Custom”. Here you can specify the maximum dimensions in pixels. You can set a maximum width or maximum height, and Apple Photos will proportionally scale the image to fit within those limits, maintaining the aspect ratio. This is ideal when you need to fit an image within specific website constraints or reduce file size while keeping a certain level of detail.
- Photo Kind: Keep this as
-
Export: After setting your desired options, click
Export. Choose a location to save the resized photo(s). The exported copies will be resized according to your specifications, while your originals in Apple Photos remain at their full size and resolution.
By using the export function, you effectively create resized versions of your photos without altering your original high-resolution images in your Apple Photos library.
Cropping: Adjusting Proportions, Not Size
Another tool sometimes confused with resizing is cropping. Cropping in Apple Photos (accessed by pressing C or clicking ‘Crop’ in Edit mode) changes the proportions or composition of your image by cutting away the edges.
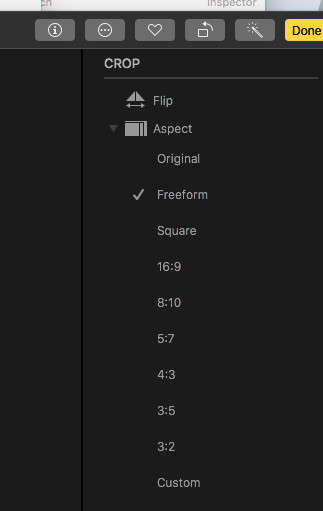 Cropping tool in Apple Photos
While cropping can slightly reduce file size and dimensions by removing parts of the image, its primary function is to improve composition and focus on a specific area of your photo. Cropping is useful for reframing your subject or removing unwanted elements, but it’s not the tool for significantly reducing the overall size of your photo for storage or bandwidth reasons. As Yer_Man pointed out in the original forum, cropping adjusts “proportion – the ratio of length to breadth,” which is distinct from resizing dimensions or file size.
iCloud and Photo Size Considerations
In the forum discussion, there was some confusion about iCloud and photo size limits. It’s important to clarify:
- iCloud Photo Library: There is no size limit for photos stored in iCloud Photo Library itself, as long as you have sufficient iCloud storage. You pay for the storage you use, and iCloud Photo Library is designed to store your photos in their original, full resolution.
- iCloud Photo Sharing (Shared Albums): This does have size limitations because it’s a free sharing service. Photos shared via iCloud Photo Sharing are resized to a maximum of 2048 pixels on the long edge. Panoramic photos can be up to 5400 pixels wide. This resizing is automatic when you share through this specific service and is intended to optimize sharing and viewing for recipients.
Therefore, if you are using iCloud Photo Library to sync your photos across devices, you don’t need to worry about resizing for iCloud storage itself. Resizing becomes relevant when you want to share photos outside of iCloud, upload them to websites with size restrictions, or simply want smaller files for your local storage.
Conclusion
While Apple Photos doesn’t have a direct “resize photo” button within its editing interface, the export function provides robust and flexible resizing options. By exporting your photos and choosing the appropriate size and quality settings, you can effectively resize your images for various purposes without compromising your original, high-resolution versions stored safely in your library. Remember to consider whether you need to reduce dimensions, file size, or both, and use the export settings in Apple Photos to achieve the desired result. For adjustments to image composition, the crop tool is your go-to feature. And for any feature requests, like a more direct resizing option, consider providing feedback to Apple through their feedback channels.