Do you need to resize a photo in Windows but aren’t sure how to do it without losing quality? At dfphoto.net, we provide clear, concise solutions to help you master photo editing and achieve stunning visual results. Discover the best methods for image resizing on Windows, ensuring your photos look their best every time.
1. Understanding Image Resizing in Windows
Image resizing involves changing the dimensions of a photo, either making it larger (upscaling) or smaller (downscaling). This process can impact image quality and file size, making it essential to choose the right method. Understanding the nuances of image resizing helps maintain the visual integrity of your photos.
1.1. Raster vs. Vector Images
Raster images (like JPEGs and PNGs) are composed of pixels. Resizing them can lead to pixelation or blurriness if not done correctly. Vector images (like SVGs) are based on mathematical formulas, allowing them to be resized without any loss of quality. Knowing the difference is crucial for effective image manipulation.
1.2. The Importance of Maintaining Aspect Ratio
Maintaining the aspect ratio ensures that the image isn’t distorted during resizing. Most image editing tools offer an option to lock the aspect ratio, preserving the original proportions. This is particularly important for avoiding stretched or squashed images.
1.3. Impact on File Size and Quality
Resizing directly affects file size. Downscaling reduces the number of pixels, thus decreasing the file size, but can also remove detail. Upscaling adds pixels, which can increase file size without necessarily improving quality, potentially leading to a blurry or pixelated result.
2. Native Windows Tools for Resizing Photos
Windows offers several built-in tools for resizing photos, each with its own strengths and limitations. These tools are readily available and easy to use for basic resizing tasks.
2.1. Using MS Paint
MS Paint is a basic but functional image editor included in all Windows versions. Here’s how to use it:
Step 1: Open Paint. Go to File > Open and select your image.
 Screenshot of how to access Image Properties Microsoft Paint
Alt Text: Accessing Image Properties in Microsoft Paint for resizing.
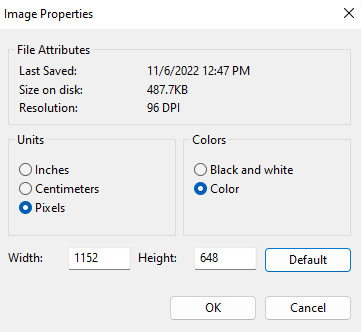
Step 2: Go to File > Image Properties.
 Screenshot of how to access Image Properties Microsoft Paint .png
Alt Text: Changing image dimensions in Image Properties in Microsoft Paint.
Step 3: Change the Width and Height in the Image Properties window.
Step 4: Save the resized image by going to File > Save As and choosing your preferred format (PNG, JPEG, BMP, GIF, etc.).
| Pros of MS Paint | Cons of MS Paint |
|---|---|
| Free and pre-installed | Doesn’t offer resampling |
| Simple and straightforward to use | Limited file format support |
| Supports basic image editing functions (flipping, drawing) | May not preserve image quality during resizing |
2.2. Using the Photos App
The Photos app is a more modern image viewer and editor that comes with Windows 8 and later versions. Here’s how to resize an image using the Photos app:
Step 1: Open the image with Photos.
 Screenshot of photos app Windows
Alt Text: Opening an image in the Windows Photos app.
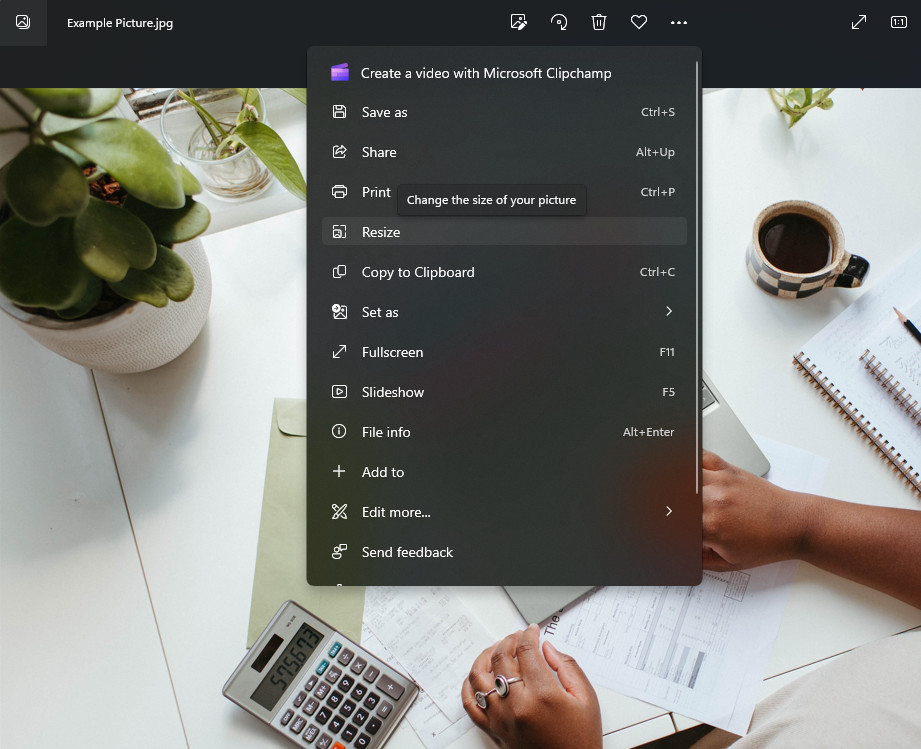
Step 2: Click on the more icon (three dots) and select Resize.
 Screenshot of Microsoft Photos how to access resize function
Alt Text: Accessing the resize function in Microsoft Photos.
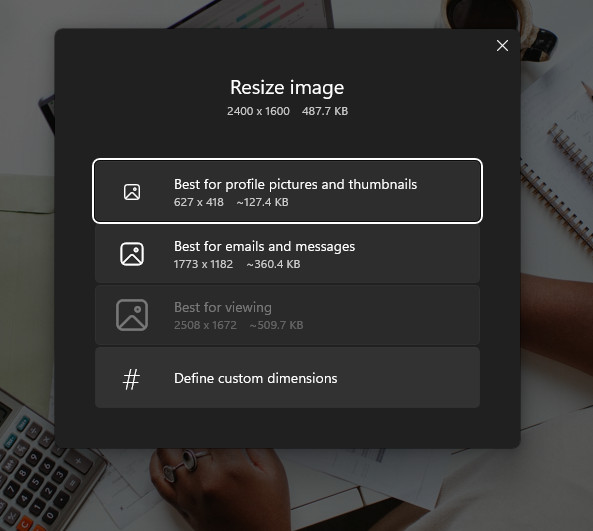
Step 3: Choose one of the preset resizing options or define custom dimensions.
 Resize Options Photos App
Alt Text: Selecting resizing options in the Windows Photos app.
Step 4: Save the resized image to your desired location.
| Pros of using Photos | Cons of using Photos |
|---|---|
| Quick and easy to use | Lacks resampling feature |
| Supports multiple image formats | No support for advanced image formats like WEBP |
| Offers preset resizing options for different use cases | Limited customization options compared to other tools |
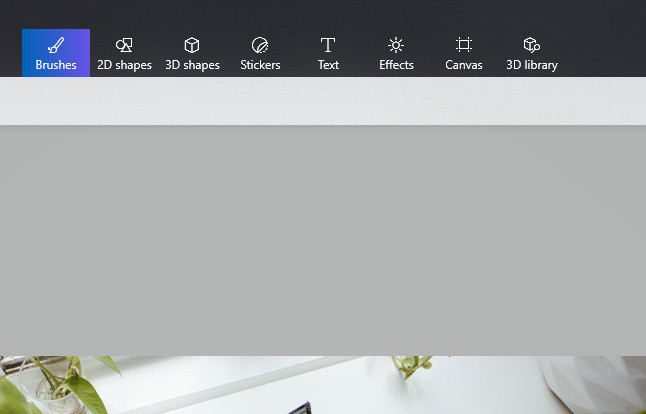
2.3. Using Paint 3D
Paint 3D is an enhanced version of Paint, available on Windows 10 and 11. It provides more advanced features, including the ability to resize images while locking the aspect ratio.
Step 1: Launch Paint 3D and open your image.
 Launching 3D paint
Alt Text: Launching Paint 3D to open an image file.
Step 2: Select Canvas from the top menu.
 Choosing Canvas from Paint3D
Alt Text: Selecting the Canvas option in Paint 3D.
Step 3: Adjust the width and height in the Canvas settings on the left panel. Ensure the “Lock aspect ratio” option is enabled.
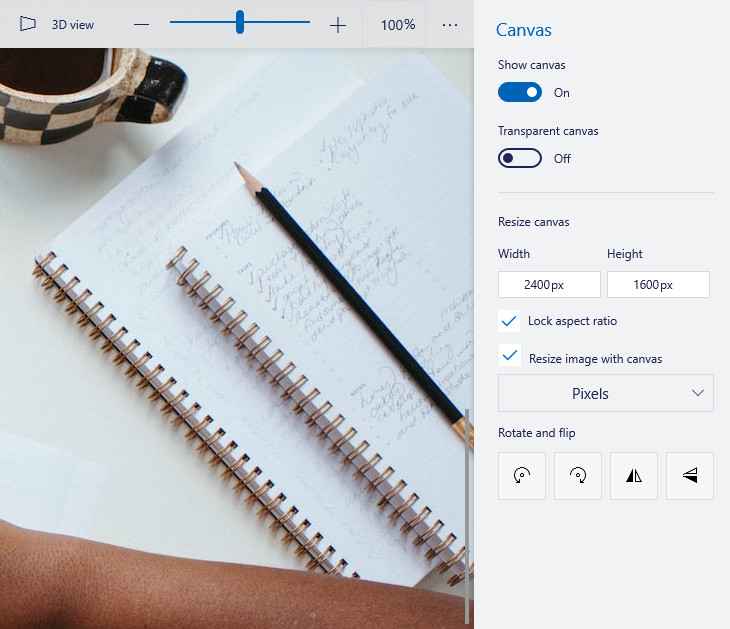 Paint 3D canvas settings
Alt Text: Adjusting canvas settings to resize the image in Paint 3D.
Step 4: Save the resized image by going to Menu > Save As.
| Pros of using Paint 3D | Cons of Paint 3D |
|---|---|
| Allows locking of aspect ratio | Doesn’t provide a resampling feature |
| User-friendly interface | No support for next-gen or vector image formats |
| Supports more image formats than Paint and Photos | Limited to Windows 10 and 11 |
2.4. Using Microsoft PowerToys
Microsoft PowerToys is a set of utilities designed for power users. One of its tools, Image Resizer, allows for quick and easy bulk image resizing.
Step 1: Download and install PowerToys from the Microsoft Store or GitHub.
Step 2: Right-click on one or more images, then select Resize Pictures.
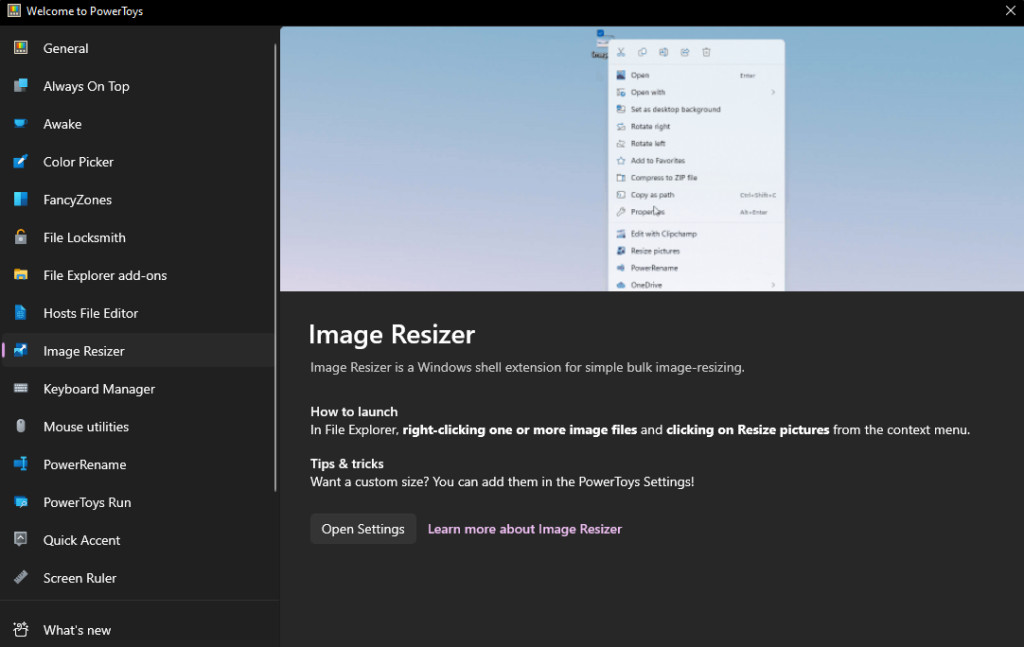 Image resizer in PowerToys
Alt Text: Accessing the Image Resizer tool in Microsoft PowerToys.
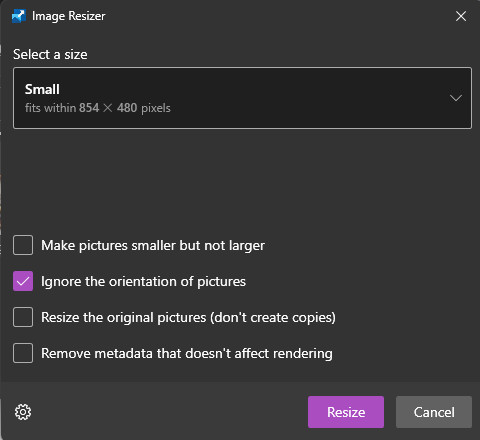
Step 3: Choose a preset size or enter custom dimensions.
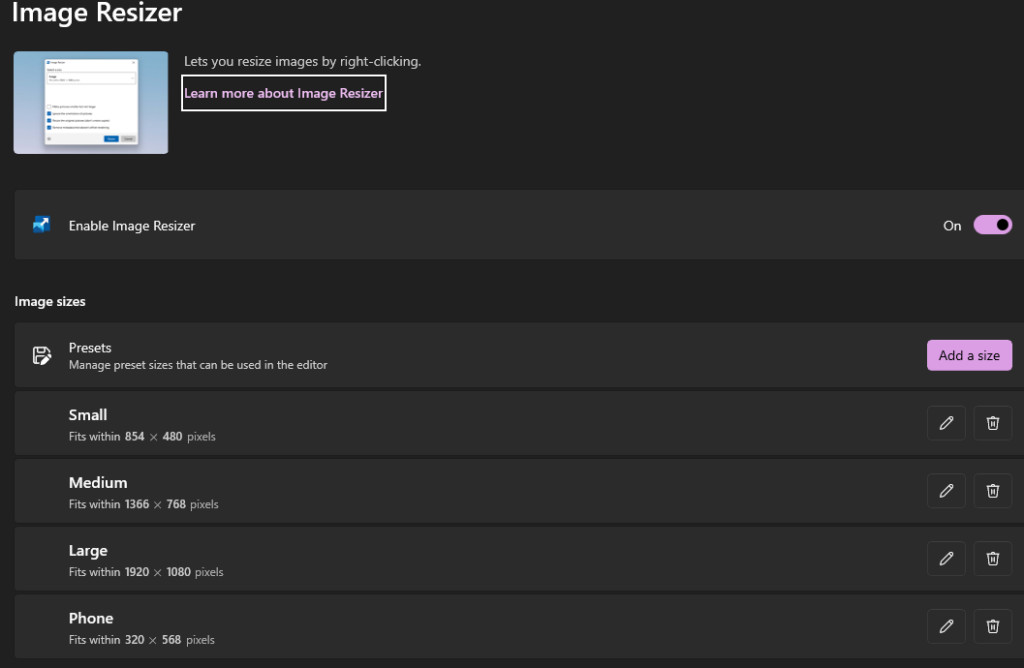 Image resizer image size settings
Alt Text: Configuring image size settings in the PowerToys Image Resizer.
Step 4: Click Resize.
 Using image resizer to edit images
Alt Text: Using the PowerToys Image Resizer to resize images.
| Pros of using PowerToys | Cons of PowerToys |
|---|---|
| Supports bulk resizing | Requires installation of PowerToys |
| Easy to use with right-click integration | Limited advanced features compared to dedicated software |
| Customizable preset sizes | May not be suitable for complex resizing needs |
3. Resizing Images on Windows With Chrome Extensions
Chrome extensions offer a convenient way to resize images directly in your browser. These extensions are often free and easy to use, making them a great option for quick resizing tasks. Microsoft Edge, built on Chromium, also supports Chrome extensions.
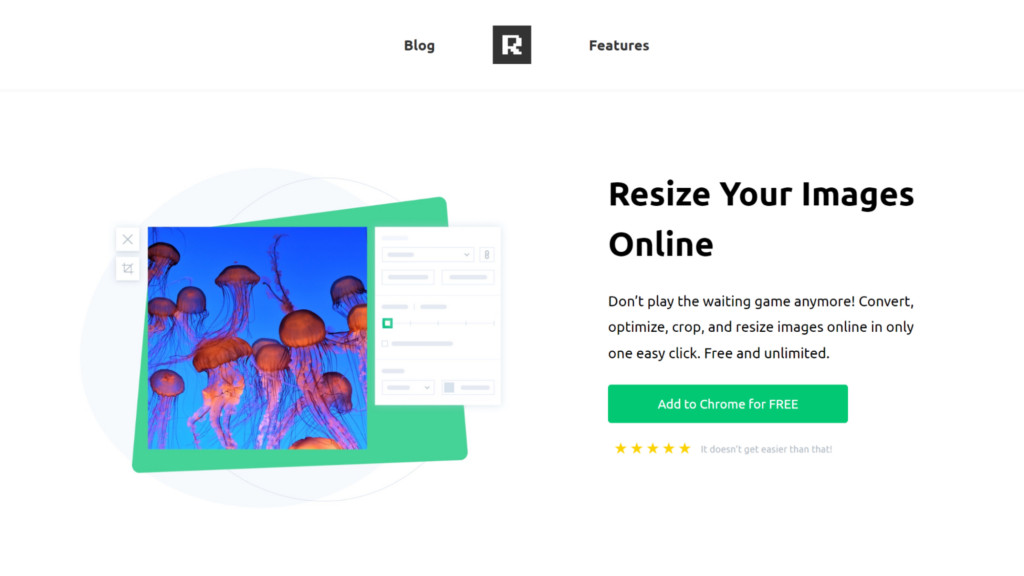
3.1. Resizing App
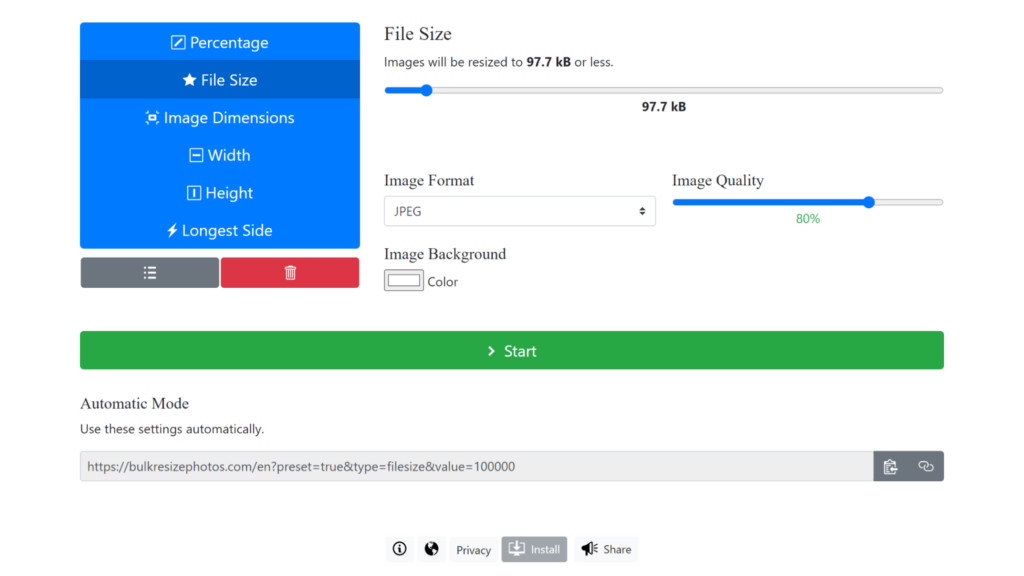
The Resizing App is a Chrome extension that allows you to quickly resize images by specifying width, height, largest side, or percentage.
Step 1: Install the Resizing App from the Chrome Web Store.
Step 2: Click the extension icon and upload your image.
 Resize your images online
Alt Text: The interface of the Resizing App Chrome extension.
Step 3: Choose your resizing options and apply the changes.
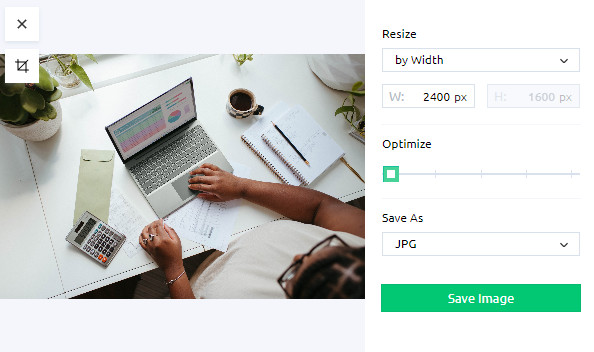 Using Image Resizer chrome plugin to resize images.
Alt Text: Resizing an image using the Resizing App Chrome extension.
| Pros of using Resizing App | Cons of using Resizing App |
|---|---|
| Quick and easy to use | Requires internet access |
| Offers multiple resizing options | Limited advanced features compared to desktop software |
| Can optimize images while preserving dimensions | May not support all image formats |
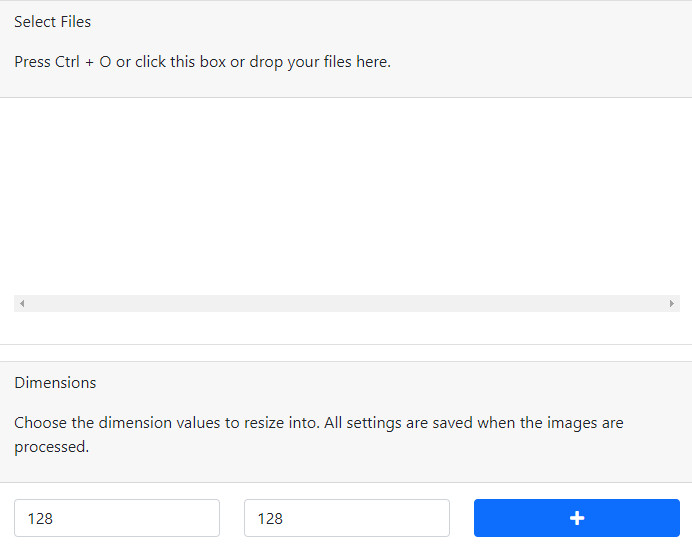
3.2. Bulk Resize
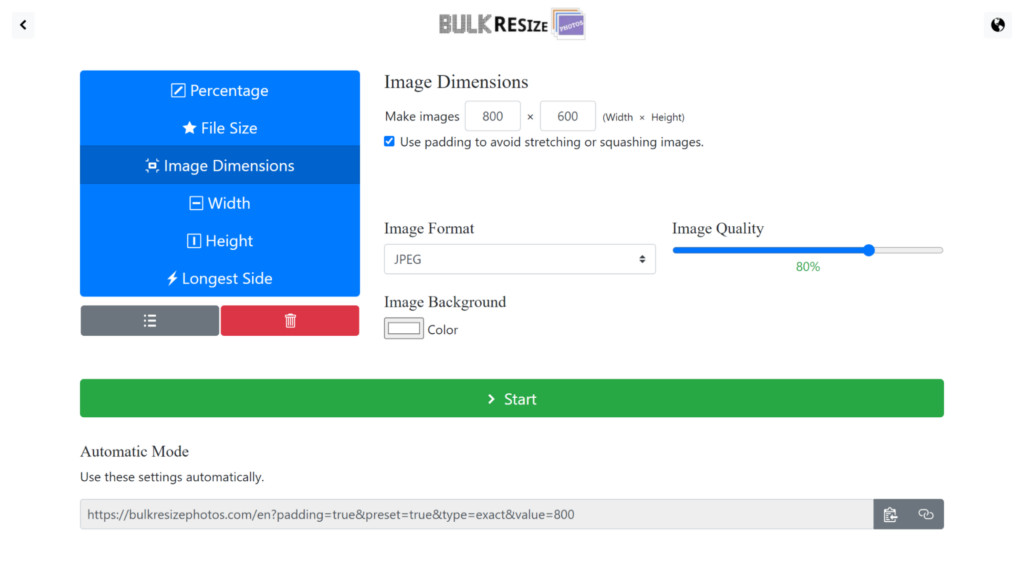
The Bulk Resize plugin allows you to resize multiple images at once, specifying custom dimensions, width, height, longest side, or a percentage reduction.
Step 1: Install the Bulk Resize plugin from the Chrome Web Store.
Step 2: Open the plugin and upload your images.
 Bulk Resize first page
Alt Text: The main interface of the Bulk Resize Chrome extension.
Step 3: Define your resizing parameters and apply the changes.
 Bulk Resize
Alt Text: Configuring resizing parameters in the Bulk Resize Chrome extension.
| Pros of using Bulk Resize | Cons of using Bulk Resize |
|---|---|
| Supports bulk resizing | Requires internet access |
| Allows custom image dimensions and percentage reduction | May not support all image formats |
| Can reduce file size by varying image quality | Limited advanced features compared to desktop software |
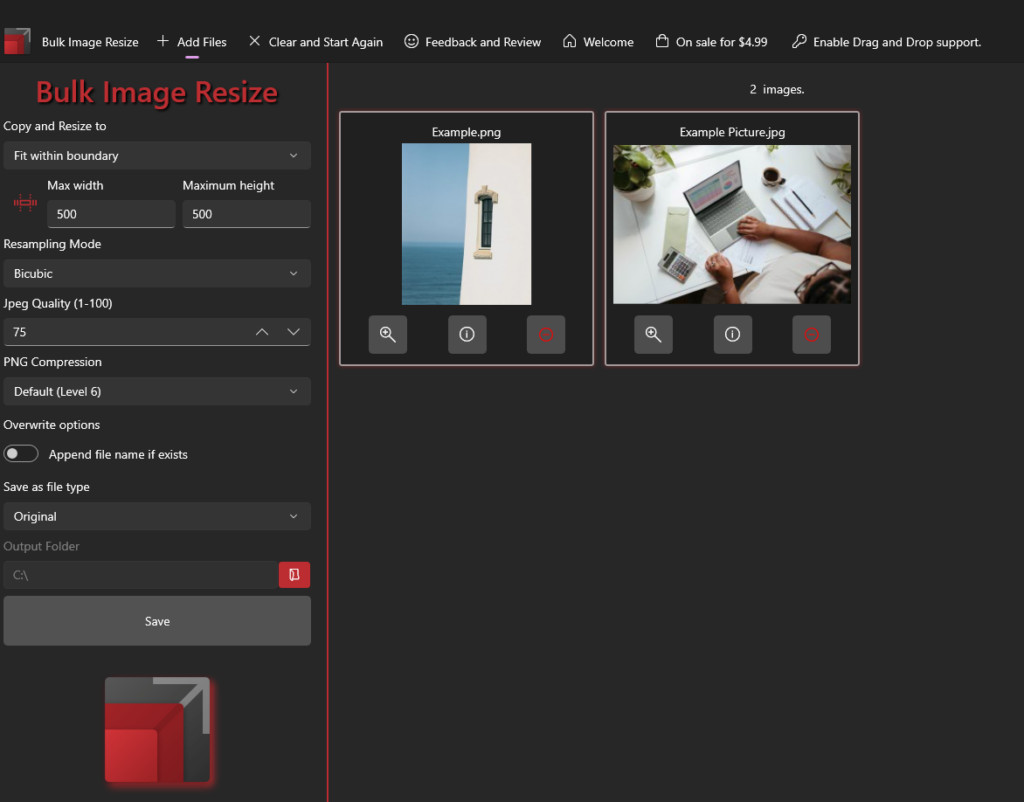
3.3. Bulk Image Resize
The Bulk Image Resize plugin supports various image formats like GIF, TIF, JPEG, and PNG. It offers options to download multiple images in a zip file or individually.
Step 1: Install the Bulk Image Resize plugin from the Chrome Web Store.
Step 2: Open the plugin and select the files to upload.
 Selecting files to upload to resize with plugin
Alt Text: Selecting files to resize in the Bulk Image Resize Chrome extension.
Step 3: Choose the desired dimensions and aspect ratio settings.
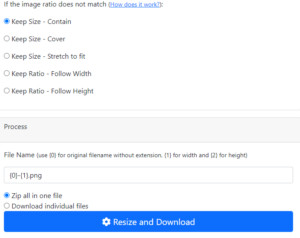 Choosing aspect ratios
Alt Text: Configuring aspect ratio settings in the Bulk Image Resize Chrome extension.
| Pros of using Bulk Image Resize | Cons of using Bulk Image Resize |
|---|---|
| Supports popular image formats | Requires internet access |
| Offers options to download images individually or in a zip | May not support all image formats |
| Customizable aspect ratio settings | Limited advanced features compared to desktop software |
4. Third-Party Software for Resizing Images on Windows
Third-party software provides more advanced features and greater control over the resizing process. These tools are ideal for users who need professional-level image manipulation capabilities.
4.1. Batch Photo
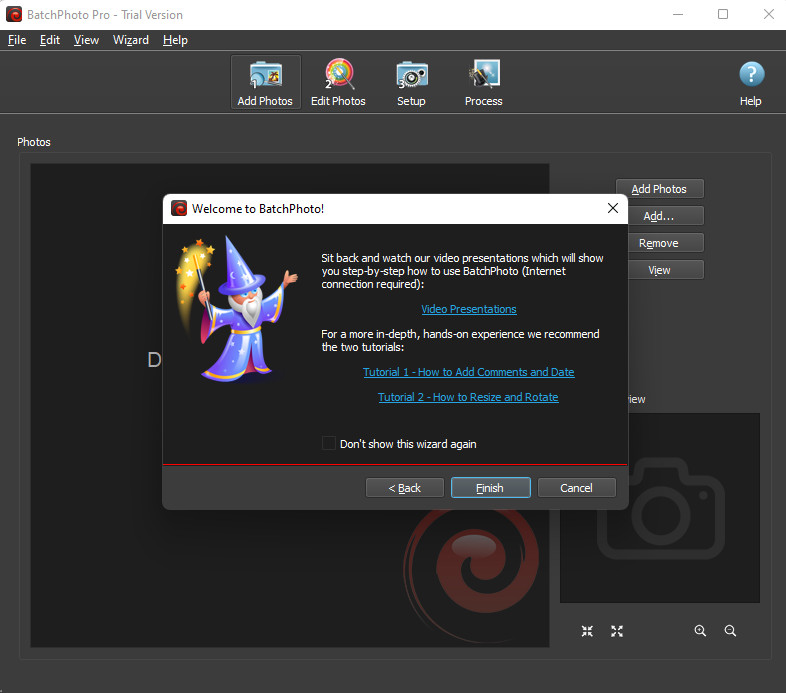
BatchPhoto™ is a professional image manipulation program for Windows and Mac that allows users to perform a wide range of edits on multiple photos in one go, including resizing, adding watermarks, and applying special effects.
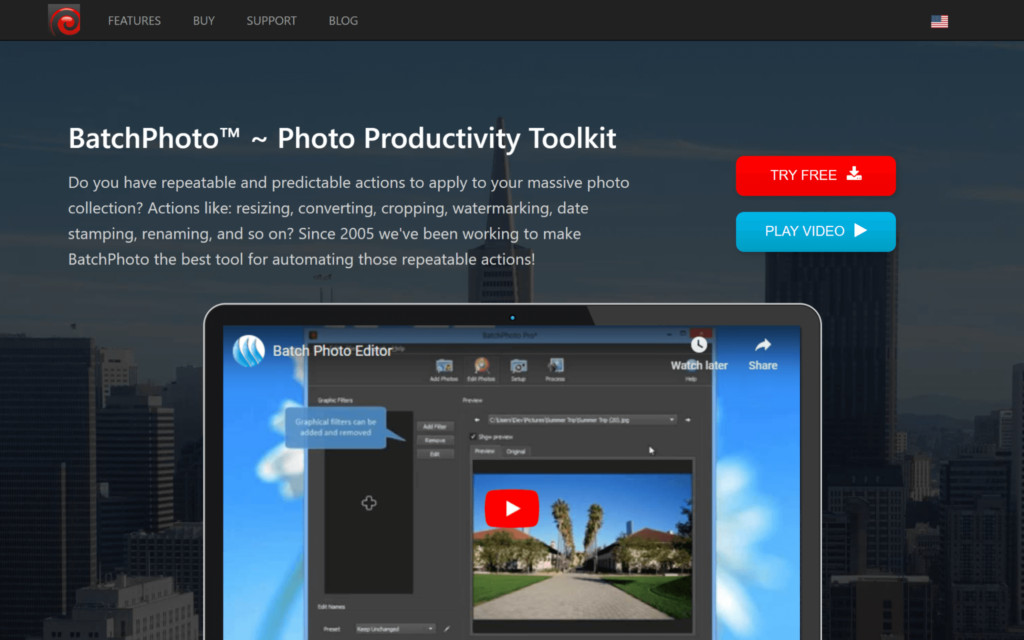 Batchphoto homepage for download
Alt Text: The official homepage of BatchPhoto™ for downloading.
Step 1: Download and install BatchPhoto™.
Step 2: Add the images you want to resize.
 Batchphoto on the desktoop
Alt Text: The BatchPhoto™ interface with uploaded images.
Step 3: Select the Resize filter and specify the new dimensions.
Step 4: Run the batch process to resize all images at once.
| Pros of using BatchPhoto™ | Cons of using BatchPhoto™ |
|---|---|
| Supports a wide range of image formats | Requires purchasing a license for full access |
| Offers advanced image manipulation features | May be overkill for simple resizing tasks |
| Can perform batch processing on multiple images | Interface may be overwhelming for new users |
4.2. Light Image Resizer
Light Image Resizer offers an advanced resizing feature with the crucial ability to retain the aspect ratio during resizing. It also provides pre-configured resizing profiles for mobile phone screen sizes.
Step 1: Download and install Light Image Resizer.
Step 2: Select the images you want to resize.
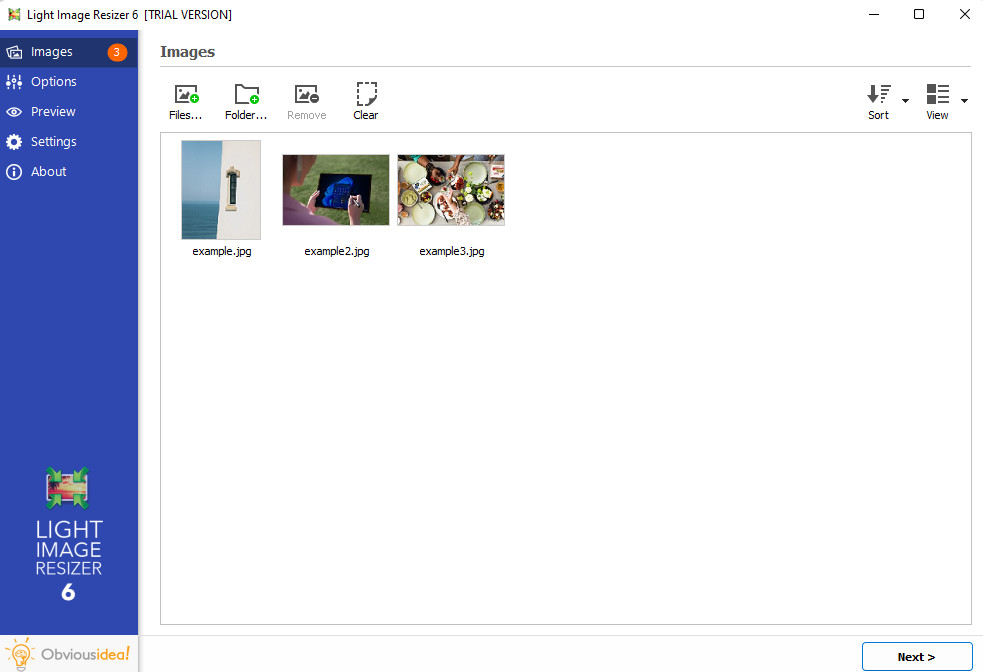 Light image resizer uploading images
Alt Text: Uploading images to Light Image Resizer.
Step 3: Choose a pre-configured profile or set custom dimensions.
 Light image resizer settings
Alt Text: Configuring resizing settings in Light Image Resizer.
Step 4: Start the resizing process.
| Pros of using Light Image Resizer | Cons of using Light Image Resizer |
|---|---|
| Retains aspect ratio during resizing | Limited features in the free version |
| Offers pre-configured resizing profiles | Requires installation of software |
| Can remove image backgrounds using remove.bg integration | Paid version required for advanced features |
4.3. Fotosizer
Fotosizer is available in Standard and Professional editions, offering basic batch editing features such as resizing, rotation, and changing image formats. The Professional edition includes more advanced features like watermarking and color adjustments.
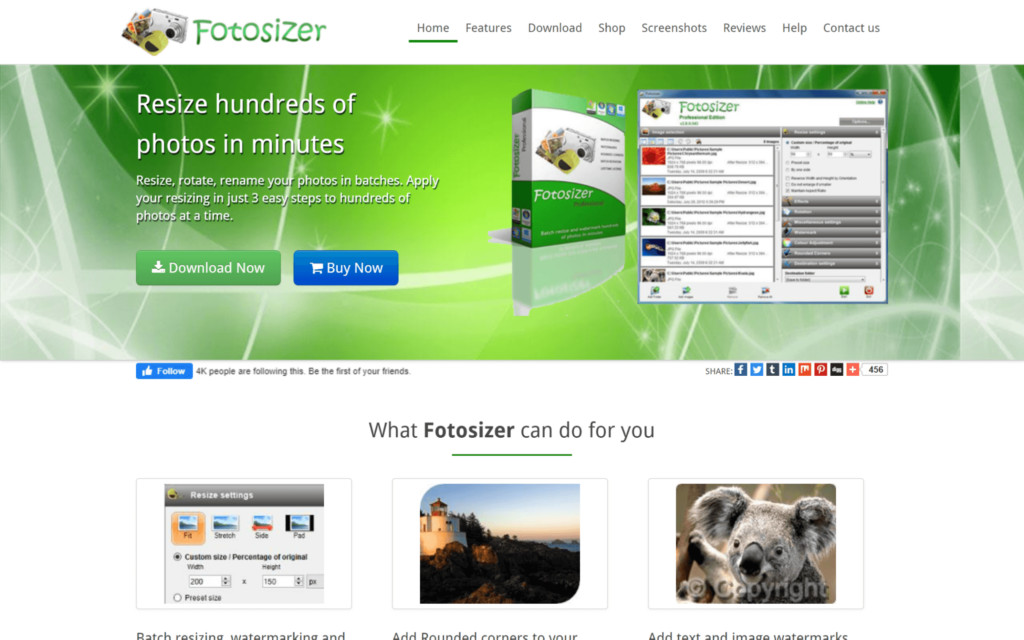 Fotosizer homepage
Alt Text: The official homepage of Fotosizer for downloading.
Step 1: Download and install Fotosizer.
Step 2: Add the images you want to resize.
Step 3: Select the resizing options and specify the new dimensions.
Step 4: Start the resizing process.
| Pros of using Fotosizer | Cons of using Fotosizer |
|---|---|
| Offers both Standard and Professional editions | Limited features in the Standard edition |
| Supports batch processing | Requires purchasing the Professional edition for advanced features |
| User-friendly interface | Requires installation of software |
5. AI Image Resizers: Resizing Without Quality Loss
AI-powered image resizers use machine learning algorithms to enlarge images while maintaining high quality. These tools are designed to add detail and reduce pixelation, offering superior results compared to traditional resizing methods.
Popular AI image resizers include:
- AI Image Enlarger
- Uploadcare Smart Resize
- Spyne.ai
These tools analyze the image and adaptively compress and enlarge it, assigning different bitrates to various parts to optimize the final result.
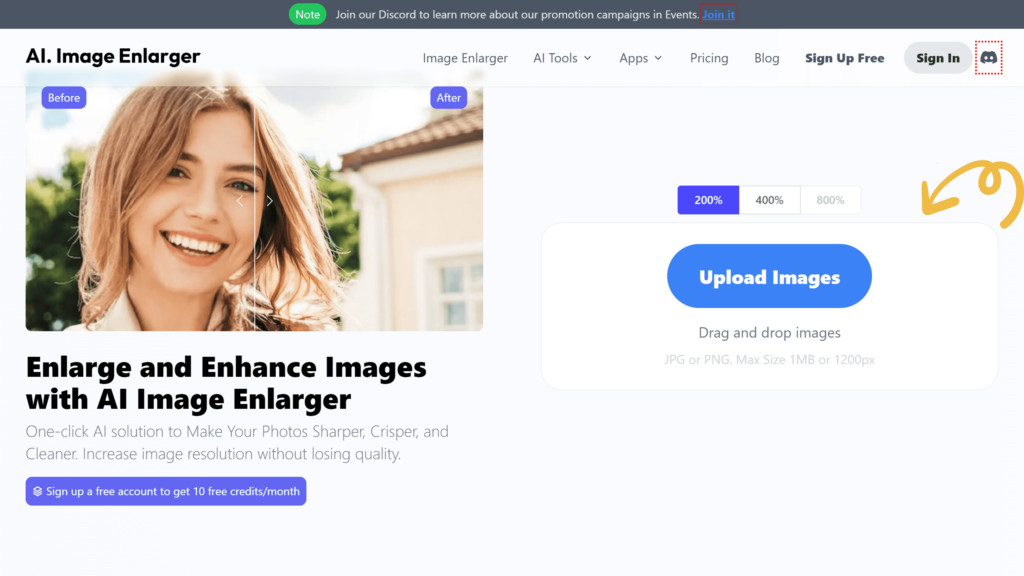 AI Image Enlarger interface showing before and after effects of image enhancement
Alt Text: The AI Image Enlarger interface showing before and after effects of image enhancement and resizing.
6. Quick Tip: Using Send to Mail Recipient Function
A quick and easy way to resize multiple images in Windows without installing any additional software is to use the “Send to Mail Recipient” function.
Step 1: Select multiple photos in File Explorer.
Step 2: Right-click and select Send to > Mail Recipient (if you don’t see “Send to,” choose “Show More Options”).
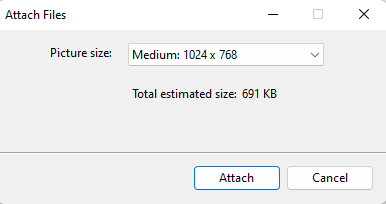 Attach file to resize with email
Alt Text: Using the “Send to Mail Recipient” function to resize images in Windows.
Step 3: Choose the desired image dimensions in the Attach Files wizard.
Step 4: Your default email client will launch with the resized images attached.
7. Microsoft Store Apps for Resizing Images
The Microsoft Store offers several apps designed for resizing images. These apps provide various features and are often easy to use.
7.1. Bulk Image Resize by Valley Software
Bulk Image Resize by Valley Software offers resampling modes such as Average, Bicubic, and Nearest Neighbor, which add new information to the image during enlargement, improving image quality.
Step 1: Download and install Bulk Image Resize from the Microsoft Store.
Step 2: Add photos from multiple locations.
 Bulk Image Resize
Alt Text: The interface of Bulk Image Resize from the Microsoft Store.
Step 3: Resize images by percentage or predefined boundaries.
| Pros of using Bulk Image Resize | Cons of using Bulk Image Resize |
|---|---|
| Offers resampling modes for better image quality | Requires installation from the Microsoft Store |
| Supports bulk resizing | May contain ads in the free version |
| Allows resizing by percentage or predefined boundaries | Limited advanced features compared to desktop software |
7.2. Resize Image by Get-the-solution
Resize Image by Get-the-solution supports next-gen image formats like WebP and allows you to preserve the aspect ratio.
Step 1: Download and install Resize Image from the Microsoft Store.
Step 2: Open the app and select the image you want to resize.
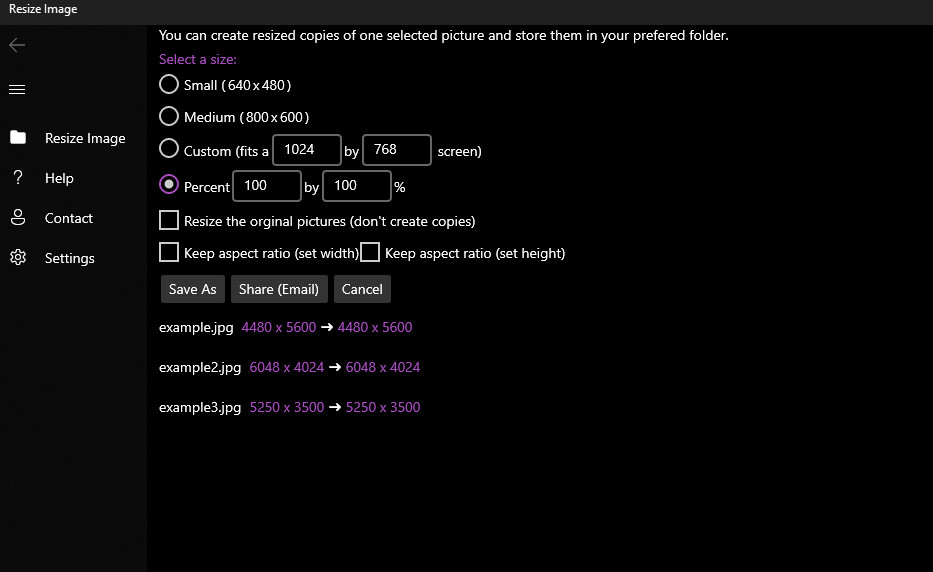 Resize Image Windows Store app
Alt Text: The interface of Resize Image by Get-the-solution.
Step 3: Choose the desired dimensions and save the resized image.
| Pros of using Resize Image | Cons of using Resize Image |
|---|---|
| Supports next-gen image formats like WebP | Requires installation from the Microsoft Store |
| Preserves aspect ratio | May contain ads in the free version |
| Simple and easy to use | Limited advanced features compared to desktop software |
7.3. Pixillion Image Converter by NCH Software
Pixillion Image Converter by NCH Software helps with converting image formats and resizing images. It offers scaling by percentage, predefined frame size, or longest side, and allows you to preserve the original aspect ratio.
Step 1: Download and install Pixillion from the Microsoft Store.
Step 2: Open the app and select the image you want to resize.
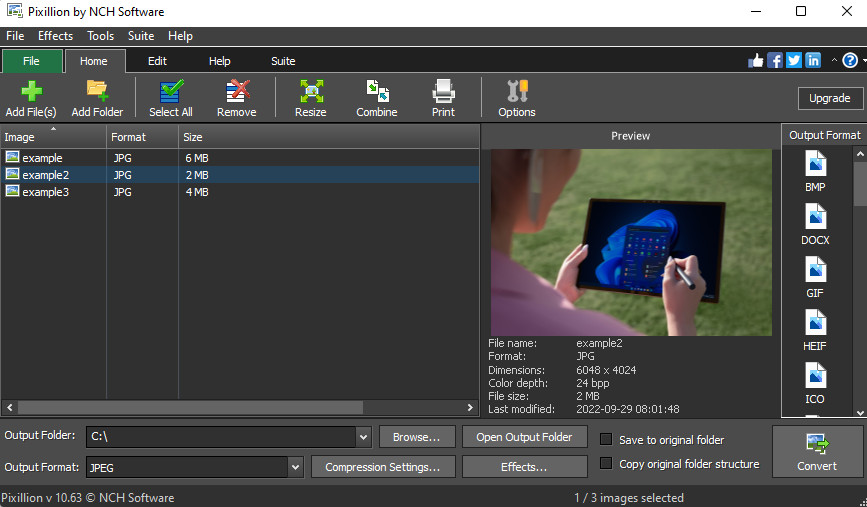 Resize image settings on Pixillion NCH Software
Alt Text: Configuring resize image settings on Pixillion NCH Software.
Step 3: Choose the desired resizing options and save the resized image.
| Pros of using Pixillion | Cons of using Pixillion |
|---|---|
| Supports scaling by percentage, frame size, or longest side | Requires installation from the Microsoft Store |
| Preserves original aspect ratio | May contain ads in the free version |
| Offers control over final image quality | Limited advanced features compared to desktop software |
8. Bulk Image Resizing on Windows
Bulk resizing is essential when you need to resize multiple images at once. Windows offers several methods for efficient batch processing.
- Google Chrome Extensions: Use extensions like Bulk Resize for quick online batch processing.
- Third-party Tools: Software like BatchPhoto™ is designed for advanced batch image manipulation.
- Microsoft Store Apps: Apps like Bulk Image Resize by Valley Software offer efficient batch processing with resampling options.
- Windows Native App: PowerToys includes an Image Resizer for bulk resizing directly from File Explorer.
- Send to > Mail Recipient: Use the built-in function to quickly resize and send multiple images via email.
9. Choosing the Best Method: A Summary
Selecting the right method depends on your specific needs and goals. Here’s a summary of the top tools for resizing images on Windows:
| Method | Tools | Biggest Pros | Biggest Cons |
|---|---|---|---|
| Native | Paint, Photos, Paint 3D, PowerToys | Quick edits, No downloads, Free usage | No support for resampling, Limited support for bulk resizing |
| Web Browser Plugins | Resizing App, Bulk Resize, Bulk Image Resize | Bulk edits, Resizing photos on the web, Free usage | Some may need internet access, May require uploading photos |
| Desktop Apps | BatchPhoto™, Light Image Resizer, Fotosizer | Advanced photo manipulations, Bulk resizing, Offline access | Many tools may require paid version for full access, Few tools offering resampling |
| Send to > Mail Recipient | Sending resized image via email, No downloads, Native method | Preconfigured image sizes, Lack of other photo manipulations | |
| Windows Store Apps | Bulk Image Resize, Resize Image, Pixillion | Resampling support on some tools, Plenty of free options, Offline access | Need to purchase ad-free versions, Limited to newer versions of Windows with Store App |
10. Frequently Asked Questions (FAQ)
What is a raster file?
A raster file is an image format where the image is defined by pixels. The pixel’s location, size, and colors are defined with numbers.
What is image resizing?
Image resizing refers to making an image smaller or larger, which can change the image dimensions, quality, and file size.
What is batch resizing?
Batch resizing is altering the image dimensions of multiple images at the same time, saving time when dealing with many files.
Does resizing affect image quality?
Resizing may not significantly affect the perceivable image quality if the image occupies a smaller screen size. However, the quality is affected if the photo is magnified.
Does resizing an image change the file size?
Yes, resizing an image typically changes the file size. Downscaling reduces the number of pixels, decreasing the file size, while upscaling increases it.
Why does my image get blurry when I make it smaller?
An image should not typically get blurry when made smaller. This issue could be due to resolution settings or the resizing tool producing blurry pixels.
How can you resize images on Windows without losing quality?
To resize images without significant quality loss, use a tool with a resampling feature like Adobe Photoshop or Bulk Image Resize.
Can you reduce file size without losing quality?
You can reduce the file size of an image by using a lossless compression tool and saving the file in a lossless format like PNG or a next-gen format like WebP.
Conclusion: Enhance Your Photo Editing Skills
Resizing photos in Windows doesn’t have to be a challenge. With the right tools and techniques, you can easily manage image dimensions without sacrificing quality. Whether you’re a professional photographer or a casual user, mastering these methods will enhance your photo editing skills.
Ready to dive deeper into the world of photography? Visit dfphoto.net today to discover a wealth of tutorials, stunning photo galleries, and a vibrant community of fellow photography enthusiasts. Take your skills to the next level and unleash your creative potential!
For more information or assistance, reach out to us at:
- Address: 1600 St Michael’s Dr, Santa Fe, NM 87505, United States
- Phone: +1 (505) 471-6001
- Website: dfphoto.net
Empower your photographic journey with dfphoto.net – where creativity meets expertise!
