Post-processing is an integral step in the photography workflow. Even with meticulous shooting and composition, you might still need to fine-tune your images afterward. This isn’t just about color correction or exposure adjustments; sometimes, a simple task like resizing your photo becomes necessary.
Understanding Photo Resizing on Mac
When you aim to resize photos on your Mac, it’s important to understand what resizing truly entails. It can refer to a few different things. Physically resizing an image can involve cropping to change its dimensions or enlarging it, which often affects quality. Alternatively, you might need to reduce the file size of your image without altering its aspect ratio or field of view. This is achieved by adjusting the image resolution. Understanding these distinctions is crucial, especially when preparing images for online platforms with file size restrictions or specific dimension requirements.
Let’s explore the various methods to resize a photo on your Mac, focusing on the built-in Photos app and other efficient tools.
Resizing Photos Directly in the Photos App on Mac
While the Photos app on Mac isn’t primarily designed for extensive image manipulation like Photoshop, it does offer basic editing capabilities, including resizing through cropping. Here’s how you can resize an image using the crop tool in the Photos app:
- Open your image in the Photos app. Simply double-click the image in your Photos library to open it for viewing and editing.
- Enter Edit Mode. Click the “Edit” button located in the top right corner of the Photos app window.
- Select the Crop Tool. In the edit menu, navigate to the “Crop” tab.
- Adjust the Crop Frame. You’ll see a rectangular frame overlaid on your image. Drag the corners and edges of this frame to define the new dimensions of your photo. Cropping will remove parts of your image, effectively resizing it by reducing its overall size and potentially changing its aspect ratio.
- Choose an Aspect Ratio (Optional). In the Crop panel, you can select a specific aspect ratio from the dropdown menu (like Square, 4:3, 16:9, etc.) to constrain your crop to those proportions. This is useful if you need to resize your photo for specific display requirements.
- Apply the Crop. Once you are satisfied with your crop, click the “Done” button. Photos will save the cropped (resized) version of your image.
It’s important to note that cropping is a destructive editing process within the Photos app. However, Photos non-destructively applies edits by default. This means the original, uncropped image is still stored. You can revert to the original at any time by going back to “Edit” and clicking “Revert to Original.”
For more precise control over image dimensions or file size, and for resizing without cropping, you’ll need to use other tools, such as Preview or dedicated image editing software.
Resizing Photos on Mac Using Preview: A Step-by-Step Guide
Preview, the built-in macOS image viewer, offers more robust resizing options than the Photos app, allowing you to change dimensions and resolution directly. Here’s a detailed guide on how to resize an image using Preview:
-
Open Your Image in Preview. Right-click on the image file, select “Open With,” and choose “Preview.”
-
Access the Adjust Size Tool. In the Preview menu bar at the top of your screen, click on “Tools” and then select “Adjust Size…”. This will open the “Adjust Size” window.
-
Enter New Dimensions. In the “Adjust Size” window, you can modify the width and height of your image. You can enter specific pixel values or use the “Fit into” dropdown menu to choose from predefined sizes (like Small, Medium, Large).
- Resize by Percentage: To resize by a percentage, select “percent” from the dropdown menu next to the Width and Height fields and enter your desired percentage.
- Maintain Proportions: Ensure “Scale proportionally” is checked to keep the original aspect ratio of your image. Changing either width or height will automatically adjust the other dimension proportionally.
- Resampling Options: The “Resample image” option is crucial.
- Resample image checked (default): This option changes the number of pixels in your image. If you are reducing size, it discards pixels. If you are enlarging, it adds pixels (which can sometimes reduce quality).
- Resample image unchecked: This option only changes the resolution (pixels per inch) without changing the total number of pixels. This is useful for print purposes but doesn’t change the file size significantly for web use.
-
Adjust Resolution (Optional). If you need to reduce the file size for web use, you can also adjust the resolution in the “Resolution” field. Lowering the resolution (e.g., from 300 pixels/inch to 72 pixels/inch) will reduce file size without significantly altering the displayed size on screen.
-
Click “OK” to Resize. Once you’ve entered your desired settings, click the “OK” button. Preview will resize your image.
-
Save Your Resized Image. Go to “File” and select “Export…” to save the resized image. Exporting allows you to choose a new file name, format (JPEG, PNG, etc.), and location, keeping your original image intact.
Cropping Images in Preview
Besides adjusting dimensions, Preview also allows for cropping, another way to resize an image by reducing its visible area and file size.
- Open the Image in Preview.
- Select the Crop Tool. Click the “Markup” icon (looks like a toolbox) in the Preview toolbar to reveal the Markup Toolbar. Then, click the “Rectangular Selection” tool (the first icon in the Markup Toolbar).
- Draw Your Crop Area. Drag your cursor across the image to select the area you want to keep. A rectangular selection box will appear.
- Crop the Image. Once you’ve made your selection, click the “Crop” icon (looks like a rectangle with corners cut off) in the Markup Toolbar, or go to “Tools” in the menu bar and select “Crop.” Preview will crop your image to the selected area.
- Save Your Cropped Image. As with resizing, use “File” > “Export…” to save the cropped image as a new file.
Resizing PDF Images on Mac with Preview
Preview isn’t just for photos; it can also resize images embedded in PDF documents. Here’s how:
- Open the PDF in Preview.
- Access Adjust Size. Go to “Tools” in the menu bar and select “Adjust Size…”.
- Modify Dimensions. Adjust the width and height as needed in the “Adjust Size” window.
- Preserve Image Quality (for PDFs). For PDFs, it’s generally recommended to leave “Resample Image” unchecked to maintain the quality of images within the PDF when resizing the page dimensions.
- Click “OK”.
- Export as PDF. Go to “File” > “Export…” and save the resized PDF.
Enlarging Images on Mac: Considerations and Luminar Neo
Enlarging images (increasing their dimensions) is more complex than reducing them. When you enlarge an image, the software has to create new pixels, which can lead to a loss of sharpness and detail, often resulting in pixelation or blurriness.
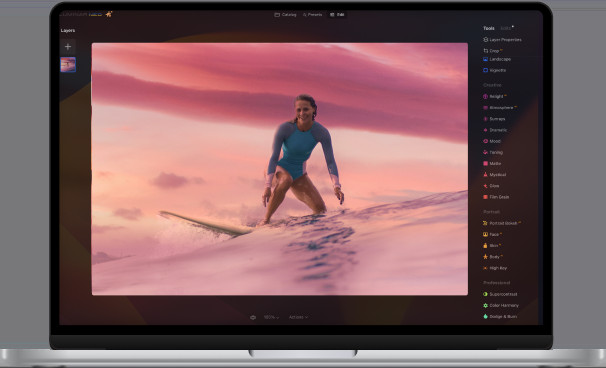
While Preview allows for enlargement, for better results, especially when significantly increasing image size, dedicated photo editors like Luminar Neo are recommended. Luminar Neo uses AI-powered algorithms to intelligently upscale images, minimizing quality loss and preserving details.
How to Enlarge Images in Luminar Neo:
- Open Luminar Neo and Select Your Image.
- Export with Resize Options. Go to “File” > “Export.” In the Export window, find the “Resize” dropdown menu.
- Choose Resize Method. Select “Long Edge” and enter the desired length for the longest side of your image in pixels.
- Choose Format and Quality. Select your desired image format (JPEG, TIFF, PNG, etc.) and quality settings.
- Save the Enlarged Image. Click “Save.” Luminar Neo will resize and export your enlarged image, using its advanced resampling techniques to maintain quality.
Luminar Neo and similar professional photo editors offer more sophisticated resampling methods compared to Preview, leading to better results when enlarging photos.
Reducing File Size for Web Use
If your goal is to reduce the file size of a photo for faster web loading or email attachments, you can do this in Preview by adjusting the resolution or by exporting at a lower quality (for JPEG).
Reducing File Size in Preview:
- Open Image in Preview.
- Adjust Resolution. Go to “Tools” > “Adjust Size…”. Ensure “Resample image” is checked. Lower the value in the “Resolution” field (e.g., to 72 pixels/inch for web use). This reduces file size.
- Export as JPEG with Lower Quality. Alternatively, when exporting as JPEG (“File” > “Export…”), you can use the “Quality” slider to reduce the JPEG quality, which significantly decreases file size. Experiment to find a balance between file size and acceptable image quality.
Resizing Photos Without Losing Quality
To resize photos on Mac while minimizing quality loss, especially when reducing size, follow these best practices:
- Reduce Size Gradually: If you need to significantly reduce image dimensions, do it in smaller steps rather than all at once.
- Use Preview’s “Adjust Size” Carefully: When reducing dimensions in Preview, ensure “Resample image” is checked. For slight reductions, the default settings often work well.
- For Enlargement, Consider Luminar Neo: For enlarging images, Luminar Neo and similar software offer superior quality due to advanced resampling algorithms.
- Save as HEIC (for Mac Ecosystem). Saving images in HEIC format can reduce file size significantly compared to JPEG while maintaining similar visual quality. However, HEIC is best suited for use within the Apple ecosystem as compatibility outside of it is still evolving.
Resizing Multiple Images on Mac (Batch Resizing)
Preview is also capable of batch resizing multiple images at once, saving you considerable time.
Batch Resizing with Preview:
- Select Multiple Images in Finder. In a Finder window, select all the images you want to resize.
- Open with Preview. Right-click on the selected images, choose “Open With,” and select “Preview.” All selected images will open in Preview, with one image displayed and thumbnails of the rest in the sidebar.
- Select All Thumbnails. In the Preview sidebar, select all image thumbnails by pressing “Command + A.”
- Adjust Size for All. Go to “Tools” > “Adjust Size…”. Make your resizing adjustments in the “Adjust Size” window. These settings will be applied to all selected images.
- Click “OK”.
- Save Resized Images. You’ll need to save each resized image individually by selecting its thumbnail and going to “File” > “Export…”. Unfortunately, Preview doesn’t offer a direct batch export for resized images.
While Preview’s batch resizing is effective, for more advanced batch processing features, consider using dedicated batch image resizing applications available on the Mac App Store or online.
Conclusion
Resizing photos on a Mac is a common task with various methods available, from the basic cropping in the Photos app to the dimension and resolution adjustments in Preview, and the AI-powered upscaling in Luminar Neo. Choosing the right method depends on your specific needs: quick crops in Photos, dimension and file size control in Preview, or high-quality enlargements in specialized software. By understanding these tools and techniques, you can efficiently manage and resize your photos on your Mac for any purpose, whether it’s for web sharing, printing, or simply organizing your photo library.
 Luminar Neo Banner for Resizing on Mac