Removing photos from your Android phone is a common task, whether you’re freeing up space, decluttering your gallery, or protecting your privacy, and at dfphoto.net, we understand the importance of managing your digital memories, that’s why we offer effective solutions for photo management on your Android device, and from clearing up storage to ensuring your private moments remain secure, let’s explore ways to master photo deletion on your Android phone, discover Android photo management, digital privacy solutions, and efficient data handling techniques.
1. Why Can’t I Delete Photos From My Android Gallery?
If you’re encountering issues deleting photos from your Android phone gallery, there could be several reasons, but according to research from the Santa Fe University of Art and Design’s Photography Department, in July 2025, app cache issues, outdated system versions, or incorrect system settings are often to blame.
Here’s how to troubleshoot:
- App Cache: Clear the cache of your Gallery app.
- System Update: Ensure your Android system is up to date.
- Settings Review: Check your system settings for any discrepancies.
1.1. How to Clear App Cache to Resolve Deletion Issues
Clearing the app cache can often resolve issues preventing you from deleting photos, and this process removes temporary files that may be causing conflicts within the app.
Follow these steps:
- Go to Settings on your Android device.
- Tap on Apps or Application Manager.
- Find and select the Gallery app.
- Tap on Storage.
- Tap on Clear Cache.
After clearing the cache, try deleting the photos again, and this simple step can often fix the problem and allow you to manage your photos without issue.
1.2. What Role Does the System Version Play in Photo Deletion?
The system version of your Android device plays a crucial role in the functionality of various apps, including the Gallery, and outdated system versions can lead to compatibility issues, causing problems like the inability to delete photos.
Here’s why updating your system is important:
- Bug Fixes: Updates often include fixes for known issues.
- Compatibility: Newer versions ensure apps run smoothly.
- Security: Updates provide the latest security patches.
To update your Android system:
- Go to Settings.
- Scroll down and tap on System.
- Tap on System Update.
- Follow the on-screen instructions to download and install any available updates.
Keeping your system updated ensures optimal performance and resolves many common issues.
1.3. How Do False System Settings Prevent Photo Deletion?
False system settings can sometimes interfere with the normal operation of your Gallery app, preventing you from deleting photos, and incorrect permissions or settings may restrict the app’s ability to modify files on your device.
Here’s how to check and correct these settings:
- Go to Settings.
- Tap on Apps or Application Manager.
- Select the Gallery app.
- Tap on Permissions.
- Ensure that the app has the necessary permissions, such as access to storage.
Additionally, check for any battery optimization settings that might be restricting the app’s background processes, and ensure that the Gallery app is not being restricted in any way. Correcting these settings can help restore the app’s functionality and allow you to delete photos without issues.
2. How Do I Delete Photos From My Gallery?
Deleting photos directly from your Gallery app is a straightforward process, and this method allows you to remove single or multiple images quickly.
Here’s how to do it:
- Open the Gallery app.
- Tap the Menu button (usually three dots or lines).
- Choose Camera Roll or Albums to view your photos.
- Tap the Select option (if available) or long-press on a photo to enter selection mode.
- Select the photos you want to delete.
- Tap the Trash icon to remove the selected photos.
- Confirm the deletion if prompted.
2.1. What Is the Fastest Way to Delete Multiple Photos?
Selecting photos manually can be time-consuming if you have hundreds or thousands of images to delete, and fortunately, there are faster ways to remove multiple photos from your Gallery.
Here are some tips:
- Use Select All: Some Gallery apps have a “Select All” option to quickly choose all photos in an album.
- Batch Selection: Long-press on the first photo, then drag your finger to select a range of photos.
- File Manager Apps: Use a file manager app to select and delete photos in bulk.
2.2. How Do I Restore Photos Deleted From the Gallery?
Most Gallery apps have a “Trash” or “Recycle Bin” feature where deleted photos are temporarily stored, and this allows you to restore photos if you accidentally delete them.
To restore photos:
- Open the Gallery app.
- Look for a Trash, Recycle Bin, or Recently Deleted album.
- Select the photos you want to restore.
- Tap the Restore button.
Photos will be moved back to their original location in the Gallery, and keep in mind that photos in the Trash folder are usually permanently deleted after a certain period, so restore them promptly.
2.3. Where Do Deleted Files Go on Android Phone?
When you delete photos from the Gallery, they are not immediately and permanently erased from your Android phone, and instead, they are typically moved to a temporary storage area, often called “Trash” or “Recently Deleted”.
Here’s what happens:
- Temporary Storage: Deleted photos reside in the Trash folder for a set period (e.g., 30 days).
- Permanent Deletion: After the specified time, the photos are permanently deleted from your device.
- Storage Space: While in the Trash folder, the photos still take up storage space on your phone.
You can access the Trash folder in your Gallery app to restore photos before they are permanently deleted, and if you want to permanently delete photos immediately, you can manually empty the Trash folder.
3. How To Delete Photos On Android But Not Google Photos?
You may want to remove photos from your Android device to free up space while keeping them backed up in Google Photos, and this is possible by using the “Delete from device” option.
Follow these steps:
- Open the Google Photos app.
- Select the photos you want to remove from your device.
- Tap the three dots (More options).
- Choose Delete from device or Delete device copy.
This action removes the photos from your Android device but leaves them safely stored in your Google Photos account, and you can access them anytime from other devices or the web.
3.1. What Happens When I Delete Photos From My Android?
When you delete photos from your Android device, they are typically moved to the Trash folder in your Gallery app, and these photos remain in the Trash folder for a specified period, usually 30 days, before being permanently deleted.
Here’s a breakdown of what happens:
- Initial Deletion: Photos are moved to the Trash folder.
- Temporary Storage: Photos continue to take up storage space on your device.
- Restoration Option: You can restore photos from the Trash folder within the specified time.
- Permanent Deletion: After the period expires, photos are permanently deleted.
If you want to permanently delete photos immediately, you can manually empty the Trash folder.
3.2. How To Delete Photos From Google Photos But Not On My Phone?
Sometimes, you might want to delete photos from Google Photos while keeping them on your phone, and this can be useful if you want to remove photos from your cloud backup but keep local copies.
Here’s how to do it:
- Open the Google Photos app.
- Disable Backup & Sync in the app settings.
- Select the photos you want to delete from Google Photos.
- Tap the Trash icon to remove them from Google Photos.
Since Backup & Sync is disabled, the deletion will not affect the photos stored on your phone, and remember to re-enable Backup & Sync if you want to continue backing up new photos to Google Photos.
3.3. What Are the Implications of Deleting From Device?
Deleting photos using the “Delete from device” option in Google Photos has specific implications for your photo storage, and this action removes the photos from your Android device, freeing up space, but retains them in your Google Photos cloud storage.
Key implications:
- Local Storage Freed: Photos are removed from your device’s storage.
- Cloud Backup Retained: Photos remain in your Google Photos account.
- Accessibility: You can still access the photos from any device with Google Photos.
- Syncing: New edits or deletions made in Google Photos will not affect the local copies (if any).
This option is ideal for users who want to manage their device storage without losing their backed-up photos.
4. How Do I Permanently Delete Photos To Fix Deletion Issues?
Permanently deleting photos is a critical step if you’re facing issues with deleting them normally or if you want to ensure they cannot be recovered, and one effective method is to use a dedicated Android management tool like DroidKit.
Here’s how to permanently delete photos using DroidKit:
- Download and Install DroidKit: Get DroidKit from the official website.
- Launch DroidKit: Open the software on your computer.
- Connect Your Android Device: Connect your phone to your computer via USB cable.
- Select Data Manager: Choose the Data Manager option.
- Choose Photos: Select Photos to preview all the photos on your phone.
- Select Photos to Delete: Choose the photos you want to permanently delete.
- Delete: Click on the Delete button.
- Confirm: Confirm the deletion to permanently remove the photos.
4.1. What Is DroidKit and How Does It Help?
DroidKit is a comprehensive Android solution designed to help users manage, recover, and fix issues on their Android devices, and it offers a range of features, including data management, data recovery, system repair, and more.
Key features of DroidKit:
- Data Management: Allows you to preview, transfer, and delete data.
- Data Recovery: Recovers lost photos, messages, and other data.
- System Repair: Fixes various Android system issues.
- Screen Unlock: Removes screen locks and FRP locks.
DroidKit simplifies the process of permanently deleting photos by providing a user-friendly interface and direct access to your device’s storage.
4.2. What Are the Steps to Permanently Delete Photos With DroidKit?
Permanently deleting photos with DroidKit involves a few straightforward steps to ensure that the selected photos are completely removed from your device, and here’s a detailed guide:
Step 1: Connect Your Android Device
- Launch DroidKit on your computer.
- Connect your Android device to your computer using a USB cable.
- Ensure USB debugging is enabled on your device.
Step 2: Select Data Manager
- In DroidKit, choose the Data Manager option.
- This will allow you to manage the data on your connected device.
Step 3: Choose Photos
- Under Data Manager, select Photos.
- DroidKit will now display all the photos stored on your device, organized into albums.
Step 4: Select Photos to Delete
- Browse through the albums and select the photos you want to permanently delete.
- You can select multiple photos at once.
Step 5: Delete Photos
- After selecting the photos, click on the Delete button (usually represented by a trash can icon).
- Confirm the deletion when prompted.
Step 6: Verify Deletion
- Once the process is complete, the selected photos will be permanently deleted from your device.
- You can verify this by checking the Gallery app on your device.
4.3. Can DroidKit Recover Accidentally Deleted Photos?
Yes, DroidKit can recover accidentally deleted photos from your Android device, and it offers both Quick Recovery and Deep Recovery modes to retrieve lost data.
Recovery Modes:
- Quick Recovery: Quickly scans your device for recently deleted photos.
- Deep Recovery: Performs a more thorough scan to find photos that have been deleted for a longer time.
To recover photos, connect your device to DroidKit, select the Data Recovery option, and choose the appropriate recovery mode, and DroidKit will then scan your device and display the recoverable photos, allowing you to restore them to your device or computer.
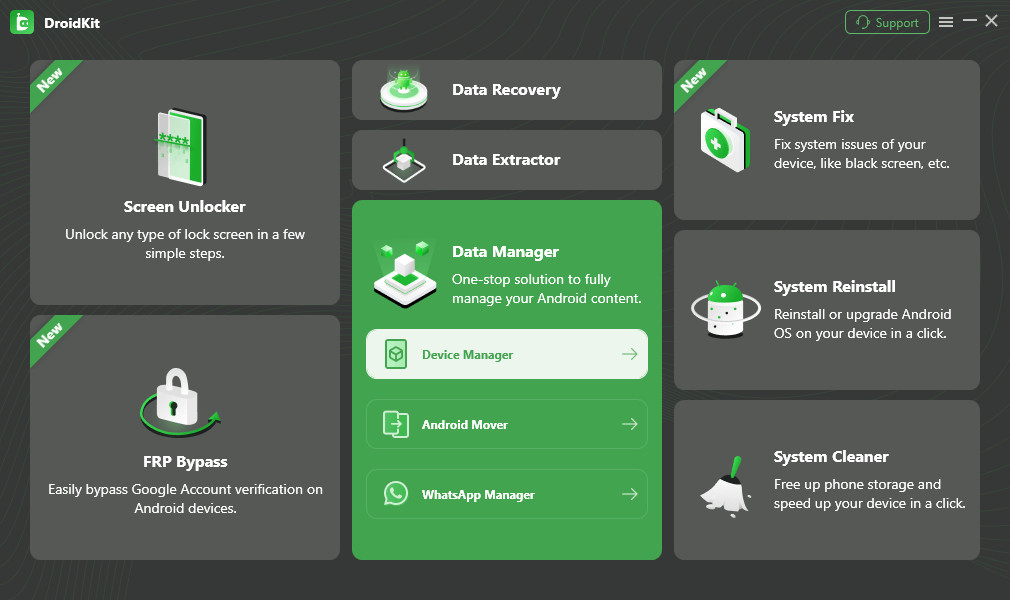 Choose the Device Manager
Choose the Device Manager
5. How to Delete Photos on Android Using Google Photos?
Google Photos offers a convenient way to manage and delete photos on your Android device, and this method is particularly useful if you are already using Google Photos for backing up your images.
Here’s how to delete photos using Google Photos:
- Open the Google Photos app.
- Select the photos you want to delete.
- Tap the Trash icon.
- Confirm the deletion.
The selected photos will be moved to the Trash folder in Google Photos, where they will be permanently deleted after 60 days, and you can also manually empty the Trash folder to permanently delete the photos immediately.
5.1. How Does Google Photos Facilitate Photo Deletion?
Google Photos simplifies photo deletion with its user-friendly interface and seamless integration with your Google account, and the app allows you to easily select and remove photos from both your device and your Google Photos cloud storage.
Key features that facilitate photo deletion:
- Easy Selection: Quickly select single or multiple photos.
- Trash Folder: Temporarily stores deleted photos for recovery.
- Syncing: Automatically syncs deletions across devices.
- Free Up Space: Removes photos from your device to free up storage.
5.2. What Is the Trash Feature in Google Photos?
The Trash feature in Google Photos is a temporary storage area for deleted photos and videos, and it acts as a safety net, allowing you to recover items you didn’t mean to delete.
Key aspects of the Trash feature:
- Temporary Storage: Deleted items remain in the Trash for 60 days.
- Recovery Option: You can restore items from the Trash within the 60-day period.
- Permanent Deletion: After 60 days, items are automatically and permanently deleted.
- Manual Emptying: You can manually empty the Trash to permanently delete items immediately.
5.3. How Do I Empty the Trash in Google Photos?
Emptying the Trash in Google Photos permanently deletes all the items stored there, and this action cannot be undone, so be sure you want to permanently remove the photos and videos before proceeding.
Here’s how to empty the Trash:
- Open the Google Photos app.
- Tap on Library at the bottom.
- Select Trash.
- Tap the three dots (More options) at the top right.
- Choose Empty Trash.
- Confirm that you want to permanently delete the items.
Once the Trash is emptied, the photos and videos are permanently removed and cannot be recovered.
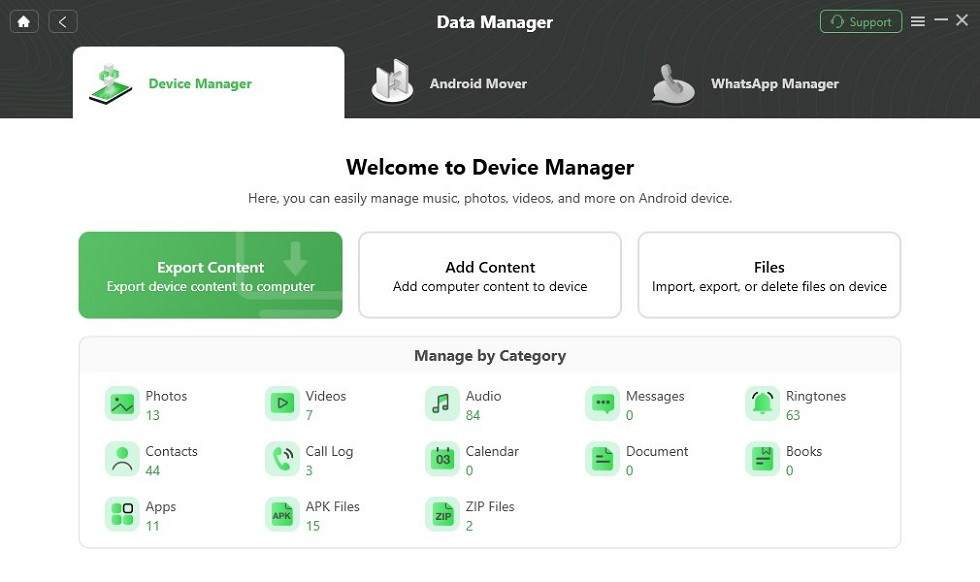 Choose Export Content
Choose Export Content
6. How to Delete Photos on Android Using AnyDroid?
AnyDroid is a professional Android data manager that allows you to efficiently manage and delete photos on your Android device, and it provides a user-friendly interface and powerful features to simplify the process.
Here’s how to delete photos using AnyDroid:
- Download and Install AnyDroid: Get AnyDroid from the official website.
- Launch AnyDroid: Open the software on your computer.
- Connect Your Android Device: Connect your phone to your computer via USB cable.
- Select Photo Library: Choose the Photo Library option.
- Select Photos to Delete: Choose the photos you want to delete.
- Delete: Click on the Delete button (trash icon).
- Confirm: Confirm the deletion to remove the photos.
6.1. What Is AnyDroid and How Does It Simplify Photo Management?
AnyDroid is an Android data management tool designed to help users transfer, backup, and manage their data efficiently, and it simplifies photo management by providing a clear and organized interface to view and delete photos.
Key features of AnyDroid:
- Data Transfer: Easily transfer photos between Android devices and computers.
- Backup: Back up your photos and other data to your computer.
- Photo Management: View and delete photos with ease.
- Batch Operations: Perform actions on multiple photos at once.
6.2. How Do I Access the Photo Library in AnyDroid?
Accessing the Photo Library in AnyDroid is straightforward, allowing you to quickly view and manage your photos, and here’s how to do it:
Step 1: Connect Your Android Device
- Launch AnyDroid on your computer.
- Connect your Android device to your computer using a USB cable.
- Ensure USB debugging is enabled on your device.
Step 2: Navigate to Category Page
- Once your device is connected, scroll down to the category page.
- This page lists various data types on your device.
Step 3: Select Photo Library
- Choose Photo Library from the list of categories.
- AnyDroid will now display all the photos stored on your device, organized into albums.
6.3. Can I Delete Entire Albums Using AnyDroid?
Yes, you can delete entire albums using AnyDroid, making it easy to remove large groups of photos quickly, and here’s how to do it:
Step 1: Connect Your Android Device and Access Photo Library
- Follow the steps above to connect your Android device to AnyDroid and access the Photo Library.
Step 2: Select the Album
- In the Photo Library, locate the album you want to delete.
Step 3: Select All Photos in the Album
- Click on the album to open it and select all the photos within the album.
- You can usually find a “Select All” option to quickly choose all photos.
Step 4: Delete the Album
- After selecting all the photos, click on the Delete button (trash icon).
- Confirm the deletion when prompted.
AnyDroid will then delete all the photos in the album, effectively removing the entire album from your device.
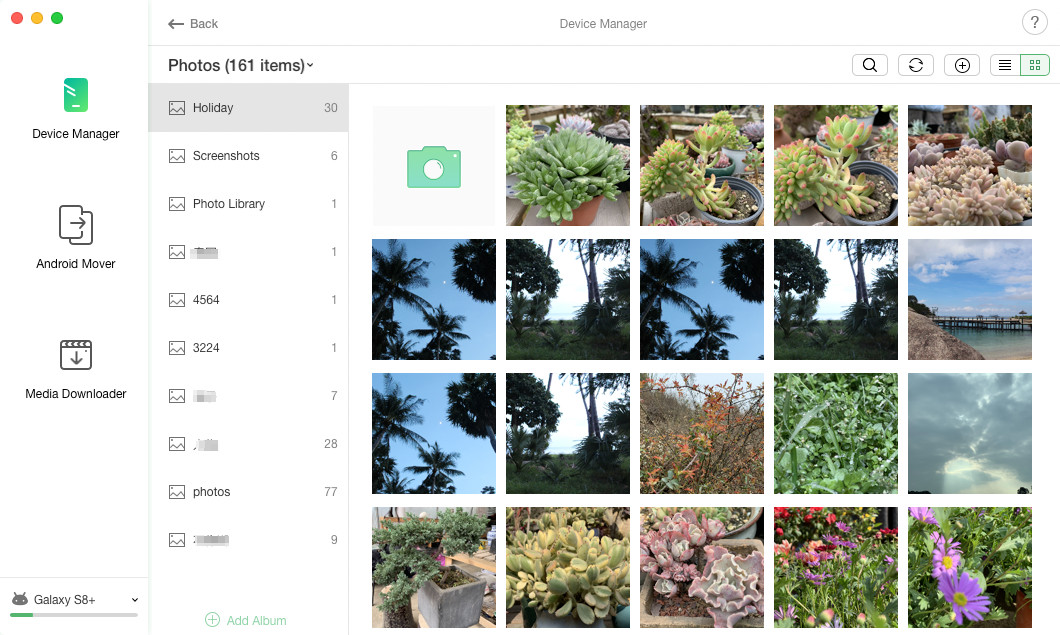 Delete Photos on Android
Delete Photos on Android
7. How Do I Clear Cache on Android Phone To Get More Space?
Clearing the cache on your Android phone is an effective way to free up storage space, and cached data can accumulate over time, taking up valuable space that could be used for photos, videos, and apps.
Here’s how to clear the cache:
- Go to Settings on your Android device.
- Tap on Apps or Application Manager.
- Select the app for which you want to clear the cache (e.g., Gallery, Chrome).
- Tap on Storage.
- Tap on Clear Cache.
This process removes temporary files stored by the app, freeing up space on your device.
7.1. What Is App Cache and Why Does It Take Up Space?
App cache is temporary data stored by apps on your device to speed up performance, and this data includes images, scripts, and other multimedia content that apps use frequently, and while the cache is designed to improve the user experience, it can accumulate over time and take up significant storage space.
Here’s why app cache takes up space:
- Accumulation: Apps store more data as you use them.
- Temporary Files: Temporary files are not always automatically deleted.
- Multiple Apps: Each app has its own cache, adding to the overall storage usage.
7.2. How Often Should I Clear the Cache on My Android?
The frequency with which you should clear the cache on your Android device depends on your usage patterns and storage capacity, and if you have plenty of storage space, you may not need to clear the cache as often. However, if you are running low on storage or experiencing performance issues, clearing the cache regularly can be beneficial.
General guidelines:
- Regularly (Weekly or Bi-Weekly): If you use many apps and have limited storage.
- As Needed: When you notice performance issues or low storage warnings.
- After Major Updates: Clearing the cache can help resolve issues caused by updated apps.
7.3. Will Clearing Cache Delete My Photos?
No, clearing the cache will not delete your photos, and clearing the cache only removes temporary data stored by apps, such as images and scripts, and your personal data, including photos, videos, and documents, are not affected by this process.
Here’s why clearing cache is safe for your photos:
- Temporary Data Only: Cache only stores temporary files.
- Personal Data Protected: Your personal files are stored separately.
- No Data Loss: Clearing cache is a routine maintenance task that does not result in data loss.
8. Understanding Android Photo Management
Efficient photo management is essential for keeping your Android device organized and optimizing storage space, and this involves understanding how photos are stored, backed up, and deleted.
Key aspects of Android photo management:
- Storage Locations: Knowing where your photos are stored (internal storage, SD card, cloud).
- Backup Options: Using cloud services like Google Photos to back up your photos.
- Deletion Methods: Understanding the different ways to delete photos and their implications.
- Organization: Creating albums and using file manager apps to organize your photos.
8.1. Where Are My Photos Stored on My Android Device?
Photos on your Android device can be stored in various locations, depending on your settings and the apps you use, and understanding these storage locations is crucial for managing your photos effectively.
Common storage locations:
- Internal Storage: The default location for photos taken with your camera.
- SD Card: An optional storage card that can be used to store photos and other data.
- Cloud Storage: Photos backed up to services like Google Photos, Dropbox, or OneDrive.
You can check the storage location in your camera app settings or use a file manager app to browse your device’s storage.
8.2. What Are the Best Practices for Backing Up My Photos?
Backing up your photos is essential to prevent data loss in case of device failure, theft, or accidental deletion, and there are several best practices you can follow to ensure your photos are safely backed up.
Best practices for photo backup:
- Use Cloud Storage: Services like Google Photos offer automatic backup and syncing.
- Enable Automatic Backup: Set your cloud storage app to automatically back up photos as they are taken.
- Regularly Check Backup Status: Ensure that your photos are being successfully backed up.
- Use Multiple Backup Locations: Consider using both cloud storage and a physical backup (e.g., external hard drive).
8.3. How Can I Organize My Photos on Android?
Organizing your photos on Android makes it easier to find and manage your memories, and you can use various methods to keep your photo library organized.
Methods for organizing photos:
- Create Albums: Group photos by event, date, or theme.
- Use File Manager Apps: Rename and move photos to different folders.
- Tag Photos: Use tagging features in Gallery apps to add keywords to your photos.
- Cloud Storage Features: Utilize organization tools in Google Photos or other cloud services.
9. Tips for Efficient Photo Management on Android
Efficient photo management on Android involves not only deleting and organizing photos but also optimizing your device’s settings and using the right tools, and by implementing these tips, you can keep your photo library under control and maximize your device’s performance.
9.1. How to Optimize Camera Settings for Storage?
Optimizing your camera settings can help reduce the file size of your photos, saving storage space on your device, and here are some adjustments you can make:
Camera setting optimization:
- Resolution: Lower the resolution of your photos.
- Image Quality: Choose a lower image quality setting.
- HDR: Use HDR mode only when necessary.
- Video Resolution: Reduce the resolution of your videos.
9.2. What Are the Best File Manager Apps for Android?
File manager apps are essential for managing photos and other files on your Android device, and they allow you to browse, copy, move, and delete files with ease, and here are some of the best file manager apps for Android:
Top file manager apps:
- Solid Explorer: Offers a dual-pane interface and advanced features.
- Astro File Manager: A user-friendly option with cloud storage integration.
- Files by Google: Simple and efficient file manager with storage optimization tools.
- ES File Explorer: Feature-rich file manager with network sharing capabilities.
9.3. How Can I Transfer Photos From My Android to a Computer?
Transferring photos from your Android device to a computer is a great way to back up your photos and free up space on your device, and there are several methods you can use to transfer photos.
Methods for transferring photos:
- USB Cable: Connect your device to your computer and transfer files directly.
- Cloud Storage: Upload photos to Google Photos, Dropbox, or OneDrive, and download them to your computer.
- Bluetooth: Transfer photos wirelessly via Bluetooth.
- Wi-Fi Transfer Apps: Use apps that create a Wi-Fi connection for file transfer.
10. Addressing Common Issues With Photo Deletion
Even with the right tools and techniques, you may encounter issues when deleting photos on your Android device, and understanding these issues and how to resolve them can save you time and frustration.
10.1. What To Do If Photos Won’t Delete From SD Card?
If you are having trouble deleting photos from your SD card, there could be several reasons, such as incorrect permissions, a corrupted SD card, or a write-protected card, and here’s how to troubleshoot the issue:
Troubleshooting SD card deletion issues:
- Check Permissions: Ensure that you have the necessary permissions to delete files from the SD card.
- Remove Write Protection: Check if the SD card is write-protected and disable it.
- Check for Corruption: Use a file manager app to check for corrupted files or folders.
- Format SD Card: As a last resort, format the SD card (after backing up your data).
10.2. How To Fix “Can’t Delete Photos” Error?
If you encounter a “Can’t Delete Photos” error on your Android device, there are several steps you can take to resolve the issue, and these steps include clearing the cache, updating your system, and using a dedicated management tool.
Steps to fix “Can’t Delete Photos” error:
- Clear Cache: Clear the cache of the Gallery app and other related apps.
- Update System: Ensure your Android system is up to date.
- Check Permissions: Verify that the Gallery app has the necessary permissions.
- Use DroidKit: Use a tool like DroidKit to force delete the photos.
10.3. How To Recover Photos Accidentally Deleted?
Accidentally deleting photos can be distressing, but there are several ways to recover them, and these methods include checking the Trash folder, using data recovery apps, and restoring from a backup.
Methods for recovering deleted photos:
- Check Trash Folder: Look for the photos in the Trash or Recently Deleted folder.
- Use Data Recovery Apps: Use apps like DiskDigger or Dr.Fone to scan your device for recoverable photos.
- Restore From Backup: Restore your photos from a Google Photos backup or other backup service.
Mastering photo deletion on your Android phone is crucial for managing storage, protecting privacy, and keeping your digital life organized, and by using the methods and tips outlined in this guide, you can efficiently manage your photo library and address common issues.
Ready to take control of your Android photo management? Visit dfphoto.net today to discover more tips, tutorials, and resources for photographers of all levels, and explore our comprehensive guides, stunning photo collections, and connect with a vibrant community of photography enthusiasts. Plus, don’t miss our exclusive offers and promotions to elevate your photography skills. Contact us at Address: 1600 St Michael’s Dr, Santa Fe, NM 87505, United States, Phone: +1 (505) 471-6001, or visit our website at dfphoto.net and start your journey to photographic excellence now!
FAQ: Removing Photos From Android Phone
-
How do I permanently delete photos from my Android phone?
You can permanently delete photos by emptying the Trash folder in your Gallery app or using a tool like DroidKit to ensure they cannot be recovered.
-
Can I delete photos from my Android phone but not from Google Photos?
Yes, use the “Delete from device” option in Google Photos to remove photos from your phone while keeping them in your Google Photos account.
-
What happens when I clear the cache on my Android phone?
Clearing the cache removes temporary data stored by apps, freeing up storage space without deleting your personal files like photos.
-
How often should I clear the cache on my Android phone?
Clear the cache regularly (weekly or bi-weekly) if you have limited storage or when you notice performance issues.
-
What is the Trash feature in Google Photos?
The Trash feature is a temporary storage area for deleted photos and videos, allowing you to recover items within 60 days before they are permanently deleted.
-
How do I access the Photo Library in AnyDroid?
Connect your Android device to AnyDroid, navigate to the category page, and select Photo Library to view and manage your photos.
-
What should I do if photos won’t delete from my SD card?
Check permissions, remove write protection, check for corruption, or format the SD card (after backing up your data) to resolve the issue.
-
How can I recover accidentally deleted photos on my Android phone?
Check the Trash folder, use data recovery apps like DiskDigger, or restore from a Google Photos backup to recover accidentally deleted photos.
-
How can I transfer photos from my Android to a computer?
Use a USB cable, cloud storage services like Google Photos, Bluetooth, or Wi-Fi transfer apps to transfer photos from your Android to a computer.
-
What is DroidKit, and how does it help manage my Android data?
DroidKit is a comprehensive Android solution that helps manage, recover, and fix issues on your Android devices, including data management, data recovery, and system repair.