Removing a photo from an iPhone contact is a simple process, but it can be confusing if you’re not sure where to look. This guide from dfphoto.net will walk you through the steps to remove a contact photo on your iPhone, ensuring your contact list looks exactly how you want it. We’ll also cover alternative methods and troubleshooting tips for a seamless experience. Keep reading to master iPhone contact photo management and explore exciting photography resources!
1. Why Can’t I Remove a Photo From My iPhone Contact? Understanding the Reasons
Removing a photo from an iPhone contact can sometimes feel like navigating a maze. The process might seem straightforward, but various underlying reasons could prevent you from deleting the photo.
-
Account Synchronization Issues: One primary reason is the synchronization of contacts with different accounts.
- iCloud, Google, or Exchange accounts often sync contact information.
- Changes made on your iPhone might be overridden by the settings in these linked accounts.
Solution: To prevent conflicts, it’s essential to manage your default account settings and understand how each account interacts with your contacts.
-
Contacts Linked to Social Media: Another common issue arises when your iPhone contacts are linked to social media profiles, such as Facebook or LinkedIn.
- If a contact’s photo is sourced from their social media profile, deleting it directly from your iPhone might not be possible.
- The photo is tied to their social media account, not just your local contact data.
Solution: Unlinking the contact from their social media profile or updating the photo on their social media account can help resolve this issue.
-
iOS Version and Device Compatibility: Different iOS versions and iPhone models can have slightly different interfaces and functionalities.
- Instructions that work for one iOS version might not apply to another.
- Older devices might lack certain features available in newer models.
Solution: Always ensure you’re using the most up-to-date iOS version and check the specific instructions for your iPhone model.
-
Incorrect Permissions and Settings: Sometimes, incorrect settings or permissions can restrict your ability to modify contact photos.
- If you’ve accidentally disabled certain permissions or have restrictions enabled, you might be unable to make changes.
- Check your privacy settings to ensure that you have the necessary permissions to edit contacts.
Solution: Review your privacy settings and adjust permissions to allow changes to your contacts.
Understanding these reasons can help you troubleshoot and find the correct solution for removing a photo from your iPhone contact. Next, we’ll dive into the detailed steps on how to remove a contact photo, covering multiple methods and potential pitfalls.
2. How to Remove a Photo From an iPhone Contact Directly
Removing a photo directly from an iPhone contact is generally the most straightforward method. Here’s how you can do it:
-
Open the Contacts App: Start by opening the Contacts app on your iPhone. This app stores all your contact information and allows you to make changes.
-
Select the Contact:
- Scroll through your contact list to find the contact whose photo you want to remove.
- Alternatively, use the search bar at the top of the screen to quickly locate the contact.
-
Edit the Contact:
- Tap on the contact to open their details.
- In the top right corner, tap the “Edit” button. This allows you to modify the contact’s information.
-
Tap “Edit” under the Photo:
- You should see the contact’s photo at the top of the screen. Below the photo, tap the “Edit” option.
-
Delete the Photo:
- After tapping “Edit”, you might see options such as “Assign to Contact,” “Edit,” and “Duplicate.”
- Look for the “Delete” button (it might appear as a trash can icon) and tap it.
- If you don’t see a “Delete” option, it could be due to the contact photo being synced from another account (more on this later).
-
Confirm the Change:
- Once you’ve tapped “Delete,” the photo should disappear, leaving a default icon in its place.
- Tap “Done” in the top right corner to save the changes.
-
Verify the Removal:
- Go back to the contact’s details to ensure the photo has been successfully removed.
- Also, check the contact’s entry in the Phone app to confirm the change has synced correctly.
 iPhone Contact App Interface showing the edit button
Following these steps should allow you to remove a photo from an iPhone contact directly. If you encounter any issues, the next sections will cover alternative methods and troubleshooting tips.
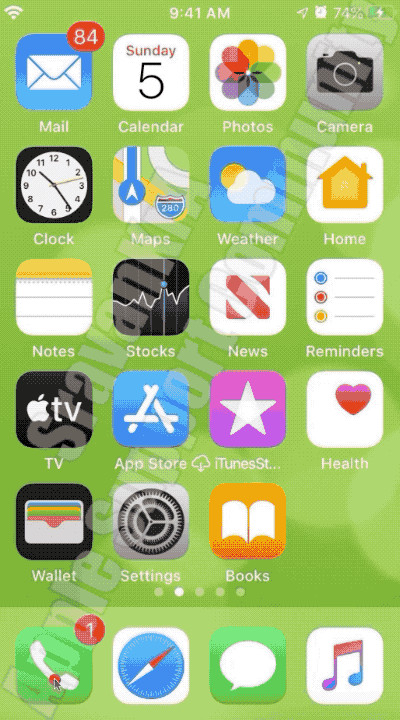
3. Using the Phone App to Remove a Contact Photo
The Phone app on your iPhone offers another way to manage your contacts, including removing photos. Here’s how you can use the Phone app to achieve this:
-
Open the Phone App: Launch the Phone app on your iPhone. This is the same app you use to make calls.
-
Navigate to Contacts:
- At the bottom of the screen, tap the “Contacts” tab. This will display your list of contacts.
-
Select the Contact:
- Scroll through your contact list to find the contact whose photo you want to remove.
- Alternatively, use the search bar at the top to quickly locate the contact.
-
Edit the Contact:
- Tap on the contact to open their details.
- In the top right corner, tap the “Edit” button.
-
Tap “Edit” under the Photo:
- Look for the contact’s photo at the top of the screen.
- Below the photo, tap the “Edit” option.
-
Delete the Photo:
- After tapping “Edit”, you should see options like “Assign to Contact,” “Edit,” “Duplicate,” and “Delete.”
- Tap the “Delete” button to remove the photo.
-
Confirm the Change:
- Once the photo is deleted, a default icon will replace it.
- Tap “Done” in the top right corner to save the changes.
-
Verify the Removal:
- Check the contact’s details in the Phone app to ensure the photo is removed.
- Also, verify the change in the Contacts app to ensure synchronization.
 iPhone Phone App Contacts Tab showing the edit button
Using the Phone app provides a convenient alternative for managing contact photos. If you still face issues, the following sections will explore other methods and troubleshooting steps.
4. Removing Photos Synced From Other Accounts
One of the most common reasons you might struggle to remove a photo from an iPhone contact is that the photo is synced from another account, such as Google, Exchange, or social media platforms like Facebook or LinkedIn. Here’s how to handle these situations:
4.1. Identifying the Source Account
Before you can remove the photo, you need to identify which account is syncing the contact information.
-
Open Settings: Go to the Settings app on your iPhone.
-
Navigate to Contacts: Scroll down and tap on “Contacts.”
-
Check Accounts:
- Tap on “Accounts” to see a list of all accounts connected to your iPhone that sync contact information.
- This list might include iCloud, Google, Exchange, Yahoo, and other email or social media accounts.
-
Examine Each Account:
- Tap on each account to see if the “Contacts” toggle is enabled.
- The account with the “Contacts” toggle turned on is likely the source of the contact photo.
4.2. Removing Photos From Google Contacts
If the photo is synced from Google Contacts, you need to remove it from your Google account.
-
Access Google Contacts:
- Open a web browser on your computer or iPhone and go to Google Contacts.
- Sign in to the Google account associated with your iPhone contacts.
-
Find the Contact:
- Search for the contact whose photo you want to remove.
- Click on the contact to open their details.
-
Edit the Contact:
- Hover over the contact’s current photo, and you should see an “Edit” (pencil) icon appear.
- Click on the “Edit” icon.
-
Remove the Photo:
- In the edit window, hover over the photo again. You should see a “Change” or “Remove” option.
- Click “Remove” to delete the photo.
-
Save the Changes:
- Click “Save” to update the contact information.
-
Sync Changes on iPhone:
- On your iPhone, go to Settings > Contacts > Accounts.
- Tap on your Google account.
- Toggle the “Contacts” option off and then back on to force a sync.
4.3. Removing Photos From Exchange Accounts
If the photo is synced from an Exchange account (often used for business contacts), follow these steps:
-
Access Exchange Account:
- Log in to your Exchange account through a web browser on your computer.
- This is typically done through your company’s email portal (e.g., Outlook Web App).
-
Navigate to Contacts:
- Find and open the “Contacts” section in your Exchange account.
-
Find the Contact:
- Search for the contact whose photo you want to remove.
-
Edit the Contact:
- Open the contact’s details and look for an “Edit” option.
-
Remove the Photo:
- Remove the existing photo. The exact steps may vary depending on the interface of your Exchange account.
-
Save the Changes:
- Save the updated contact information.
-
Sync Changes on iPhone:
- On your iPhone, go to Settings > Contacts > Accounts.
- Tap on your Exchange account.
- Toggle the “Contacts” option off and then back on to force a sync.
4.4. Removing Photos From Social Media (Facebook, LinkedIn)
If your contacts are linked to social media accounts, the photo might be sourced from there.
-
Unlink the Contact (If Possible):
- On your iPhone, go to the Contacts app and find the contact in question.
- Tap “Edit” and look for a “Linked Contacts” section.
- If you see a linked social media account, try unlinking it.
- If unlinking is not possible, you might need to change the photo directly on the social media platform.
-
Update Photo on Social Media:
- Log in to the respective social media account (e.g., Facebook, LinkedIn).
- Find the contact’s profile.
- Update or remove their profile picture.
-
Sync Changes on iPhone:
- After updating the photo on the social media platform, force a sync on your iPhone.
- Go to Settings > Contacts > Accounts, tap the account, and toggle “Contacts” off and on.
By identifying the source account and making the necessary changes, you can effectively remove photos synced from other platforms.
5. Alternative Methods for Removing Contact Photos
Sometimes, the direct methods don’t work due to various sync issues or account settings. Here are some alternative methods you can try:
5.1. Replacing the Photo With a Default Image
Instead of directly deleting the photo, you can replace it with a default image.
-
Open the Contacts App: Launch the Contacts app on your iPhone.
-
Select the Contact: Find and select the contact whose photo you want to change.
-
Edit the Contact: Tap “Edit” in the top right corner.
-
Tap “Edit” under the Photo: Tap the “Edit” option below the current photo.
-
Choose a Default Image:
- You might see options to choose from your photo library or use a default image.
- Select a plain or generic image from your photo library as a temporary replacement.
-
Save the Changes: Tap “Done” to save the new photo.
This method can be useful if you can’t directly delete the photo but want to change it to something less personal.
5.2. Using Third-Party Contact Management Apps
Several third-party contact management apps offer advanced features for managing contacts, including removing photos.
-
Research and Download an App:
- Search the App Store for contact management apps like “Contacts Sync for Google Gmail” or “Contact Cleanup.”
- Read reviews and choose an app with good ratings and features that suit your needs.
-
Grant Permissions:
- Install the app and grant it access to your contacts. Be cautious and only use reputable apps.
-
Remove the Photo:
- Use the app’s interface to find the contact and remove the photo.
- The steps will vary depending on the app.
-
Sync Changes to iPhone:
- After removing the photo in the app, ensure the changes sync to your iPhone’s Contacts app.
Using a third-party app can sometimes bypass sync issues and offer more control over your contacts.
5.3. Resetting Contact Sync Settings
Resetting the contact sync settings can sometimes resolve persistent issues with removing photos.
-
Open Settings: Go to the Settings app on your iPhone.
-
Navigate to Contacts: Scroll down and tap on “Contacts.”
-
Check Accounts: Tap on “Accounts” and select the account causing issues (e.g., Google, Exchange).
-
Toggle Contacts Off: Toggle the “Contacts” option off.
-
Confirm Deletion:
- A pop-up may ask if you want to keep or delete the contacts from your iPhone.
- Select “Delete from My iPhone.” This will remove the synced contacts from your device.
-
Restart Your iPhone: Turn off your iPhone and then turn it back on.
-
Toggle Contacts On: Go back to Settings > Contacts > Accounts, select the account, and toggle “Contacts” back on.
-
Wait for Sync: Allow the contacts to sync back to your iPhone. This may take a few minutes.
Alternative text: Navigating to Contacts settings on an iPhone.
Resetting the sync settings can clear out corrupted data and allow you to remove the photo after the contacts are re-synced.
6. Troubleshooting Common Issues
Even with the right steps, you might encounter issues while trying to remove a photo from your iPhone contact. Here are some common problems and their solutions:
6.1. “Delete” Option Not Available
If you don’t see the “Delete” option when trying to edit the contact photo, it’s likely because the photo is synced from another account.
- Solution: Identify the source account (Google, Exchange, Facebook, etc.) and remove the photo from that account directly.
- Verification: After removing it from the source, force a sync on your iPhone by toggling the “Contacts” option off and on in the account settings.
6.2. Changes Not Syncing Across Devices
Sometimes, you might remove the photo on your iPhone, but it doesn’t sync across your other Apple devices (like your iPad or Mac).
-
Solution 1: Check iCloud Sync:
- Ensure that iCloud Contacts is enabled on all your devices.
- Go to Settings > [Your Name] > iCloud and make sure “Contacts” is toggled on.
- Wait for a few minutes to allow the changes to sync.
-
Solution 2: Force Sync:
- On each device, toggle the “Contacts” option off and on in the iCloud settings to force a sync.
6.3. Duplicate Contacts
Having duplicate contacts can cause confusion and make it difficult to manage contact photos.
-
Solution 1: Manual Merge:
- In the Contacts app, tap on a duplicate contact.
- Tap “Edit,” scroll down, and tap “Link Contacts.”
- Choose the other duplicate contact to merge them.
- Repeat this process for all duplicate contacts.
-
Solution 2: Use Third-Party App:
- Use a contact management app like “Contact Cleanup” to automatically find and merge duplicate contacts.
6.4. Photo Reappears After Deletion
If the photo reappears after you delete it, it’s likely being re-synced from another account.
- Solution: Identify all accounts that sync contacts to your iPhone.
- Remove the photo from each of those accounts.
- Force a sync on your iPhone after making the changes.
6.5. Error Messages
If you receive error messages while trying to remove the photo, note the specific message and search for solutions online.
- Solution: Common error messages might relate to account permissions, sync issues, or software glitches.
- Consult Apple Support or online forums for specific troubleshooting steps.
7. Tips for Managing iPhone Contacts Effectively
Managing your iPhone contacts efficiently can save you time and prevent common issues. Here are some tips:
7.1. Setting a Default Account for Contacts
Setting a default account ensures that new contacts are saved to the correct location and prevents sync conflicts.
- Open Settings: Go to the Settings app on your iPhone.
- Navigate to Contacts: Scroll down and tap on “Contacts.”
- Default Account: Tap on “Default Account.”
- Choose an Account: Select the account you want to use as the default (e.g., iCloud, Google).
7.2. Regularly Backing Up Your Contacts
Backing up your contacts ensures you don’t lose important information in case of device failure or accidental deletion.
-
iCloud Backup:
- Go to Settings > [Your Name] > iCloud > iCloud Backup.
- Make sure “iCloud Backup” is toggled on.
- Tap “Back Up Now” to create a manual backup.
-
iTunes/Finder Backup:
- Connect your iPhone to your computer.
- Open iTunes (or Finder on macOS Catalina and later).
- Select your device and choose “Back Up Now.”
7.3. Organizing Contacts With Groups
Organizing contacts into groups makes it easier to find and manage specific contacts.
-
Using iCloud:
- Go to iCloud.com on your computer and sign in with your Apple ID.
- Open the “Contacts” app.
- Click the “+” button in the bottom left corner and choose “New Group.”
- Name the group and add contacts to it.
-
Using Third-Party Apps:
- Use a contact management app like “Groups” to create and manage contact groups on your iPhone.
7.4. Keeping Contact Information Updated
Regularly updating contact information ensures accuracy and prevents outdated details.
- Set Reminders: Set periodic reminders to review and update your contacts.
- Use Contact Scanners: Use apps that scan business cards and automatically update contact information.
7.5. Reviewing and Cleaning Up Contacts Regularly
Regularly reviewing and cleaning up your contacts helps maintain a clutter-free and efficient contact list.
- Delete Unnecessary Contacts: Remove contacts you no longer need.
- Merge Duplicate Contacts: Merge any duplicate entries to avoid confusion.
- Correct Errors: Fix any errors or incomplete information in your contacts.
By following these tips, you can effectively manage your iPhone contacts and prevent common issues related to contact photos and synchronization.
8. Understanding Contact Sharing and Privacy
Contact sharing and privacy are crucial aspects of managing your iPhone contacts. Here’s what you need to know:
8.1. Sharing Contact Information
You can share contact information with others in various ways:
- AirDrop: Quickly share contacts with nearby Apple devices using AirDrop.
- Email: Send contact information via email.
- Messages: Share contacts through text messages.
8.2. Privacy Settings for Contacts
Your iPhone allows you to control which apps have access to your contacts:
- Open Settings: Go to the Settings app on your iPhone.
- Navigate to Privacy: Scroll down and tap on “Privacy.”
- Contacts: Tap on “Contacts” to see a list of apps that have requested access to your contacts.
- Manage Access: Toggle the switches to grant or revoke access for each app.
8.3. Sharing Name and Photo in Messages
You can choose to share your name and photo with contacts when sending messages:
- Open Settings: Go to the Settings app on your iPhone.
- Navigate to Messages: Scroll down and tap on “Messages.”
- Share Name and Photo: Tap on “Share Name and Photo.”
- Customize Settings: Customize who can see your name and photo (Everyone, Contacts Only, or Nobody).
8.4. Protecting Your Contact Information
Here are some tips to protect your contact information:
- Be cautious about granting apps access to your contacts.
- Use strong passwords for your accounts.
- Enable two-factor authentication for added security.
- Regularly review your privacy settings.
Understanding and managing contact sharing and privacy settings helps you maintain control over your personal information.
9. dfphoto.net: Your Resource for Visual Arts and Photography Tips
At dfphoto.net, we are dedicated to providing you with the best resources for visual arts and photography. Whether you’re an amateur enthusiast or a seasoned professional, our platform offers a wealth of information and inspiration.
9.1. Explore Our Photography Guides
Discover in-depth guides on various photography techniques, from basic composition to advanced editing. Learn how to capture stunning images and enhance your skills.
9.2. Get Inspired by Our Photo Galleries
Browse our curated photo galleries featuring works from talented photographers around the world. Find inspiration for your next project and see how others are pushing the boundaries of visual storytelling.
9.3. Stay Updated With the Latest Trends
Stay informed about the latest trends in photography and visual arts. Our articles cover new equipment, software updates, and emerging styles to keep you ahead of the curve.
9.4. Join Our Community
Connect with fellow photographers and visual artists in our community forums. Share your work, ask questions, and get feedback from peers.
9.5. Enhance Your Skills With Our Tutorials
Follow our step-by-step tutorials to master new techniques and improve your workflow. Learn how to use popular software like Adobe Photoshop and Lightroom to enhance your images.
9.6. Find the Best Equipment Reviews
Read our comprehensive reviews of cameras, lenses, and accessories to make informed purchasing decisions. We provide unbiased evaluations to help you find the right gear for your needs.
Visit dfphoto.net today and unlock your creative potential.
10. FAQ: Removing Photos From iPhone Contacts
Here are some frequently asked questions about removing photos from iPhone contacts:
1. Why can’t I see the “Delete” option when trying to remove a photo?
The “Delete” option might be missing because the photo is synced from another account, such as Google, Exchange, or Facebook. You need to remove the photo from that source account directly.
2. How do I identify which account is syncing the contact photo?
Go to Settings > Contacts > Accounts and check which accounts have the “Contacts” toggle enabled. The account with the toggle on is likely the source.
3. What if the photo reappears after I delete it?
The photo is likely being re-synced from another account. Identify all accounts syncing contacts to your iPhone and remove the photo from each of them.
4. How do I remove a photo synced from Google Contacts?
Log in to Google Contacts on a web browser, find the contact, edit the contact’s details, and remove the photo. Then, force a sync on your iPhone.
5. Can I remove a photo from a contact linked to Facebook?
Yes, but you might need to unlink the contact from Facebook or update the photo on the contact’s Facebook profile.
6. What should I do if changes aren’t syncing across my Apple devices?
Ensure that iCloud Contacts is enabled on all your devices and force a sync by toggling the “Contacts” option off and on in the iCloud settings.
7. Is it possible to replace the photo with a default image instead of deleting it?
Yes, you can edit the contact and choose a plain or generic image from your photo library as a temporary replacement.
8. Are there third-party apps that can help manage contact photos?
Yes, several contact management apps offer advanced features for managing contacts, including removing photos. Examples include “Contacts Sync for Google Gmail” and “Contact Cleanup.”
9. How can I prevent sync conflicts with my contacts?
Set a default account for contacts in Settings > Contacts > Default Account and regularly review your contact settings.
10. What privacy settings should I be aware of regarding my contacts?
Review the privacy settings in Settings > Privacy > Contacts to control which apps have access to your contacts and manage sharing options in Settings > Messages > Share Name and Photo.
This comprehensive guide covers everything you need to know about removing photos from iPhone contacts. For more photography tips, inspiration, and resources, visit dfphoto.net.