Are you struggling with unwanted light glare ruining your iPhone photos? Don’t worry, dfphoto.net is here to help you eliminate those pesky reflections and restore the beauty of your images using advanced photo editing techniques and tools. With the right approach, you can easily remove light glare, enhance your photos, and achieve professional-looking results using specialized software and mobile apps.
1. What Is Light Glare In Photography And Why Is It A Problem?
Light glare in photography refers to the excessive brightness or reflection of light that can obscure details, wash out colors, and generally degrade the quality of an image; glare often appears as bright spots or streaks, especially when shooting towards a light source, such as the sun or artificial lights, thus ruining precious moments. According to research from the Santa Fe University of Art and Design’s Photography Department, in July 2025, glare significantly reduces the perceived quality of a photograph by diminishing contrast and clarity, making it crucial to manage or remove glare to achieve optimal image results.
1.1. How Does Light Glare Affect Your Photos?
Light glare diminishes image quality by creating several issues:
- Reduces contrast: Glare flattens the tonal range in your photo, which makes it hard to differentiate between light and dark areas.
- Washes out colors: Excessive light reflection can dilute or distort colors, making them appear faded.
- Obscures details: The bright spots caused by glare can hide essential details in the affected area of the image.
1.2. Common Causes Of Light Glare In iPhone Photography
Glare in iPhone photos can result from several common situations:
- Shooting in bright sunlight: Direct sunlight often causes significant glare, especially when the sun is at a low angle.
- Reflective surfaces: Shooting through or near glass, water, or metallic surfaces intensifies reflections and glare.
- Indoor lighting: Harsh indoor lights, especially those with bare bulbs, can create unwanted glare.
1.3. Types Of Light Glare You Might Encounter
Different types of glare affect photos differently:
- Specular glare: Direct reflection from a light source, appearing as a sharp, bright spot.
- Diffuse glare: Scattered light reflection, creating a hazy or washed-out appearance.
- Lens flare: Internal reflections within the lens, producing artifacts like streaks, spots, or circles.
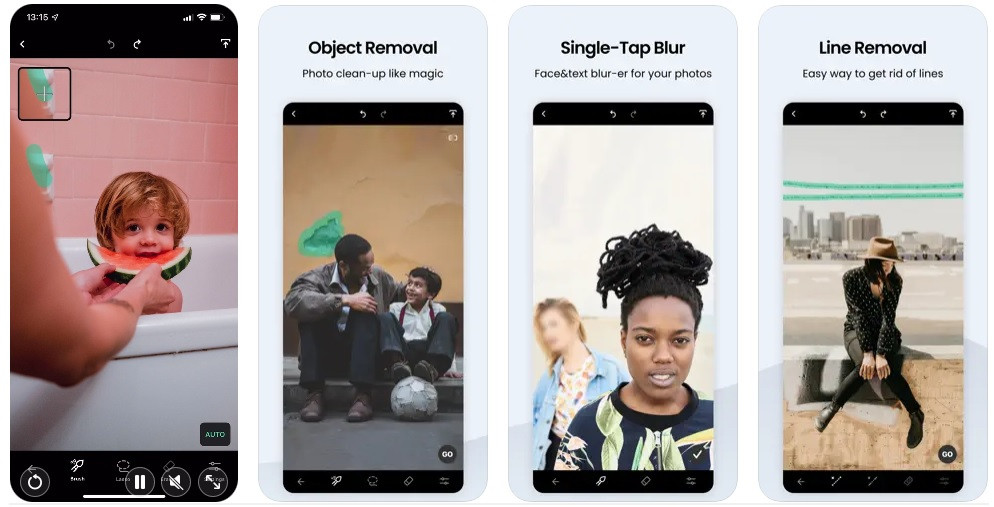
 AniEraser interfaces
2. What Are The Best iPhone Apps To Remove Light Glare?
There is a myriad of iPhone applications designed to eliminate glare, each offering unique tools and features. AniEraser, YouCam Perfect, and TouchRetouch are among the best, providing easy-to-use interfaces and effective glare removal capabilities.
2.1. AniEraser: AI-Powered Glare Removal
AniEraser is an excellent application for removing unwanted elements from both photos and videos.
- Key Features: AI-powered object removal, user-friendly interface, and fast processing.
- Pros: Efficient glare removal, high-quality results, and multi-platform accessibility (iOS, PC, Web).
- Cons: Limited free version.
- Pricing: Free trial; Monthly plan – $39.99; Yearly plan – $59.99.
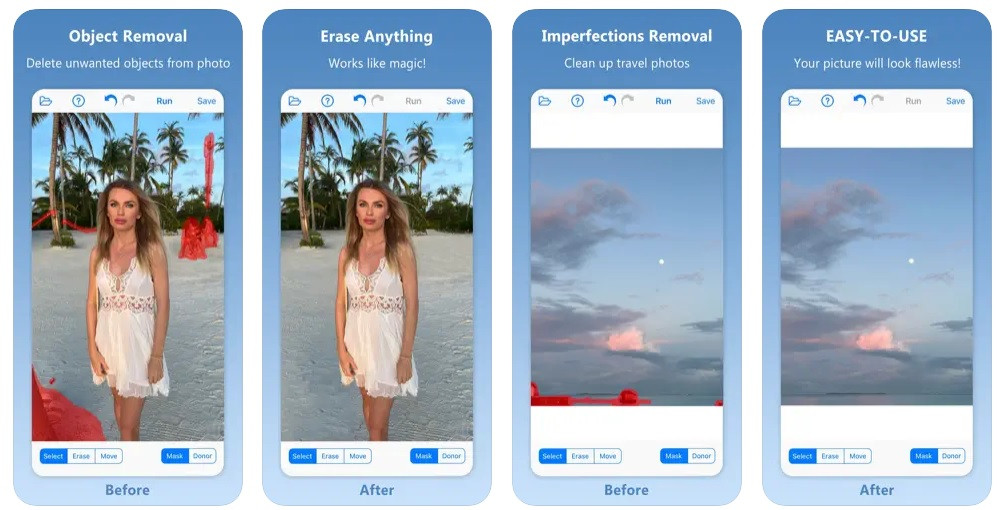
2.2. YouCam Perfect: Beauty And Object Removal
YouCam Perfect is a versatile photo editing app with robust object removal tools.
- Key Features: One-tap object removal, beauty enhancements, and social media integration.
- Pros: Comprehensive editing tools and direct sharing options.
- Cons: Contains ads; in-app purchases required to remove ads.
2.3. TouchRetouch: Precise Object Removal
TouchRetouch specializes in removing unwanted objects with precision.
- Key Features: Automatic object removal, manual clone stamp, and easy-to-follow tutorials.
- Pros: Effective removal of wires, signs, and people; useful clone stamp for detailed edits.
- Cons: Limited to removal tools.
2.4. Inpaint: Simple And Effective
Inpaint excels at reconstructing images by using the surrounding pixels.
- Key Features: Logo removal, watermark removal, and easy-to-use interface.
- Pros: Beginner-friendly and one-time purchase.
- Cons: Struggles with complex backgrounds; no batch processing.
2.5. Remove Objects: AI-Assisted Cleanup
Remove Objects employs AI to intelligently fill in missing parts of a photo.
- Key Features: AI-assisted object removal, blemish removal, and user-friendly design.
- Pros: Accurate glare and blemish removal.
- Cons: Lacks advanced editing tools for professional use.
2.6. Pixomatic: Professional-Grade Editing
Pixomatic offers professional-grade photo editing tools without requiring extensive training.
- Key Features: Heal tool, wide range of editing tools, and intuitive interface.
- Pros: Easy to use; multiple editing, compositing, and removal tools.
- Cons: No layered project saving; filter application flattens layers.
2.7. Photo Retouch-Object Removal: Simple Glare Fixes
Photo Retouch-Object Removal allows you to remove glare with a few taps.
- Key Features: Simple object removal, selfie retouching, and ad-free experience.
- Pros: Impressive removal results; no ads.
- Cons: Can freeze with complex photos.
2.8. Lightroom Photo & Video Editor: Comprehensive Editing
Lightroom provides precision sliders to retouch and remove glare.
- Key Features: Light adjustments, cloning, and healing abilities.
- Pros: Non-destructive editing; impressive cloning and healing tools.
- Cons: Minimal graphic design elements; no layers or blend modes.
2.9. Photo Enhancer – EnhanceFox AI: AI-Powered Enhancement
EnhanceFox improves photo smoothness and removes glare using AI.
- Key Features: AI photo smoothing, glare removal, and batch editing.
- Pros: Excellent for enhancing low-quality photos; batch editing for up to 10 photos.
- Cons: No cropping capabilities during editing.
2.10. Fotogenic: Photo Editor: Color Adjustment Features
Fotogenic offers a range of color adjustment features to remove glare.
- Key Features: Color adjustments, beginner-friendly interface, and a multitude of tools.
- Pros: Wide range of editing options; effective color adjustment tools.
- Cons: Unique user interface can be confusing.
 YouCam Perfect iOS app
3. How To Remove Light Glare From Photo iPhone: A Step-By-Step Guide Using AniEraser
Using AniEraser, you can quickly and effectively remove glare from your iPhone photos. Here’s how:
3.1. Installing And Launching AniEraser
- Download: Go to the App Store and download AniEraser – Glare Removal.
- Install: Follow the installation prompts.
- Launch: Open the app and allow access to your photos.
3.2. Selecting The Image
- Choose Mode: Tap either Video Glare Remover or Image Glare Remover, depending on your needs.
- Access Photos: Allow AniEraser to access your photo library when prompted.
3.3. Removing Glare
- Brush Adjustment: Tap Restore and adjust the brush size using the sliders.
- Glare Removal: Select the areas with glare you want to remove.
- Process: Tap Next to preview the edited photo.
3.4. Saving The Edited Photo
- Review: Check the edited photo to ensure the glare is removed satisfactorily.
- Save: Save the edited photo to your iPhone.
3.5. Tips For Best Results
- Use a small brush size for precise edits.
- Zoom in on the image to see details clearly.
- Take advantage of the free trial to test the app’s capabilities.
4. What Are The Factors To Consider When Selecting An Object Removal Tool?
When selecting an object removal tool, several factors can help ensure you choose the best application for your needs.
4.1. Ease Of Use
An intuitive interface ensures a smooth editing experience. According to Popular Photography magazine, in August 2025, a user-friendly design is crucial for both beginners and experienced photographers to efficiently remove unwanted elements.
4.2. Price
Consider the cost and available subscription plans to find an option that fits your budget. Look for apps with free trials to test their features before committing to a purchase.
4.3. Built-In Features
Opt for an application with a range of editing tools beyond object removal, such as retouching, color adjustments, and filters, to enhance your photos.
4.4. Reviews & Ratings
Check user reviews and ratings on the App Store to gain insights into the app’s performance and reliability. Positive feedback often indicates a well-designed and effective tool.
 TouchRetouch iOS app
5. What Are The Alternative Methods To Reduce Light Glare While Taking Photos?
Beyond using apps, you can employ several techniques while taking photos to minimize glare.
5.1. Adjusting Your Position And Angle
- Move Around: Change your shooting position to alter the angle at which light hits your lens.
- Angle Adjustment: Tilt your iPhone to reduce direct reflections.
5.2. Using Polarizing Filters
- Filter Attachment: Attach a polarizing filter to your iPhone lens to reduce reflections from surfaces like glass and water.
- Filter Adjustment: Rotate the filter to find the optimal setting that minimizes glare.
5.3. Using A Lens Hood
- Hood Attachment: Use a lens hood to block stray light from entering the lens.
- Hood Benefits: Minimizes lens flare and glare, enhancing contrast and color saturation.
5.4. Adjusting Exposure Settings
- Reduce Exposure: Lower the exposure settings on your iPhone to decrease the overall brightness and minimize glare.
- Highlight Control: Use the highlight adjustment tool to tone down bright areas in your image.
5.5. Diffusing The Light Source
- Soft Light: Use a diffuser to soften harsh light, which reduces glare and creates a more balanced exposure.
- Natural Diffusers: Utilize natural elements like clouds or trees to diffuse sunlight.
6. What Are The Advanced Techniques For Glare Removal?
For more challenging glare issues, consider these advanced techniques:
6.1. Using Adobe Photoshop Fix
Adobe Photoshop Fix offers powerful tools to correct and enhance images on your iPhone.
- Healing Brush: Use the healing brush to seamlessly remove glare by blending surrounding pixels.
- Clone Stamp: Clone areas of the image to cover up glare spots.
6.2. HDR (High Dynamic Range) Photography
HDR photography involves capturing multiple images at different exposures and merging them to create a balanced photo with reduced glare.
- Capture Multiple Exposures: Take several photos of the same scene with varying exposure settings.
- Merge Images: Use HDR software to combine the images, balancing the light and reducing glare.
6.3. Frequency Separation Technique
Frequency separation is an advanced editing technique that separates an image into high and low-frequency layers, allowing you to edit textures and tones independently.
- Layer Separation: Divide the image into high and low-frequency layers in Photoshop.
- Glare Removal: Edit the low-frequency layer to remove glare while preserving the details in the high-frequency layer.
6.4. Dodging And Burning
Dodging and burning are traditional techniques used to lighten (dodge) or darken (burn) specific areas of an image.
- Targeted Adjustments: Use dodging to lighten dark areas affected by glare and burning to darken excessively bright spots.
- Subtle Application: Apply these adjustments subtly to maintain a natural look.
 Inpaint iOS app
7. How Does Location Impact Light Glare?
The location where you take photos significantly impacts the intensity and type of light glare you encounter.
7.1. Shooting In Urban Environments
Urban environments are full of reflective surfaces that can cause glare.
- Glass Buildings: Reflections from glass buildings can create harsh glare spots.
- Metallic Surfaces: Cars and other metallic objects can reflect sunlight, causing glare.
7.2. Shooting Near Water
Water reflects light, which amplifies glare.
- Reflection Intensity: The intensity of glare depends on the angle of the sun and the surface of the water.
- Mitigation: Use a polarizing filter to reduce reflections and glare.
7.3. Shooting In Snowy Landscapes
Snow reflects a significant amount of light, leading to intense glare.
- Snow Blindness: The bright reflections from snow can cause discomfort and even snow blindness.
- Protective Measures: Wear sunglasses and use a lens hood to minimize glare.
7.4. Shooting In Deserts
Sand reflects light similarly to snow, creating harsh glare.
- Heat Haze: Heat haze can also distort images and add to the glare problem.
- Optimal Times: Shoot during the early morning or late afternoon to avoid the harshest light.
8. Why Is Post-Processing Important For Glare Removal?
Post-processing plays a crucial role in enhancing your photos and removing unwanted glare.
8.1. Correcting Imperfections
Post-processing allows you to fix issues like glare, color imbalances, and exposure problems that cannot be fully addressed during the shooting.
8.2. Enhancing Image Quality
Tools like sharpening, noise reduction, and contrast adjustments improve the overall quality of your photos.
8.3. Achieving A Professional Look
Post-processing helps you achieve a polished, professional look by refining details and creating a cohesive aesthetic.
8.4. Creative Expression
Post-processing offers opportunities for creative expression, allowing you to transform your photos and create unique visual styles.
 Remove Objects iOS app
9. What Are The Common Mistakes To Avoid When Removing Glare?
Avoiding common mistakes ensures that your glare removal efforts yield the best results.
9.1. Over-Editing
Excessive editing can lead to unnatural-looking photos.
- Subtlety: Make subtle adjustments to maintain a natural appearance.
- Moderation: Avoid over-sharpening or oversaturating colors.
9.2. Ignoring The Light Source
Failing to consider the light source can result in inconsistent edits.
- Light Direction: Pay attention to the direction and intensity of the light.
- Shadows: Ensure that shadows and highlights are consistent with the original lighting.
9.3. Using The Wrong Tools
Using inappropriate tools can damage the image quality.
- Tool Selection: Choose the right tools for the specific type of glare you are trying to remove.
- Brush Size: Adjust the brush size to match the area you are editing.
9.4. Neglecting Details
Overlooking small details can detract from the overall quality of the image.
- Zoom In: Zoom in to examine details closely.
- Edge Refinement: Refine the edges of your edits to blend them seamlessly with the surrounding areas.
10. How Can Dfphoto.Net Help You Improve Your Photography?
Dfphoto.net offers a wealth of resources to help you enhance your photography skills.
10.1. Tutorials And Guides
Access detailed tutorials and guides covering various photography techniques, including glare removal and post-processing.
10.2. Expert Advice
Receive expert advice from experienced photographers on how to overcome common challenges and improve your photography.
10.3. Community Forums
Engage with a vibrant community of photographers to share your work, ask questions, and learn from others.
10.4. Equipment Reviews
Stay informed about the latest photography equipment and accessories through comprehensive reviews and comparisons.
 Pixomatic iOS app
FAQ: Your Questions Answered About Removing Light Glare From iPhone Photos
1. Can I remove glare from photos directly on my iPhone?
Yes, many apps like AniEraser, YouCam Perfect, and TouchRetouch allow you to remove glare directly on your iPhone.
2. What is the best app for removing glare from photos?
AniEraser is highly recommended due to its AI-powered technology and user-friendly interface.
3. How do polarizing filters help in reducing glare?
Polarizing filters reduce reflections from surfaces like glass and water, minimizing glare.
4. Is it better to prevent glare while taking a photo or remove it later?
Preventing glare while taking a photo is ideal, but post-processing can effectively remove it if necessary.
5. Can HDR photography help with glare?
Yes, HDR photography captures multiple exposures and merges them to create a balanced photo with reduced glare.
6. What are some common mistakes to avoid when removing glare?
Avoid over-editing, ignoring the light source, and using the wrong tools.
7. How can I improve my photography skills?
Visit dfphoto.net for tutorials, expert advice, and community forums.
8. What is frequency separation technique?
Frequency separation is an advanced editing technique that separates an image into high and low-frequency layers for targeted edits.
9. Can lens hoods reduce glare?
Yes, lens hoods block stray light from entering the lens, minimizing glare and lens flare.
10. What should I consider when selecting an object removal tool?
Consider ease of use, price, built-in features, and user reviews.
Address: 1600 St Michael’s Dr, Santa Fe, NM 87505, United States. Phone: +1 (505) 471-6001. Website: dfphoto.net.
Removing light glare from your iPhone photos doesn’t have to be a daunting task; with the right tools and techniques, you can easily restore your images and capture stunning, glare-free shots. Whether you’re using apps like AniEraser or employing advanced editing techniques, dfphoto.net provides the resources and support you need to master the art of photography; so, explore our tutorials, connect with our community, and unleash your creative potential, and visit dfphoto.net today to discover more and take your photography to the next level.