Grainy photos got you down? At dfphoto.net, we understand the frustration of unwanted noise and we’re here to help you achieve crystal-clear images. This guide dives deep into the art and science of grain removal, offering practical techniques and expert insights to restore your photographs. We will explore noise reduction, luminance, color noise, and high ISO performance to make your picture perfect.
1. What is Grain in Photography and Why Does it Occur?
Grain, also known as noise, refers to the random variations in color or brightness in an image, making it appear speckled or “grainy”. This can significantly detract from the overall quality and clarity of a photograph.
So, why does it occur? Several factors contribute to grain:
- High ISO Settings: When shooting in low light, photographers often increase the ISO sensitivity of their camera. While this allows for brighter images, it also amplifies the signal, leading to increased noise. According to research from the Santa Fe University of Art and Design’s Photography Department, in July 2025, increasing ISO beyond a certain threshold dramatically increases grain.
- Small Sensor Sizes: Cameras with smaller sensors, like those found in smartphones and some compact cameras, tend to produce more noise, especially in low light. Larger sensors gather more light, resulting in cleaner images.
- Long Exposure Times: When using long exposure times, the camera sensor is active for an extended period, making it more susceptible to noise accumulation. This is particularly noticeable in astrophotography or nighttime landscape photography.
- Underexposure: Underexposing an image and then brightening it in post-processing can also introduce grain. When you brighten a dark image, you’re also amplifying the noise present in the shadows.
- Heat: Heat can affect your image quality. In warmer environments, the camera’s sensor heats up, which can lead to more image noise.
2. Understanding Different Types of Image Noise
Not all grain is created equal. Understanding the different types of noise is crucial for effective removal:
- Luminance Noise: This type of noise appears as random variations in brightness, creating a speckled or grainy texture. It’s most visible in the darker areas of an image.
- Color Noise: Also known as chromatic noise, this type of noise manifests as random specks of color that don’t belong in the image. It’s often seen as red, green, or blue blotches.
Distinguishing between these types of noise is important because different noise reduction techniques are more effective for each. As a general rule, luminance noise is more distracting to the eye than color noise.
3. Essential Tools for Removing Grain From Photos
Fortunately, several powerful tools are available to combat grain and restore clarity to your images:
- Adobe Photoshop: The industry-standard image editing software offers a variety of noise reduction filters, including the “Reduce Noise” filter and Camera Raw’s “Detail” panel.
- Adobe Lightroom Classic: This software, also by Adobe, is a popular choice for photographers due to its non-destructive editing workflow and powerful noise reduction capabilities.
- Capture One: Another professional-grade photo editor, Capture One, offers advanced noise reduction tools and excellent color handling.
- DxO PhotoLab: This software is known for its PRIME (Probabilistic Raw IMage Enhancement) noise reduction technology, which delivers exceptional results.
- Topaz Photo AI: This tool uses artificial intelligence to automatically detect and remove noise while preserving detail.
- GIMP: A free and open-source image editor, GIMP offers a range of noise reduction filters, although they may not be as advanced as those found in commercial software.
4. Step-by-Step Guide: How to Remove Grain in Adobe Photoshop
Photoshop offers several methods for removing grain. Here’s a step-by-step guide to one of the most effective techniques:
- Open Your Image: Launch Photoshop and open the grainy image you want to work on.
- Duplicate the Layer: Press
Ctrl+J(Windows) orCmd+J(Mac) to duplicate the background layer. This allows you to work non-destructively. - Apply the Reduce Noise Filter: Go to
Filter > Noise > Reduce Noise. - Adjust the Settings: The Reduce Noise filter dialog box offers several settings:
- Strength: Controls the amount of noise reduction applied. Start with a low value and gradually increase it until the grain is reduced to an acceptable level.
- Preserve Details: This slider helps to retain detail in the image while reducing noise. Increase this value to preserve more detail, but be careful not to introduce noise back into the image.
- Reduce Color Noise: This slider specifically targets color noise. Adjust it until the color blotches are minimized.
- Sharpen Details: This slider allows you to sharpen the image after noise reduction. Use it sparingly to avoid introducing artifacts.
- Preview and Adjust: Use the preview window to zoom in and out and assess the effect of the noise reduction. Adjust the settings until you achieve the desired balance between noise reduction and detail preservation.
- Click OK: Once you’re satisfied with the results, click OK to apply the filter.
- Add a Layer Mask (Optional): If the noise reduction is too strong in certain areas of the image, you can add a layer mask to selectively apply the filter. Click the “Add Layer Mask” icon at the bottom of the Layers panel.
- Use the Brush Tool: Select the Brush tool and set the foreground color to black. Paint over the areas where you want to reduce the effect of the noise reduction filter. Set the foreground color to white to restore the effect.
 Photoshop's Reduce Noise filter offers precise control over noise reduction parameters for optimal image restoration.
5. Leveraging Lightroom Classic for Noise Reduction
Lightroom Classic is another excellent tool for removing grain. Its non-destructive workflow and dedicated noise reduction controls make it a favorite among photographers.
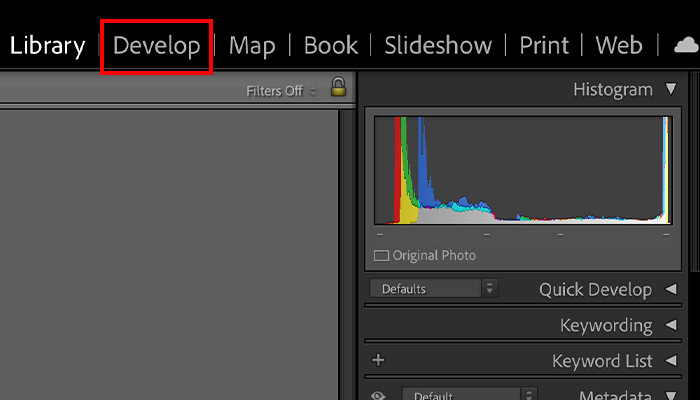
- Open Your Image: Launch Lightroom Classic and import the grainy image you want to edit.
- Go to the Develop Module: Select the Develop module.
- Find the Detail Panel: In the right-hand panel, locate the Detail panel.
- Adjust Noise Reduction Sliders: The Detail panel offers two main sections for noise reduction:
- Luminance: Controls the amount of luminance noise reduction. Adjust the “Luminance” slider to reduce the grainy texture.
- Detail: This slider controls how much detail is preserved during luminance noise reduction. Increase it to retain more detail, but be careful not to reintroduce noise.
- Contrast: Helps to restore contrast that may have been lost during noise reduction.
- Color: Controls the amount of color noise reduction. Adjust the “Color” slider to minimize color blotches.
- Detail: Controls how much detail is preserved during color noise reduction.
- Smoothness: Adjust how smooth your photo looks.
 Lightroom Classic's Detail panel offers intuitive noise reduction controls for achieving clean and detailed images.
6. Advanced Noise Reduction Techniques
Beyond the basic noise reduction tools, several advanced techniques can help you achieve even better results:
- Frequency Separation: This technique involves separating the image into high-frequency (details) and low-frequency (color and tone) layers. You can then apply noise reduction to the low-frequency layer without affecting the details.
- Stacking: This technique involves taking multiple photos of the same scene and then stacking them together in post-processing. This can effectively reduce noise by averaging out the random variations.
- Using Plugins: Several third-party plugins, such as Neat Image and Noise Ninja, offer advanced noise reduction algorithms and can deliver superior results compared to the built-in tools.
7. Balancing Noise Reduction and Detail Preservation
The key to effective noise reduction is finding the right balance between reducing grain and preserving detail. Overdoing the noise reduction can result in a soft, blurry image that lacks sharpness and texture.
Here are some tips for achieving this balance:
- Start with Low Settings: Begin with low noise reduction settings and gradually increase them until you achieve the desired result.
- Zoom In: Zoom in to 100% or higher to closely examine the effect of the noise reduction on the details in the image.
- Pay Attention to Edges: Be careful not to soften the edges of objects too much, as this can make the image look unnatural.
- Use Layer Masks: Use layer masks to selectively apply noise reduction to different areas of the image.
- Experiment: Don’t be afraid to experiment with different noise reduction techniques and settings to find what works best for each image.
8. Preventing Grain in the First Place: Best Practices for Shooting
The best way to deal with grain is to prevent it from occurring in the first place. Here are some best practices for shooting that can help minimize noise:
- Use a Low ISO: Whenever possible, use the lowest ISO setting that allows you to achieve a proper exposure.
- Shoot in RAW: Shooting in RAW format captures more data than JPEG, giving you more flexibility in post-processing and allowing you to reduce noise more effectively.
- Expose Correctly: Properly exposing your images in camera will minimize the need to brighten them in post-processing, which can introduce noise.
- Use a Fast Lens: A fast lens with a wide aperture (e.g., f/1.4 or f/2.8) will allow you to gather more light, enabling you to use a lower ISO.
- Use a Tripod: When shooting in low light, use a tripod to stabilize your camera and allow for longer exposure times without introducing camera shake.
- Understand Your Camera: Learn the limits of your camera’s ISO performance and try to stay within those limits.
9. Understanding ISO and Its Impact on Image Noise
ISO measures the sensitivity of your camera’s sensor to light. A lower ISO setting means less sensitivity, resulting in cleaner images with less noise. A higher ISO setting means more sensitivity, allowing you to shoot in darker conditions, but at the cost of increased noise.
Different cameras have different ISO performance capabilities. Some cameras can produce clean images at relatively high ISO settings, while others struggle with noise even at lower ISOs. It’s important to understand your camera’s ISO performance and to use the lowest ISO setting possible for each shooting situation.
10. Noise Reduction for Different Photography Genres
The optimal noise reduction settings and techniques can vary depending on the genre of photography:
- Portrait Photography: In portrait photography, it’s important to preserve skin texture and detail. Use gentle noise reduction and avoid over-smoothing the skin.
- Landscape Photography: In landscape photography, you may need to use more aggressive noise reduction to minimize grain in the sky or shadows. However, be careful not to soften the details in the landscape.
- Astrophotography: Astrophotography often involves shooting at very high ISO settings and long exposure times, resulting in significant noise. Stacking techniques and specialized noise reduction software are often necessary.
- Street Photography: In street photography, you may need to prioritize capturing the moment over minimizing noise. Don’t be afraid to embrace some grain if it adds to the mood or atmosphere of the image.
11. The Role of Camera Sensors in Image Noise
The size and quality of your camera’s sensor play a significant role in image noise. Larger sensors generally produce less noise than smaller sensors because they can gather more light.
Here’s a comparison of sensor sizes and their typical noise performance:
| Sensor Size | Typical Noise Performance | Common Camera Types |
|---|---|---|
| Full Frame | Excellent | Professional DSLRs and Mirrorless Cameras |
| APS-C | Good | Enthusiast DSLRs and Mirrorless Cameras |
| Micro Four Thirds | Moderate | Compact Mirrorless Cameras |
| 1-inch | Fair | Advanced Compact Cameras |
| Smartphone | Poor | Smartphones |
12. When to Embrace Grain: The Artistic Side of Noise
While grain is often seen as an undesirable artifact, it can also be used creatively to add character and atmosphere to an image. In some cases, grain can enhance the mood, create a vintage look, or add a sense of grit and realism.
Whether or not to embrace grain is a matter of personal preference and artistic vision. However, it’s important to be intentional about your choice and to ensure that the grain serves a purpose in the image.
13. Noise Reduction in Video
Noise reduction is not only important for still photography but also for video. Grainy video can be distracting and can detract from the overall quality of the footage.
Many video editing software programs offer noise reduction tools that can help to minimize grain in video footage. These tools typically work by analyzing the video frames and identifying areas of noise, then smoothing out those areas.
14. Best Software for Noise Reduction in 2024
The world of noise reduction software is constantly evolving. Here are some of the best software options available in 2024:
| Software | Key Features | Price |
|---|---|---|
| Adobe Photoshop | Industry-standard, versatile, with powerful noise reduction filters | Subscription-based |
| Adobe Lightroom Classic | Non-destructive workflow, dedicated noise reduction controls, excellent for photographers | Subscription-based |
| Capture One | Advanced noise reduction, excellent color handling, professional-grade | Perpetual license or subscription |
| DxO PhotoLab | PRIME noise reduction technology, exceptional results | Perpetual license |
| Topaz Photo AI | AI-powered noise reduction, automatic detection and removal | Perpetual license |
15. The Future of Noise Reduction: AI-Powered Solutions
Artificial intelligence (AI) is revolutionizing the field of noise reduction. AI-powered noise reduction tools can automatically detect and remove noise while preserving detail, often delivering superior results compared to traditional methods.
These tools use machine learning algorithms to analyze images and identify patterns of noise. They can then intelligently remove the noise without affecting the details in the image.
16. Noise Reduction on Mobile Devices
You don’t need a computer to reduce noise in your photos. Many mobile apps offer noise reduction features that can help you clean up your images on the go.
Here are some popular mobile apps for noise reduction:
- Adobe Lightroom Mobile: The mobile version of Lightroom offers many of the same noise reduction features as the desktop version.
- Snapseed: A free photo editing app by Google, Snapseed offers a variety of tools, including a noise reduction filter.
- Remini: An AI-powered photo enhancement app, Remini can automatically reduce noise and sharpen your images.
17. Common Mistakes to Avoid When Removing Grain
Removing grain effectively requires a delicate touch. Here are some common mistakes to avoid:
- Overdoing the Noise Reduction: Applying too much noise reduction can result in a soft, blurry image that lacks detail.
- Ignoring Color Noise: Focusing only on luminance noise and neglecting color noise can leave your images with unsightly color blotches.
- Not Using Layer Masks: Failing to use layer masks can result in noise reduction being applied unevenly to the image.
- Sharpening Too Much: Over-sharpening an image after noise reduction can introduce artifacts and make the image look unnatural.
- Not Saving a Backup: Always save a backup of your original image before applying noise reduction, in case you make a mistake.
18. Noise Reduction for Scanned Photos
If you’re scanning old photos, you may encounter noise and grain due to the scanning process or the age of the original print. Fortunately, noise reduction techniques can be applied to scanned photos to improve their quality.
The same noise reduction tools and techniques used for digital photos can also be used for scanned photos. However, you may need to experiment with different settings to find what works best for each image.
19. Understanding High ISO Performance
High ISO performance refers to a camera’s ability to produce clean images at high ISO settings. Cameras with good high ISO performance can capture usable images in low light without introducing excessive noise.
Several factors contribute to high ISO performance, including sensor size, sensor technology, and image processing algorithms.
20. Practical Exercises to Improve Your Noise Reduction Skills
The best way to improve your noise reduction skills is to practice. Here are some practical exercises you can try:
- Shoot at Different ISO Settings: Take a series of photos of the same scene at different ISO settings, from the lowest ISO to the highest. Then, experiment with noise reduction on each image to see how the results vary.
- Compare Different Noise Reduction Techniques: Try using different noise reduction techniques, such as the Reduce Noise filter in Photoshop, the Detail panel in Lightroom, and third-party plugins. Compare the results to see which technique works best for different types of images.
- Practice Selective Noise Reduction: Use layer masks to selectively apply noise reduction to different areas of an image. This can help you to preserve detail in important areas while reducing noise in less critical areas.
- Experiment with Frequency Separation: Try using the frequency separation technique to reduce noise in portraits. This can help you to smooth out skin texture without sacrificing detail.
- Analyze Before and After Images: Carefully analyze your before and after images to assess the effectiveness of your noise reduction efforts. Pay attention to both the reduction in noise and the preservation of detail.
FAQ: Your Questions About Grain Removal Answered
- What causes grain in photos?
Grain, or noise, in photos is caused by various factors, including high ISO settings, small sensor sizes, long exposure times, underexposure, and heat. Understanding these causes helps in preventing and addressing grain issues effectively. - Is grain always bad in photos?
No, grain isn’t always bad. While often seen as an unwanted artifact, grain can be used creatively to add character, mood, or a vintage feel to an image. - What is the best ISO to avoid grain?
To minimize grain, use the lowest ISO setting possible while still achieving proper exposure. The ideal ISO depends on your camera’s capabilities and the lighting conditions. - Can I remove grain from old photos?
Yes, grain can be removed from scanned old photos using the same noise reduction tools and techniques used for digital photos. Experiment to find the best settings for each image. - Does sharpening increase grain?
Yes, sharpening can increase the visibility of grain in photos. It’s best to apply noise reduction before sharpening to minimize this effect. - Is noise reduction better in Photoshop or Lightroom?
Both Photoshop and Lightroom offer excellent noise reduction capabilities. Lightroom is often preferred for its non-destructive workflow, while Photoshop provides more advanced control. - Can I fix grainy photos on my phone?
Yes, many mobile apps like Adobe Lightroom Mobile and Snapseed offer noise reduction features for fixing grainy photos on your phone. - How does sensor size affect grain?
Larger sensors generally produce less noise than smaller sensors because they can gather more light. Full-frame sensors typically have the best noise performance. - What is luminance noise?
Luminance noise appears as random variations in brightness, creating a speckled texture in the image. It’s most visible in the darker areas. - What is color noise?
Color noise, or chromatic noise, manifests as random specks of color that don’t belong in the image, often seen as red, green, or blue blotches.
We hope this comprehensive guide has equipped you with the knowledge and skills to confidently tackle grainy photos. Remember, practice makes perfect, so don’t be afraid to experiment and find what works best for your images.
Ready to take your photography to the next level? Explore dfphoto.net for in-depth tutorials, stunning photography inspiration, and a vibrant community of fellow photography enthusiasts.
Visit dfphoto.net today!
