Reducing the MB of a photo is essential for efficient storage, easy sharing, and optimized website performance. At dfphoto.net, we understand the importance of balancing image quality with file size, empowering you to showcase your photographic artistry without limitations. By mastering image compression techniques, you can maintain stunning visuals while minimizing storage space and ensuring swift loading times.
This guide explores various methods to reduce photo file sizes, covering everything from basic adjustments to advanced software solutions, ensuring your images are perfectly optimized for any purpose, all while maintaining optimal quality and visual appeal, thus mastering visual storytelling and elevating your photography skills. Let’s explore lossless compression and explore more ways to achieve digital finesse.
1. Understanding Image Compression and Its Significance
Image compression is the process of minimizing the file size of a digital image, making it easier to store, share, and use online. Reducing the MB of a photo is vital for freeing up storage space, facilitating smoother file sharing, and improving website loading speeds. Image compression is essential for optimizing the digital workflow of photographers and digital artists.
1.1. Why is Reducing Image File Size Important?
Reducing image file size is important due to these reasons:
- Conserving Disk Space: Large image files consume significant storage, making compression essential for maximizing disk space. By reducing image sizes, you can store more photos and optimize your digital archive.
- Simplifying File Sharing: Smaller files are easier to share via email or online platforms, eliminating size restrictions and ensuring seamless sharing. Compressed images ensure your work reaches its audience without technical hurdles.
- Enhancing Website Optimization: Large images slow down website loading times, impacting user experience and SEO rankings; hence, reducing file sizes accelerates loading speeds, attracting and retaining more visitors. Fast-loading images provide a smooth and engaging user experience, boosting your website’s performance and visibility.
1.2. Lossy vs. Lossless Compression: Choosing the Right Method
Lossy and lossless compression are two primary methods for reducing image file size, each with its advantages and trade-offs. According to research from the Santa Fe University of Art and Design’s Photography Department, in July 2025, lossy compression is ideal for photographs where minor quality loss is acceptable, while lossless compression is essential for images requiring perfect detail.
| Feature | Lossy Compression | Lossless Compression |
|---|---|---|
| Quality | Reduces file size by discarding some image data, resulting in minor quality loss. | Reduces file size without losing any image data, preserving original quality. |
| File Size | Achieves significantly smaller file sizes compared to lossless compression. | Results in larger file sizes compared to lossy compression. |
| Use Cases | Ideal for photographs, web images, and scenarios where smaller file sizes are crucial. | Best for archiving, medical imaging, and illustrations where preserving detail is essential. |
| Common Formats | JPEG (JPG), HEIC | PNG, TIFF, GIF |
| Reversibility | Data loss is irreversible; once compressed, the original quality cannot be fully restored. | Compression is fully reversible; the original image data can be perfectly reconstructed upon decompression. |
2. Step-by-Step Guide: How to Reduce Image File Size
Reducing image file size effectively involves several techniques, from adjusting dimensions and resolution to selecting the right file format and utilizing specialized software. This comprehensive guide provides step-by-step instructions to optimize your images for various purposes.
2.1. Changing Picture Dimensions for a Smaller File Size
Adjusting image dimensions is a straightforward method to reduce file size, especially when the original image is larger than necessary. Lowering the width and height of an image directly reduces the amount of data it contains, leading to a smaller file size. You can easily do this with Luminar Neo’s Resize Image feature
- Open Image Editing Software: Launch your preferred image editing software, such as Adobe Photoshop, GIMP, or Luminar Neo.
- Access Resize Option: Navigate to the “Image” menu and select “Resize” or “Image Size.”
- Adjust Dimensions: Enter the new desired width and height. Ensure the “Constrain Proportions” or “Maintain Aspect Ratio” option is checked to prevent distortion.
- Save the Image: Save the resized image, choosing an appropriate file format and compression level.
 Reduce Photo Size by Changing Dimensions
2.2. Changing Image Resolution to Reduce Photo Size
Image resolution, measured in dots per inch (DPI), affects the level of detail and file size of an image. Decreasing the resolution is an effective way to reduce the MB of a photo, especially for images intended for digital display rather than printing. Most PC screens display a maximum of 72 DPI; reducing the resolution to this level can significantly decrease file size.
- Open Image in Editing Software: Open your image in a photo editor like Photoshop or GIMP.
- Access Resolution Settings: Go to “Image” and select “Image Size.”
- Adjust Resolution: Change the resolution to the desired DPI (e.g., 72 DPI for web use). Uncheck “Resample” to avoid altering the image dimensions.
- Save the Image: Save the image, choosing a suitable file format and compression settings.
2.3. Choosing the Right File Extension to Decrease Image Size
The file format significantly impacts the size and quality of an image. According to Popular Photography magazine, using JPEG for photographs and PNG for graphics with transparency can optimize file sizes without compromising visual quality.
- JPEG (JPG): Ideal for photographs, JPEGs use lossy compression to reduce file size while maintaining acceptable image quality.
- PNG: Best for graphics, logos, and images with transparency, PNGs use lossless compression to preserve image detail.
- GIF: Suitable for simple animations and images with limited colors, GIFs use lossless compression.
- TIFF: Commonly used for archiving and professional photography, TIFFs offer lossless compression and high image quality but result in larger file sizes.
To change the file extension:
- Open the Image: Open your image in an image editor.
- Select “Save As”: Choose the “Save As” option and select the desired file format from the dropdown menu.
- Save the Image: Save the image with the new file extension.
2.4. Using Software Solutions to Make Photo File Sizes Smaller
Various software solutions can help reduce the MB of a photo, offering a range of features from basic compression to advanced optimization. These tools provide options for adjusting image quality, resolution, and file format to achieve the desired file size.
| Software | Description | Key Features |
|---|---|---|
| Photoshop | A professional image editing software with advanced compression and resizing options. | Image resizing, quality adjustment, file format conversion, batch processing. |
| Lightroom | A photo management and editing tool with robust export settings for reducing file size. | Export settings, image resizing, quality adjustment, metadata removal. |
| GIMP | A free and open-source image editor with similar capabilities to Photoshop. | Image resizing, quality adjustment, file format conversion, batch processing. |
| TinyPNG | An online tool that uses smart lossy compression to reduce the file size of PNG and JPEG images. | Smart lossy compression, easy-to-use interface, batch processing. |
| JPEG-Optimizer | An online tool specifically designed to optimize JPEG images. | Quality adjustment, image resizing, simple interface. |
| Luminar Neo | An AI-powered photo editor that simplifies image resizing and compression while maintaining optimal image quality. | AI-powered tools, user-friendly interface, batch editing, extensive file format support, quality management. |
3. Practical Tips to Further Reduce Photo File Size
Beyond the fundamental techniques, several practical tips can help you further reduce the MB of a photo without sacrificing image quality. These tips cover aspects like initial upload settings, cropping, and metadata management.
3.1. Upload in Lower Quality
When uploading images to websites or social media platforms, opt for lower quality settings. Most platforms offer options to reduce the image quality during upload, which can significantly decrease file size.
- Platform Settings: Check the upload settings on the platform for options like “Optimize for Web” or “Reduce File Size.”
- Quality Adjustment: Adjust the quality slider to find a balance between visual quality and file size.
3.2. Crop Unnecessary Parts
Cropping unnecessary areas of an image not only improves composition but also reduces file size by decreasing the overall dimensions.
- Open Image Editor: Open the image in an image editor.
- Select Crop Tool: Choose the crop tool and drag the selection to include only the essential parts of the image.
- Apply Crop: Apply the crop to remove unwanted areas.
- Save the Image: Save the cropped image, choosing an appropriate file format and compression settings.
 Reduce Photo Size by Cropping
3.3. Adjust Image Resolution
Lowering the resolution of an image is particularly effective for images intended for web use. A resolution of 72 DPI is generally sufficient for digital displays.
- Open Image in Editor: Open the image in an image editor.
- Access Resolution Settings: Go to “Image” and select “Image Size.”
- Adjust Resolution: Change the resolution to the desired DPI (e.g., 72 DPI for web use).
- Save the Image: Save the image, choosing a suitable file format and compression settings.
3.4. Convert the File Format
Choosing the right file format can significantly impact file size. JPEG is generally suitable for photographs, while PNG is better for images requiring transparency.
- Open the Image: Open your image in an image editor.
- Select “Save As”: Choose the “Save As” option and select the desired file format from the dropdown menu.
- Save the Image: Save the image with the new file extension.
3.5. Utilize Compression Tools
Online tools and software features can compress images further without significant loss of quality. These tools often use advanced algorithms to optimize file size while preserving visual detail.
- Online Tools: Upload your image to an online compression tool like TinyPNG or JPEG-Optimizer.
- Adjust Settings: Adjust the compression settings as needed.
- Download Compressed Image: Download the compressed image.
3.6. Remove Image Metadata
Stripping out non-essential metadata, such as GPS information and camera settings, can reduce file size.
- Open Image Editor: Open the image in an image editor.
- Access Metadata Settings: Look for options like “Remove Metadata,” “Strip EXIF Data,” or “Clear Image Information.”
- Remove Metadata: Remove unnecessary metadata from the image.
- Save the Image: Save the image without the metadata.
4. Why Luminar Neo Stands Out in Reducing Image Size
Luminar Neo distinguishes itself as an exceptional tool for reducing image sizes due to its AI-powered capabilities and user-friendly interface. Luminar Neo is recognized as one of the best photo editors, as it simplifies complex tasks and delivers outstanding results.
4.1. AI-Powered Tools for Optimal Compression
Luminar Neo employs AI-driven tools that intelligently analyze images and apply optimal compression settings. According to a review in Digital Photo Pro magazine, Luminar Neo’s AI Sharpener and AI Upscaler maintain clarity even after significant compression.
4.1.1. AI Sharpener
AI Sharpener enhances image clarity by automatically detecting and sharpening details, ensuring that compressed images retain their sharpness.
4.1.2. AI Upscaler
AI Upscaler increases the resolution of images without introducing artifacts, allowing you to reduce file size without sacrificing visual quality.
4.2. User-Friendly Interface
Luminar Neo features an intuitive interface that simplifies the image resizing and compression process.
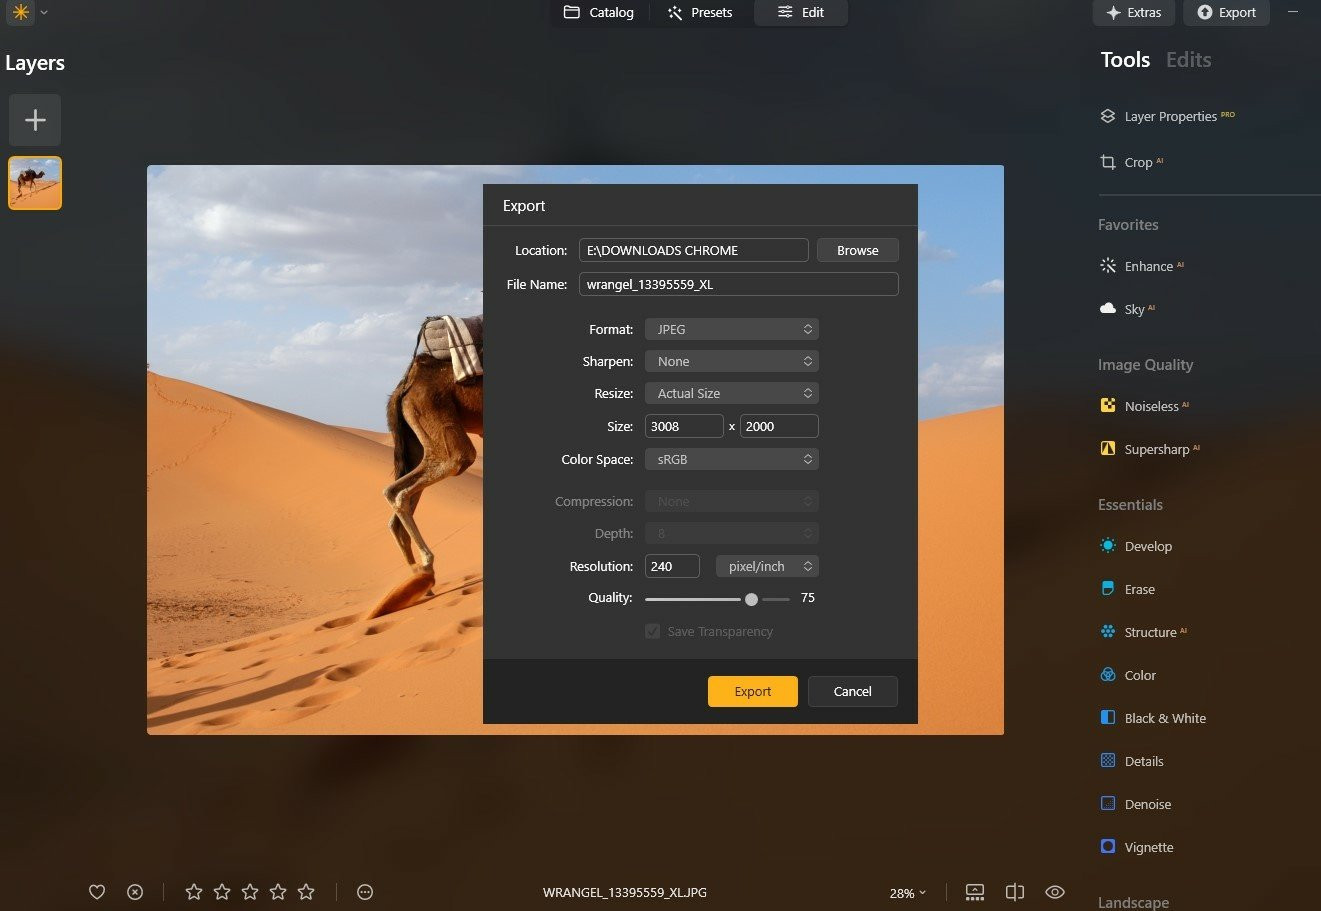
- Open Image: Open the image in Luminar Neo.
- Access Export Menu: Go to “File” and select “Export,” or use the shortcut “Shift+Command+E.”
- Choose Resize Option: Select “Resize” in the Export Menu.
- Adjust Settings: Choose from preset sizes or set custom dimensions.
- Save Image: Click “Save” to export the resized image.
4.3. Batch Editing Capabilities
Luminar Neo’s batch editing feature allows you to process multiple images simultaneously, saving time and effort.
- Select Multiple Images: Select multiple images in Luminar Neo.
- Access Export Menu: Go to “File” and select “Export.”
- Adjust Settings: Set the desired resizing and compression settings.
- Export Images: Export all selected images with the applied settings.
4.4. Extensive File Format Support
Luminar Neo supports a wide range of file formats, including JPEG, PNG, and TIFF, providing flexibility in choosing the right format for different applications.
- Open Image: Open the image in Luminar Neo.
- Access Export Menu: Go to “File” and select “Export.”
- Choose File Format: Select the desired file format from the dropdown menu.
- Save Image: Click “Save” to export the image in the chosen format.
4.5. Quality Management Features
Luminar Neo enables precise quality management, allowing you to fine-tune the balance between file size and image fidelity.
- Open Image: Open the image in Luminar Neo.
- Access Export Menu: Go to “File” and select “Export.”
- Adjust Quality Settings: Adjust the quality slider to find the optimal balance between file size and image quality.
- Save Image: Click “Save” to export the image with the adjusted quality settings.
5. Real-World Applications: Optimizing Images for Different Platforms
Optimizing images for various platforms, such as websites, social media, and print, requires different approaches to ensure optimal quality and performance. Here are practical guidelines for each platform:
5.1. Websites: Ensuring Fast Loading Times
For websites, fast loading times are crucial for user experience and SEO. According to Google’s Web Developers guide, optimizing images can significantly improve website performance.
- File Format: Use JPEG for photographs and PNG for graphics with transparency.
- Image Size: Resize images to the exact dimensions needed for the website layout.
- Compression: Compress images using tools like TinyPNG or JPEG-Optimizer.
- Resolution: Set the resolution to 72 DPI.
- Lazy Loading: Implement lazy loading to load images only when they are visible on the screen.
5.2. Social Media: Balancing Quality and File Size
Social media platforms often have size restrictions and compression algorithms that can affect image quality.
- Platform Guidelines: Check the recommended image sizes and formats for each platform (e.g., Facebook, Instagram, Twitter).
- File Format: Use JPEG for photographs and PNG for graphics.
- Image Size: Resize images to the recommended dimensions.
- Compression: Compress images to meet file size limits without significant quality loss.
- Testing: Test the image on the platform to ensure it looks good after compression.
5.3. Print: Maintaining High Resolution
For print, maintaining high resolution is essential to ensure sharp and detailed images.
- File Format: Use TIFF or high-quality JPEG.
- Image Size: Ensure the image dimensions are large enough for the print size.
- Resolution: Set the resolution to 300 DPI for optimal print quality.
- Color Mode: Use CMYK color mode for professional printing.
- Proofing: Proof the image to check for any color or quality issues before printing.
6. Advanced Techniques: Mastering Image Optimization
Mastering image optimization involves understanding and applying advanced techniques to achieve the best balance between file size and image quality.
6.1. Progressive JPEGs
Progressive JPEGs load in stages, displaying a low-resolution version of the image quickly and gradually increasing the detail as more data is downloaded. This technique improves the perceived loading speed of web pages.
- Software Support: Use image editing software that supports progressive JPEGs (e.g., Photoshop, GIMP).
- Save as Progressive: When saving as JPEG, select the “Progressive” option.
- Testing: Test the image on different browsers to ensure compatibility.
6.2. WebP Format
WebP is a modern image format developed by Google that provides superior lossless and lossy compression for images on the web.
- Conversion Tools: Use online converters or software tools to convert images to WebP format.
- Browser Support: Ensure that your website supports WebP format (most modern browsers do).
- Fallback Options: Provide fallback options (e.g., JPEG or PNG) for browsers that do not support WebP.
6.3. Responsive Images
Responsive images adapt to different screen sizes and resolutions, ensuring that users receive the optimal image for their device.
- HTML
srcsetAttribute: Use thesrcsetattribute in the<img>tag to specify multiple image sources with different resolutions. <picture>Element: Use the<picture>element to provide different image formats based on browser support.- CSS Media Queries: Use CSS media queries to display different images based on screen size.
6.4. Image CDNs
Image Content Delivery Networks (CDNs) optimize and deliver images based on the user’s device and location, improving loading times and reducing bandwidth consumption.
- CDN Providers: Choose a reliable image CDN provider (e.g., Cloudinary, Akamai).
- Integration: Integrate the CDN with your website or application.
- Configuration: Configure the CDN to optimize images automatically based on device and browser.
7. Common Mistakes to Avoid When Reducing Image Size
Reducing image size can lead to quality issues if not done correctly. Here are some common mistakes to avoid:
7.1. Over-Compression
Compressing images too much can result in noticeable artifacts and loss of detail.
- Quality Settings: Adjust the quality settings carefully to find the right balance between file size and image quality.
- Visual Inspection: Visually inspect the compressed image to ensure it meets your quality standards.
7.2. Upscaling Images
Increasing the size of an image (upscaling) can result in blurry and pixelated results.
- Original Size: Always start with an image that is at least as large as the desired display size.
- AI Upscaling: If upscaling is necessary, use AI-powered tools like Luminar Neo’s AI Upscaler to minimize quality loss.
7.3. Ignoring File Format
Using the wrong file format can result in larger file sizes and poor image quality.
- Format Selection: Choose the appropriate file format based on the image content and intended use (JPEG for photographs, PNG for graphics).
- Format Conversion: Convert images to the optimal format using image editing software or online tools.
7.4. Neglecting Metadata
Leaving unnecessary metadata in images can increase file size.
- Metadata Removal: Remove unnecessary metadata using image editing software or online tools.
- EXIF Data: Strip EXIF data to reduce file size.
8. Conclusion: Mastering the Art of Making Photos Smaller in File Size
Mastering the art of reducing the MB of a photo involves understanding the principles of image compression, utilizing the right tools and techniques, and avoiding common mistakes. By following this comprehensive guide, you can optimize your images for various platforms while maintaining exceptional quality.
Visit dfphoto.net for more resources, tutorials, and inspiration to enhance your photography skills and explore the art of visual storytelling. Discover our extensive collection of stunning photographs and connect with a vibrant community of photographers. Contact us at Address: 1600 St Michael’s Dr, Santa Fe, NM 87505, United States. Phone: +1 (505) 471-6001. Website: dfphoto.net.
9. FAQ
9.1. How to make a picture file smaller?
To make a picture file smaller, use image editing software like Photoshop, GIMP, or Luminar Neo to adjust the image dimensions, resolution, and compression settings. Additionally, you can use online tools like TinyPNG or JPEG-Optimizer to compress the image further.
9.2. How to reduce the size of a photo on iPhone?
You can reduce the size of a photo on your iPhone by using the built-in Photos app to crop and resize the image. Additionally, you can adjust your camera settings to capture photos in a more compressed format like HEIC.
9.3. How to reduce image file size on Mac?
On a Mac, you can use the Preview app to reduce image file size. Open the image in Preview, go to Tools, select Adjust Size, and then reduce the size or resolution.
9.4. How to reduce image file size in Photoshop?
To reduce image file size in Photoshop, open your image, then select File > Export > Save for Web (Legacy). Adjust the image dimensions, quality, and file format to minimize file size while maintaining acceptable image quality.
9.5. How to reduce image file size on Android?
You can reduce image file size on Android by using built-in photo editing tools to crop and resize the image. Alternatively, you can use third-party apps like Photo Compress & Resize from the Google Play Store.
9.6. How to reduce image file size for a website?
To reduce image file size for a website, use image editing software or online tools to compress the image, resize it to the required dimensions, and choose the appropriate file format (JPEG for photographs, PNG for graphics). Also, consider using progressive JPEGs or WebP format for better performance.
9.7. What is the best file format for reducing image size?
The best file format for reducing image size depends on the type of image. JPEG is generally best for photographs, as it uses lossy compression to significantly reduce file size while maintaining acceptable image quality. PNG is better for graphics, logos, and images with transparency, as it uses lossless compression to preserve image detail.
9.8. How does image resolution affect file size?
Image resolution, measured in dots per inch (DPI), directly affects file size. Higher resolution images contain more data and thus have larger file sizes. Reducing the resolution of an image decreases the amount of data it contains, resulting in a smaller file size.
9.9. Can I reduce image size without losing quality?
Yes, you can reduce image size without losing quality by using lossless compression techniques, such as saving images in PNG format or using online tools that offer lossless compression. Additionally, resizing the image to smaller dimensions while maintaining the same aspect ratio can reduce file size without sacrificing visual quality.
9.10. What are the best online tools for reducing image size?
Some of the best online tools for reducing image size include TinyPNG, JPEG-Optimizer, and CompressJPEG. These tools use smart compression algorithms to reduce file size while minimizing quality loss.