Reducing the file size of your photos is crucial for various reasons, from speeding up website loading times to saving storage space on your devices. The primary method to achieve this is through image compression. Most image editing software offers this feature during the “Save As” or “Export As” process for common formats like PNG, JPG, and GIF. Higher compression leads to smaller file sizes, which in turn makes web pages load faster.
Before you begin, deciding on the right file format is the first step. For photographs with a wide array of colors or illustrations featuring smooth gradients, JPEG (JPG) is generally the most efficient choice for reducing file size. If you need lossless compression or transparent backgrounds for similar images, PNG-24 is necessary. For simpler graphics with limited colors and solid blocks, GIF or PNG-8 formats are ideal. Let’s explore how to optimize compression for each of these file types, starting with JPEG. Instructions for PNG and GIF compression are detailed further down.
Understanding JPG Compression
Compressing a JPG image is straightforward, primarily revolving around adjusting the image quality. When exporting as a JPG from an image editor, you’ll encounter quality settings. These might be presented as presets (low, medium, high, maximum), a numerical scale (e.g., 0-12), or a percentage (0-100%). The key principle is to select the lowest quality setting that still meets your visual requirements.
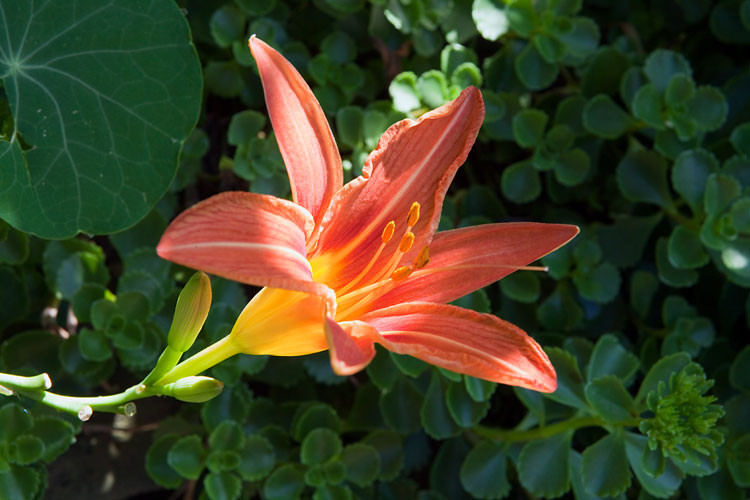
A practical approach is to start with a high-quality setting. If the result looks acceptable, gradually decrease the quality and check the image again. Continue reducing quality until you notice an unacceptable level of degradation, then revert to the last acceptable setting. Always consider the intended use of the image. For botanical encyclopedia submissions, high quality is paramount to preserve minute details. However, for casual spring flower photos, lower quality is usually sufficient. Let’s examine a flower photo excerpt saved at six different quality levels to illustrate this.
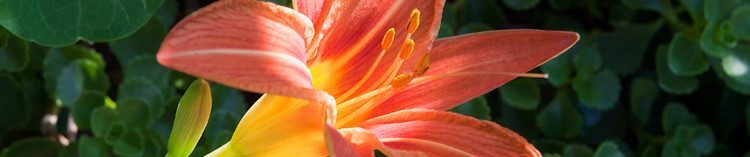
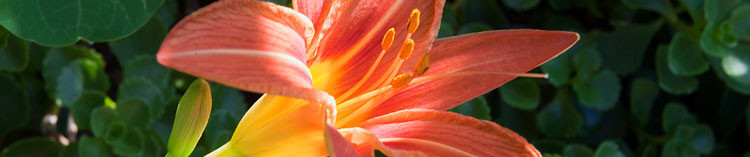
100% Quality, 103 KB File Size
This image, saved at 100% quality, demonstrates unnecessarily high fidelity for most web uses.
 Daylily flower and buds at 100% quality
80% Quality, 48 KB File Size
At 80% quality, the image remains virtually indistinguishable from the 100% version, yet the file size is significantly reduced.
 Daylily flower and buds at 80% quality
60% Quality, 28 KB File Size
Even at 60% quality, most viewers would perceive no difference from the 100% version, while the file size is quartered, leading to four times faster loading.
 Daylily flower and buds at 60% quality
40% Quality, 17 KB File Size
For many common applications, 40% quality is perfectly adequate, offering five times faster loading than the original.
 Daylily flower and buds at 40% quality
20% Quality, 12 KB File Size
Image quality starts to degrade noticeably at 20%.
 Daylily flower and buds at 20% quality
0% Quality, 7 KB File Size
Extreme JPG compression at 0% results in significant blockiness and poor image quality.
 Daylily flower and buds at 0% quality
Example image from FCIT’s stock plant photo collection on the ClipPix ETC website.
Another technique to reduce JPG file size involves subtly blurring the image before compression. Images with fewer sharp lines and fine details compress more efficiently. This is particularly useful for background images. You can selectively blur parts of an image to achieve file size reductions. Consider a day lily photo with a distracting background. At 60% JPG quality, the file size is 77 KB.
 Day lily flower with sharp background
By selectively blurring the background in an image editor like Photoshop, while keeping the flower sharp, and exporting at the same 60% quality, the file size drops to just 54 KB – roughly a 30% reduction for faster loading. This method enhances the photo aesthetically by emphasizing the flower and simultaneously reduces file size—a beneficial outcome on both fronts.
 Day lily flower with blurred background
A crucial point about JPG is its lossy nature. Each time you save a JPG, you lose some image quality. If you anticipate future use or edits, always save your original in a lossless format like TIFF or PSD. Export to JPG only for final web use. Avoid repeatedly saving a JPG over itself, as this cumulative loss degrades quality, similar to photocopying a photocopy. Always revert to your original, uncompressed file for editing.
Optimizing GIF Compression
GIFs are traditionally favored for graphics with simple shapes and limited color palettes. PNG-8 now offers comparable results with often smaller file sizes.
GIF images are limited to 256 colors, but reducing the color depth can significantly decrease file size. For optimal results, aim for color counts near powers of two: 256, 128, 64, 32, 16, 8, 4, or 2. For instance, reducing a 33-color image to 32 colors yields substantial file size savings, whereas decreasing from 32 to 31 colors provides minimal benefit.
Refer to “What is bit depth?” for detailed information and visual examples on color depth.
When saving or exporting as GIF, first, choose the desired number of colors. Second, if gradients exhibit “banding,” consider if GIF is the appropriate format. Dithering, especially “diffusion” dithering, can mitigate banding. Third, if transparency is needed, ensure the “transparent” option is selected.
Settings like “Web snap” can generally be ignored as they are remnants from older display technologies. The “Matte” setting, once useful for blending transparent GIF edges with backgrounds, is less critical now; PNG might be a better alternative if edge blending is problematic.
GIF remains a classic choice for animated images, though PNG is increasingly capable in this area too.
 Animated dancing robot GIF
Example graphic from FCIT’s robot illustration collection on the TIM website.
Mastering PNG Compression
PNG, while last in this discussion, is not least important. It combines attributes of both JPG and GIF and is gaining popularity, potentially surpassing JPG and GIF in web usage. While seemingly complex initially, mastering PNG is valuable for regular web graphic creation.
The primary decision with PNG is choosing between PNG-8 and PNG-24. PNG-8 is akin to GIF, best suited for graphics with few colors and solid areas like logos. PNG-8 typically yields smaller file sizes than GIF. PNG-24 resembles JPG, ideal for continuous-tone images like photos or images with over 256 colors. PNG-24 is lossless, resulting in larger files than JPG but superior quality.
Exporting as PNG-8: The export interface for PNG-8 is similar to GIF, requiring you to select the number of colors (2, 4, 8, 16, 32, 64, 128, or 256), dithering options, and transparency needs. The main advantage of PNG-8 over GIF is its typically smaller file size.
Here’s a cartoon saved as a 32-color GIF with a file size of 13.6 KB.
 Cartoon saved as GIF format
The same cartoon, exported as a 32-color PNG with identical settings, results in a 10.2 KB file – a 25% file size reduction.
Cartoon saved as PNG format
Example graphic from FCIT’s tech cartoon collection on the TIM website.
Exporting as PNG-24: PNG-24 is a lossless format, offering no quality settings during export as no image data is discarded. This lossless nature leads to potentially large file sizes.
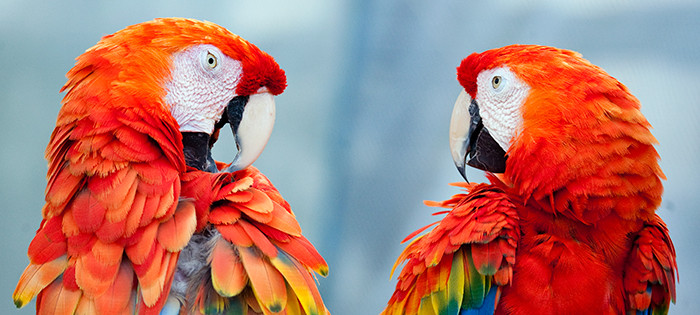
A macaw photo exported as PNG-24 has a file size of 400 KB, which is considerably large.
 Scarlet macaws photo saved as PNG-24
The same photo as a JPG at maximum (100%) quality is 259 KB.
 Scarlet macaws photo saved as maximum quality JPG
And at high (60%) JPG quality, the file size is only 69 KB.
 Scarlet macaws photo saved as high quality JPG
Example image from FCIT’s stock animal photo collection on the ClipPix ETC website.
Why choose PNG-24 over a much smaller JPG? Several reasons justify using PNG-24 despite its larger file size:
- Transparency: PNG is essential for images requiring transparency, as JPG does not support it.
- Lossless Quality: PNG-24 retains image integrity without loss, unlike JPG which degrades quality even at maximum settings over time.
- Image Clarity: For images demanding absolute clarity without JPG artifacts, such as screenshots with fine text, PNG is superior. JPG compression can blur small text, while PNG reproduces it pixel-perfectly.
Further Reading:
What is the difference between bitmap and vector images?
What is bit depth?