Are you looking to retrieve deleted photos from Google Drive? At dfphoto.net, we understand the panic of accidentally deleting precious memories. This guide provides effective methods to recover your lost photos, whether recently deleted or permanently removed. We’ll explore various techniques, from checking the Trash folder to utilizing data recovery software and contacting Google Support. Let’s delve into the world of photo recovery, cloud storage recovery, and file restoration, so you can get back to your photography passion with peace of mind.
1. Understanding Google Drive’s Photo Deletion and Recovery
Before diving into recovery methods, it’s essential to understand how Google Drive handles deleted photos. This knowledge can significantly impact your recovery strategy and increase your chances of success.
1.1 How Google Drive Handles Deleted Photos
When you delete a photo from Google Drive, it doesn’t immediately vanish. Instead, it’s moved to the “Trash” folder. This is similar to the Recycle Bin on Windows or the Trash on macOS. This temporary storage provides a safety net, allowing you to recover the photo if you change your mind or accidentally delete it.
According to Google Drive Help, files in the Trash are automatically deleted permanently after 30 days. This means you have a 30-day window to recover deleted photos from the Trash before they are gone forever.
1.2 What Happens After 30 Days?
Once the 30-day period has passed, Google Drive permanently deletes the photos from the Trash. At this point, the photos are no longer directly accessible through the Google Drive interface.
However, this doesn’t necessarily mean the photos are unrecoverable. As we’ll explore later, there are still methods you can try, such as contacting Google Support or using data recovery software. But it’s crucial to act quickly, as the chances of successful recovery decrease over time.
1.3 Impact of Syncing on Photo Deletion
If you use Google Drive’s sync feature, deleting a photo on one device will also delete it on all other synced devices. This can be convenient for managing your files across multiple devices, but it also means that accidentally deleting a photo on one device can lead to its deletion everywhere.
To prevent accidental data loss, it’s essential to be cautious when deleting photos and to understand how syncing works. Regularly backing up your photos to an external hard drive or another cloud storage service can also provide an extra layer of protection.
2. Initial Steps: Checking the Obvious Places
Before resorting to more advanced recovery methods, it’s always best to start with the simplest solutions. These initial steps can often resolve the issue quickly and easily.
2.1 Examining the Google Drive Trash Folder
The first place to look for deleted photos is the Google Drive Trash folder. This is where deleted files are temporarily stored before being permanently deleted.
How to Access the Trash Folder:
- Open Google Drive in your web browser.
- In the left-hand menu, click on “Trash.”
- Browse through the files in the Trash folder to find your deleted photos.
Restoring Photos from the Trash:
- Select the photo(s) you want to restore.
- Right-click on the selected photo(s) and choose “Restore.”
- The restored photos will be moved back to their original location in Google Drive.
Alt text: Restoring a photo from the Google Drive Trash folder by right-clicking and selecting “Restore”.
2.2 Checking Synced Devices and Folders
If you use Google Drive’s sync feature, the deleted photo might still be present on one of your synced devices. Check the Google Drive folder on your computer, phone, or tablet to see if the photo is still there.
Steps to Check Synced Devices:
- Open the Google Drive folder on each of your synced devices.
- Look for the deleted photo in its original location.
- If you find the photo, copy it to a safe location to prevent accidental deletion.
2.3 Exploring Shared Drives
If the deleted photo was located in a shared drive, check with the other members of the shared drive to see if they still have a copy of the photo. They might have downloaded it or saved it to another location.
How to Check Shared Drives:
- Open Google Drive in your web browser.
- In the left-hand menu, click on “Shared drives.”
- Browse through the shared drives to find the deleted photo.
- Contact the other members of the shared drive to inquire about the photo.
3. Advanced Recovery Methods for Permanently Deleted Photos
If the initial steps didn’t yield results, don’t despair. There are still several advanced methods you can try to recover permanently deleted photos from Google Drive.
3.1 Utilizing Data Recovery Software
Data recovery software can scan your computer’s hard drive or storage device for deleted files, including photos that were synced with Google Drive. This method is most effective if you have Google Drive’s sync feature enabled and the deleted photo was stored on your computer.
How Data Recovery Software Works:
Data recovery software works by searching for file signatures and data fragments that remain on your hard drive after a file has been deleted. Even though the file is no longer visible in the file system, the data may still be present until it is overwritten by new data.
Recommended Data Recovery Software:
- Recuva: A free and easy-to-use data recovery tool for Windows.
- EaseUS Data Recovery Wizard: A powerful data recovery tool for Windows and macOS.
- Stellar Data Recovery: A comprehensive data recovery tool for Windows and macOS.
- Disk Drill: A user-friendly data recovery tool for macOS.
Steps to Use Data Recovery Software:
- Download and install the data recovery software of your choice.
- Select the drive or folder where Google Drive syncs your files.
- Start the scan and wait for the software to find deleted files.
- Preview the recovered files to find your deleted photos.
- Select the photos you want to recover and save them to a safe location.
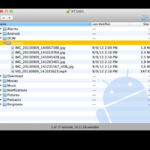
Alt text: Selecting the Google Drive folder location in data recovery software to scan for lost photo files.
3.2 Contacting Google Drive Support
If you’ve exhausted all other options, you can try contacting Google Drive Support for assistance. While they may not be able to guarantee recovery, they might have access to tools or resources that can help.
How to Contact Google Drive Support:
- Open Google Drive in your web browser.
- Click on the “?” icon in the top right corner.
- Click on “Help.”
- Search for “recover deleted files” and follow the prompts to contact Google Support.
Information to Provide to Google Support:
- Your Google account information.
- The name and type of the deleted photos.
- The date and time when the photos were deleted.
- Any other relevant information that might help them locate the photos.
Alt text: Filling out the Google Drive feedback form to request assistance with recovering permanently deleted photos.
3.3 Checking Google Vault (For Google Workspace Users)
If you use Google Workspace (formerly G Suite) for your business or organization, your administrator might have enabled Google Vault. Google Vault is a data retention and eDiscovery tool that can preserve, search, and export your organization’s Google Workspace data, including Google Drive files.
How to Check Google Vault:
- Contact your Google Workspace administrator.
- Ask them to check if Google Vault is enabled for your organization.
- If it is, ask them to search for the deleted photos in Google Vault.
- If the photos are found, your administrator can restore them to your Google Drive account.
3.4 File History (Windows) or Time Machine (macOS)
If you have enabled File History on Windows or Time Machine on macOS, you might be able to recover previous versions of your Google Drive folder that contain the deleted photos.
How to Use File History (Windows):
- Open File Explorer and navigate to the Google Drive folder.
- Right-click on the folder and choose “Restore previous versions.”
- Select a previous version of the folder from a date before the photos were deleted.
- Click on “Restore” to restore the folder and its contents.
How to Use Time Machine (macOS):
- Open Time Machine from the menu bar or the Applications folder.
- Navigate to the Google Drive folder.
- Use the timeline to select a backup from a date before the photos were deleted.
- Select the photos you want to restore and click on “Restore.”
4. Prevention is Better Than Cure: Backing Up Your Photos
While the above methods can help you recover deleted photos, the best approach is to prevent data loss in the first place. Regularly backing up your photos is crucial for protecting your precious memories.
4.1 Using Google Backup and Sync
Google Backup and Sync is a tool that allows you to automatically back up files from your computer to Google Drive. This can be a convenient way to protect your photos from accidental deletion or hardware failure.
How to Use Google Backup and Sync:
- Download and install Google Backup and Sync on your computer.
- Sign in with your Google account.
- Choose the folders you want to back up to Google Drive, including your photo folders.
- Google Backup and Sync will automatically back up your files to Google Drive.
Alt text: Setting up Google Backup and Sync to automatically back up photo folders to Google Drive.
4.2 Third-Party Backup Solutions
In addition to Google Backup and Sync, there are many third-party backup solutions that you can use to protect your photos. These solutions often offer more advanced features, such as incremental backups, versioning, and encryption.
Recommended Third-Party Backup Solutions:
- Backblaze: An online backup service that provides unlimited storage for a fixed price.
- Carbonite: Another popular online backup service with a variety of plans to choose from.
- Acronis Cyber Protect Home Office: A comprehensive backup solution that includes ransomware protection and other security features.
4.3 Local Backups to External Hard Drives
While cloud backups are convenient, it’s also a good idea to create local backups of your photos to an external hard drive. This provides an extra layer of protection in case of internet outages or cloud service disruptions.
How to Create Local Backups:
- Connect an external hard drive to your computer.
- Copy your photo folders to the external hard drive.
- Regularly update the backup to ensure that you have the latest versions of your photos.
- Store the external hard drive in a safe location, away from your computer.
5. Understanding Google Drive’s Storage Policies and Limitations
Being aware of Google Drive’s storage policies and limitations can help you manage your photos more effectively and avoid data loss.
5.1 Storage Limits and Plans
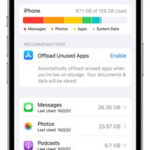
Google Drive offers a limited amount of free storage (15 GB) that is shared across Google Drive, Gmail, and Google Photos. If you need more storage, you can upgrade to a paid Google One plan.
Google One Plans:
| Plan | Storage | Price (USD/month) |
|---|---|---|
| Basic | 100 GB | $1.99 |
| Standard | 200 GB | $2.99 |
| Premium | 2 TB | $9.99 |
| 5 TB | 5 TB | $24.99 |
| 10 TB | 10 TB | $49.99 |
| 20 TB | 20 TB | $99.99 |
| 30 TB | 30 TB | $149.99 |
5.2 Impact of Exceeding Storage Limits
If you exceed your Google Drive storage limit, you won’t be able to upload new files, and you might experience issues with syncing and accessing your existing files. To avoid these issues, it’s essential to monitor your storage usage and upgrade to a larger plan if necessary.
5.3 Managing and Optimizing Storage Usage
To make the most of your Google Drive storage, you can try the following tips:
- Delete unnecessary files and folders.
- Compress large photos and videos.
- Convert files to Google Docs, Sheets, or Slides format, which take up less storage space.
- Empty the Trash folder regularly.
- Identify and delete large hidden files.
6. Advanced Tips for Protecting Your Photography on Google Drive
Beyond basic backups, there are advanced techniques to safeguard your photography workflow and data on Google Drive.
6.1 Versioning and Revision History
Google Drive automatically saves previous versions of your files, allowing you to revert to an earlier version if needed. This can be useful if you accidentally make changes to a photo or want to recover a previous edit.
How to Access Version History:
- Open the photo in Google Drive.
- Click on “File” > “Version history” > “See version history.”
- Select a previous version of the photo and click on “Restore this version.”
6.2 Using Google Drive for Collaboration and Sharing
Google Drive makes it easy to collaborate with other photographers and share your photos with clients. However, it’s essential to be aware of the sharing settings and permissions to protect your work from unauthorized access or modification.
Sharing Settings:
- Restricted: Only people with explicit access can open the photo.
- Anyone with the link: Anyone who has the link can open the photo.
- Public on the web: Anyone can find and open the photo.
Permissions:
- Viewer: Can only view the photo.
- Commenter: Can view and comment on the photo.
- Editor: Can view, comment, and edit the photo.
6.3 Watermarking and Copyright Protection
To protect your photos from unauthorized use, consider adding a watermark to them before uploading them to Google Drive. You can also include copyright information in the photo’s metadata.
How to Add a Watermark:
- Open the photo in a photo editing program like Adobe Photoshop or GIMP.
- Add a text or image watermark to the photo.
- Save the watermarked photo.
How to Add Copyright Information:
- Open the photo in a photo editing program.
- Go to “File” > “File Info” or “Properties.”
- Add copyright information to the “Copyright” or “Rights” field.
- Save the photo with the updated metadata.
7. Integrating Google Drive with Your Photography Workflow
Google Drive can be seamlessly integrated into your photography workflow, from shooting to editing to sharing.
7.1 Direct Upload from Camera or Phone
Many cameras and phones allow you to directly upload photos to Google Drive, making it easy to back up your photos on the go.
How to Enable Direct Upload:
- Check your camera or phone’s settings for Google Drive integration.
- Sign in with your Google account.
- Configure the upload settings to your liking.
7.2 Editing Photos Directly in Google Drive
Google Drive allows you to open and edit photos directly in compatible apps, such as Adobe Photoshop Express and Pixlr. This can be a convenient way to make quick edits without having to download the photos to your computer.
How to Edit Photos in Google Drive:
- Right-click on the photo in Google Drive.
- Choose “Open with” and select a compatible app.
- Edit the photo in the app and save your changes.
7.3 Creating Photo Albums and Presentations
Google Drive allows you to create photo albums and presentations to showcase your work. This can be a great way to share your photos with clients or promote your photography business.
How to Create a Photo Album:
- Create a new folder in Google Drive.
- Upload your photos to the folder.
- Share the folder with others and grant them viewing permissions.
How to Create a Presentation:
- Open Google Slides.
- Create a new presentation.
- Insert your photos into the slides.
- Add text and other elements to create a visually appealing presentation.
8. Addressing Common Issues and Errors
Even with the best practices in place, you might encounter issues or errors when using Google Drive to manage your photos. Here’s how to troubleshoot some common problems.
8.1 Syncing Problems and Solutions
If you’re experiencing syncing problems, try the following solutions:
- Check your internet connection.
- Restart Google Backup and Sync.
- Pause and resume syncing.
- Check your Google Drive storage usage.
- Update Google Backup and Sync to the latest version.
- Reinstall Google Backup and Sync.
8.2 Slow Upload and Download Speeds
If you’re experiencing slow upload and download speeds, try the following solutions:
- Check your internet connection speed.
- Close other applications that are using your internet bandwidth.
- Upload or download photos during off-peak hours.
- Compress large photos before uploading them.
- Upgrade to a faster internet plan.
8.3 File Corruption and Data Loss
If you suspect that your photos have been corrupted or lost, try the following solutions:
- Check the version history of the photos.
- Run a virus scan on your computer.
- Use data recovery software to scan your hard drive.
- Contact Google Drive Support for assistance.
9. Real-World Examples and Case Studies
Let’s look at some real-world examples and case studies of how photographers have successfully recovered deleted photos from Google Drive.
9.1 Case Study 1: Recovering Wedding Photos After Accidental Deletion
A wedding photographer accidentally deleted an entire folder of wedding photos from Google Drive. They were able to recover the photos by using data recovery software to scan their computer’s hard drive.
9.2 Case Study 2: Restoring Photos After a Google Drive Account Hack
A photographer’s Google Drive account was hacked, and all of their photos were deleted. They were able to restore the photos by contacting Google Drive Support and providing proof of ownership of the account.
9.3 Example: A Photographer Uses Google Vault to Recover Lost Client Photos
A photography studio using Google Workspace accidentally deleted a client’s portrait photos. The studio administrator used Google Vault to recover the photos and restore them to the client’s Google Drive folder.
10. The Future of Photo Storage and Recovery with Google Drive
As technology evolves, Google Drive will continue to improve its photo storage and recovery capabilities.
10.1 AI-Powered Recovery Tools
In the future, Google Drive might incorporate AI-powered recovery tools that can automatically identify and recover deleted photos based on their content and metadata.
10.2 Enhanced Versioning and Backup Options
Google Drive might also offer enhanced versioning and backup options that provide more granular control over how your photos are protected.
10.3 Deeper Integration with Photo Editing Software
Google Drive will likely continue to deepen its integration with photo editing software, allowing you to seamlessly edit and manage your photos directly within the cloud.
FAQ: Recovering Deleted Photos From Google Drive
Here are some frequently asked questions about recovering deleted photos from Google Drive:
1. Can I recover permanently deleted photos from Google Drive?
Yes, you can potentially recover permanently deleted photos from Google Drive using data recovery software, contacting Google Support, or checking Google Vault (for Google Workspace users).
2. How long does Google Drive keep deleted files?
Google Drive keeps deleted files in the Trash folder for 30 days. After 30 days, the files are permanently deleted.
3. Where do deleted photos go in Google Drive?
Deleted photos in Google Drive go to the “Trash” folder.
4. How do I restore photos from Google Drive Trash?
To restore photos from Google Drive Trash, open the Trash folder, select the photos you want to restore, right-click, and choose “Restore.”
5. Can I recover deleted photos from a shared drive?
Yes, if you have the necessary permissions, you can recover deleted photos from a shared drive by checking the shared drive’s Trash folder or contacting the other members of the shared drive.
6. What is Google Vault and how can it help me recover deleted photos?
Google Vault is a data retention and eDiscovery tool for Google Workspace users. It can preserve, search, and export your organization’s Google Workspace data, including Google Drive files. If your administrator has enabled Google Vault, they might be able to recover deleted photos from it.
7. How can data recovery software help me recover deleted photos from Google Drive?
Data recovery software can scan your computer’s hard drive or storage device for deleted files, including photos that were synced with Google Drive. This method is most effective if you have Google Drive’s sync feature enabled and the deleted photo was stored on your computer.
8. How do I contact Google Drive Support to recover deleted photos?
To contact Google Drive Support, open Google Drive in your web browser, click on the “?” icon in the top right corner, click on “Help,” search for “recover deleted files,” and follow the prompts to contact Google Support.
9. How can I prevent photo loss in Google Drive?
To prevent photo loss in Google Drive, use Google Backup and Sync, third-party backup solutions, create local backups to external hard drives, and be mindful of storage limits and sharing settings.
10. Is it possible to recover photos deleted due to account hacking?
Yes, it is possible. Contact Google Drive Support immediately with proof of account ownership. They may have tools to help restore your data. Additionally, check Google Vault if you are a Google Workspace user.
Losing photos can be a distressing experience, but with the right knowledge and tools, you can increase your chances of recovering them. At dfphoto.net, we’re committed to providing you with the information and resources you need to protect your precious memories.
Ready to explore more photography tips, discover stunning visuals, and connect with a vibrant community? Visit dfphoto.net today! Let’s inspire each other and elevate the art of photography together. At dfphoto.net, located at 1600 St Michael’s Dr, Santa Fe, NM 87505, United States, or call us at +1 (505) 471-6001.