Google Photos stands as a favorite for many, offering a secure haven to back up and cherish our photo memories. It’s a fantastic tool for freeing up device space and ensuring your photos are accessible across devices. However, the ease of digital life sometimes comes with accidental clicks, and deleting precious photos can happen to anyone. If you’re wondering How To Recover Deleted Photos From Google Photos, you’ve come to the right place. This comprehensive guide will walk you through effective methods to retrieve your lost memories swiftly and efficiently.
Understanding Google Photos and Photo Deletion
Before diving into recovery methods, let’s clarify how Google Photos handles deleted images. Understanding the process is key to a successful recovery.
What is Google Photos?
Google Photos is a photo and video sharing and storage service developed by Google. It allows users to back up photos and videos in the cloud, accessible from any device. Initially offering unlimited storage for “High quality” (now called “Storage Saver”) photos, it’s become a go-to platform for managing digital memories. It supports photos up to 16 megapixels and videos up to 1080p Full HD in its free tier.
Where Do Deleted Photos Go in Google Photos?
When you delete photos or videos from Google Photos, they aren’t immediately gone forever. Instead, they are moved to the Trash or Bin folder. This acts as a safety net, giving you a chance to recover items you didn’t intend to delete.
Photos and videos remain in the Trash for 60 days. After this period, Google Photos automatically and permanently deletes them from the Trash. This 60-day window is crucial for successful self-recovery.
Can You Recover Photos from Google Photos After 60 Days?
Yes, recovering photos after 60 days is possible, although it becomes more challenging and less guaranteed. While the photos are purged from your Trash after 60 days, there are still avenues to explore. These include contacting Google Support or utilizing specialized data recovery software. We’ll delve into these methods in detail further in this guide.
4 Proven Methods to Recover Deleted Photos from Google Photos
Numerous online resources claim to offer solutions for Google Photos recovery. However, not all methods are equally effective. To help you successfully restore deleted photos from Google Photos, we’ve compiled four reliable and trusted methods.
Method 1: Recovering Photos from Google Photos Trash
The first and most straightforward method is to restore photos directly from the Google Photos Trash. This method works effectively if the deletion occurred within the last 60 days. The process is similar across Android, iPhone, and Computer platforms.
Step-by-Step Guide for Android:
Step 1: Open the Google Photos app on your Android phone.
Step 2: Tap the Menu icon (three horizontal lines) usually located in the top left corner. Select Trash from the menu options.
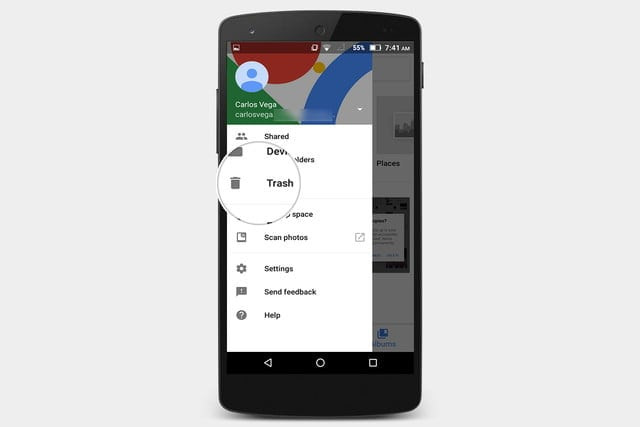 Accessing the trash folder from the menu in the Google Photos app on Android
Step 3: Browse through the photos in the Trash. Tap and hold on each photo you wish to recover to select them. You can select multiple photos at once.
Step 4: Once you’ve selected all desired photos, tap the Restore button at the bottom of the screen. The icon usually looks like a rounded arrow pointing upwards out of a tray.
The restored photos will be returned to their original location in your Google Photos library.
Step-by-Step Guide for iPhone:
The process on iPhone is nearly identical to Android.
Step 1: Launch the Google Photos app on your iPhone.
Step 2: Tap the Menu icon at the top left corner and select Trash.
 Accessing the trash folder from the menu in the Google Photos app on iPhone
Step 3: Touch and hold the photos you want to recover to select them.
Step 4: Tap Restore at the bottom of the screen to retrieve your selected photos.
Step-by-Step Guide for Computer:
You can also recover deleted photos from Google Photos Trash using a web browser on your computer.
Step 1: Go to photos.google.com in your web browser.
Step 2: Click on the Menu icon (three horizontal lines) on the top left.
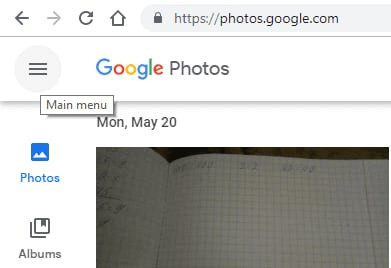 Accessing the menu on the Google Photos website
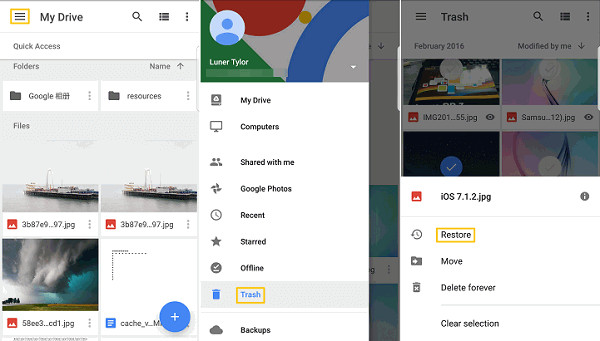
Step 3: Select Trash from the menu options.
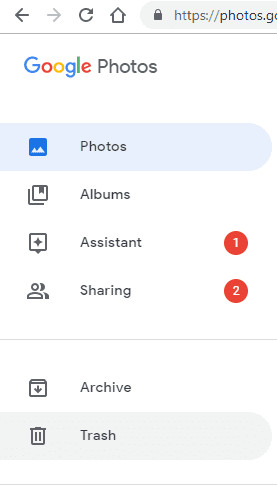 Selecting the trash option from the Google Photos menu
Step 4: Hover over the photo(s) you want to restore. A checkmark icon will appear in the top-left corner of each photo. Click the checkmark to select the photos. You can select multiple photos.
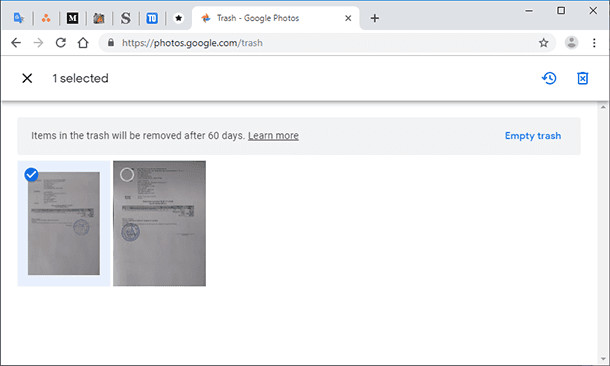 Selecting multiple photos to restore from the trash
Step 5: Once you’ve selected all the photos, click the Restore icon, which is a rounded arrow, usually located in the top right corner of the screen.
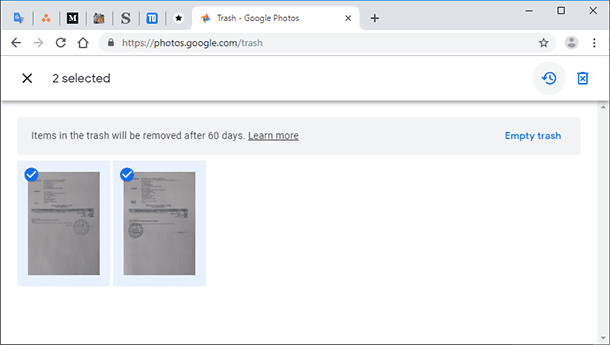 Restoring selected photos from the trash in Google Photos
The photos will be restored to their original albums within your Google Photos library.
Method 2: Recovering Photos from Your Computer’s Recycle Bin (If Applicable)
This method applies if you were managing Google Photos through desktop sync and have deleted photos from your computer’s synced folders. In this scenario, the deleted photos might be in your computer’s Recycle Bin (Windows) or Trash (Mac).
Step-by-Step Guide for Windows Recycle Bin:
Step 1: Double-click the Recycle Bin icon on your desktop to open it. If you can’t find it, search for “Recycle Bin” in the Windows search bar.
Step 2: Locate the deleted photos within the Recycle Bin. You can sort files by date deleted, size, or file type to help find your photos more efficiently. You can also use the search bar within the Recycle Bin to search for specific file names or types.
Step 3: Select the photo(s) you wish to restore. You can select multiple files by holding down the Ctrl key while clicking on each file.
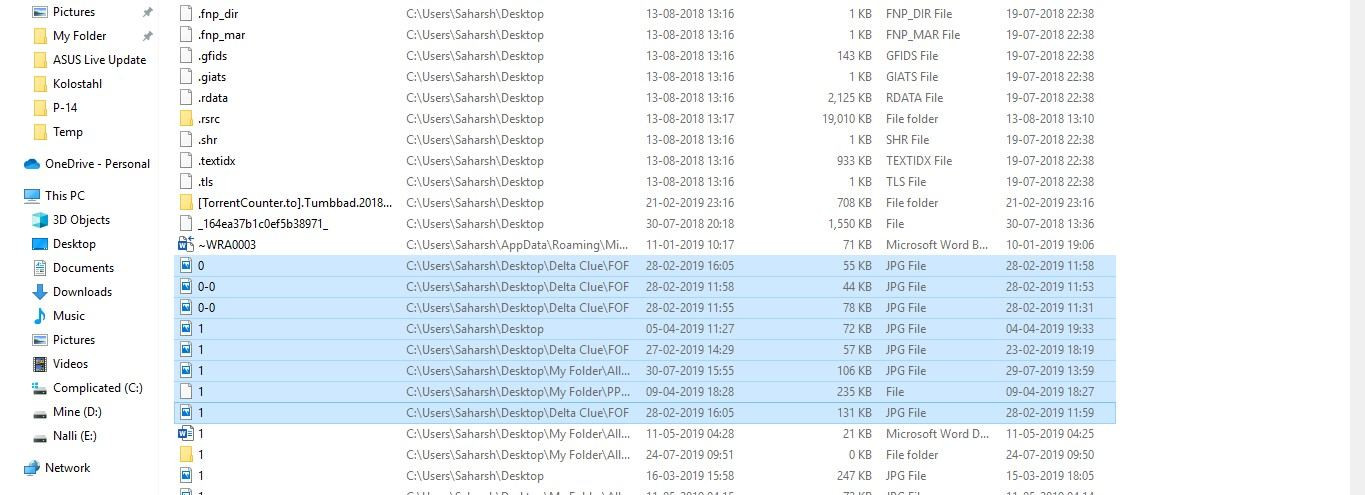 Selecting multiple photos from the Recycle Bin to restore
Step 4: Right-click on the selected photo(s) and choose Restore from the context menu.
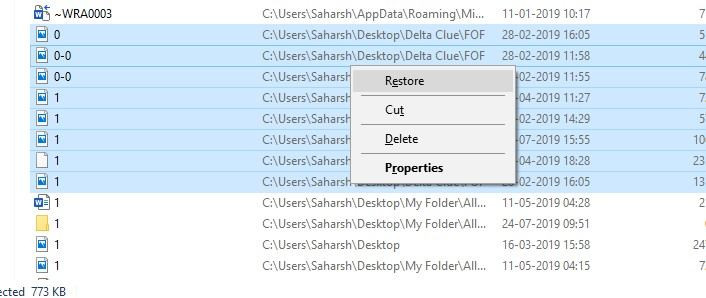 Right-clicking and choosing the restore option for selected photos in the Recycle Bin
The restored photos will be returned to their original folders on your computer. If these folders were synced with Google Photos, the photos should eventually reappear in your Google Photos library as well.
Method 3: Contacting Google Support for Recovery
If you’ve emptied the Trash or the 60-day period has passed, directly recovering photos through Google Photos interface becomes impossible. In such cases, contacting Google Support is a viable option, especially for recently permanently deleted photos.
Google may, in some instances, be able to assist with recovery for a limited period even after permanent deletion from the Trash. Anecdotal evidence suggests a potential 21-day window for recovery through support, but this is not officially guaranteed by Google and can depend on various factors.
Step-by-Step Guide to Contact Google Support:
Step 1: Navigate to the Google Drive Help page. Since Google Photos is linked to Google Drive storage, the Drive help section is often the relevant starting point. You can search for “Google Drive Help” or go directly to the Google Drive support website.
Step 2: Look for options related to “Missing or deleted files” or similar topics. The exact wording may vary, but aim to find help resources for file recovery.
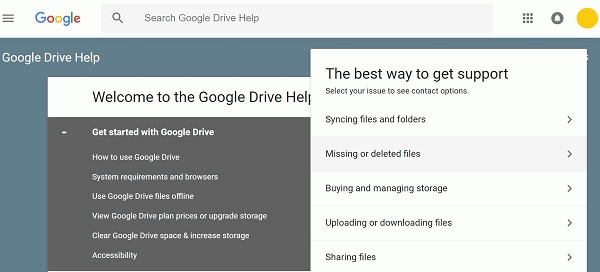 Selecting the missing or deleted files option from Google Drive Help
Step 3: You will typically be presented with options to contact support. Common options include “Request chat” or “Email support.” Choose the option that suits you best. Chat support usually provides faster responses.
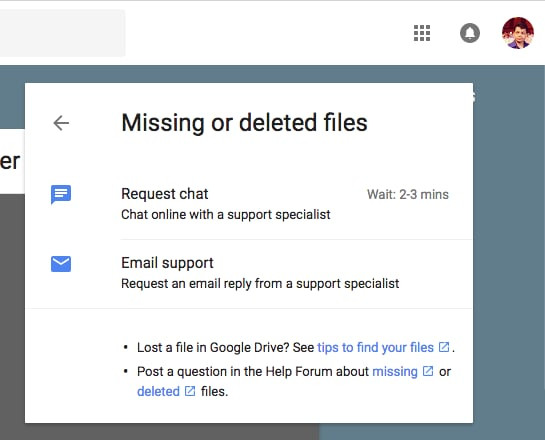 Choosing between chat support and email support for Google Drive
Step 4: When contacting support, clearly explain your situation. State that you accidentally permanently deleted photos from Google Photos and need assistance with recovery. Provide as much detail as possible, including dates of deletion if you remember them.
Google Support will review your request. If they determine recovery is possible from their backend systems, they will guide you through the necessary steps. Keep in mind that recovery through Google Support is not guaranteed and depends on their data retention policies and the specific circumstances of your deletion.
Method 4: Utilizing Data Recovery Software
For situations where photos are permanently deleted from Google Photos Trash and beyond Google Support’s recovery window, or if you want to attempt recovery from local storage devices, data recovery software can be a powerful tool.
Wondershare Recoverit is a reputable data recovery software known for its effectiveness in retrieving deleted files, including photos, from various storage devices like hard drives, SSDs, USB drives, and SD cards.
Step-by-Step Guide Using Wondershare Recoverit:
Step 1: Download and Install Wondershare Recoverit on your computer. You can download the software from the official Wondershare website.
Step 2: Launch Recoverit and select the drive or location where you believe the deleted photos were originally stored. If you synced Google Photos to a specific folder on your computer’s hard drive, select that drive. If you are trying to recover photos from an external device like an SD card from your phone, connect it to your computer and select the external device in Recoverit. Click Start to begin the scan.
 Selecting a drive or location to start the photo recovery process in Recoverit
Step 3: Recoverit will initiate a scanning process on the selected location to find deleted files, including photos. The scan duration depends on the size of the drive and the amount of data.
 The scanning process in progress to find deleted Google Photos using Recoverit
Step 4: Once the scan is complete, Recoverit will display a list of recoverable files. You can preview the found photos to verify they are the ones you want to recover. Select the photos you need and click the Recover button.
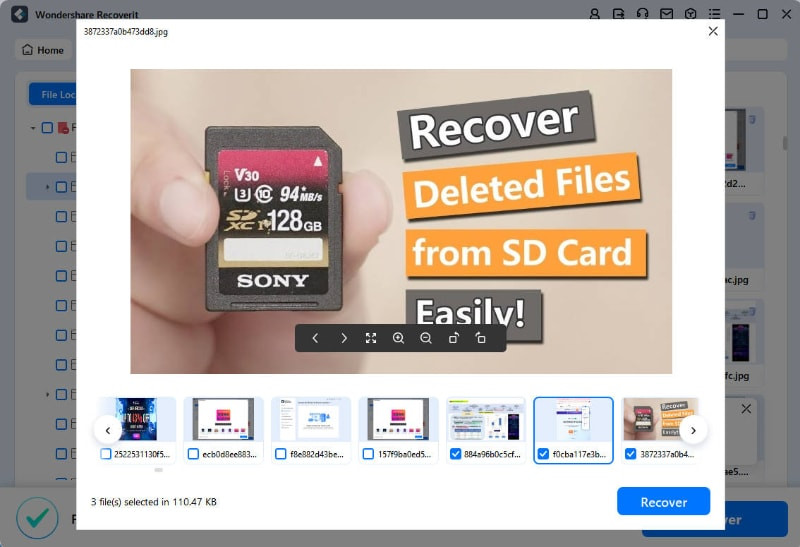 Previewing and selecting photos to recover using Recoverit
Step 5: Choose a safe location to save the recovered photos. It’s crucial to select a different drive or external storage device than the one you are recovering from to avoid overwriting data and potentially hindering further recovery.
Wondershare Recoverit and similar data recovery software can be effective in recovering permanently deleted photos, especially if the data hasn’t been overwritten. However, the success rate can vary depending on factors like how long ago the deletion occurred and the activity on the storage device since then.
Bonus Tips for Google Photos Recovery and Prevention
Recovering deleted photos can be stressful. Here are some bonus tips to enhance your chances of successful recovery and prevent future data loss:
- Act Quickly: The sooner you realize photos are deleted and begin the recovery process, the higher your chances of success, especially when recovering from the Trash.
- Regular Backups: Beyond Google Photos, consider setting up additional backups of your important photos to other cloud services or external hard drives. Redundancy is key to data safety.
- Double-Check Before Deleting: Before deleting photos, especially in bulk, take a moment to review your selections and ensure you are deleting only what you intend to.
- Understand Sync Settings: If you are syncing Google Photos with your computer, understand how deletions are handled across devices to avoid unintended permanent deletions.
- Explore Google Photos Archive: In rare cases, photos might be archived rather than deleted. Check your Google Photos Archive (get.google.com/albumarchive) to see if your missing photos are there.
- Check Google Drive: Google Photos is integrated with Google Drive. While photos are primarily managed in the Photos interface, in some cases, checking your Google Drive (drive.google.com) might reveal remnants or backups.
FAQs About Google Photos Recovery
1. How do I download all photos from Google Photos?
To download all photos:
- Go to photos.google.com on your computer.
- Select all photos (you might need to scroll down and load all, then use Shift+click to select a range or use browser extensions for bulk selection).
- Click the three vertical dots (More options) and select “Download.”
- Google will create a zip file of your photos for download.
2. Do photos stay on Google Photos if deleted from my phone?
Yes, if you delete photos from the Google Photos app on your phone, they are moved to the Google Photos Trash and remain there for 60 days, provided backup and sync is enabled. They are not permanently deleted immediately from Google Photos when deleted from your phone.
3. How do I retrieve my pictures from Google?
To retrieve pictures:
- Go to photos.google.com or open the Google Photos app.
- Open the menu and select “Trash.”
- Choose the photos you want to retrieve.
- Click “Restore.”
4. Is it safe to keep photos in Google Photos?
Yes, Google Photos is generally considered safe for storing photos. Google employs robust security measures to protect user data. However, as with any cloud service, it’s wise to use strong passwords and be mindful of your account security.
5. Tips for Recovering Google Photos?
- Check the Google Photos Trash first.
- Restore from your computer’s Recycle Bin if applicable.
- Explore the Google Photos Archive.
- Use data recovery software for deeper scans.
- Contact Google Support if other methods fail.
- Check Google Drive.
The Bottom Line: Recovering Your Memories
Knowing how to recover deleted photos from Google Photos is essential for anyone using the platform. While the 60-day Trash period offers a straightforward recovery window, options exist even after permanent deletion. By understanding these methods and acting promptly, you significantly increase your chances of retrieving your precious photo memories. Remember to implement preventative measures like regular backups to safeguard your digital legacy for the future.