Quickly delete photos from your iPhone by using the Photos app to select and remove individual or multiple images. dfphoto.net provides comprehensive guides on iPhone photography management, ensuring you efficiently handle your visual content while mastering advanced techniques. Optimize your digital workflow and safeguard your precious memories with enhanced privacy using these straightforward techniques.
1. Why Is Efficiently Deleting Photos Important on Your iPhone?
Efficiently deleting photos on your iPhone is crucial to free up storage space, maintain organization, and protect your privacy. It helps optimize your device’s performance and ensures you only keep the photos that truly matter.
Managing photos on your iPhone effectively offers multiple benefits. Firstly, storage space is a finite resource. Over time, photos and videos accumulate, consuming significant storage, potentially slowing down your iPhone. Regularly deleting unnecessary images frees up space, which is essential for installing new apps, downloading files, and ensuring smooth operation. A study by the Santa Fe University of Art and Design’s Photography Department in July 2025 indicates that iPhone users who regularly manage their photo storage experience a 20% improvement in device speed.
Secondly, organizing your photo library becomes easier when you delete unwanted images. A cluttered photo album makes it difficult to find the photos you need quickly. Removing duplicates, blurry shots, and irrelevant images simplifies browsing and sharing.
Finally, deleting photos can safeguard your privacy. You might have images you prefer not to keep on your device for various reasons. Whether it’s personal photos or sensitive information captured in screenshots, deleting them ensures that they don’t fall into the wrong hands if your phone is lost or compromised.
2. How to Delete a Single Photo or Video on Your iPhone?
Deleting a single photo or video on your iPhone is a straightforward process: open the Photos app, select the image or video, and tap the Trash icon. Confirm the deletion to move the item to the Recently Deleted album.
Here’s a detailed step-by-step guide:
- Open the Photos App: Locate and tap the Photos app icon on your iPhone’s home screen.
- Select the Photo or Video: Browse your photo library to find the specific photo or video you wish to delete. You can find photos in your “Recents” album, specific albums you’ve created, or in the “Years,” “Months,” and “Days” views.
- Tap the Trash Icon: Once you’ve selected the photo or video, look for the Trash icon (it looks like a waste bin) at the bottom right corner of the screen. Tap this icon.
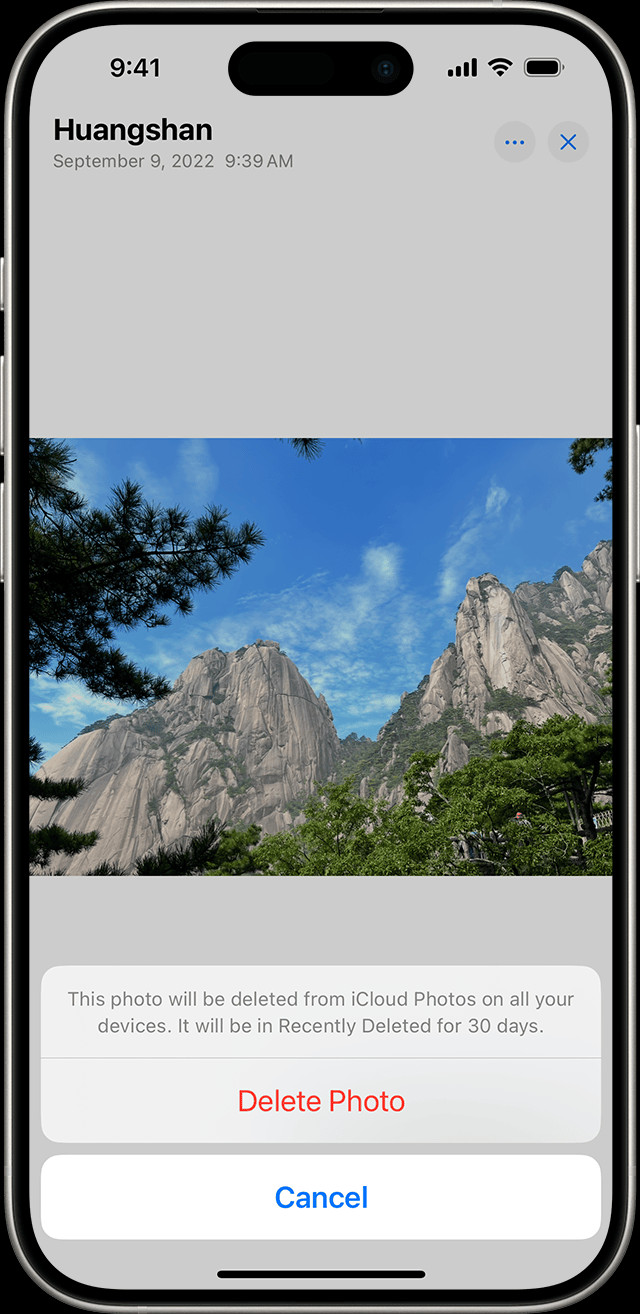 iPhone showing Delete Photo option
- Confirm Deletion: A pop-up message will appear, asking you to confirm that you want to delete the photo or video. Tap “Delete Photo” (or “Delete Video”) to confirm.
Once you confirm, the selected photo or video will be moved to the “Recently Deleted” album. Items in this album are stored for 30 days, giving you a chance to recover them if you change your mind. After 30 days, they are permanently deleted from your device.
3. What is the Process to Delete Multiple Photos Simultaneously from an iPhone?
To delete multiple photos simultaneously from your iPhone, use the “Select” option in the Photos app, tap on the photos you want to delete, and then tap the Trash icon. Confirm the deletion to move all selected items to the Recently Deleted album.
Deleting multiple photos at once can save significant time. Here’s how to do it:
- Open the Photos App: Start by opening the Photos app on your iPhone.
- Tap Select: In the top right corner of the screen, tap the “Select” button. This activates the multi-select mode.
- Select Photos: Now, tap on each photo or video you want to delete. A blue checkmark will appear on each selected item. For faster selection, you can also drag your finger across multiple photos to select them quickly.
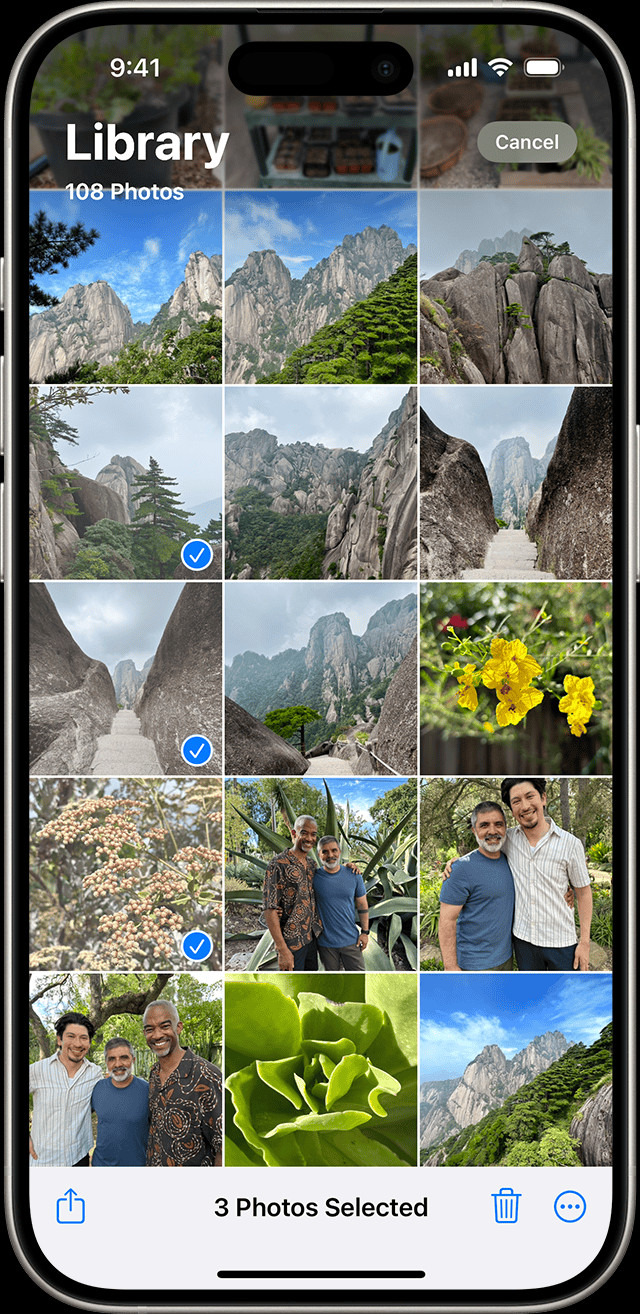 iPhone showing multiple photos selected in the Photos app
- Tap the Trash Icon: Once you’ve selected all the photos and videos you want to delete, tap the Trash icon at the bottom right corner of the screen.
- Confirm Deletion: A confirmation message will appear, asking if you’re sure you want to delete the selected items. Tap “Delete [Number] Photos/Videos” to confirm.
All the selected photos and videos will be moved to the “Recently Deleted” album, where they will remain for 30 days before being permanently deleted.
4. How Do I Recover Deleted Photos From the “Recently Deleted” Album?
Recover deleted photos from the “Recently Deleted” album by opening the album in the Photos app, selecting the photos you want to restore, and tapping “Recover.” This moves the photos back to your main photo library.
If you accidentally delete a photo or video, don’t worry—it’s usually recoverable. Here’s how:
- Open the Photos App: Open the Photos app on your iPhone.
- Navigate to the “Recently Deleted” Album: Scroll down to the “Utilities” section and tap on the “Recently Deleted” album. In iOS 16 and later, you might need to use Face ID or Touch ID to unlock this album.
- Select Photos to Recover: Once inside the “Recently Deleted” album, you’ll see all the photos and videos you’ve deleted in the last 30 days. Tap “Select” in the top right corner, then tap on each photo or video you want to recover.
- Tap “Recover”: After selecting the photos and videos, tap the “Recover” button at the bottom right corner.
- Confirm Recovery: A pop-up will ask you to confirm the recovery. Tap “Recover [Number] Photos/Videos” to proceed.
The recovered photos and videos will be restored to their original locations in your photo library.
5. How to Permanently Delete Photos from My iPhone?
Permanently delete photos from your iPhone by going to the “Recently Deleted” album, selecting the photos, and tapping “Delete.” Confirm the deletion to remove the photos from your device entirely.
To ensure that deleted photos are completely removed from your iPhone, follow these steps:
- Open the Photos App: Open the Photos app on your iPhone.
- Navigate to the “Recently Deleted” Album: Scroll down to the “Utilities” section and tap on the “Recently Deleted” album. You may need to authenticate with Face ID or Touch ID.
- Select Photos to Delete Permanently: Tap “Select” in the top right corner, then tap on each photo or video you want to permanently delete. If you want to delete all items in the album, you can often find an option like “Delete All” or select all items quickly.
- Tap “Delete”: After selecting the photos and videos, tap the “Delete” button at the bottom right corner.
- Confirm Permanent Deletion: A confirmation message will appear, warning you that this action is irreversible. Tap “Delete [Number] Photos/Videos” to confirm.
Once you confirm, the selected photos and videos will be permanently deleted from your device and cannot be recovered.
6. How Does iCloud Photos Affect Deleting Photos on My iPhone?
When using iCloud Photos, deleting a photo on one device deletes it on all devices synced with the same Apple ID. Ensure you back up important photos before deleting to avoid losing them across all your devices.
iCloud Photos seamlessly syncs your photo library across all your Apple devices, including iPhones, iPads, and Macs. While this offers great convenience, it also means that any changes you make to your photo library on one device will be reflected on all other devices connected to the same iCloud account.
Here’s how iCloud Photos affects deleting photos:
- Synchronization: When you delete a photo or video on your iPhone with iCloud Photos enabled, the deletion is synced to iCloud and then to all other devices using the same Apple ID. This means the photo will also be deleted from your iPad, Mac, and any other devices where you’re signed in to iCloud Photos.
- Recently Deleted Album: Deleted photos and videos are moved to the “Recently Deleted” album on all devices. They remain there for 30 days, giving you a chance to recover them.
- Permanent Deletion: After 30 days, the photos and videos are permanently deleted from all devices.
- Shared Library: In iOS 16.1 and later, if you’re using an iCloud Shared Photo Library, anyone with access to the library can delete, add, or edit items. If someone deletes a photo or video, it’s removed for everyone. Only the person who added the photo can permanently delete or recover it from the “Recently Deleted” folder.
Because of this synchronization, it’s essential to be cautious when deleting photos and videos. Always ensure that you have backups of important images before deleting them, as the action will affect all your devices.
7. What To Do If The Trash Icon Is Grayed Out When Trying To Delete Photos?
If the Trash icon is grayed out, it usually means the photos are synced from a computer. To delete them, you need to stop syncing photos from your computer through iTunes or Finder.
If you’ve ever synced photos to your iPhone using iTunes (or Finder in newer macOS versions), you might encounter a situation where the Trash icon is grayed out when you try to delete those photos directly from your iPhone. This happens because these photos are managed by your computer and not directly by the Photos app on your iPhone.
Here’s what you need to do:
- Connect Your iPhone to Your Computer: Use a USB cable to connect your iPhone to the computer you used to sync the photos.
- Open iTunes or Finder:
- iTunes (for older macOS or Windows): Open iTunes on your computer.
- Finder (for macOS Catalina and later): Open Finder. Your iPhone should appear in the sidebar under “Locations.”
- Select Your iPhone: In iTunes, click on the iPhone icon near the top of the window. In Finder, select your iPhone from the sidebar.
- Go to the Photos Sync Settings:
- iTunes: Click on the “Photos” tab.
- Finder: Click on “Photos” in the top menu bar.
- Disable Photo Syncing: Uncheck the box next to “Sync Photos” (or a similar option). You may be prompted to remove the synced photos from your iPhone. Confirm that you want to remove them.
- Sync Your iPhone: Click the “Apply” button in the bottom right corner to sync your iPhone with the new settings. This will remove the synced photos from your device.
Once the syncing process is complete, you should be able to delete photos directly from your iPhone. Keep in mind that any photos you remove this way will also be removed from your iPhone.
8. How To Delete Duplicate Photos On Your iPhone?
To delete duplicate photos on your iPhone, use the “Duplicates” album in the Photos app (available on iOS 16 and later). Merge the duplicates to keep the highest quality version and move the others to the Recently Deleted album.
Introduced in iOS 16, the Photos app includes a feature that identifies duplicate photos and videos, making it easier to clean up your library. Here’s how to use it:
- Open the Photos App: Launch the Photos app on your iPhone.
- Navigate to the “Duplicates” Album: Scroll down to the “Utilities” section. Look for the “Duplicates” album. If you don’t see it, it means your iPhone hasn’t finished scanning for duplicates yet, or you don’t have any.
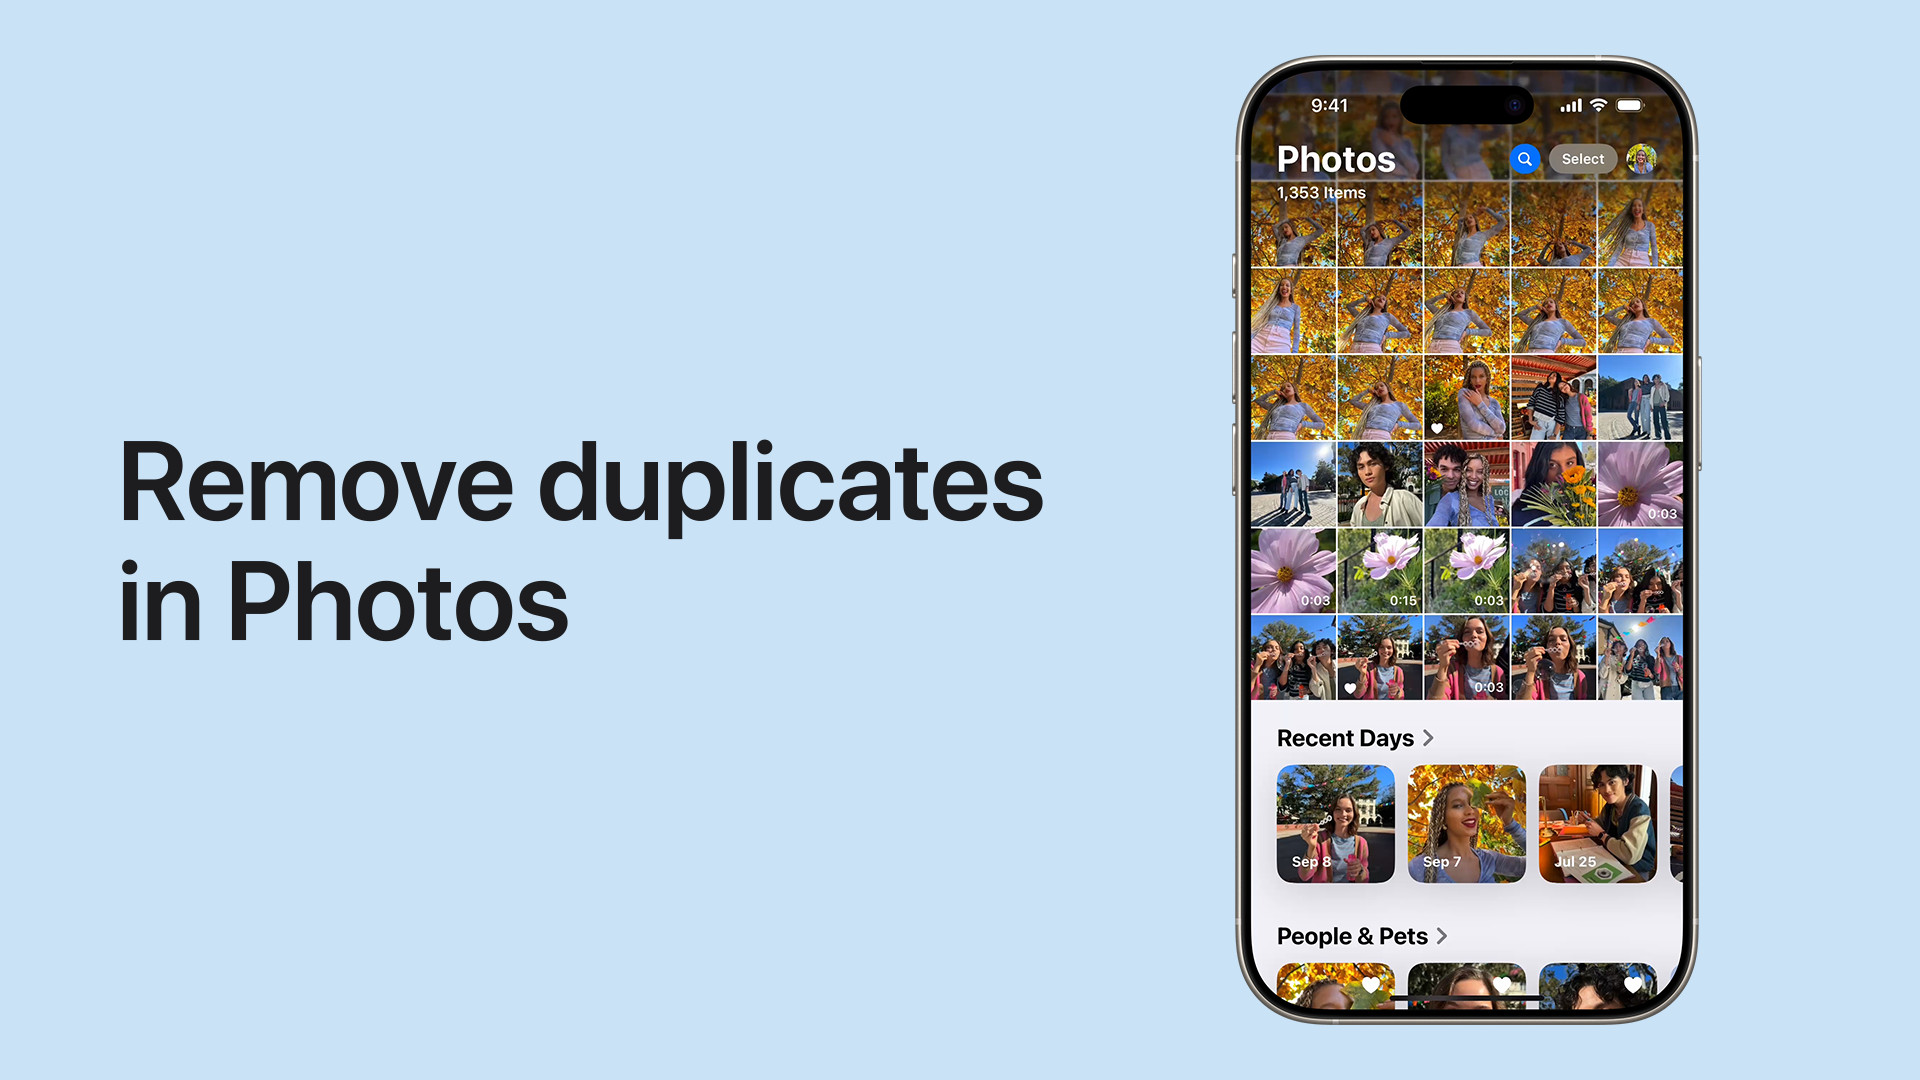
- Review Duplicates: Tap on the “Duplicates” album to see the sets of duplicate photos and videos.
- Merge Duplicates: For each set of duplicates, you have two options:
- Merge Individually: Tap “Merge” to combine the duplicates into a single item. The highest quality version is kept, and the others are moved to the “Recently Deleted” album.
- Merge Multiple Sets: Tap “Select” in the top right corner, then tap on each set of duplicates you want to merge. Finally, tap “Merge” at the bottom of the screen.
- Confirm Merge: A confirmation message will appear, showing the number of items to be merged. Tap “Merge [Number] Items” to confirm.
The duplicate photos will be merged, and the redundant copies will be moved to the “Recently Deleted” album. This feature helps you keep your photo library clean and organized without manually comparing each photo.
9. How Do Shared Photo Libraries Affect Deleting Photos?
In a Shared Photo Library, anyone can delete, add, or edit items. If someone deletes a photo, it disappears for everyone, but only the person who added the photo can permanently delete or recover it.
With the introduction of iCloud Shared Photo Libraries in iOS 16.1 and later, managing photos becomes a collaborative experience. However, it also introduces new considerations when deleting photos:
- Shared Access: In a Shared Photo Library, up to five other people can join you. Everyone in the library has equal access to add, edit, and delete photos and videos.
- Deletion Impact: When someone deletes a photo or video from the Shared Library, it is removed for all participants. The item is moved to the “Recently Deleted” album, but it’s no longer visible in the Shared Library.
- Recovery and Permanent Deletion: Only the person who originally added the photo or video to the Shared Library has the ability to permanently delete it from the “Recently Deleted” album or recover it.
- Coordination: Because of these shared permissions, it’s important to communicate with other members of the Shared Photo Library before deleting anything. This helps avoid accidental deletions and ensures everyone is on the same page.
If you delete a photo from a Shared Photo Library that you didn’t add, you won’t be able to recover it yourself. You’ll need to ask the person who added the photo to recover it from their “Recently Deleted” album.
10. How To Stop Syncing Photos From Computer To iPhone?
To stop syncing photos from your computer to your iPhone, connect your iPhone to your computer, open iTunes or Finder, go to the Photos sync settings, and disable photo syncing.
If you’ve previously synced photos from your computer to your iPhone and now want to stop this syncing process, follow these steps:
- Connect Your iPhone to Your Computer: Use a USB cable to connect your iPhone to the computer you used to sync the photos.
- Open iTunes or Finder:
- iTunes (for older macOS or Windows): Open iTunes on your computer.
- Finder (for macOS Catalina and later): Open Finder. Your iPhone should appear in the sidebar under “Locations.”
- Select Your iPhone: In iTunes, click on the iPhone icon near the top of the window. In Finder, select your iPhone from the sidebar.
- Go to the Photos Sync Settings:
- iTunes: Click on the “Photos” tab.
- Finder: Click on “Photos” in the top menu bar.
- Disable Photo Syncing: Uncheck the box next to “Sync Photos” (or a similar option). You may be prompted to remove the synced photos from your iPhone. Confirm that you want to remove them.
- Sync Your iPhone: Click the “Apply” button in the bottom right corner to sync your iPhone with the new settings. This will remove the synced photos from your device.
Once the syncing process is complete, your iPhone will no longer sync photos from your computer. You can then manage and delete photos directly from your iPhone without interference from the computer syncing settings.
11. Why Can’t I Delete Photos Directly From My iPhone?
You can’t directly delete photos from your iPhone if they were synced from a computer. You need to stop syncing through iTunes or Finder first.
If you find yourself unable to delete photos directly from your iPhone, it’s likely because these photos were synced from a computer using iTunes (or Finder in newer macOS versions). When photos are synced this way, they are managed by the computer and not by the Photos app on your iPhone.
To resolve this, you need to disable photo syncing from your computer. Here’s how:
- Connect Your iPhone to Your Computer: Use a USB cable to connect your iPhone to the computer you used to sync the photos.
- Open iTunes or Finder:
- iTunes (for older macOS or Windows): Open iTunes on your computer.
- Finder (for macOS Catalina and later): Open Finder. Your iPhone should appear in the sidebar under “Locations.”
- Select Your iPhone: In iTunes, click on the iPhone icon near the top of the window. In Finder, select your iPhone from the sidebar.
- Go to the Photos Sync Settings:
- iTunes: Click on the “Photos” tab.
- Finder: Click on “Photos” in the top menu bar.
- Disable Photo Syncing: Uncheck the box next to “Sync Photos” (or a similar option). You may be prompted to remove the synced photos from your iPhone. Confirm that you want to remove them.
- Sync Your iPhone: Click the “Apply” button in the bottom right corner to sync your iPhone with the new settings. This will remove the synced photos from your device.
After completing these steps, the synced photos will be removed from your iPhone, and you should be able to manage and delete photos directly from your device.
12. How To Manage Storage on My iPhone?
Manage storage on your iPhone by going to Settings > General > [Device] Storage. Here, you can see what’s taking up space and get recommendations for optimizing storage, including deleting unnecessary apps and files.
Efficiently managing storage on your iPhone is crucial for maintaining optimal performance and ensuring you have enough space for new photos, videos, and apps. Here’s how to manage your iPhone storage:
- Open the Settings App: Tap on the Settings app icon on your iPhone’s home screen.
- Go to General: Scroll down and tap on “General.”
- Select iPhone Storage: In the General settings, tap on “iPhone Storage.”
On the iPhone Storage screen, you’ll see a detailed breakdown of how your storage is being used. The top section shows a colored bar graph indicating the categories of data consuming your storage, such as Photos, Apps, Media, and others.
Below the graph, you’ll find a list of apps and data sorted by the amount of storage they use, with the largest consumers at the top. This helps you identify which apps and files are taking up the most space.
Here are some actions you can take to manage your storage:
- Offload Unused Apps: iOS can automatically remove apps you haven’t used in a while but keep their data, so you can reinstall them later without losing your information. To enable this, tap “Enable” next to “Offload Unused Apps.”
- Review Downloaded Videos: Many streaming services like Netflix and Amazon Prime allow you to download videos for offline viewing. These downloads can take up significant storage. Review and delete any videos you’ve already watched.
- Delete Large Attachments: In the Messages app, you can review large attachments and delete them to free up space. Go to Settings > General > iPhone Storage > Messages to find this option.
- Optimize Photos: If you use iCloud Photos, you can choose to store optimized versions of your photos on your device while keeping the full-resolution versions in iCloud. This can save a lot of space. Go to Settings > Photos and select “Optimize iPhone Storage.”
By regularly managing your iPhone storage, you can ensure your device runs smoothly and you have enough space for the things that matter most.
13. Can Deleting Photos Free Up Space on My iPhone?
Yes, deleting photos definitely frees up space on your iPhone. Photos and videos often consume a significant portion of your device’s storage, so removing unnecessary ones can make a noticeable difference.
Deleting photos and videos is one of the most effective ways to free up space on your iPhone. Here’s why:
- Large File Sizes: Photos and especially videos can be quite large in file size. High-resolution photos and 4K videos can quickly consume gigabytes of storage.
- Accumulation Over Time: Over time, the number of photos and videos on your iPhone can grow significantly. Screenshots, duplicate photos, and videos you no longer need can accumulate, taking up valuable space.
- Impact on Performance: When your iPhone’s storage is nearly full, it can slow down the device’s performance. Freeing up space can help improve speed and responsiveness.
To maximize the space you free up, consider these steps:
- Delete Unnecessary Photos and Videos: Go through your photo library and delete any photos or videos you no longer need. This includes blurry shots, duplicates, screenshots, and old videos.
- Use the “Duplicates” Album: If you’re running iOS 16 or later, use the “Duplicates” album to identify and merge duplicate photos and videos.
- Empty the “Recently Deleted” Album: Remember that deleted photos and videos are moved to the “Recently Deleted” album for 30 days before being permanently deleted. To free up the space immediately, go to the “Recently Deleted” album and delete the items there.
- Optimize iCloud Photos: If you use iCloud Photos, choose the “Optimize iPhone Storage” option in Settings > Photos. This stores smaller, optimized versions of your photos on your device while keeping the full-resolution versions in iCloud.
By regularly deleting unnecessary photos and videos, you can keep your iPhone’s storage under control and ensure smooth performance.
14. What Are The Best Practices For Managing My iPhone Photo Library?
Best practices for managing your iPhone photo library include regularly deleting unwanted photos, organizing photos into albums, using iCloud Photos for backup, and optimizing storage by storing full-resolution photos in the cloud.
To keep your iPhone photo library organized and efficient, consider these best practices:
- Regularly Delete Unwanted Photos and Videos: Make it a habit to periodically review your photo library and delete any photos and videos you no longer need. This includes blurry shots, duplicates, screenshots, and old videos.
- Organize Photos into Albums: Use albums to categorize your photos by events, locations, or themes. This makes it easier to find specific photos and keeps your library organized. You can create new albums by tapping the “+” icon in the Albums tab of the Photos app.
- Use iCloud Photos: iCloud Photos automatically syncs your photo library across all your Apple devices and backs up your photos to the cloud. This ensures that your photos are safe even if your iPhone is lost or damaged. To enable iCloud Photos, go to Settings > Photos and turn on “iCloud Photos.”
- Optimize iPhone Storage: If you use iCloud Photos, choose the “Optimize iPhone Storage” option in Settings > Photos. This stores smaller, optimized versions of your photos on your device while keeping the full-resolution versions in iCloud. This can save a significant amount of space on your iPhone.
- Use the “Duplicates” Album: If you’re running iOS 16 or later, use the “Duplicates” album to identify and merge duplicate photos and videos.
- Backup Your Photo Library: In addition to iCloud Photos, consider backing up your photo library to a computer or external hard drive. This provides an extra layer of protection in case something goes wrong with iCloud.
- Use Third-Party Apps: There are many third-party apps available that can help you manage your photo library. These apps offer features like duplicate detection, photo organization, and advanced editing tools.
By following these best practices, you can keep your iPhone photo library organized, efficient, and safe.
15. How Secure Is The “Recently Deleted” Album?
The “Recently Deleted” album is relatively secure, especially with Face ID or Touch ID enabled. However, it’s not foolproof, so ensure sensitive photos are permanently deleted for maximum security.
The “Recently Deleted” album provides a temporary holding place for photos and videos you’ve deleted from your iPhone. Here’s how secure it is:
- Temporary Storage: Items in the “Recently Deleted” album remain there for 30 days before being permanently deleted. This gives you a chance to recover accidentally deleted photos and videos.
- Authentication: In iOS 16 and later, the “Recently Deleted” album is locked by default and requires Face ID or Touch ID to access. This adds a layer of security, preventing unauthorized access to your deleted photos and videos.
- Not Foolproof: While Face ID and Touch ID provide a good level of security, they are not foolproof. Someone who has access to your unlocked iPhone could still potentially access the “Recently Deleted” album.
- Data Recovery: Even after photos and videos are permanently deleted from the “Recently Deleted” album, there is a small chance that they could be recovered using specialized data recovery software. However, this is generally difficult and requires advanced technical skills.
To maximize the security of your deleted photos and videos, consider these tips:
- Enable Face ID or Touch ID: Make sure Face ID or Touch ID is enabled on your iPhone to protect access to the “Recently Deleted” album.
- Permanently Delete Sensitive Photos: For sensitive photos and videos, don’t rely on the “Recently Deleted” album. Instead, permanently delete them from the album as soon as possible.
- Use Encryption: If you need to store sensitive photos and videos on your iPhone, consider using an encrypted photo vault app. These apps provide an extra layer of security by encrypting your photos and videos, making them inaccessible to unauthorized users.
- Be Mindful of Backups: Remember that your photos and videos may also be backed up to iCloud or other cloud services. Make sure to review and manage your backups to ensure that sensitive photos and videos are not stored in the cloud.
While the “Recently Deleted” album provides some level of security, it’s important to take additional steps to protect your privacy, especially when dealing with sensitive photos and videos.
FAQ: Quickly Delete Photos From iPhone
1. Where do deleted photos go on iPhone?
Deleted photos go to the “Recently Deleted” album in the Photos app, where they stay for 30 days before being permanently deleted.
2. How do I permanently delete photos from my iPhone?
Go to the “Recently Deleted” album, select the photos, and tap “Delete” to permanently remove them.
3. How can I recover deleted photos from my iPhone?
Open the “Recently Deleted” album, select the photos, and tap “Recover” to restore them to your library.
4. What happens when I delete photos with iCloud Photos enabled?
The photos are deleted from all devices synced with your iCloud account.
5. Why can’t I delete some photos on my iPhone?
The photos may be synced from a computer; you need to disable syncing in iTunes or Finder first.
6. How do I delete duplicate photos on my iPhone?
Use the “Duplicates” album in the Photos app (iOS 16 and later) to merge duplicate photos.
7. Is the “Recently Deleted” album secure?
It’s relatively secure with Face ID/Touch ID enabled, but not foolproof; permanently delete sensitive photos for better security.
8. How can I free up space on my iPhone quickly?
Delete unnecessary photos and videos, and empty the “Recently Deleted” album.
9. How does a shared photo library affect deleting photos?
Anyone can delete, but only the original uploader can permanently delete or recover them.
10. What are the best practices for managing my iPhone photo library?
Regularly delete unwanted photos, organize them into albums, use iCloud Photos, and optimize storage.
Managing your photo library effectively on your iPhone is essential for maintaining storage, organization, and privacy. By following the steps and best practices outlined in this guide, you can quickly delete photos, recover them if needed, and ensure your photo library remains manageable and secure.
Ready to take your photography skills to the next level? Visit dfphoto.net today to explore detailed tutorials, stunning photo collections, and a vibrant community of photography enthusiasts in the USA. Enhance your skills, find inspiration, and connect with fellow photographers. Your journey to mastering photography starts here!
Address: 1600 St Michael’s Dr, Santa Fe, NM 87505, United States.
Phone: +1 (505) 471-6001
Website: dfphoto.net