Putting photos on material opens up a world of creative possibilities, from personalized gifts to unique home décor. At dfphoto.net, we’re passionate about helping you explore these techniques, ensuring you achieve stunning results with your images and fabrics. Whether you’re transferring digital images or preserving vintage prints, understanding the right methods and materials is key to creating lasting, beautiful pieces of art.
1. What Are The Best Methods For How To Put Photos On Material?
The best methods for How To Put Photos On Material depend on the desired outcome, the type of fabric, and the equipment available. There are several popular and effective techniques, each with its own set of advantages. Here’s a breakdown of the most common methods:
- Iron-On Transfers: This method uses special transfer paper that is printed with your image and then ironed onto the fabric. It’s great for simple designs and readily available.
- Direct Printing: Direct-to-garment (DTG) printing involves printing the image directly onto the fabric using specialized inkjet technology. This method is ideal for complex designs and vibrant colors.
- Sublimation Printing: This technique uses heat to transfer dye onto synthetic fabrics. It’s excellent for creating durable, full-color prints on polyester materials.
- Fabric Markers and Stencils: This hands-on approach involves using fabric markers and stencils to manually apply the image onto the material. It’s perfect for custom, artistic designs.
- Image Transfer with Mediums: This method uses acrylic mediums to transfer images from paper to fabric. It allows for unique, textured effects.
1.1 Iron-On Transfers: Quick and Convenient
Iron-on transfers are a popular choice for their simplicity and accessibility. This method involves printing your image onto special transfer paper, which is then applied to the fabric using a household iron. Here’s a detailed look at the process:
- Select Your Image: Choose a high-resolution image to ensure a clear print.
- Print on Transfer Paper: Use an inkjet or laser printer to print the image onto the transfer paper. Remember to mirror the image if necessary, as it will be reversed when ironed on.
- Prepare the Fabric: Ensure the fabric is clean, dry, and ironed smooth.
- Position the Transfer: Place the transfer paper face down on the fabric where you want the image to appear.
- Iron the Transfer: Use a hot iron to apply even pressure over the transfer paper for the recommended time, usually a few minutes.
- Peel Away the Paper: Allow the transfer to cool slightly, then carefully peel away the paper backing to reveal the transferred image.
Tips for Success:
- Use high-quality transfer paper for better results.
- Always follow the manufacturer’s instructions for the transfer paper.
- Apply even pressure with the iron to ensure the image adheres properly.
- Wash the fabric inside out to preserve the transferred image.
1.2 Direct-To-Garment (DTG) Printing: Ideal for Complex Designs
Direct-to-garment (DTG) printing is a modern technique that allows for high-quality, full-color prints on fabric. This method uses specialized inkjet printers to apply the ink directly to the material, resulting in detailed and vibrant designs. Here’s what you need to know:
- Prepare Your Design: Create a high-resolution digital image using graphic design software.
- Pre-treat the Fabric: Apply a pre-treatment solution to the fabric to help the ink adhere properly.
- Load the Fabric: Place the fabric onto the DTG printer’s platen, ensuring it is smooth and aligned correctly.
- Print the Image: Use the DTG printer to print the image directly onto the fabric.
- Cure the Ink: Use a heat press or conveyor dryer to cure the ink, ensuring it sets permanently into the fabric.
Advantages of DTG Printing:
- High Detail: DTG printing can reproduce intricate designs and photographs with great accuracy.
- Full Color: This method allows for unlimited colors and gradients.
- Soft Feel: DTG prints tend to have a softer feel compared to other methods, as the ink is embedded into the fabric.
- Suitable for Small Orders: DTG is cost-effective for small print runs, as there are no setup costs associated with screens or stencils.
1.3 Sublimation Printing: Best for Synthetic Fabrics
Sublimation printing is a technique that uses heat to transfer dye onto synthetic fabrics, typically polyester. This method is known for producing vibrant, durable, and long-lasting prints. Here’s how it works:
- Create Your Design: Design a high-resolution image using graphic design software.
- Print on Sublimation Paper: Use a sublimation printer and ink to print the image onto special sublimation paper.
- Prepare the Fabric: Ensure the fabric is clean, dry, and made of at least 65% polyester.
- Heat Press the Transfer: Place the sublimation paper face down on the fabric and use a heat press to apply heat and pressure. The heat turns the solid dye into a gas, which penetrates the fabric and bonds with the fibers.
- Cool and Remove Paper: Allow the fabric to cool, then remove the sublimation paper to reveal the transferred image.
Benefits of Sublimation Printing:
- Durability: Sublimated prints are highly resistant to fading, cracking, and peeling.
- Vibrant Colors: Sublimation produces bright, vivid colors that are embedded into the fabric.
- Full-Color Printing: This method allows for complex, full-color designs.
- Soft Feel: The print becomes part of the fabric, resulting in a soft, smooth feel.
1.4 Fabric Markers and Stencils: Creative Customization
Using fabric markers and stencils is a fantastic way to add custom designs to fabric. This method is perfect for creating unique, artistic pieces and allows for a high degree of personalization. Here’s how to do it:
- Gather Your Materials: You’ll need fabric markers, stencils, fabric, and an iron.
- Prepare the Fabric: Wash, dry, and iron the fabric to create a smooth surface.
- Position the Stencil: Place the stencil on the fabric where you want the design to appear.
- Apply the Marker: Use the fabric marker to carefully fill in the stencil, applying even pressure.
- Remove the Stencil: Gently lift the stencil to reveal the design.
- Heat Set the Design: Iron the fabric to heat set the design, making it permanent and washable.
Tips for Using Fabric Markers and Stencils:
- Choose high-quality fabric markers that are permanent and washable.
- Use stencils with clean, crisp edges for best results.
- Practice on scrap fabric to get a feel for the markers and stencils.
- Allow the ink to dry completely before heat setting.
1.5 Image Transfer With Mediums: Unique Textured Effects
Image transfer with mediums involves using acrylic mediums to transfer images from paper to fabric. This method offers a unique, textured effect that can add depth and character to your designs. Here’s a step-by-step guide:
- Select Your Image: Choose a printed image from a laser or inkjet printer.
- Apply Medium: Apply a layer of acrylic medium (such as matte medium) to the front of the image.
- Position on Fabric: Place the image face down on the fabric.
- Smooth the Image: Use a bone folder or your fingers to smooth the image onto the fabric, ensuring good contact.
- Dry the Transfer: Allow the medium to dry completely, which may take several hours or overnight.
- Remove the Paper: Wet the paper and gently rub it away, revealing the transferred image on the fabric.
Tips for Image Transfer with Mediums:
- Use a matte medium for a non-glossy finish.
- Ensure the image is completely dry before removing the paper.
- Use a soft cloth to gently rub away the paper, avoiding damage to the transferred image.
- Experiment with different mediums to achieve various textures and effects.
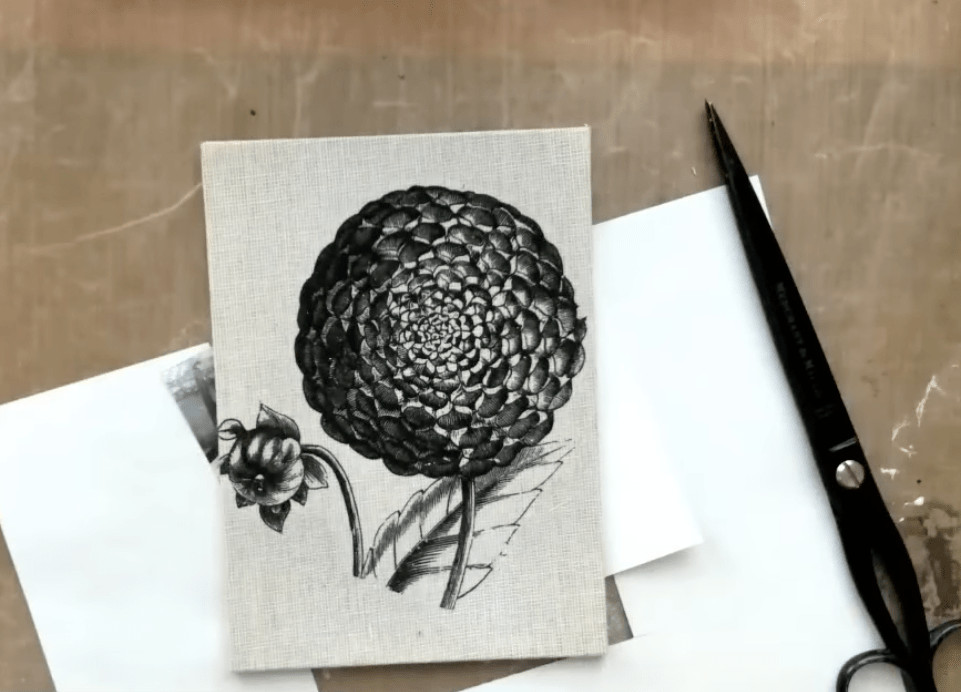 Image transfer onto fabric using acrylic medium with a matte finish
2. What Materials Are Needed For How To Put Photos On Material?
To successfully put photos on material, you’ll need specific materials depending on the method you choose. Here’s a comprehensive list of essential supplies:
- Iron-On Transfers:
- Transfer paper (inkjet or laser)
- Printer (inkjet or laser)
- Iron
- Fabric
- Scissors
- Direct-To-Garment (DTG) Printing:
- DTG printer
- DTG ink
- Pre-treatment solution
- Heat press or conveyor dryer
- Fabric
- Design software
- Sublimation Printing:
- Sublimation printer
- Sublimation ink
- Sublimation paper
- Heat press
- Polyester fabric
- Design software
- Fabric Markers and Stencils:
- Fabric markers
- Stencils
- Fabric
- Iron
- Image Transfer with Mediums:
- Acrylic medium (matte or gloss)
- Printed image (laser or inkjet)
- Fabric
- Bone folder or smoothing tool
- Soft cloth
- Water
2.1 Choosing The Right Fabric For Image Transfers
Selecting the right fabric is crucial for achieving the best results when transferring photos. Different fabrics react differently to various transfer methods. Here’s a guide to help you choose the appropriate fabric for your project:
- Cotton: A versatile and popular choice, cotton is suitable for iron-on transfers, DTG printing, and image transfers with mediums.
- Polyester: Ideal for sublimation printing due to its ability to bond with the sublimation dyes.
- Blends: Cotton-polyester blends can work well with multiple methods, offering a balance of comfort and durability.
- Linen: Linen provides a unique, textured surface for image transfers with mediums and fabric markers.
- Silk: A delicate fabric that requires careful handling, best suited for fabric markers and gentle image transfer techniques.
Fabric Considerations by Method:
| Method | Recommended Fabrics | Notes |
|---|---|---|
| Iron-On Transfers | Cotton, Cotton Blends | Ensure fabric can withstand high heat. |
| DTG Printing | Cotton, Cotton Blends | Pre-treatment is essential for best results. |
| Sublimation Printing | Polyester, High-Polyester Blends | Requires a high polyester content for dye to bond effectively. |
| Fabric Markers & Stencils | Cotton, Linen, Silk | Choose markers suitable for the fabric type. |
| Image Transfer with Mediums | Cotton, Linen, Canvas | Provides a unique, textured effect. |
2.2 Selecting The Perfect Transfer Paper
The type of transfer paper you choose can significantly impact the quality of your image transfer. Here’s a breakdown of the different types of transfer paper and their best uses:
- Inkjet Transfer Paper: Designed for use with inkjet printers, this paper is ideal for transferring images onto light-colored fabrics.
- Laser Transfer Paper: Suitable for laser printers, this paper works well on both light and dark-colored fabrics.
- Sublimation Paper: Specifically designed for sublimation printing, this paper releases the dye when heated, allowing it to bond with polyester fabrics.
- Dark Fabric Transfer Paper: This paper has an opaque layer that allows images to be transferred onto dark-colored fabrics without losing vibrancy.
- Light Fabric Transfer Paper: Best used on light-colored fabrics, this paper produces soft, breathable transfers.
Key Features to Look For:
- Compatibility: Ensure the transfer paper is compatible with your printer type (inkjet or laser).
- Fabric Color: Choose the appropriate paper for light or dark fabrics.
- Durability: Look for transfer paper that produces long-lasting, washable prints.
- Ease of Use: Opt for paper that is easy to print on, apply, and peel.
2.3 Choosing The Right Inks And Markers
Selecting the right inks and markers is essential for achieving vibrant, durable, and long-lasting images on fabric. Here’s a guide to help you make the best choices:
- DTG Inks: Specifically formulated for direct-to-garment printing, these inks provide excellent color vibrancy and washability.
- Sublimation Inks: Designed for use with sublimation printers, these inks turn into a gas when heated, bonding with polyester fibers to create permanent prints.
- Fabric Markers: Available in a wide range of colors and tip sizes, fabric markers are perfect for creating custom designs on fabric. Look for markers that are permanent, washable, and non-toxic.
- Acrylic Paints: Can be used with stencils or applied directly to fabric for artistic designs. Choose paints that are specifically formulated for fabric and heat-set them for durability.
- Pigment Inks: Known for their lightfastness and water resistance, pigment inks are a great choice for archival-quality prints on fabric.
Factors to Consider When Choosing Inks and Markers:
- Fabric Type: Ensure the ink or marker is compatible with the fabric you are using.
- Color Vibrancy: Look for products that offer bright, vivid colors.
- Washability: Choose inks and markers that are designed to withstand washing without fading or bleeding.
- Permanence: Opt for products that create long-lasting, durable prints.
- Safety: Select non-toxic, water-based inks and markers for safe use.
3. What Are The Steps For How To Put Photos On Material?
The steps for how to put photos on material vary depending on the method you choose. Here are detailed instructions for each technique:
3.1 Step-By-Step Guide To Iron-On Transfers
- Prepare Your Image: Select a high-resolution image and mirror it if necessary.
- Print on Transfer Paper: Load the transfer paper into your printer and print the image according to the manufacturer’s instructions.
- Cut Out the Image: Trim any excess paper around the image.
- Prepare the Fabric: Iron the fabric to remove any wrinkles.
- Position the Transfer: Place the transfer paper face down on the fabric.
- Iron the Transfer: Use a hot iron to apply even pressure over the transfer paper for the recommended time.
- Peel Away the Paper: Allow the transfer to cool slightly, then carefully peel away the paper backing.
3.2 Step-By-Step Guide To DTG Printing
- Prepare Your Design: Create a high-resolution digital image using graphic design software.
- Pre-treat the Fabric: Apply a pre-treatment solution to the fabric.
- Load the Fabric: Place the fabric onto the DTG printer’s platen.
- Print the Image: Use the DTG printer to print the image directly onto the fabric.
- Cure the Ink: Use a heat press or conveyor dryer to cure the ink.
3.3 Step-By-Step Guide To Sublimation Printing
- Create Your Design: Design a high-resolution image using graphic design software.
- Print on Sublimation Paper: Use a sublimation printer and ink to print the image onto special sublimation paper.
- Prepare the Fabric: Ensure the fabric is clean, dry, and made of at least 65% polyester.
- Heat Press the Transfer: Place the sublimation paper face down on the fabric and use a heat press to apply heat and pressure.
- Cool and Remove Paper: Allow the fabric to cool, then remove the sublimation paper.
3.4 Step-By-Step Guide To Using Fabric Markers And Stencils
- Gather Your Materials: You’ll need fabric markers, stencils, fabric, and an iron.
- Prepare the Fabric: Wash, dry, and iron the fabric.
- Position the Stencil: Place the stencil on the fabric.
- Apply the Marker: Use the fabric marker to carefully fill in the stencil.
- Remove the Stencil: Gently lift the stencil.
- Heat Set the Design: Iron the fabric to heat set the design.
3.5 Step-By-Step Guide To Image Transfer With Mediums
- Select Your Image: Choose a printed image from a laser or inkjet printer.
- Apply Medium: Apply a layer of acrylic medium to the front of the image.
- Position on Fabric: Place the image face down on the fabric.
- Smooth the Image: Use a bone folder or your fingers to smooth the image onto the fabric.
- Dry the Transfer: Allow the medium to dry completely.
- Remove the Paper: Wet the paper and gently rub it away.
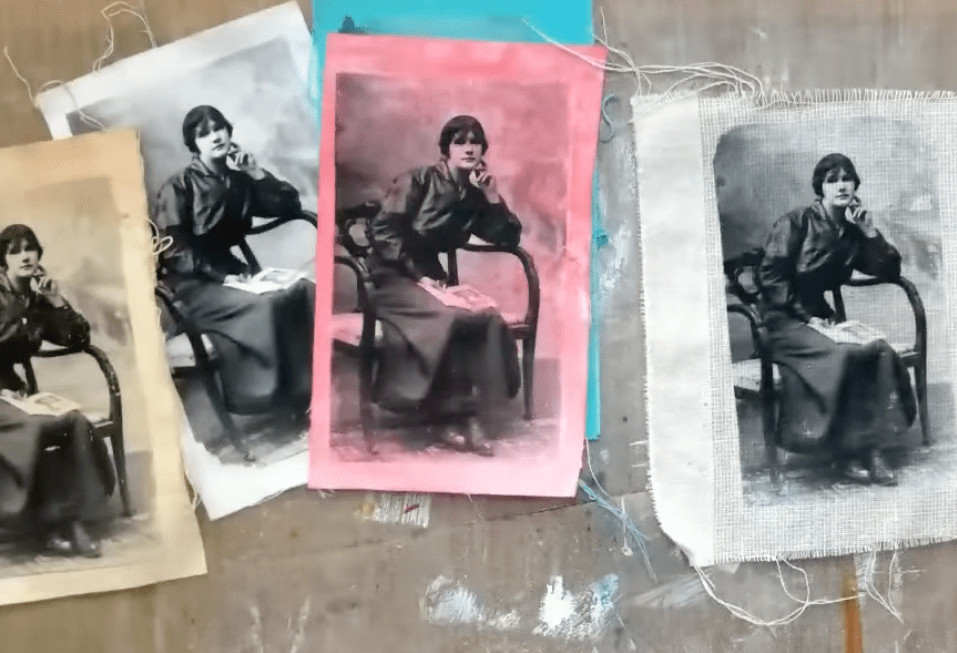 Fabric photo transfer with acrylic medium
4. What Are Some Creative Ideas For How To Put Photos On Material?
Putting photos on material opens up a vast array of creative possibilities. Here are some inspiring ideas to get you started:
- Personalized T-Shirts: Create custom t-shirts with family photos, favorite quotes, or unique designs.
- Custom Tote Bags: Design tote bags with your artwork or photographs for a stylish and eco-friendly accessory.
- Photo Pillows: Transfer photos onto pillow covers to create personalized home décor items.
- Fabric Wall Art: Create unique wall art by transferring images onto fabric and stretching it over a canvas frame.
- Memory Quilts: Preserve cherished memories by creating a quilt with fabric squares featuring family photos and memorable images.
- Personalized Aprons: Design aprons with fun designs, family photos or custom logos for cooking enthusiasts.
- Custom Banners: Make personalized banners for special events by transferring photos onto fabric.
- Photo Coasters: Make personalized coasters as gifts by transferring photos onto fabric and sealing them.
4.1 Creating Personalized T-Shirts With Photo Transfers
Personalized t-shirts are a fun and creative way to showcase your favorite photos. Here’s how to create your own:
- Choose Your Photo: Select a high-resolution photo that you want to feature on your t-shirt.
- Prepare the Image: Use graphic design software to adjust the image size and resolution as needed.
- Print the Image: Print the image onto transfer paper using an inkjet or laser printer.
- Prepare the T-Shirt: Iron the t-shirt to remove any wrinkles.
- Position the Transfer: Place the transfer paper face down on the t-shirt where you want the image to appear.
- Iron the Transfer: Use a hot iron to apply even pressure over the transfer paper for the recommended time.
- Peel Away the Paper: Allow the transfer to cool slightly, then carefully peel away the paper backing.
4.2 Designing Custom Tote Bags With Fabric Printing
Custom tote bags are a stylish and eco-friendly way to carry your belongings. Here’s how to design your own using fabric printing:
- Choose Your Design: Select a high-resolution image, pattern, or artwork that you want to feature on your tote bag.
- Prepare the Image: Use graphic design software to adjust the image size and resolution as needed.
- Select Your Printing Method: Choose between iron-on transfers, DTG printing, or sublimation printing, depending on the fabric and desired outcome.
- Print the Image: Print the image onto the appropriate transfer paper or directly onto the fabric using a DTG printer.
- Transfer the Image: Follow the instructions for your chosen printing method to transfer the image onto the tote bag.
- Heat Set the Design: Use a heat press or iron to heat set the design, ensuring it is permanent and washable.
4.3 Crafting Photo Pillows For Home Decor
Photo pillows are a wonderful way to personalize your home décor. Here’s how to craft your own using photo transfers:
- Choose Your Photo: Select a high-resolution photo that you want to feature on your pillow cover.
- Prepare the Image: Use graphic design software to adjust the image size and resolution as needed.
- Print the Image: Print the image onto transfer paper using an inkjet or laser printer.
- Prepare the Pillow Cover: Iron the pillow cover to remove any wrinkles.
- Position the Transfer: Place the transfer paper face down on the pillow cover where you want the image to appear.
- Iron the Transfer: Use a hot iron to apply even pressure over the transfer paper for the recommended time.
- Peel Away the Paper: Allow the transfer to cool slightly, then carefully peel away the paper backing.
5. How Can You Ensure The Longevity Of Photos On Material?
Ensuring the longevity of photos on material involves proper care and maintenance. Here are some tips to help your creations last:
- Use High-Quality Materials: Start with high-quality transfer papers, inks, and fabrics.
- Follow Instructions Carefully: Adhere to the manufacturer’s instructions for all materials and equipment.
- Heat Set the Design: Properly heat set the design using an iron or heat press to ensure it bonds with the fabric.
- Wash Inside Out: Wash the fabric inside out to protect the printed image from abrasion.
- Use Gentle Detergents: Use mild, gentle detergents that are free from bleach and harsh chemicals.
- Avoid High Heat: Avoid using high heat when washing or drying the fabric.
- Air Dry When Possible: Air drying is gentler on the fabric and helps to preserve the printed image.
- Store Properly: Store the fabric in a cool, dry place away from direct sunlight to prevent fading.
5.1 Proper Washing Techniques For Preserving Photo Transfers
Proper washing techniques are essential for preserving photo transfers on fabric. Here are some guidelines to follow:
- Turn the Fabric Inside Out: Before washing, turn the fabric inside out to protect the printed image.
- Use Cold Water: Wash the fabric in cold water to prevent the colors from fading or bleeding.
- Use a Gentle Detergent: Use a mild, gentle detergent that is free from bleach and harsh chemicals.
- Avoid Bleach: Never use bleach, as it can damage the printed image and fade the colors.
- Wash on a Gentle Cycle: Use a gentle cycle to minimize abrasion and wear on the fabric.
- Avoid Overloading the Washer: Avoid overloading the washing machine, as this can cause excessive friction and damage the printed image.
- Remove Promptly: Remove the fabric from the washing machine promptly to prevent wrinkles and color transfer.
5.2 Best Storage Practices For Photo-Enhanced Fabrics
Proper storage practices can significantly extend the life of photo-enhanced fabrics. Here are some tips to follow:
- Clean Before Storing: Ensure the fabric is clean and free from stains before storing.
- Store in a Cool, Dry Place: Store the fabric in a cool, dry place away from direct sunlight and humidity.
- Use Acid-Free Materials: Use acid-free tissue paper or storage containers to prevent discoloration and damage.
- Avoid Plastic Bags: Avoid storing fabric in plastic bags, as they can trap moisture and cause mildew.
- Fold or Roll Carefully: Fold or roll the fabric carefully to prevent creases and wrinkles.
- Store Flat When Possible: Store the fabric flat whenever possible to maintain its shape and prevent stretching.
- Check Periodically: Check the fabric periodically for signs of damage, such as fading, discoloration, or mildew.
6. How To Troubleshoot Common Issues When You Put Photos On Material?
Even with careful preparation, you may encounter some common issues when putting photos on material. Here’s how to troubleshoot them:
- Image Fading:
- Cause: Using low-quality inks or transfer papers.
- Solution: Use high-quality materials and follow the manufacturer’s instructions.
- Image Cracking:
- Cause: Improper heat setting or using the wrong type of transfer paper.
- Solution: Ensure the design is properly heat set and use transfer paper that is compatible with the fabric.
- Uneven Transfer:
- Cause: Uneven pressure during ironing or heat pressing.
- Solution: Apply even pressure and ensure the fabric is smooth and wrinkle-free.
- Color Bleeding:
- Cause: Using the wrong type of ink or washing the fabric in hot water.
- Solution: Use inks that are designed for fabric and wash in cold water with a gentle detergent.
- Paper Sticking:
- Cause: Not allowing the transfer to cool completely before peeling off the paper.
- Solution: Allow the transfer to cool slightly before carefully peeling off the paper backing.
6.1 Addressing Fading And Cracking In Photo Transfers
Fading and cracking are common issues that can occur in photo transfers. Here’s how to address them:
- Fading:
- Prevention: Use high-quality inks that are designed to resist fading.
- Solution: Avoid exposing the fabric to direct sunlight for extended periods and wash in cold water with a gentle detergent.
- Cracking:
- Prevention: Ensure the design is properly heat set and use transfer paper that is flexible and durable.
- Solution: Avoid stretching or pulling the fabric excessively and wash inside out on a gentle cycle.
6.2 Resolving Uneven Or Incomplete Image Transfers
Uneven or incomplete image transfers can be frustrating. Here’s how to resolve them:
- Check Pressure: Ensure you are applying even pressure during ironing or heat pressing.
- Smooth Fabric: Make sure the fabric is smooth and wrinkle-free before transferring the image.
- Adjust Temperature: Adjust the temperature of your iron or heat press according to the manufacturer’s instructions.
- Use a Protective Sheet: Use a protective sheet (such as parchment paper) between the iron and the transfer paper to prevent sticking and ensure even heat distribution.
- Reprint If Necessary: If the transfer is significantly flawed, reprint the image and try again.
7. Where Can You Find Inspiration And Resources For Putting Photos On Material?
Finding inspiration and resources is key to expanding your creativity and skills in putting photos on material. Here are some great places to look:
- Online Tutorials: Websites like YouTube, Skillshare, and CreativeLive offer a wealth of tutorials on various fabric printing techniques.
- Craft Blogs: Follow craft blogs and websites for inspiration, tips, and project ideas.
- Social Media: Explore platforms like Pinterest and Instagram for visual inspiration and to discover new trends.
- Photography Communities: Join photography communities and forums to share ideas and learn from other photographers and artists.
- Local Workshops: Attend local workshops and classes to learn hands-on techniques and connect with other enthusiasts.
- Dfphoto.net: dfphoto.net provides a rich source of tutorials, beautiful photo collections, and a vibrant community to explore the world of photography.
7.1 Online Platforms For Learning Fabric Printing Techniques
Online platforms offer a convenient and accessible way to learn fabric printing techniques. Here are some top resources:
- YouTube: Search for tutorials on specific techniques like iron-on transfers, DTG printing, and sublimation printing.
- Skillshare: Take in-depth classes on fabric design and printing from experienced instructors.
- CreativeLive: Access live workshops and on-demand courses covering a wide range of creative topics, including fabric printing.
- Udemy: Explore courses on digital design for fabric printing and learn how to create stunning patterns and images.
- Craftsy: Discover classes on sewing, quilting, and fabric crafts, including techniques for adding photos to fabric.
7.2 Photography Communities And Forums For Sharing Ideas
Photography communities and forums are great places to connect with other enthusiasts, share ideas, and get feedback on your projects. Here are some popular platforms:
- Dfphoto.net: Discover the resources and connect with other photographers. The website is located at 1600 St Michael’s Dr, Santa Fe, NM 87505, United States, and you can reach them by phone at +1 (505) 471-6001.
- Flickr: Share your photos and join groups dedicated to fabric printing and textile arts.
- Reddit: Participate in discussions on subreddits like r/photography and r/textiles for tips and inspiration.
- Facebook Groups: Join groups focused on fabric printing, photo transfers, and textile design to connect with like-minded individuals.
- Online Forums: Explore forums dedicated to photography and crafting, such as those on photography websites and craft-specific sites.
8. What Are The Latest Trends In Putting Photos On Material?
Staying up-to-date with the latest trends in putting photos on material can inspire new ideas and techniques. Here are some current trends:
- Sustainable Printing: Using eco-friendly inks and fabrics to create sustainable and environmentally conscious designs.
- Mixed Media: Combining photo transfers with other artistic techniques, such as painting, embroidery, and collage.
- Digital Fabrication: Incorporating digital fabrication methods like laser cutting and 3D printing to create intricate and unique fabric designs.
- Customization: Creating personalized products with custom photos and designs for individual customers or special events.
- Upcycling: Transforming old or discarded fabrics into new and unique creations by adding photo transfers.
8.1 Sustainable And Eco-Friendly Fabric Printing Options
Sustainable and eco-friendly fabric printing options are gaining popularity as more people seek environmentally conscious ways to create. Here are some choices:
- Eco-Friendly Inks: Using water-based, non-toxic inks that are free from harmful chemicals.
- Organic Fabrics: Choosing fabrics made from organic cotton, linen, or hemp.
- Recycled Materials: Using fabrics made from recycled materials, such as recycled polyester or recycled cotton.
- Digital Printing: Opting for digital printing methods like DTG, which minimize waste and reduce water consumption.
- Natural Dyes: Using natural dyes derived from plants, minerals, or insects to color fabrics.
8.2 Combining Photo Transfers With Mixed Media Art
Combining photo transfers with mixed media art opens up exciting possibilities for creating unique and textured pieces. Here are some ideas:
- Painting: Add hand-painted elements to photo transfers using acrylic paints, watercolors, or fabric markers.
- Embroidery: Stitch embellishments and details around photo transfers using embroidery floss and needles.
- Collage: Combine photo transfers with other collage elements, such as paper, fabric scraps, and found objects.
- Stenciling: Use stencils to add patterns and designs around photo transfers.
- Texture: Create textured backgrounds using mediums like gesso, modeling paste, or gel medium.
9. FAQ: How To Put Photos On Material
9.1 Can I use any fabric for iron-on transfers?
Not all fabrics are suitable for iron-on transfers. Cotton and cotton blends work best because they can withstand the high heat required for the transfer. Synthetic fabrics like polyester may melt or scorch under high heat.
9.2 Do I need a special printer for fabric printing?
For some methods like DTG and sublimation printing, you need a specialized printer. However, for iron-on transfers and image transfers with mediums, a standard inkjet or laser printer will work.
9.3 How do I prevent the image from fading after washing?
To prevent fading, wash the fabric inside out in cold water with a gentle detergent. Avoid using bleach and air dry when possible.
9.4 What is the best way to transfer a photo onto dark fabric?
For dark fabrics, use transfer paper specifically designed for dark materials. These papers have an opaque layer that prevents the fabric color from affecting the image.
9.5 Can I transfer a photo onto clothing that I wear regularly?
Yes, you can transfer a photo onto clothing, but the longevity of the transfer depends on the quality of materials and proper care. Follow washing instructions carefully to preserve the image.
9.6 Is it possible to remove a photo transfer from fabric?
Removing a photo transfer is difficult and may damage the fabric. Some methods involve using heat or solvents, but results vary. It’s best to test on a small, inconspicuous area first.
9.7 What is the difference between inkjet and laser transfer paper?
Inkjet transfer paper is designed for use with inkjet printers, while laser transfer paper is for laser printers. They use different types of ink and require different transfer processes.
9.8 How do I ensure the colors in my photo transfer are vibrant?
Use high-quality inks and transfer papers. Adjust your printer settings for optimal color output and ensure the fabric is properly prepared before transferring the image.
9.9 Can I use a regular iron for iron-on transfers?
Yes, a regular household iron can be used, but ensure it is clean and free of any residue. Use a high heat setting and apply even pressure for the recommended time.
9.10 Are fabric markers permanent?
Most fabric markers are permanent once heat-set with an iron. However, it’s important to choose markers specifically designed for fabric and follow the manufacturer’s instructions for best results.
10. Conclusion: Transform Your Memories With Photos On Material
Learning how to put photos on material opens up a world of creative possibilities for personalizing clothing, home décor, and gifts. Whether you choose iron-on transfers, DTG printing, sublimation, fabric markers, or image transfers with mediums, each method offers unique ways to showcase your favorite memories. Remember to use high-quality materials, follow instructions carefully, and take proper care to ensure your creations last.
We at dfphoto.net encourage you to explore these techniques and discover the joy of transforming your memories into beautiful, tangible art. Visit dfphoto.net for more tutorials, inspiring photo collections, and a vibrant community to help you on your creative journey. Connect with fellow photography enthusiasts, share your projects, and find new inspiration to elevate your skills. Let’s celebrate the art of photography together. Explore dfphoto.net today and start creating!