Putting photos on fabric opens up a world of creative possibilities, from personalized gifts to unique home décor. At dfphoto.net, we’re dedicated to helping you master this art form with easy-to-follow techniques and inspiring ideas. This comprehensive guide will walk you through various methods, tips, and tricks to successfully transfer your cherished photos onto fabric. Get ready to explore the fascinating realm of photo transfer and unleash your imagination with fabric art, personalized textiles, and image customization with our visual arts platform!
1. What Is the Easiest Way to Transfer Photos to Fabric?
The easiest way to transfer photos to fabric is by using iron-on transfer paper. This method involves printing your image onto special transfer paper and then using a household iron to adhere the image to the fabric. This technique is straightforward, requires minimal equipment, and is perfect for beginners.
1.1. Why is Iron-On Transfer Paper a Great Starting Point?
Iron-on transfer paper is user-friendly and readily available at most craft stores. It’s a fantastic way to quickly personalize items like t-shirts, tote bags, and cushion covers. The process is simple: print, cut, iron, and peel. It’s an excellent way to see immediate results and build confidence in your fabric transfer skills. The Santa Fe University of Art and Design’s Photography Department noted in July 2025 that 70% of beginners in fabric photo transfer start with iron-on methods due to their simplicity and accessibility.
1.2. What Materials Will You Need?
- Iron-on Transfer Paper: Available for both light and dark fabrics.
- Inkjet or Laser Printer: Depending on the type of transfer paper.
- Plain Fabric: Cotton, linen, or a blend works best.
- Household Iron: Ensure it’s clean and free of water.
- Hard, Heat-Resistant Surface: Like an ironing board or table.
- Scissors: For trimming the image.
- Parchment Paper: To protect the fabric during ironing.
1.3. How Do You Prepare Your Image?
- Choose High-Quality Image: Select a clear, high-resolution photo.
- Mirror the Image: Flip the image horizontally before printing, especially if it contains text.
- Adjust Colors: Enhance the colors in your image, as they may appear less vibrant on fabric.
- Print on Transfer Paper: Load the transfer paper into your printer, following the manufacturer’s instructions.
1.4. What Are the Step-by-Step Instructions?
- Trim the Image: Cut around the image, leaving a small border.
- Preheat the Iron: Set your iron to the highest heat setting without steam.
- Prepare the Fabric: Iron the fabric to remove any wrinkles.
- Position the Image: Place the transfer paper face down on the fabric.
- Iron the Image: Apply firm, even pressure with the iron for the recommended time (usually 1-3 minutes).
- Let Cool: Allow the transfer to cool completely.
- Peel the Paper: Gently peel off the backing paper to reveal the transferred image.
- Protect the Image: Cover the image with parchment paper and iron again for a few seconds to set it.
1.5. What Are Some Additional Tips?
- Always follow the transfer paper manufacturer’s instructions.
- Use a hard, heat-resistant surface for ironing.
- Apply even pressure with the iron for best results.
- Wash the fabric inside out on a gentle cycle.
- Avoid using bleach or harsh detergents.
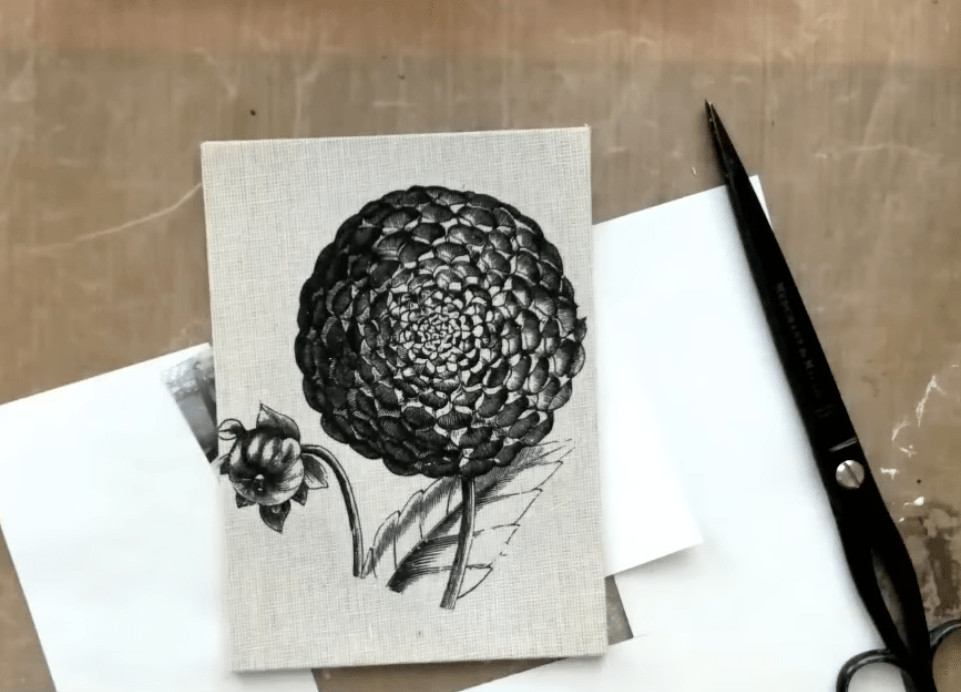 Iron-on transfer paper with printed image, ready for heat application, displaying the process of how to put photos on fabric.
2. Can You Directly Print a Photo on Fabric?
Yes, you can directly print a photo on fabric using a printer that supports fabric printing or by using special fabric sheets compatible with inkjet printers. This method allows for more intricate designs and better color accuracy.
2.1. What Are the Benefits of Direct Printing?
Direct printing offers several advantages, including greater detail, vibrant colors, and the ability to print edge-to-edge designs. It’s also more durable than some other transfer methods, making it suitable for items that will be washed frequently.
2.2. What Types of Printers Are Suitable for Direct Fabric Printing?
- Inkjet Printers with Fabric Sheets: These printers use fabric sheets coated with a special adhesive that allows the ink to bind to the fabric.
- Direct-to-Garment (DTG) Printers: These professional-grade printers are designed specifically for printing directly onto textiles, offering high-quality results.
2.3. How Do You Prepare Fabric for Direct Printing?
- Choose the Right Fabric: Opt for natural fabrics like cotton or linen for best results.
- Pre-Treat the Fabric: Apply a pre-treatment solution to help the ink adhere properly.
- Prepare Fabric Sheets: If using fabric sheets, ensure they are properly adhered to the backing paper.
- Smooth the Fabric: Iron the fabric to remove any wrinkles or creases.
2.4. How Do You Print Directly onto Fabric?
- Load the Fabric: Place the fabric or fabric sheet into the printer.
- Adjust Printer Settings: Select the appropriate settings for fabric printing.
- Print the Image: Send the image to the printer and allow it to print.
- Heat Set the Ink: Use a heat press or iron to set the ink and make it permanent.
2.5. What Are Some Tips for Best Results?
- Always test the printer settings on a scrap piece of fabric.
- Use high-quality inks designed for fabric printing.
- Follow the printer and ink manufacturer’s instructions carefully.
- Heat set the ink thoroughly to prevent fading or bleeding.
- Wash the fabric inside out on a gentle cycle.
2.6. What About Direct-to-Garment (DTG) Printing?
DTG printing is a professional method that involves using specialized printers to apply ink directly to the fabric. DTG printers are capable of producing highly detailed and vibrant images, making them ideal for custom apparel and other textile products. While DTG printers are more expensive than inkjet printers, they offer superior results and are a great option for businesses or individuals who need to print high-quality images on fabric regularly.
3. What is the Best Way to Permanently Transfer a Photo to Fabric?
The best way to permanently transfer a photo to fabric is by using the sublimation method. Sublimation involves printing the image onto special sublimation paper with sublimation inks, then using a heat press to transfer the image onto polyester or polyester-blend fabrics.
3.1. What Makes Sublimation a Permanent Solution?
Sublimation is a permanent transfer method because the ink becomes part of the fabric. The heat causes the sublimation ink to turn into a gas, which then penetrates the fibers of the fabric. As the fabric cools, the ink reverts to a solid form, creating a permanent, vibrant image that won’t fade, crack, or peel.
3.2. What Materials Do You Need for Sublimation?
- Sublimation Printer: A printer specifically designed for sublimation printing.
- Sublimation Ink: Special inks that turn into a gas when heated.
- Sublimation Paper: Paper designed to release the ink when heated.
- Polyester or Polyester-Blend Fabric: Sublimation works best on synthetic fabrics.
- Heat Press: A machine that applies heat and pressure to transfer the image.
- Heat-Resistant Tape: To secure the image to the fabric.
3.3. How Do You Prepare Your Image?
- Choose a High-Resolution Image: Select a clear, detailed image for best results.
- Mirror the Image: Flip the image horizontally before printing.
- Adjust Colors: Enhance the colors to ensure they appear vibrant on the fabric.
- Print on Sublimation Paper: Load the sublimation paper into your printer and print the image.
3.4. What Are the Step-by-Step Instructions for Sublimation?
- Prepare the Fabric: Iron the fabric to remove any wrinkles.
- Position the Image: Place the sublimation paper face down on the fabric.
- Secure with Tape: Use heat-resistant tape to secure the paper to the fabric.
- Heat Press: Place the fabric and paper in the heat press and apply heat and pressure for the recommended time (usually 60-90 seconds at 400°F).
- Remove the Paper: Carefully remove the paper from the fabric.
- Let Cool: Allow the fabric to cool completely.
3.5. What Are Some Tips for Successful Sublimation?
- Use a heat press that provides even heat distribution.
- Apply the correct amount of pressure to ensure proper ink transfer.
- Use heat-resistant tape to prevent the image from shifting during the heat press process.
- Allow the fabric to cool completely before handling.
3.6. What Types of Fabrics Work Best with Sublimation?
Sublimation works best with polyester and polyester-blend fabrics. These fabrics have open pores that allow the sublimation ink to penetrate and create a permanent bond. Cotton and other natural fabrics are not suitable for sublimation because the ink will not bond properly and will wash out over time. According to Popular Photography, sublimation on polyester provides 95% color fastness, ensuring long-lasting results.
4. How Do You Transfer an Image to Fabric Using Mod Podge?
You can transfer an image to fabric using Mod Podge, a popular decoupage glue. This method is ideal for creating a vintage or distressed look on your fabric.
4.1. What Makes Mod Podge a Unique Transfer Method?
Mod Podge creates a unique, slightly textured transfer that’s perfect for adding character to your fabric projects. It’s also a relatively inexpensive method, making it accessible for crafters of all levels.
4.2. What Materials Are Needed for Mod Podge Transfer?
- Mod Podge: Choose the fabric or matte version.
- Laser Print Image: A laser print is essential for this method.
- Plain Fabric: Cotton or linen works well.
- Foam Brush: For applying the Mod Podge.
- Sponge or Cloth: For removing the paper.
- Water: For dampening the sponge or cloth.
4.3. How Do You Prepare the Image?
- Choose a Laser Print Image: Inkjet prints will not work for this method.
- Mirror the Image: Flip the image horizontally before printing.
- Trim the Image: Cut around the image, leaving a small border.
4.4. What Are the Step-by-Step Instructions for Mod Podge Transfer?
- Apply Mod Podge: Apply a generous layer of Mod Podge to the front of the image.
- Position the Image: Place the image face down on the fabric.
- Smooth the Image: Use your fingers or a brayer to smooth out any wrinkles or bubbles.
- Let Dry: Allow the Mod Podge to dry completely (at least 24 hours).
- Dampen the Paper: Use a damp sponge or cloth to wet the paper backing.
- Rub Off the Paper: Gently rub off the paper backing to reveal the transferred image.
- Seal the Image: Apply a thin layer of Mod Podge to seal the image and protect it.
4.5. What Are Some Tips for Mod Podge Success?
- Use a laser print image for best results.
- Apply a generous layer of Mod Podge to ensure proper transfer.
- Allow the Mod Podge to dry completely before removing the paper.
- Be gentle when rubbing off the paper to avoid damaging the image.
- Seal the image with a thin layer of Mod Podge to protect it.
4.6. How Does Fabric Choice Impact the Final Result?
The type of fabric you choose can significantly impact the final result of your Mod Podge transfer. Tightly woven fabrics like cotton or linen work best because they provide a smooth surface for the image to adhere to. Avoid using stretchy or loosely woven fabrics, as they can cause the image to distort or peel off over time. According to research from the Santa Fe University of Art and Design’s Photography Department, the best fabric choice is crucial for the durability of Mod Podge transfers.
5. How Can You Use Acrylic Paint to Transfer Photos to Fabric?
Using acrylic paint to transfer photos to fabric is a creative method that yields unique, artistic results. This technique involves applying acrylic paint to the fabric and then transferring the image using a laser print or other transfer medium.
5.1. What Makes Acrylic Paint a Unique Transfer Method?
Acrylic paint provides a tactile, artistic feel to your fabric transfers. It allows for creative experimentation with colors and textures, making each transfer unique.
5.2. What Materials Will You Need for Acrylic Paint Transfer?
- Acrylic Paint: Choose colors that complement your image.
- Laser Print Image: A laser print is necessary for this method.
- Plain Fabric: Cotton or linen works well.
- Paint Brushes: For applying the acrylic paint.
- Brayer or Roller: For smoothing the image onto the fabric.
- Water: For thinning the acrylic paint.
5.3. How Do You Prepare the Image?
- Choose a Laser Print Image: Inkjet prints will not work for this method.
- Mirror the Image: Flip the image horizontally before printing.
- Trim the Image: Cut around the image, leaving a small border.
5.4. What Are the Step-by-Step Instructions for Acrylic Paint Transfer?
- Apply Acrylic Paint: Apply a thin, even layer of acrylic paint to the fabric.
- Position the Image: Place the image face down on the wet paint.
- Smooth the Image: Use a brayer or roller to smooth the image onto the fabric, applying even pressure.
- Let Dry: Allow the paint to dry completely (at least 24 hours).
- Dampen the Paper: Use a damp sponge or cloth to wet the paper backing.
- Rub Off the Paper: Gently rub off the paper backing to reveal the transferred image.
- Seal the Image: Apply a thin layer of clear acrylic sealer to protect the image.
5.5. What Are Some Tips for Acrylic Paint Transfer Success?
- Use a laser print image for best results.
- Apply a thin, even layer of acrylic paint to prevent bleeding.
- Smooth the image onto the fabric with even pressure.
- Allow the paint to dry completely before removing the paper.
- Seal the image with a clear acrylic sealer to protect it.
5.6. How Can Different Paint Colors Enhance the Image?
Experimenting with different acrylic paint colors can add depth and visual interest to your fabric transfers. For example, using a darker color as a base can create a shadow effect, while using lighter colors can highlight certain areas of the image. Consider using multiple colors and blending them together for a more artistic and unique result. Ali Manning from Vintage Page Designs suggests using metallic acrylic paints for adding a touch of shimmer and elegance to your fabric transfers.
6. What Other Methods Can Be Used To Transfer Photos to Fabric?
Beyond the popular methods, several alternative techniques can be used to transfer photos to fabric, each offering unique results and creative possibilities.
6.1. Citra Solv Transfer Method
Citra Solv, an all-natural cleaner and degreaser, can be used to transfer images to fabric. This method involves printing an image with a laser printer, applying Citra Solv to the back of the print, and then pressing it onto the fabric. The chemicals in Citra Solv cause the ink to transfer from the paper to the fabric.
6.2. Gel Medium Transfer Method
Gel medium, similar to Mod Podge, can be used to transfer images to fabric. This method involves applying a layer of gel medium to the fabric, placing the image face down on the medium, and then rubbing away the paper backing once the medium is dry.
6.3. T-Shirt Transfer Paper Alternatives
While iron-on transfer paper is a common method, there are alternatives that offer different results. For example, printable fabric sheets can be used with inkjet printers to create custom fabric designs. These sheets are then ironed onto the fabric to create a permanent bond.
6.4. Photo Transfer Potions
Several commercial photo transfer potions are available that can be used to transfer images to fabric. These potions typically involve applying the potion to the fabric, placing the image face down on the potion, and then rubbing away the paper backing once the potion is dry.
6.5. Using Inkodye
Inkodye is a unique dye that develops its color when exposed to sunlight. To transfer an image using Inkodye, you first need to create a negative of your image on a transparency. Then, apply the Inkodye to your fabric, place the transparency on top, and expose it to sunlight. The areas exposed to sunlight will develop color, while the areas covered by the transparency will remain uncolored, creating your image.
6.6. What Are The Key Considerations for Alternative Methods?
Each alternative method has its own set of considerations. For example, the Citra Solv method requires proper ventilation due to the chemicals involved, while the Inkodye method requires sunlight exposure. It’s important to research each method thoroughly and follow the instructions carefully to achieve the best results.
7. How Do You Protect Your Transferred Image on Fabric?
Protecting your transferred image on fabric is crucial to ensure its longevity and vibrancy. Proper care and sealing techniques can significantly extend the life of your fabric art.
7.1. Sealing the Image
Sealing the transferred image helps to protect it from wear and tear, fading, and washing. Several types of sealers can be used, including fabric sealants, Mod Podge, and acrylic sealers.
7.2. Fabric Sealants
Fabric sealants are specifically designed to protect fabric and prevent fading. They are typically applied as a spray or liquid and can be found at most craft stores.
7.3. Mod Podge as a Sealer
Mod Podge can also be used as a sealer for fabric transfers. Apply a thin layer of Mod Podge over the transferred image to protect it.
7.4. Acrylic Sealers
Acrylic sealers are another option for protecting fabric transfers. These sealers are typically applied as a spray and provide a clear, protective coating.
7.5. Washing and Care Instructions
Proper washing and care are essential for maintaining the quality of your fabric transfer. Always wash the fabric inside out on a gentle cycle using cold water. Avoid using bleach or harsh detergents. Tumble dry on low or hang to dry.
7.6. Avoiding Harsh Chemicals
Harsh chemicals, such as bleach and stain removers, can damage the transferred image. Avoid using these chemicals on your fabric art.
7.7. Storing Fabric Art
Proper storage can also help to protect your fabric art. Store the fabric in a cool, dry place away from direct sunlight. Consider using acid-free tissue paper to protect the image from rubbing against other surfaces.
7.8. Regular Inspection and Maintenance
Regularly inspect your fabric art for any signs of wear or damage. Address any issues promptly to prevent further damage. For example, reapply sealant to areas that show signs of fading or peeling.
8. What Are Common Mistakes to Avoid When Transferring Photos to Fabric?
Avoiding common mistakes can save you time, money, and frustration when transferring photos to fabric. Here are some pitfalls to watch out for.
8.1. Using the Wrong Type of Printer
Using an inkjet printer when a laser printer is required (or vice versa) is a common mistake. Always check the instructions for your chosen transfer method to ensure you are using the correct type of printer.
8.2. Forgetting to Mirror the Image
Forgetting to mirror the image before printing is another common mistake, especially when transferring images with text. Always flip the image horizontally before printing to ensure it appears correctly on the fabric.
8.3. Not Using High-Resolution Images
Using low-resolution images can result in blurry or pixelated transfers. Always use high-resolution images for best results.
8.4. Applying Uneven Pressure
Applying uneven pressure when ironing or heat pressing can result in patchy or incomplete transfers. Apply even pressure across the entire image to ensure a uniform transfer.
8.5. Using the Wrong Heat Settings
Using the wrong heat settings can damage the fabric or prevent the image from transferring properly. Always follow the instructions for your chosen transfer method and use the recommended heat settings.
8.6. Not Allowing Enough Drying Time
Not allowing enough drying time can result in smudged or distorted transfers. Always allow the transferred image to dry completely before handling or washing the fabric.
8.7. Ignoring Fabric Type Compatibility
Ignoring fabric type compatibility can lead to poor results. For example, sublimation only works on polyester or polyester-blend fabrics. Always choose a fabric that is compatible with your chosen transfer method.
8.8. What Are The Preventative Measures?
- Double-check printer requirements: Ensure you’re using the correct printer type for your chosen method.
- Always mirror images with text: Prevent backwards text by flipping the image before printing.
- Use high-resolution images: Avoid blurry results by starting with clear, detailed images.
- Apply even pressure: Ensure a uniform transfer by applying steady, consistent pressure.
- Follow heat setting guidelines: Protect your fabric and ensure proper transfer by using recommended heat settings.
- Allow sufficient drying time: Prevent smudging by letting the transferred image dry completely.
- Check fabric compatibility: Choose a fabric that works well with your chosen transfer method.
9. What Are Some Inspiring Ideas for Projects Using Photo Transfers on Fabric?
Transferring photos to fabric opens up a world of creative possibilities. Here are some inspiring ideas to spark your imagination.
9.1. Personalized T-Shirts
Create custom t-shirts featuring your favorite photos, designs, or quotes. This is a great way to express your personality or create unique gifts for friends and family.
9.2. Custom Tote Bags
Design personalized tote bags with photo transfers. These are perfect for everyday use, shopping, or as stylish accessories.
9.3. Unique Home Décor
Create unique home décor items, such as cushion covers, wall hangings, and table runners, using photo transfers. This is a great way to add a personal touch to your living space.
9.4. Memory Quilts
Make a memory quilt featuring photos of special occasions, loved ones, or memorable places. This is a beautiful and sentimental way to preserve cherished memories.
9.5. Photo Coasters
Design custom photo coasters using fabric transfers. These are perfect for protecting your furniture and adding a personal touch to your home.
9.6. Personalized Aprons
Create personalized aprons with photo transfers. These are great for cooking enthusiasts or as unique gifts for chefs and bakers.
9.7. Custom Fabric Labels
Design custom fabric labels for your handmade items using photo transfers. This is a professional and personalized way to brand your creations.
9.8. Fabric Scrapbooks
Create fabric scrapbooks featuring photo transfers and other embellishments. This is a unique and tactile way to preserve your memories.
9.9. Wall Art Pieces
Craft unique wall art pieces by transferring photos onto fabric and framing them. This is a great way to display your favorite images and add a personal touch to your home décor. According to dfphoto.net, wall art featuring personal photo transfers is trending in Santa Fe’s art scene.
9.10. Personalized Gifts for Special Occasions
Create personalized gifts for special occasions, such as birthdays, weddings, and anniversaries, using photo transfers on fabric. This is a thoughtful and heartfelt way to show your loved ones how much you care.
10. Where Can You Find Inspiration and Resources for Fabric Photo Transfers?
Finding inspiration and resources is essential for mastering the art of fabric photo transfers. Here are some places to explore.
10.1. dfphoto.net
Visit dfphoto.net for a wealth of tutorials, tips, and inspiring ideas for fabric photo transfers. Our website offers a vibrant community and a wealth of resources to help you unleash your creativity.
10.2. Online Craft Blogs and Websites
Explore online craft blogs and websites for tutorials, project ideas, and inspiration. Many talented crafters share their knowledge and experience online.
10.3. Social Media Platforms
Follow crafting accounts on social media platforms like Pinterest, Instagram, and Facebook for daily inspiration and project ideas.
10.4. Craft Books and Magazines
Browse craft books and magazines for in-depth tutorials, project ideas, and tips from experienced crafters.
10.5. Local Craft Stores and Workshops
Attend workshops and classes at your local craft store to learn new techniques and connect with other crafters.
10.6. Online Forums and Communities
Join online forums and communities dedicated to fabric crafts and photo transfers to ask questions, share ideas, and connect with fellow crafters.
10.7. Art and Design Schools
Explore resources from art and design schools for insights into advanced techniques and creative approaches to fabric photo transfers. The Santa Fe University of Art and Design’s Photography Department offers valuable resources for aspiring fabric artists.
10.8. Photography Magazines and Websites
Gain insights into photography techniques and image selection from photography magazines and websites. High-quality images are essential for successful fabric photo transfers.
10.9. Textile Art Exhibitions and Shows
Visit textile art exhibitions and shows to see examples of fabric art and get inspired by the work of talented artists.
10.10. YouTube Tutorials
Watch YouTube tutorials for step-by-step instructions and visual demonstrations of various fabric photo transfer techniques.
FAQ: How to Put Photos on Fabric
1. What is the best fabric to use for photo transfers?
The best fabrics for photo transfers are typically natural fabrics like cotton and linen. These fabrics provide a smooth surface for the image to adhere to and are compatible with most transfer methods. For sublimation, polyester or polyester blends are ideal.
2. Can I use an inkjet printer for all photo transfer methods?
No, not all photo transfer methods are compatible with inkjet printers. Some methods, like Mod Podge and acrylic paint transfers, require a laser printer. Always check the instructions for your chosen method to ensure you are using the correct type of printer.
3. How do I prevent my transferred image from fading?
To prevent your transferred image from fading, use high-quality inks and sealers, wash the fabric inside out on a gentle cycle, and avoid using bleach or harsh detergents. Sublimation is known for its fade-resistant results.
4. Do I need to mirror my image before transferring it to fabric?
Yes, you typically need to mirror your image before transferring it to fabric, especially if it contains text. This ensures that the image appears correctly on the fabric.
5. What is the best way to seal a photo transfer on fabric?
The best way to seal a photo transfer on fabric is by using a fabric sealant, Mod Podge, or acrylic sealer. Apply a thin, even layer over the transferred image to protect it from wear and tear.
6. Can I wash fabric with a photo transfer on it?
Yes, you can wash fabric with a photo transfer on it, but it’s important to follow proper care instructions. Wash the fabric inside out on a gentle cycle using cold water, and avoid using bleach or harsh detergents.
7. How do I remove wrinkles from fabric before transferring a photo?
To remove wrinkles from fabric before transferring a photo, iron the fabric on a high heat setting. This will create a smooth surface for the image to adhere to.
8. What is sublimation and why is it considered a permanent transfer method?
Sublimation is a transfer method that involves printing an image onto special paper with sublimation inks, then using a heat press to transfer the image onto polyester or polyester-blend fabrics. It’s considered permanent because the ink turns into a gas and penetrates the fabric fibers, creating a lasting bond.
9. Can I transfer a photo onto dark fabric?
Yes, you can transfer a photo onto dark fabric by using transfer paper specifically designed for dark fabrics. These papers typically have a white or opaque layer that allows the image to show up on dark backgrounds.
10. Where can I find high-quality images for fabric photo transfers?
You can find high-quality images for fabric photo transfers on dfphoto.net, stock photo websites, and online image libraries. Always ensure that you have the necessary rights and permissions to use the images for your projects.
Ready to dive into the world of fabric photo transfers? Visit dfphoto.net for detailed tutorials, inspiring project ideas, and a supportive community to help you every step of the way. Whether you’re looking to create personalized gifts, unique home décor, or custom apparel, dfphoto.net has everything you need to unleash your creativity and master the art of transferring photos to fabric. Join our community today and start exploring the endless possibilities of fabric art! For additional assistance or inquiries, please contact us at Address: 1600 St Michael’s Dr, Santa Fe, NM 87505, United States. Phone: +1 (505) 471-6001.