Whether you’re looking to view your iPhone photos on a larger screen or simply want to back them up to your iPad, transferring photos between your Apple devices is a straightforward process. This guide will walk you through three easy methods to put photos from your iPhone to your iPad, ensuring you can access your precious memories wherever you go.
Method 1: Seamlessly Sync Photos with iCloud
For automatic and continuous photo syncing between your iPhone and iPad, iCloud Photos is the ideal solution. Once enabled, any new photos taken on your iPhone will automatically appear on your iPad, and vice versa. This method is perfect for users who want to keep their photo libraries consistent across all their Apple devices without manual intervention. Here’s how to set up iCloud Photos:
-
Open Settings on your iPhone and tap on your name at the top. This will take you to your Apple ID settings.
-
Select “iCloud”. Here you will find all the iCloud services available on your device.
-
Tap on “Photos”. This will open the settings specifically for iCloud Photos.
-
Toggle “iCloud Photos” to the green “On” position. This activates iCloud Photos syncing.
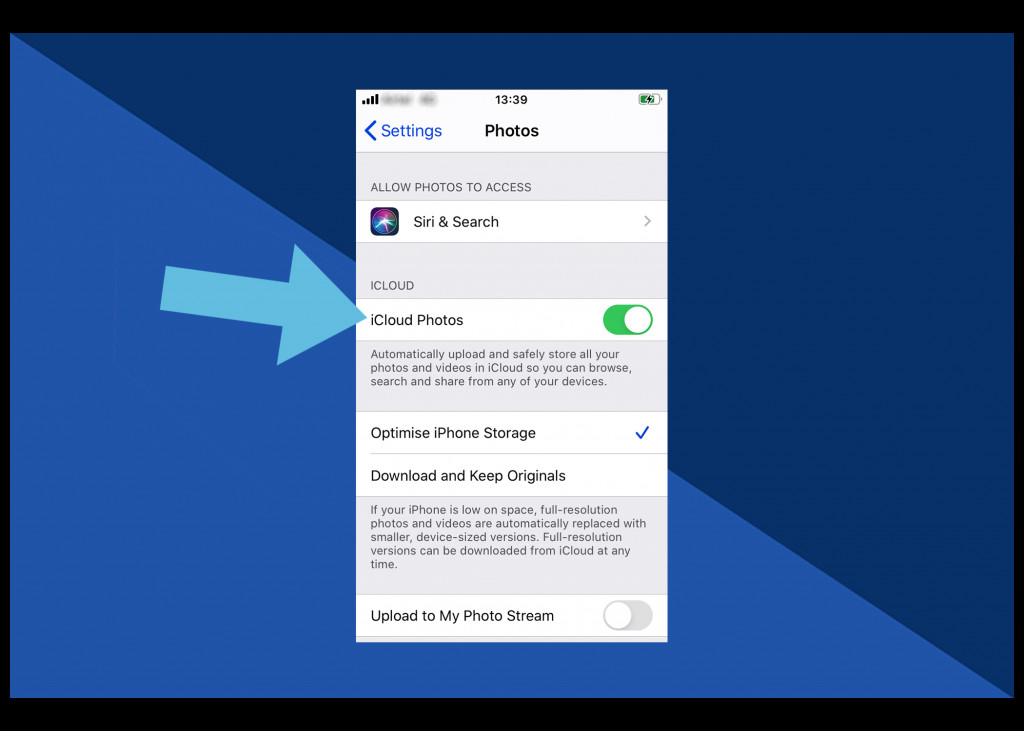 Tap on iCloud Photos
- Choose your storage preference. You can select “Optimize iPhone Storage” to save space on your iPhone by storing full-resolution photos in iCloud and keeping smaller, device-optimized versions on your phone. Alternatively, “Download and Keep Originals” stores full-resolution versions on both your device and iCloud.
Repeat these steps on your iPad to enable iCloud Photos there as well. Ensure you are logged in with the same Apple ID on both devices for seamless syncing. With iCloud Photos enabled on both your iPhone and iPad, your photo library will automatically stay updated across devices.
Method 2: Selectively Transfer Photos Using AirDrop
If you prefer a more controlled approach and only want to transfer specific photos or videos, AirDrop is your go-to method. AirDrop allows you to wirelessly send files directly from your iPhone to your iPad, offering a quick and easy way to share chosen content without syncing your entire library. Follow these steps to use AirDrop:
- Enable AirDrop on both your iPhone and iPad. To do this, open the Control Center on both devices. On iPhones with a Home button, swipe up from the bottom of the screen. On newer iPhones and iPads, swipe down from the top-right corner.
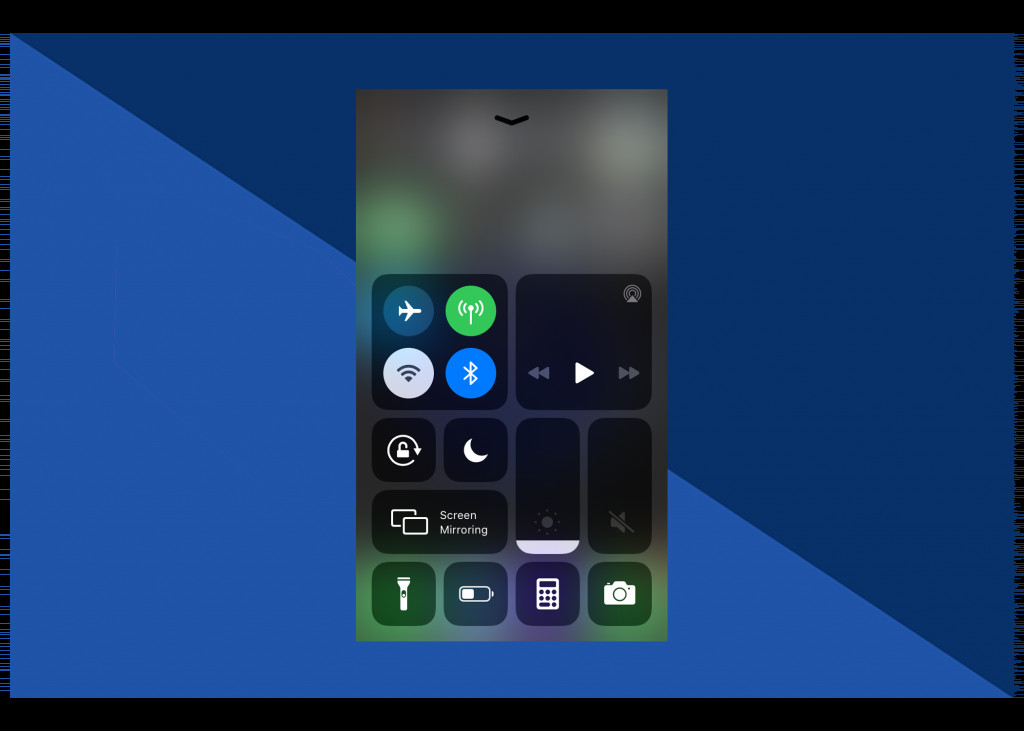 Launch the Control Centre
- In the Control Center, press and hold the wireless control box (containing Airplane Mode, Wi-Fi, and Bluetooth icons) in the top left corner. This will expand the wireless options.
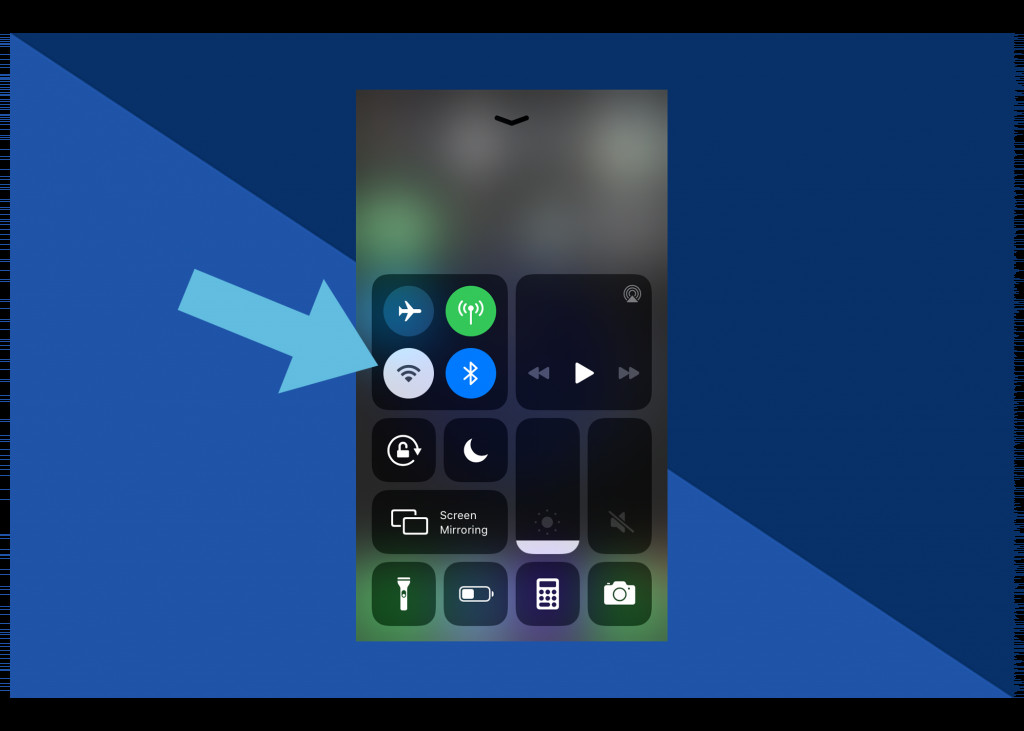 Wireless icon
- Tap the “AirDrop” button and choose your desired visibility setting. “Contacts Only” is a secure option, allowing only your contacts to see your device for AirDrop. “Everyone” makes your device discoverable to all nearby devices, which is convenient but less private.
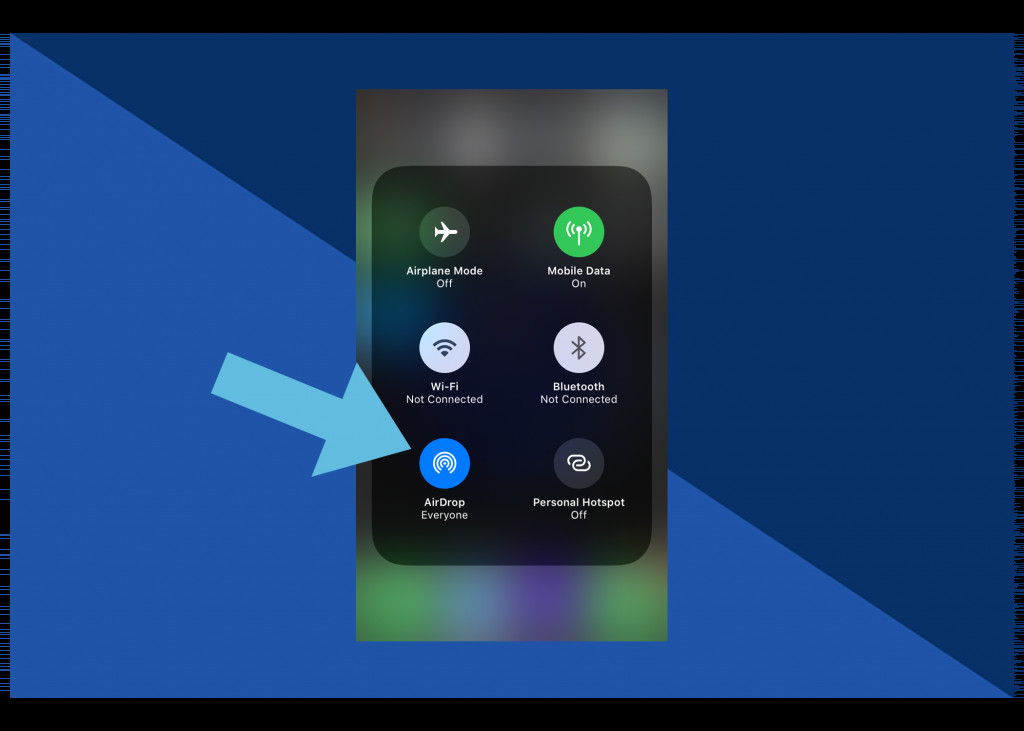 Tap AirDrop
- Open the Photos app on your iPhone and select the photo(s) you want to transfer. Tap the “Share” icon (the square with an arrow pointing upwards) in the bottom left corner.
 Open photo to be shared
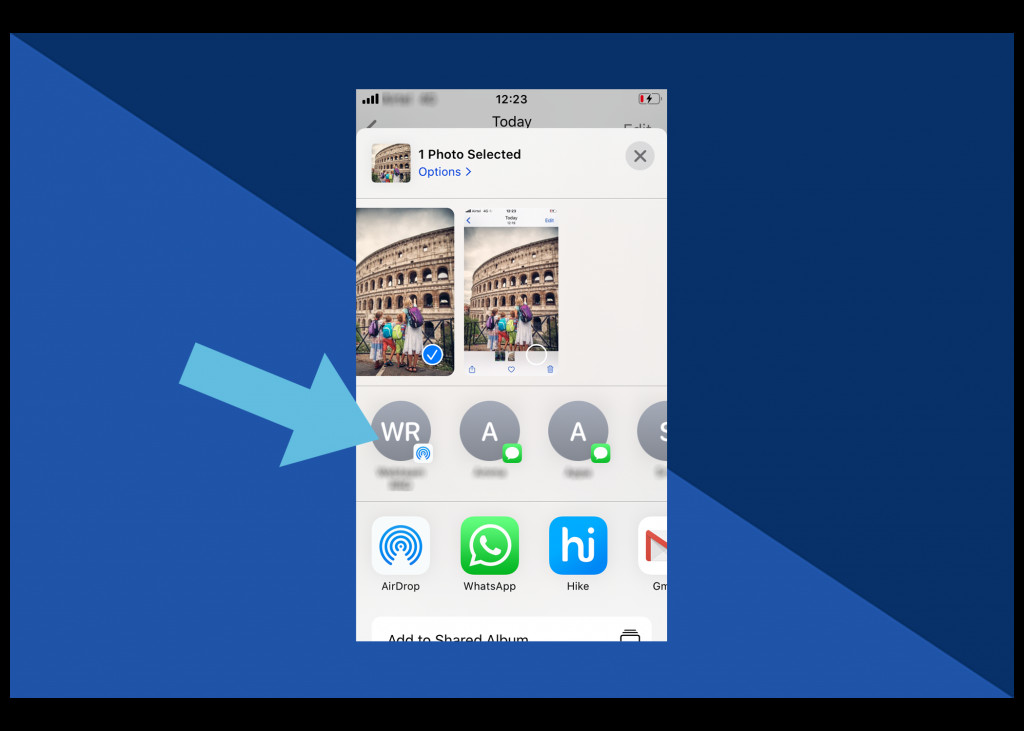
- Scroll through your sharing options and tap “AirDrop”. Your iPad should appear as an available device if AirDrop is enabled and discoverable.
 Scroll left or right to select more
- Tap on your iPad’s name. The selected photos will be sent to your iPad via AirDrop and saved in the Photos app.
 Tap on iPad device
Method 3: Transfer Photos via USB-C Cable
For a direct and wired connection, using a USB-C cable offers another reliable way to transfer photos from your iPhone to your iPad. This method is particularly useful for transferring large numbers of photos or if you prefer a physical connection. Here’s how to transfer photos using a USB-C cable:
-
Connect your iPhone to your iPad using a USB-C cable. Plug one end of the cable into the USB-C port on your iPad and the other end into the Lightning or USB-C port on your iPhone (depending on your iPhone model).
-
Unlock your iPhone. When prompted on your iPhone, tap “Trust” or “Allow” to allow your iPad to access photos and videos.
-
Open the Photos app on your iPad. In many cases, the Photos app will automatically open to the “Import” screen once your iPhone is connected and trusted. If not, navigate to the Photos app.
-
Select the photos you want to import. The Import screen will display photos from your connected iPhone. Choose the photos you wish to transfer to your iPad and tap “Import Selected” or “Import All”.
After importing, the photos will be available in your iPad’s photo library. This method provides a secure and fast transfer, especially for large photo libraries.
Enjoy Your Photos on Your iPad
With these three methods, transferring photos from your iPhone to your iPad is simple and efficient. Choose the method that best suits your needs, whether it’s the automatic syncing of iCloud, the selective sharing of AirDrop, or the direct connection of a USB-C cable. Now you can enjoy your iPhone photos on the bigger, more immersive screen of your iPad, making viewing and sharing your memories even better.