Putting multiple photos in one image is a fantastic way to tell a visual story, create a collage, or showcase different aspects of a single event. At dfphoto.net, we’re passionate about helping you unlock your creative potential, and combining photos is a brilliant technique for photographers and visual artists alike. Let’s explore the various methods and tools you can use to achieve this, enhancing your photography and visual storytelling skills with image editing software and creative photo layouts.
1. What Are The Best Apps To Combine Photos On My Phone?
Combining photos on your phone is super convenient, and there are tons of great apps to help you do it. Apps like PicCollage, Canva, and Adobe Photoshop Express are some of the best for quickly creating stunning collages and photo arrangements on the go. These apps offer user-friendly interfaces and a variety of templates and editing tools.
1.1. PicCollage: Your Go-To App for Fun Collages
PicCollage is perfect for creating fun, freestyle collages. It’s super easy to use, offering a variety of layouts, stickers, and backgrounds to personalize your creations. According to user reviews, PicCollage is favored for its intuitive interface, making it accessible for both beginners and experienced photo enthusiasts.
1.2. Canva: Design Like a Pro on Your Phone
Canva isn’t just for desktop use; its mobile app is incredibly powerful for photo editing and graphic design. You can easily create custom layouts, add text, and use various design elements to make your combined photos look professionally designed. Canva’s extensive template library and easy drag-and-drop interface make it a top choice.
1.3. Adobe Photoshop Express: Powerful Editing in Your Pocket
For those who need more advanced editing options on their phone, Adobe Photoshop Express is a fantastic choice. It allows you to combine photos seamlessly, apply filters, adjust colors, and even remove blemishes. This app provides a robust set of tools for enhancing your images before combining them.
2. How To Use Preview App to Combine Multiple Photos?
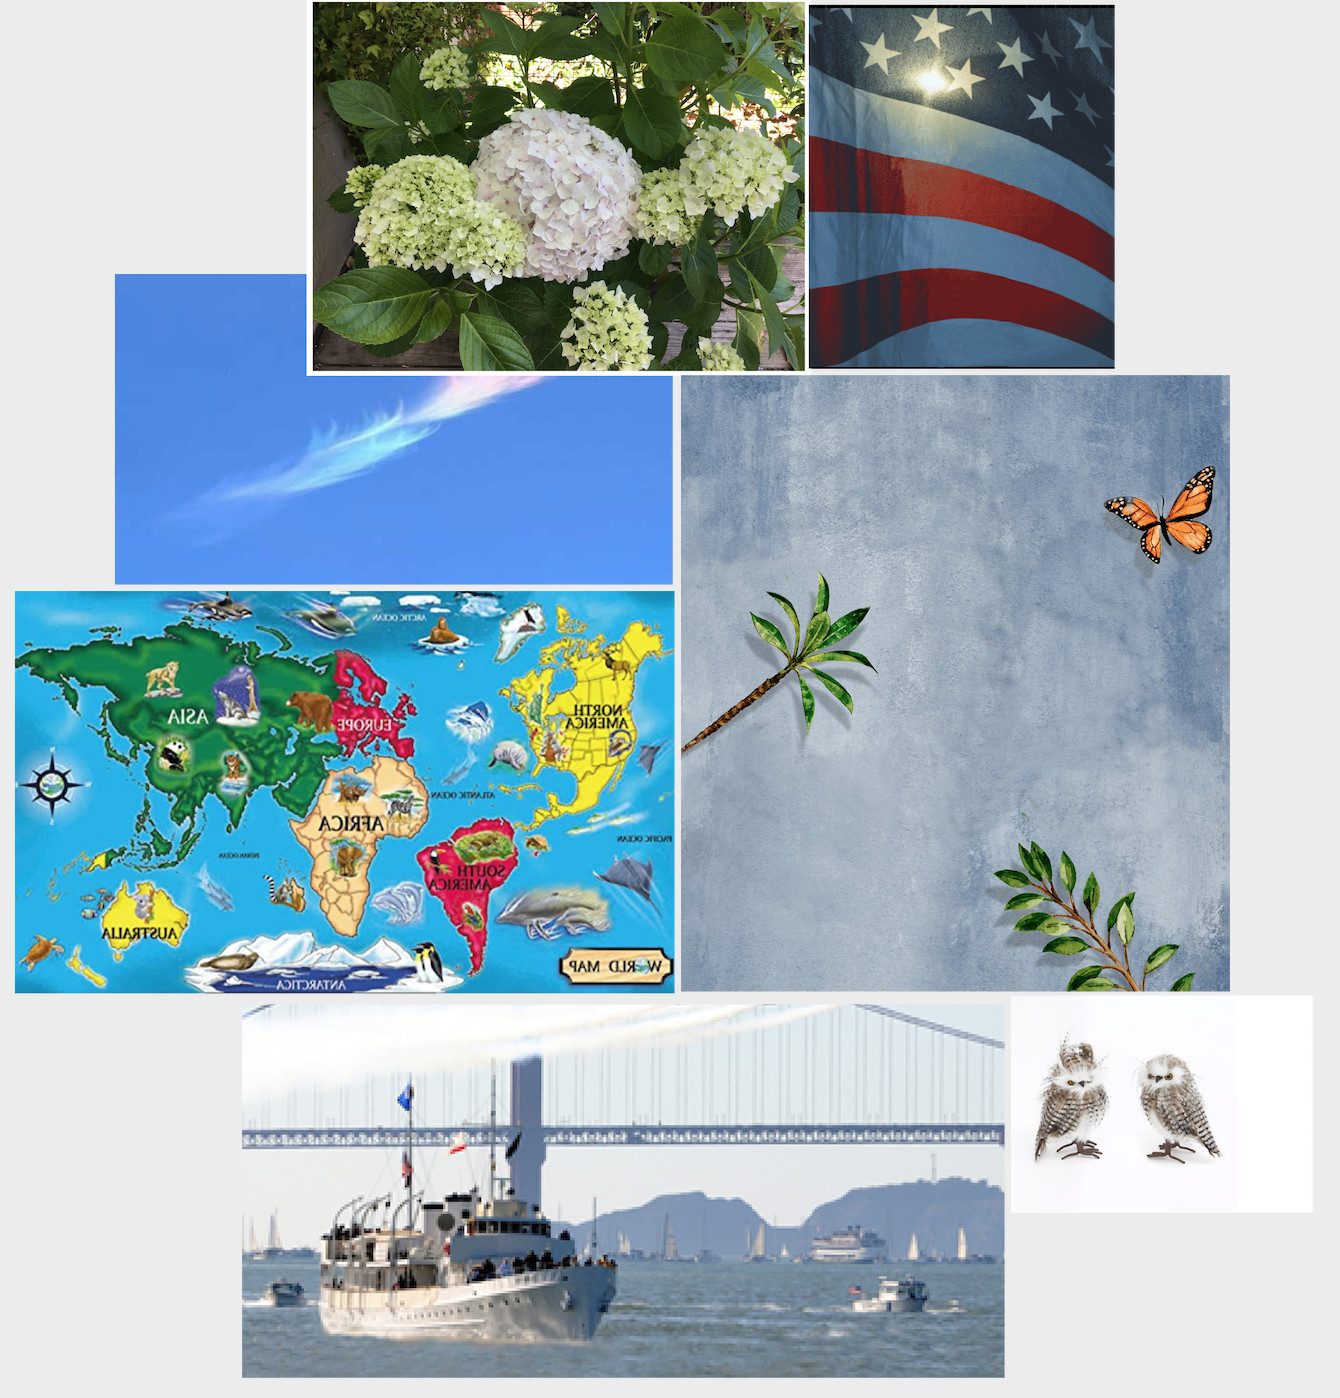
Yes, you can use the Preview app on your Mac to combine multiple photos into one image by utilizing its editing capabilities and transparency features. This method involves creating a blank transparency screen and then copying and pasting photos into it, allowing you to arrange and resize them as desired.
2.1. Step-by-Step Guide to Combining Photos with Preview:
-
Open a Photo and Create a Blank Canvas:
- Open any photo in Preview.
- Select Edit > Select All, then Edit > Delete. This leaves you with a blank transparency screen.
-
Copy and Paste Photos:
- Open another photo you want to include.
- Select Edit > Copy.
- Go back to the transparency screen and select Edit > Paste.
-
Position and Resize:
- You can now move and resize the pasted photo. Look for the drag handles to adjust the size.
- Repeat the copy and paste process for each additional photo.
-
Arrange Your Collage:
- Arrange the photos to your liking, resizing and positioning them as needed.
-
Save Your Creation:
- Once you’re satisfied with the arrangement, save the image. You might want to save it as a PNG to preserve transparency if needed.
2.2. Tips for Using Preview Effectively
- Transparency is Key: Start with a blank transparency screen to easily layer photos.
- Full Screen Mode: Working in full screen can help you see and manipulate the images more precisely.
- Duplicate Photos: Work on duplicates of your original photos to avoid accidentally altering the originals.
- Preserve Quality: Save your final image in a high-quality format to ensure it looks its best.
 Preview app transparency screen
3. What Is The Best Free Software For Photo Collages?
GIMP (GNU Image Manipulation Program) and Photopea are excellent free software options for creating photo collages, offering a range of features comparable to paid programs. GIMP is a downloadable software, while Photopea is a web-based application.
3.1. GIMP: The Powerful Open-Source Option
GIMP is a robust, open-source image editor that’s perfect for creating complex photo collages. It offers layers, masks, and a variety of editing tools that give you precise control over your final image. According to the Free Software Foundation, GIMP is widely used by both amateur and professional photographers for its extensive capabilities.
3.2. Photopea: Photoshop in Your Browser
Photopea is a fantastic web-based image editor that mimics the look and feel of Adobe Photoshop. It supports layers, masks, and various file formats, making it ideal for creating detailed photo collages without needing to download any software. Photopea is particularly favored for its accessibility and comprehensive feature set.
3.3. Key Features to Look for in Free Collage Software
- Layers: Essential for arranging photos and applying effects non-destructively.
- Templates: Useful for quick and easy collage creation.
- Text and Effects: Add text, stickers, and other effects to personalize your collages.
- User-Friendly Interface: Look for software that is intuitive and easy to navigate.
- Format Support: Ensure the software supports the image formats you need (JPEG, PNG, TIFF, etc.).
4. How Can I Use Google Docs To Combine Pictures?
Combining pictures in Google Docs is a simple way to create basic layouts, especially when you need to include images in a document. While it’s not designed for advanced photo editing, Google Docs offers some useful tools for arranging and aligning images.
4.1. Step-by-Step Guide to Combining Photos in Google Docs:
-
Insert Images:
- Open your Google Doc.
- Go to Insert > Image and choose the source (upload from computer, search the web, Google Drive, etc.).
- Insert all the images you want to combine.
-
Adjust Image Options:
- Click on an image to select it.
- Choose an option from the image toolbar (In line, Wrap text, Break text). Wrap text is usually the most flexible for arranging images.
-
Position and Resize:
- Drag the images to your desired positions.
- Use the corner handles to resize the images.
-
Align Images:
- Use the alignment guides that appear as you drag images to help align them with each other.
-
Add Borders or Text (Optional):
- You can add borders by going to Format > Image options > Size & Rotation > Border weight.
- Add text boxes (Insert > Drawing > Text box) to include captions or labels.
-
Group Images (Optional):
- For more complex layouts, you can use the drawing tool (Insert > Drawing > New) to insert images and group them. This allows you to move and resize the entire group as one object.
4.2. Tips for Effective Use of Google Docs for Images
- Use Wrap Text: This option allows you to move images freely around the document.
- Drawing Tool for Complex Layouts: The drawing tool provides more control over image placement and grouping.
- Keep It Simple: Google Docs is best for basic layouts. For more advanced collages, use dedicated photo editing software.
- Image Quality: Be aware that Google Docs may compress images, so use high-resolution originals.
5. What Are The Key Considerations For Image Resolution When Combining Multiple Photos?
Maintaining good image resolution is crucial when combining multiple photos to ensure the final result looks sharp and professional. Here are the key considerations:
5.1. Original Image Quality
Start with the highest quality images possible. Using low-resolution images will result in a blurry or pixelated final collage, especially if you plan to print it.
5.2. Resizing and Scaling
When you combine photos, you often need to resize them. Avoid drastically enlarging smaller images, as this can lead to pixelation. Instead, reduce the size of larger images to match the resolution of the smaller ones.
5.3. Final Output Size
Consider the intended use of your combined image. If you plan to print it, you’ll need a higher resolution than if you’re just using it for social media. A general rule is 300 DPI (dots per inch) for print and 72 DPI for web.
5.4. Software Settings
Make sure your photo editing software is set to maintain high resolution. When saving your final image, choose a high-quality format like JPEG (with high settings), PNG, or TIFF.
5.5. Resolution vs. File Size
Be mindful of the balance between resolution and file size. Higher resolution means a larger file size, which can be cumbersome for sharing online. Optimize the resolution for the intended use to avoid unnecessary file bloat.
5.6. Upscaling
Avoid upscaling images (increasing their resolution artificially) unless absolutely necessary. Upscaling can introduce artifacts and doesn’t genuinely improve image quality. If you must upscale, use software with good upscaling algorithms, like Adobe Photoshop or Topaz Gigapixel AI.
5.7. Test and Preview
Always test and preview your final image at the intended size to check for any loss of quality or pixelation. This helps you catch any issues before you finalize the project.
6. How To Make A Photo Collage In Adobe Photoshop?
Creating a photo collage in Adobe Photoshop offers unparalleled flexibility and control. Here’s a step-by-step guide to help you create stunning collages.
6.1. Step-by-Step Guide to Creating a Photo Collage in Photoshop:
-
Create a New Document:
- Open Adobe Photoshop.
- Go to File > New.
- Set the dimensions and resolution for your collage. If you’re printing, use 300 DPI; for web, use 72 DPI.
-
Place Your Images:
- Go to File > Place Embedded (or Place Linked).
- Select the first image and click Place.
- Repeat for all the images you want to include in your collage.
-
Arrange Layers:
- In the Layers panel, you’ll see each image on its own layer.
- Drag the layers to rearrange the order of the images. The top layer will appear in front.
-
Resize and Position Images:
- Select a layer in the Layers panel.
- Press Ctrl+T (Windows) or Cmd+T (Mac) to activate the Free Transform tool.
- Resize and position the image as needed. Hold Shift while dragging to maintain proportions.
- Press Enter to apply the transformation.
-
Add Masks:
- Select a layer.
- Click the Add Layer Mask button at the bottom of the Layers panel (it looks like a rectangle with a circle in the middle).
- Use the Brush tool (B) with a soft-edged brush and black as the foreground color to paint away parts of the image, creating seamless transitions.
-
Add Layer Styles:
- Double-click a layer in the Layers panel to open the Layer Style dialog.
- Add effects like drop shadows, strokes, or bevels to enhance your images.
-
Add Text and Graphics:
- Use the Type tool (T) to add text.
- Add shapes using the Shape tools (rectangle, ellipse, etc.).
- Customize the text and shapes with colors, gradients, and effects.
-
Adjust Colors and Tones:
- Add adjustment layers (Layer > New Adjustment Layer) to adjust the overall colors and tones of your collage.
- Experiment with levels, curves, color balance, and other adjustments.
-
Save Your Collage:
- Go to File > Save As.
- Choose a file format (JPEG for web, TIFF for print) and save your collage.
6.2. Advanced Tips for Photoshop Collages
- Use Smart Objects: Convert your image layers to Smart Objects (right-click the layer > Convert to Smart Object) to preserve image quality when resizing.
- Clipping Masks: Use clipping masks to confine an image to the shape of another layer.
- Blend Modes: Experiment with different blend modes (Normal, Multiply, Overlay, etc.) to create interesting effects.
- Filters: Apply filters (Filter menu) to add creative effects to your images.
7. What Are Some Creative Layout Ideas For Combining Photos?
Creative layouts can transform a simple combination of photos into a visually stunning piece of art. Here are some ideas to inspire your next photo collage:
7.1. Grid Layouts
A classic and clean approach, grid layouts arrange photos in rows and columns. This works well for showcasing a series of images with equal importance.
7.2. Mosaic Layouts
Similar to a grid, but with varying sizes of photos to create a dynamic mosaic effect. This layout adds visual interest while still maintaining a structured feel.
7.3. Heart Shape Collage
Arrange your photos in the shape of a heart for a romantic and visually appealing collage. This is perfect for weddings, anniversaries, or Valentine’s Day.
7.4. Number or Letter Collages
Create collages in the shape of numbers or letters for birthdays, anniversaries, or personalized gifts. This requires careful planning and precise placement of photos.
7.5. Circular Layouts
Arrange your photos in a circle to create a unique and eye-catching design. This works well for themes like family, nature, or travel.
7.6. Freestyle Collage
A more organic and free-flowing layout where you can arrange photos in any way you like. Overlap, rotate, and resize photos to create a visually dynamic collage.
7.7. Storyboard Layouts
Arrange your photos in a sequence to tell a story. This works well for showcasing events, journeys, or processes.
7.8. Silhouette Collages
Create a silhouette shape and fill it with photos to create a striking visual effect. This is perfect for themes like nature, wildlife, or cityscapes.
7.9. Minimalist Layouts
Use a few carefully selected photos with plenty of negative space to create a clean and modern collage. This approach emphasizes the quality of the images.
7.10. Themed Collages
Create collages around a specific theme, such as travel, family, or holidays. Use photos, colors, and design elements that reflect the theme.
8. How Can I Print My Photo Collage In High Quality?
Printing your photo collage in high quality ensures that your hard work looks its best. Here’s how to achieve professional-looking prints:
8.1. Start with High-Resolution Images
As mentioned earlier, use the highest resolution images possible. Aim for at least 300 DPI (dots per inch) for print quality.
8.2. Choose the Right Paper
The type of paper you use can significantly impact the final print quality. Matte paper is good for reducing glare and showing fine details, while glossy paper enhances colors and contrast. Consider the finish that best suits your collage’s style and content.
8.3. Calibrate Your Monitor
A calibrated monitor ensures that the colors you see on screen are accurate, which is crucial for print accuracy. Use a monitor calibration tool to adjust your monitor’s settings.
8.4. Use Professional Printing Services
Professional printing services have high-quality printers and expertise in color management. They can provide valuable advice and ensure your prints look their best. Local options in Santa Fe include photo labs and print shops that specialize in fine art prints.
8.5. Check Color Settings
Ensure your photo editing software is set to the correct color profile (usually sRGB for most printers). Incorrect color settings can lead to color shifts in your prints.
8.6. Soft Proofing
Soft proofing is a technique that simulates how your image will look when printed. In Photoshop, go to View > Proof Setup and choose the color profile for your printer. This allows you to make adjustments before printing.
8.7. Test Prints
Before printing your final collage, do a test print on a smaller scale to check for color accuracy and overall quality. This can save you time and money in the long run.
8.8. Avoid Over-Compression
When saving your collage for printing, avoid over-compressing the image. Use a high-quality JPEG setting or save it as a TIFF file to preserve image details.
9. What Are The Copyright Considerations When Combining Photos From Different Sources?
Copyright is a crucial aspect to consider when combining photos from different sources. Here’s what you need to know:
9.1. Understanding Copyright Law
Copyright law protects the rights of creators to control how their work is used. Generally, the photographer or artist owns the copyright to an image unless they have transferred those rights to someone else.
9.2. Permission and Licensing
Always obtain permission from the copyright holder before using their work. This often involves obtaining a license, which specifies how you can use the image and any associated fees.
9.3. Public Domain and Creative Commons
Images in the public domain are free to use without permission. Creative Commons licenses allow creators to grant certain rights to the public while retaining copyright. Check the specific terms of the Creative Commons license to understand what you can and cannot do with the image.
9.4. Fair Use
Fair use is a legal doctrine that allows limited use of copyrighted material without permission for purposes such as criticism, commentary, news reporting, teaching, scholarship, and research. However, fair use is often a gray area and depends on the specific circumstances.
9.5. Attribution
Even if you have permission to use an image, it’s good practice to give proper attribution to the creator. This acknowledges their work and helps avoid any misunderstandings.
9.6. Stock Photos
If you need images for your collage, consider using stock photo websites. These sites offer royalty-free images that you can use for a fee. Always read the licensing agreement carefully to understand the terms of use.
9.7. Originality
When combining photos, make sure your final collage is original enough to qualify for copyright protection. If your collage is simply a collection of unaltered copyrighted images, it may not be protected by copyright law.
9.8. Consequences of Copyright Infringement
Using copyrighted images without permission can lead to legal action, including lawsuits and financial penalties. It’s always better to err on the side of caution and obtain the necessary permissions.
10. What Are The Latest Trends In Photo Collage Art?
Photo collage art is constantly evolving, with new trends emerging all the time. Here are some of the latest trends to inspire your creativity:
10.1. Digital Collage
Digital collage is the creation of collage art using digital tools such as Adobe Photoshop, GIMP, and Procreate. This trend allows artists to manipulate images in ways that were not possible with traditional methods.
10.2. Mixed Media Collage
Mixed media collage combines photography with other art forms, such as painting, drawing, and sculpture. This trend adds depth and texture to collage art.
10.3. Abstract Collage
Abstract collage focuses on creating non-representational compositions using photos and other materials. This trend emphasizes form, color, and texture over recognizable imagery.
10.4. Surreal Collage
Surreal collage combines disparate images to create dreamlike and often unsettling compositions. This trend draws inspiration from surrealist art and explores the subconscious mind.
10.5. Eco-Friendly Collage
Eco-friendly collage uses recycled and sustainable materials to create collage art. This trend reflects a growing awareness of environmental issues and a desire to create art in a responsible way.
10.6. Interactive Collage
Interactive collage incorporates elements of interactivity, such as augmented reality or QR codes, to create engaging and immersive experiences for viewers.
10.7. Minimalist Collage
Minimalist collage uses a limited number of images and design elements to create clean and impactful compositions. This trend emphasizes simplicity and elegance.
10.8. Themed Collage
Themed collages revolve around a specific subject, event, or concept. This trend allows artists to explore a particular theme in depth and create cohesive collections of images.
10.9. Collage Animation
Collage animation brings collage art to life by animating individual elements and creating dynamic visual narratives.
10.10. Personalized Collage
Personalized collages are created for individuals and often incorporate personal photos, mementos, and other items. This trend is popular for gifts and keepsakes.
Combining multiple photos into one image opens up a world of creative possibilities. Whether you’re using mobile apps, free software, or professional tools like Adobe Photoshop, the key is to start with high-quality images, consider your layout carefully, and respect copyright laws. With the right techniques and a bit of inspiration, you can create stunning photo collages that tell your unique story.
Ready to take your photography skills to the next level? Visit dfphoto.net today for more tutorials, inspiration, and a thriving community of photographers! Discover expert guidance, explore breathtaking photos, and connect with fellow enthusiasts. Let dfphoto.net be your guide in mastering the art of photography and visual storytelling. Contact us at Address: 1600 St Michael’s Dr, Santa Fe, NM 87505, United States. Phone: +1 (505) 471-6001 or visit our Website: dfphoto.net.
FAQ: How To Put Multiple Photos In One Image
- What is the easiest way to combine multiple photos into one image on my phone?
Using apps like PicCollage, Canva, or Adobe Photoshop Express is the easiest way to combine multiple photos on your phone. These apps offer user-friendly interfaces and various templates to quickly create stunning collages. - Can I use the Preview app on my Mac to combine multiple photos?
Yes, the Preview app on Mac can be used to combine multiple photos by creating a blank transparency screen and then copying and pasting photos into it. You can then arrange and resize them as desired. - What free software is best for creating photo collages?
GIMP (GNU Image Manipulation Program) and Photopea are excellent free software options for creating photo collages, offering features comparable to paid programs like Adobe Photoshop. - How can I combine pictures in Google Docs?
You can combine pictures in Google Docs by inserting the images, adjusting the image options to “Wrap text,” and then positioning and resizing them as needed. This is suitable for basic layouts within a document. - What are the key considerations for image resolution when combining multiple photos?
Key considerations include using high-quality original images, avoiding drastic enlargement of smaller images, considering the final output size (300 DPI for print, 72 DPI for web), and ensuring your software settings maintain high resolution. - How do I make a photo collage in Adobe Photoshop?
To make a photo collage in Adobe Photoshop, create a new document, place your images, arrange the layers, resize and position the images, add masks for seamless transitions, and adjust colors and tones as needed. - What are some creative layout ideas for combining photos?
Creative layout ideas include grid layouts, mosaic layouts, heart shape collages, number or letter collages, circular layouts, freestyle collages, storyboard layouts, silhouette collages, minimalist layouts, and themed collages. - How can I print my photo collage in high quality?
To print your photo collage in high quality, start with high-resolution images, choose the right paper, calibrate your monitor, use professional printing services, check color settings, soft proof your image, do test prints, and avoid over-compression. - What are the copyright considerations when combining photos from different sources?
Copyright considerations include understanding copyright law, obtaining permission and licenses, checking for public domain and Creative Commons licenses, understanding fair use, giving proper attribution, using stock photos with appropriate licenses, and ensuring your collage is original enough to qualify for copyright protection. - What are the latest trends in photo collage art?
The latest trends in photo collage art include digital collage, mixed media collage, abstract collage, surreal collage, eco-friendly collage, interactive collage, minimalist collage, themed collage, collage animation, and personalized collage.