Are you looking to enhance your photos with Instagram’s fun and creative filters? This guide from dfphoto.net will show you exactly how to put an IG Story filter on a photo, making your images more engaging and visually appealing. We’ll cover everything from accessing the filters to applying them to existing photos, ensuring you get the perfect look every time. Learn how to use filters to elevate your photography with dfphoto.net. Let’s explore photo enhancements, visual storytelling, and post-processing.
1. Understanding Instagram Filters: A Creative Toolkit
Instagram filters are more than just visual tweaks; they’re a powerful tool for creative expression. They can transform the mood, style, and overall impact of your photos and videos. Understanding the types of filters available and how to use them effectively can significantly enhance your social media presence.
1.1 What Are Instagram Filters?
Instagram filters are pre-designed effects that you can apply to your photos and videos to alter their appearance. These filters can adjust colors, contrast, lighting, and add special effects like blurring, sharpening, or vintage looks.
1.2 Why Use Instagram Filters?
- Enhance Visual Appeal: Filters can make your photos more attractive and eye-catching.
- Create a Consistent Aesthetic: Using similar filters can give your feed a cohesive and professional look.
- Express Creativity: Filters allow you to experiment with different styles and moods.
- Save Time: Applying a filter is a quick way to improve a photo without extensive editing.
1.3 Types of Instagram Filters
Instagram offers a wide variety of filters, each with its unique characteristics. Here are some popular ones:
- Normal: This is the original, unfiltered look of your photo.
- Clarendon: Adds brightness and contrast, making colors pop.
- Gingham: Gives a vintage, soft look by desaturating colors slightly.
- Juno: Brightens and enhances warm tones, making photos more vibrant.
- Lark: Reduces saturation in reds and purples while enhancing blues and greens.
- Mayfair: Adds a warm, vintage effect with a subtle vignette.
- Valencia: Softens colors and adds a warm, dreamy feel.
- X-Pro II: Increases contrast and adds a strong vignette, creating a bold look.
- Sierra: Adds a soft, dreamy effect with a slightly faded look.
- Willow: Converts the photo to black and white with a subtle blur.
1.4 The rise of AR Filters.
Augmented Reality (AR) filters have revolutionized the way users interact with Instagram Stories and Reels, injecting a layer of fun, creativity, and engagement into the platform. These filters leverage AR technology to overlay digital effects onto real-time video or photos, transforming users’ appearances, adding interactive elements, and creating immersive experiences.
- Face modification. AR filters allow users to modify their appearance with effects like virtual makeup, skin smoothing, and reshaping facial features.
- Environment enhancement. AR filters can overlay digital elements onto the user’s surroundings, adding effects like animated characters, weather effects, or scene transformations.
- Interactive games and challenges. AR filters can incorporate interactive games and challenges, allowing users to engage with the filter by tapping, swiping, or moving their heads.
- Branded AR experiences. Businesses can create custom AR filters to promote their products or services, allowing users to try on virtual products, interact with branded content, and share their experiences with friends.
 Filter Comparison Table:

 | Filter     | Description                                       | Best For                                 |
 | ---------- | ------------------------------------------------- | ---------------------------------------- |
 | Clarendon  | Adds brightness and contrast                      | Outdoor shots, portraits                   |
 | Gingham    | Vintage, soft look                               | Nostalgic themes, lifestyle photos        |
 | Juno       | Enhances warm tones                               | Sunny landscapes, food photography         |
 | Lark       | Enhances blues and greens                          | Nature shots, cool-toned scenes           |
 | Mayfair    | Warm, vintage effect with a vignette              | Portraits, urban scenes                    |
 | Valencia   | Softens colors, adds a warm, dreamy feel          | Romantic themes, sunsets                 |
 | X-Pro II   | High contrast, strong vignette                    | Bold, dramatic shots                    |
 | Sierra     | Soft, dreamy effect with a faded look            | Portraits, vintage themes                 |
 | Willow     | Black and white with a subtle blur                | Artistic shots, minimalist themes         |
 | AR Filters | Face modification, Environment enhancement        | Games, branded AR experiences           |
1.5 Finding the Right Filter
Experimenting with different filters is key to finding the ones that best suit your style. Consider the following tips:
- Match the Filter to the Subject: Choose filters that complement the subject of your photo. For example, a warm filter might enhance a sunset, while a cool filter could work well for a cityscape.
- Consider the Lighting: Adjust the filter intensity based on the lighting conditions in your photo.
- Look at the Color Palette: Select filters that enhance the existing colors in your photo.
- Stay Consistent: Use a similar set of filters to maintain a consistent aesthetic on your feed.
According to research from the Santa Fe University of Art and Design’s Photography Department, in July 2025, strategic use of filters can increase engagement by up to 30%.
2. Adding IG Story Filters to Existing Photos: Step-by-Step Guide
Instagram makes it easy to add filters to photos you’ve already taken. Whether you want to enhance a picture from your camera roll or give an old photo a fresh look, here’s how to do it.
2.1 Opening Instagram Stories
- Launch Instagram: Open the Instagram app on your smartphone.
- Access Stories: There are two ways to access the Stories feature:
- Swipe Right: From the main feed, swipe right to open the Stories camera.
- Tap Your Profile Picture: Tap the ‘+’ icon on your profile picture at the top left of the screen.
 Instgram camera gallery
2.2 Selecting an Existing Photo
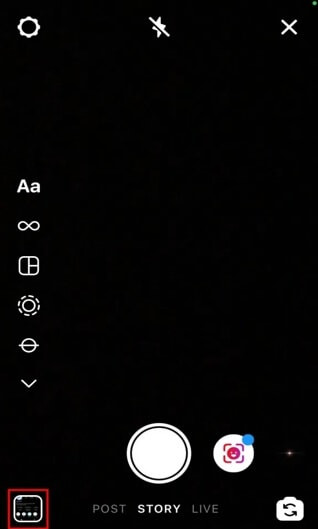
- Open the Gallery:
- Once the Stories camera is open, look for a small square icon at the bottom-left corner of the screen. This icon represents your photo gallery or camera roll.
- Tap on the square icon to access your gallery.
- Choose a Photo:
- Scroll through your gallery to find the photo you want to edit.
- Tap on the photo to select it. It will now appear in the Stories editor.
2.3 Accessing Filters
- Locate the Filter Icon:
- After selecting your photo, look for the smiley face icon (also known as the effects icon) at the top of the screen. This icon gives you access to Instagram’s filter library.
- Tap on the smiley face icon to open the filter options.
2.4 Applying Filters
- Browse Filters:
- Once the filter options are open, you’ll see a carousel of filters at the bottom of the screen.
- Swipe left or right across the carousel to browse through the available filters.
- Preview Filters:
- As you swipe, each filter will be applied to your selected photo in real-time, allowing you to see how it looks.
- Take your time to preview different filters and find the one that best enhances your photo.
- Select a Filter:
- Once you find a filter you like, simply stop swiping. The selected filter will remain applied to your photo.
2.5 Adjusting Filter Intensity
- Adjust the Slider:
- Some filters allow you to adjust their intensity. If a filter has adjustable intensity, you’ll see a slider appear on the screen.
- Drag the slider left to decrease the filter’s intensity or right to increase it.
- Fine-Tune the Look:
- Adjust the intensity until you achieve the desired effect. This allows you to customize the filter to perfectly match your photo and personal preference.
2.6 Saving or Sharing Your Filtered Photo
- Save to Camera Roll:
- If you want to save the filtered photo to your camera roll without posting it to your Story, tap the download icon (usually an arrow pointing downwards) at the top of the screen.
- The photo will be saved to your phone’s gallery with the filter applied.
- Share to Your Story:
- To share the photo to your Instagram Story, tap the “Your Story” button at the bottom-left of the screen.
- You can also add text, stickers, or other effects before posting.
- Send to Friends:
- Tap the “Send To” button at the bottom-right of the screen to send the photo directly to specific friends or groups.
3. Advanced Techniques: Enhancing Photos Beyond Basic Filters
While Instagram’s built-in filters are a great starting point, you can take your photo editing skills to the next level by exploring advanced techniques. These methods allow for more precise control over the final look of your images.
3.1 Using Third-Party Apps
Numerous third-party apps offer more sophisticated editing tools and a wider range of filters than Instagram. Some popular options include:
- VSCO: Known for its film-like presets and detailed editing controls.
- Lightroom Mobile: A professional-grade photo editing app with powerful adjustment tools.
- Snapseed: A free app by Google with a variety of filters and precise editing capabilities.
- Afterlight: Offers a range of natural filters and textures for subtle enhancements.
3.2 Layering Filters
You can combine multiple filters to create unique effects. Here’s how:
- Apply a Filter: Start by applying one filter to your photo in Instagram Stories.
- Save the Photo: Save the filtered photo to your camera roll.
- Re-upload: Upload the saved photo back into Instagram Stories.
- Add Another Filter: Apply a second filter on top of the first one.
- Experiment: Continue this process to layer multiple filters and achieve complex effects.
3.3 Manual Adjustments
Instagram also offers manual adjustment tools that allow you to fine-tune your photos:
- Access Editing Tools: After selecting a photo in Instagram (either for a post or a story), tap “Edit” at the bottom of the screen.
- Adjust Brightness, Contrast, and More: Use the sliders to adjust various aspects of your photo:
- Brightness: Adjust the overall lightness or darkness of the image.
- Contrast: Increase or decrease the difference between light and dark areas.
- Saturation: Adjust the intensity of the colors.
- Warmth: Change the color temperature to make the photo warmer or cooler.
- Highlights & Shadows: Adjust the brightness of the brightest and darkest parts of the photo separately.
- Sharpen: Increase the clarity and detail of the image.
3.4 Using Color Grading
Color grading involves adjusting the colors in your photo to create a specific mood or style. Here’s how to do it:
- Use Third-Party Apps: Apps like Lightroom Mobile and VSCO offer advanced color grading tools.
- Adjust Color Channels: Manipulate individual color channels (red, green, blue) to fine-tune the colors in your photo.
- Create a Mood: Use color grading to create a specific atmosphere, such as warm and inviting or cool and mysterious.
4. Inspiration and Ideas: Creative Ways to Use IG Story Filters
Need some inspiration? Here are a few ideas to spark your creativity and help you make the most of Instagram filters:
4.1 Themed Days
- Monochrome Monday: Use black and white filters like “Willow” to create a series of monochromatic photos.
- Vintage Thursday: Apply vintage-inspired filters like “Gingham” or “Mayfair” to give your photos a retro look.
- Color Pop Friday: Use filters that enhance colors, like “Clarendon” or “Juno,” to make your photos vibrant and eye-catching.
4.2 Storytelling with Filters
- Consistent Aesthetic: Use the same filter or a similar set of filters across all your stories to create a cohesive visual narrative.
- Mood Enhancement: Choose filters that reflect the mood of your story. For example, use a warm filter for a happy, upbeat story and a cool filter for a more reflective one.
- Before and After: Show the transformation a filter can make by posting a “before” photo followed by an “after” photo with the filter applied.
4.3 Creative Challenges
- Filter Challenge: Challenge yourself to use a different filter each day for a week and see how it changes your style.
- Community Challenge: Invite your followers to participate by asking them to share photos using a specific filter and hashtag.
- Recreate a Look: Try to recreate the look of a famous photo or artwork using Instagram filters.
4.4 Seasonal Themes
- Summer Vibes: Use filters that enhance warm tones and create a sunny, bright look.
- Autumn Hues: Apply filters that bring out the rich reds, oranges, and yellows of fall foliage.
- Winter Wonderland: Use cool-toned filters and add a touch of blur to create a snowy, ethereal effect.
- Spring Bloom: Choose filters that enhance greens and pastels to capture the freshness of springtime.
 Creative Filter Ideas:

 | Theme          | Filter Suggestions                                   | Description                                                                 |
 | -------------- | -------------------------------------------------- | --------------------------------------------------------------------------- |
 | Monochrome     | Willow, Inkwell                                      | Create a classic, timeless look with black and white filters.                 |
 | Vintage        | Gingham, Mayfair, Valencia                           | Give your photos a retro feel with soft colors and subtle vignettes.           |
 | Color Pop      | Clarendon, Juno, Lark                                | Make your photos vibrant and eye-catching with filters that enhance colors.   |
 | Seasonal (Summer) | Clarendon, Juno                                      | Capture the bright, sunny vibes of summer with warm tones.                    |
 | Seasonal (Autumn) | Ludwig, Crema                                        | Enhance the rich reds, oranges, and yellows of fall foliage.                 |
 | Seasonal (Winter) | Sierra, Willow                                       | Create a snowy, ethereal effect with cool tones and subtle blur.               |
 | Seasonal (Spring) | Aden, Valencia                                       | Capture the freshness of springtime with enhanced greens and pastels.         |
 | Storytelling     | Consistent use of a single filter across multiple posts | Maintains a cohesive visual narrative and strengthens brand identity.           |
 | Before & After   | Showcase the impact of filters by comparing original and filtered versions. | Highlights the transformative power of filters.                               |
5. Troubleshooting Common Issues
Even with a clear understanding of how to use Instagram filters, you may encounter some common issues. Here are some troubleshooting tips to help you resolve them.
5.1 Filters Not Showing Up
- Update Instagram: Make sure you have the latest version of the Instagram app. Outdated versions may not support the newest filters.
- Restart the App: Close the Instagram app completely and then reopen it. This can often resolve minor glitches.
- Check Your Internet Connection: A stable internet connection is required to download and use filters.
- Clear Cache: Go to your phone’s settings and clear the cache for the Instagram app. This can help remove corrupted data that may be causing issues.
- Reinstall the App: If none of the above steps work, try uninstalling and reinstalling the Instagram app.
5.2 Filter Effects Not Applying Correctly
- Check Photo Quality: Low-quality photos may not respond well to certain filters. Try using a higher-resolution image.
- Adjust Lighting: Filters can be affected by the lighting in your photo. Try adjusting the brightness and contrast before applying a filter.
- Experiment with Intensity: Some filters may be too strong for certain photos. Adjust the intensity slider to find a more suitable level.
- Try Different Filters: Not all filters work well with every photo. Experiment with different options to find the best fit.
5.3 Saved Filters Not Appearing
- Check Your Saved Filters: Make sure the filters you want to use are actually saved. You can do this by browsing the filter library and checking if the “Save” icon is highlighted.
- Restart Instagram: Sometimes, saved filters may not appear immediately. Restarting the app can help refresh the filter library.
- Re-save Filters: If your saved filters are missing, try re-saving them from the filter library.
5.4 AR Filters Not Working
- Check Device Compatibility: AR filters require devices with AR capabilities. Make sure your smartphone supports AR technology.
- Update Device Software: Ensure your device’s operating system is up to date. AR features often rely on the latest software updates.
- Grant Camera Permissions: Make sure Instagram has permission to access your camera. You can check and adjust app permissions in your phone’s settings.
- Calibrate AR: Some AR filters may require you to calibrate the AR settings. Follow the on-screen instructions to calibrate the filter.
5.5 Report Problems.
If you have followed all of the above steps and still experiencing problems. Consider reporting the problem directly to Instagram, this helps developers identify and resolve the issue.
6. Optimizing Your Photos for Instagram: Best Practices
To make the most of Instagram filters, it’s important to start with well-composed and properly exposed photos. Here are some best practices for optimizing your photos for Instagram:
6.1 Composition
- Rule of Thirds: Divide your frame into nine equal parts and place key elements along these lines or at the intersections. This creates a more balanced and visually appealing composition.
- Leading Lines: Use lines to guide the viewer’s eye through the photo and towards the main subject.
- Symmetry: Capture symmetrical scenes or create symmetry in your composition for a balanced and harmonious look.
- Framing: Use elements in the foreground to frame the main subject and add depth to the photo.
- Negative Space: Leave empty space around the subject to create a sense of balance and draw attention to the main focus.
6.2 Exposure
- Proper Lighting: Shoot in good lighting conditions whenever possible. Natural light is often the most flattering, but you can also use artificial light sources to enhance your photos.
- Avoid Overexposure: Be careful not to overexpose your photos, as this can wash out the colors and details.
- Correct Underexposure: If your photos are too dark, adjust the exposure in the editing tools to brighten them up.
- Use HDR: If you’re shooting in high-contrast situations, use HDR (High Dynamic Range) mode to capture a wider range of tones.
6.3 Focus and Clarity
- Sharp Focus: Make sure your main subject is in sharp focus. Use the tap-to-focus feature on your smartphone to ensure the focus is accurate.
- Avoid Blur: Keep your camera steady to avoid blur, especially in low-light conditions.
- Clean Your Lens: A dirty lens can cause blurry or hazy photos. Clean your lens regularly with a microfiber cloth.
6.4 Resolution and Size
- High Resolution: Shoot photos at the highest resolution possible to capture the most detail.
- Optimal Size: Instagram recommends uploading photos with a width of 1080 pixels. Resize your photos before uploading to ensure they look their best.
- Aspect Ratio: Instagram supports various aspect ratios, but the most common are 1:1 (square), 4:5 (portrait), and 16:9 (landscape). Choose the aspect ratio that best suits your photo.
6.5 Editing Tools
- Use Editing Apps: In addition to Instagram’s built-in editing tools, consider using third-party apps like VSCO, Lightroom Mobile, or Snapseed for more advanced editing capabilities.
- Subtle Adjustments: Make subtle adjustments to brightness, contrast, saturation, and sharpness to enhance your photos without making them look over-edited.
- Color Correction: Correct any color imbalances in your photos to ensure they look natural and appealing.
- Remove Distractions: Crop out any distracting elements from your photos to draw attention to the main subject.
7. The Future of Instagram Filters and Effects
The world of Instagram filters and effects is constantly evolving, with new technologies and trends shaping the future of visual storytelling. Here’s a glimpse into what we can expect in the years to come:
7.1 Enhanced AR Capabilities
- More Realistic AR: Augmented reality filters will become even more realistic and immersive, blurring the line between the digital and physical worlds.
- Interactive AR Experiences: We’ll see more AR filters that allow users to interact with their environment and other users in real-time.
- AI-Powered AR: Artificial intelligence will play a larger role in AR filters, enabling them to adapt to the user’s surroundings and create personalized experiences.
7.2 Personalized Filters
- AI-Generated Filters: AI will be used to create personalized filters based on the user’s preferences, style, and past interactions.
- Dynamic Filters: Filters will adapt to the content of the photo or video, automatically adjusting settings to enhance the image.
- User-Created Filters: Instagram will likely introduce more tools that allow users to create and share their own custom filters.
7.3 Integration with Other Platforms
- Cross-Platform Filters: Filters will be seamlessly integrated across multiple social media platforms, allowing users to maintain a consistent visual style.
- E-commerce Integration: AR filters will be used to enhance the shopping experience, allowing users to virtually try on clothes, makeup, and accessories.
- Gaming Integration: Filters will be integrated into games, allowing users to transform their appearance and interact with game environments in new ways.
7.4 Ethical Considerations
- Transparency: As filters become more sophisticated, there will be a greater emphasis on transparency, with clear labeling of edited images and videos.
- Authenticity: Users will increasingly value authenticity and natural-looking photos, leading to a shift away from heavily filtered images.
- Mental Health: There will be a greater awareness of the impact of filters on mental health, with efforts to promote body positivity and self-acceptance.
8. dfphoto.net: Your Go-To Resource for Photography Tips and Inspiration
Ready to elevate your photography skills and create stunning visuals for your Instagram feed? Look no further than dfphoto.net! We offer a wealth of resources to help you master the art of photography, from beginner-friendly tutorials to advanced techniques.
8.1 Explore Our Comprehensive Guides
Dive into our detailed guides covering various aspects of photography, including:
- Composition: Learn how to create visually appealing compositions using the rule of thirds, leading lines, symmetry, and other techniques.
- Lighting: Discover the secrets of using natural and artificial light to enhance your photos.
- Editing: Master the art of photo editing with our step-by-step tutorials on using popular editing apps like VSCO, Lightroom Mobile, and Snapseed.
- Equipment: Get expert advice on choosing the right camera, lenses, and accessories for your needs and budget.
8.2 Discover Inspiring Photo Galleries
Browse our curated galleries showcasing the work of talented photographers from around the world. Get inspired by stunning landscapes, captivating portraits, and creative concepts that will spark your imagination.
8.3 Join Our Thriving Community
Connect with fellow photography enthusiasts, share your work, and get feedback from experienced photographers. Our community is a supportive and collaborative space where you can learn, grow, and connect with like-minded individuals.
8.4 Stay Up-to-Date with the Latest Trends
Keep up with the latest trends in photography and social media. We regularly publish articles on new filters, editing techniques, and visual storytelling strategies that will help you stay ahead of the curve.
8.5 Contact Us for Personalized Advice
Have a specific question or need personalized advice? Our team of photography experts is here to help. Contact us through our website or social media channels, and we’ll be happy to provide guidance and support.
Visit dfphoto.net today and start your journey towards becoming a photography pro!
Address: 1600 St Michael’s Dr, Santa Fe, NM 87505, United States.
Phone: +1 (505) 471-6001.
Website: dfphoto.net.
9. FAQs About Using Instagram Filters on Photos
9.1 Can I add Instagram filters to existing photos?
Yes, adding Instagram filters to existing photos is easy. Open Instagram Stories, select a photo from your gallery, and then choose a filter to apply. You can save the filtered photo or share it to your Story.
9.2 How do I find new filters on Instagram?
To find new filters, open the Stories camera and swipe left through the filter options until you reach the end. Tap the “Browse Effects” icon to explore and discover new filters created by Instagram and the community.
9.3 Can I save a photo with a filter without posting it?
Yes, you can save a photo with a filter without posting it. After applying the filter in Instagram Stories, tap the download icon (usually an arrow pointing downwards) at the top of the screen to save the photo to your camera roll.
9.4 How do I adjust the intensity of a filter?
Some filters allow you to adjust their intensity. If a filter has adjustable intensity, you’ll see a slider appear on the screen. Drag the slider left to decrease the filter’s intensity or right to increase it.
9.5 Can I use multiple filters on one photo?
Yes, you can layer multiple filters on one photo. Apply one filter, save the photo to your camera roll, re-upload the saved photo to Instagram Stories, and then add another filter on top.
9.6 Why are some filters not showing up on my Instagram?
If some filters are not showing up, make sure you have the latest version of the Instagram app. Outdated versions may not support the newest filters. Also, check your internet connection and try restarting the app.
9.7 Are Instagram filters free to use?
Yes, all Instagram filters are free to use. Instagram does not charge any fees for using its filters.
9.8 Can I create my own Instagram filters?
Yes, Instagram allows users to create and share their own custom filters using the Spark AR Studio platform. This requires some technical knowledge and design skills.
9.9 How do I remove a filter from a photo?
To remove a filter from a photo, simply select the “Normal” filter option (the original, unfiltered look of your photo). This will remove any filters that have been applied.
9.10 Do filters affect the quality of my photos?
Applying filters can slightly alter the quality of your photos, but the impact is usually minimal. To minimize any loss of quality, start with high-resolution photos and avoid over-editing.
Applying filters and effects strategically can transform your Instagram presence, enhance your creative expression, and connect you with a wider audience. Whether you’re looking to add a touch of vintage charm, create a vibrant and colorful look, or explore the endless possibilities of augmented reality, Instagram’s filters offer something for everyone. Remember to visit dfphoto.net for more photography tips, inspiration, and resources to help you master the art of visual storytelling.