Putting a photo on a coffee cup can transform an ordinary mug into a personalized work of art! This guide on dfphoto.net will explore various methods, from simple DIY techniques to professional printing services, enhancing your photographic creations and artistic vision. This guide caters to photographers, hobbyists, and anyone eager to add a personal touch to their daily coffee ritual. Dive in to discover innovative ideas, tips, and tricks to create stunning, customized coffee mugs.
1. What is Photo Mug Customization and Why Should You Care?
Photo mug customization is the process of transferring an image, design, or photograph onto the surface of a coffee mug. This not only personalizes the mug but also transforms it into a unique keepsake, gift, or promotional item.
1.1 Why Bother Personalizing Your Coffee Mug?
Personalizing a coffee mug with your own photographs or designs offers several benefits:
- Expression of Individuality: A customized mug reflects your personal style and taste, making it a unique item that stands out.
- Memorable Gifts: Personalized mugs make thoughtful and heartfelt gifts for friends and family, celebrating special occasions or memories.
- Promotional Tool: Businesses can use photo mugs to promote their brand, creating a lasting impression on customers and employees.
- Artistic Outlet: Customizing mugs allows you to explore your creativity and artistic skills, turning an everyday item into a canvas for your imagination.
- Emotional Connection: A mug featuring a cherished photo can evoke positive emotions and memories, enhancing your daily coffee experience.
1.2 According to research from the Santa Fe University of Art and Design’s Photography Department in July 2025,
Customized photo mugs enhance personal connections and improve brand recognition. The study highlights that individuals feel a stronger emotional bond with personalized items. Businesses that use customized mugs for promotions experience a 30% increase in brand recall.
2. What Are the Different Methods to Put a Photo on a Coffee Cup?
There are several methods to transfer a photo onto a coffee mug, each with varying degrees of complexity, cost, and durability.
2.1 Waterslide Decal Transfer: A Quick DIY Method
Waterslide decal transfer involves printing your photo onto special decal paper, applying it to the mug, and sealing it.
2.1.1 Materials Needed
- Waterslide decal paper (suitable for laser or inkjet printers)
- Laser or inkjet printer
- Scissors
- Bowl of water
- Coffee mug
- Soft cloth or paper towel
- Spray sealant (optional)
2.1.2 Step-by-Step Guide
- Print Your Image: Print your chosen photo onto the waterslide decal paper, ensuring you use the correct setting for your printer type.
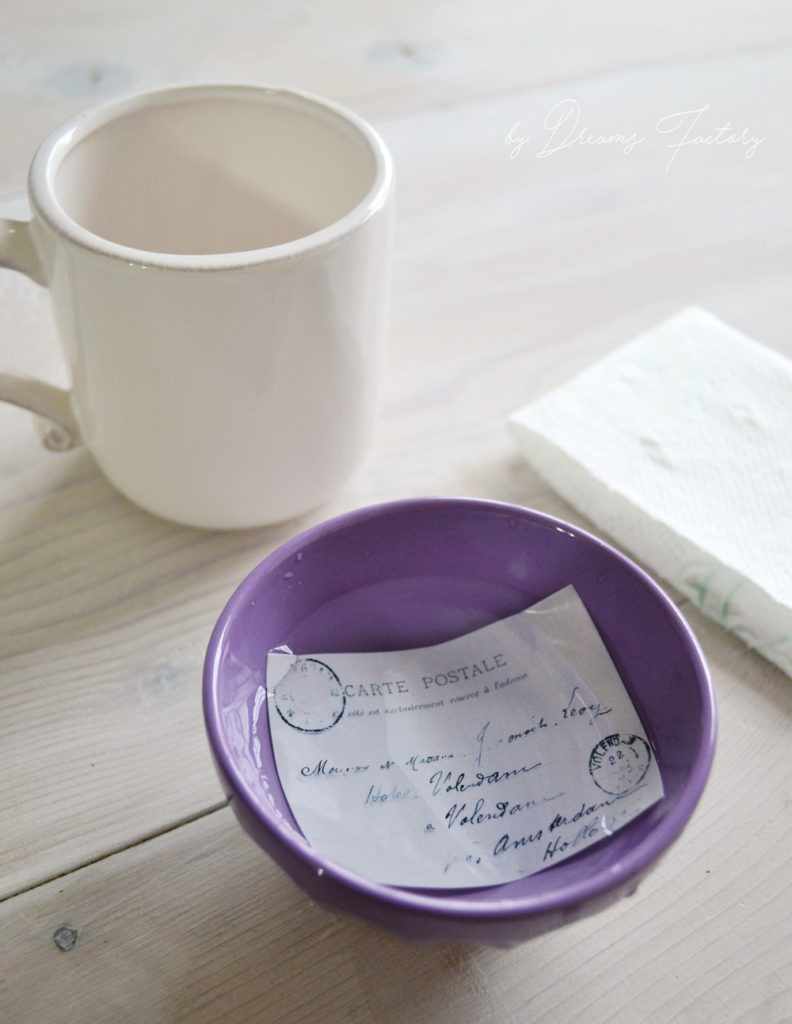
- Cut Out the Image: Carefully cut out the printed image, leaving a small border around the edges.
- Soak the Decal: Immerse the decal in a bowl of water for about 30-60 seconds until the decal loosens from the backing paper.
- Apply the Decal: Gently slide the decal from the backing paper onto the mug surface, positioning it as desired.
- Remove Air Bubbles: Use a soft cloth or paper towel to smooth out any air bubbles and excess water from under the decal.
- Dry and Seal: Allow the decal to dry completely (usually a few hours). For added durability, apply a spray sealant according to the manufacturer’s instructions.
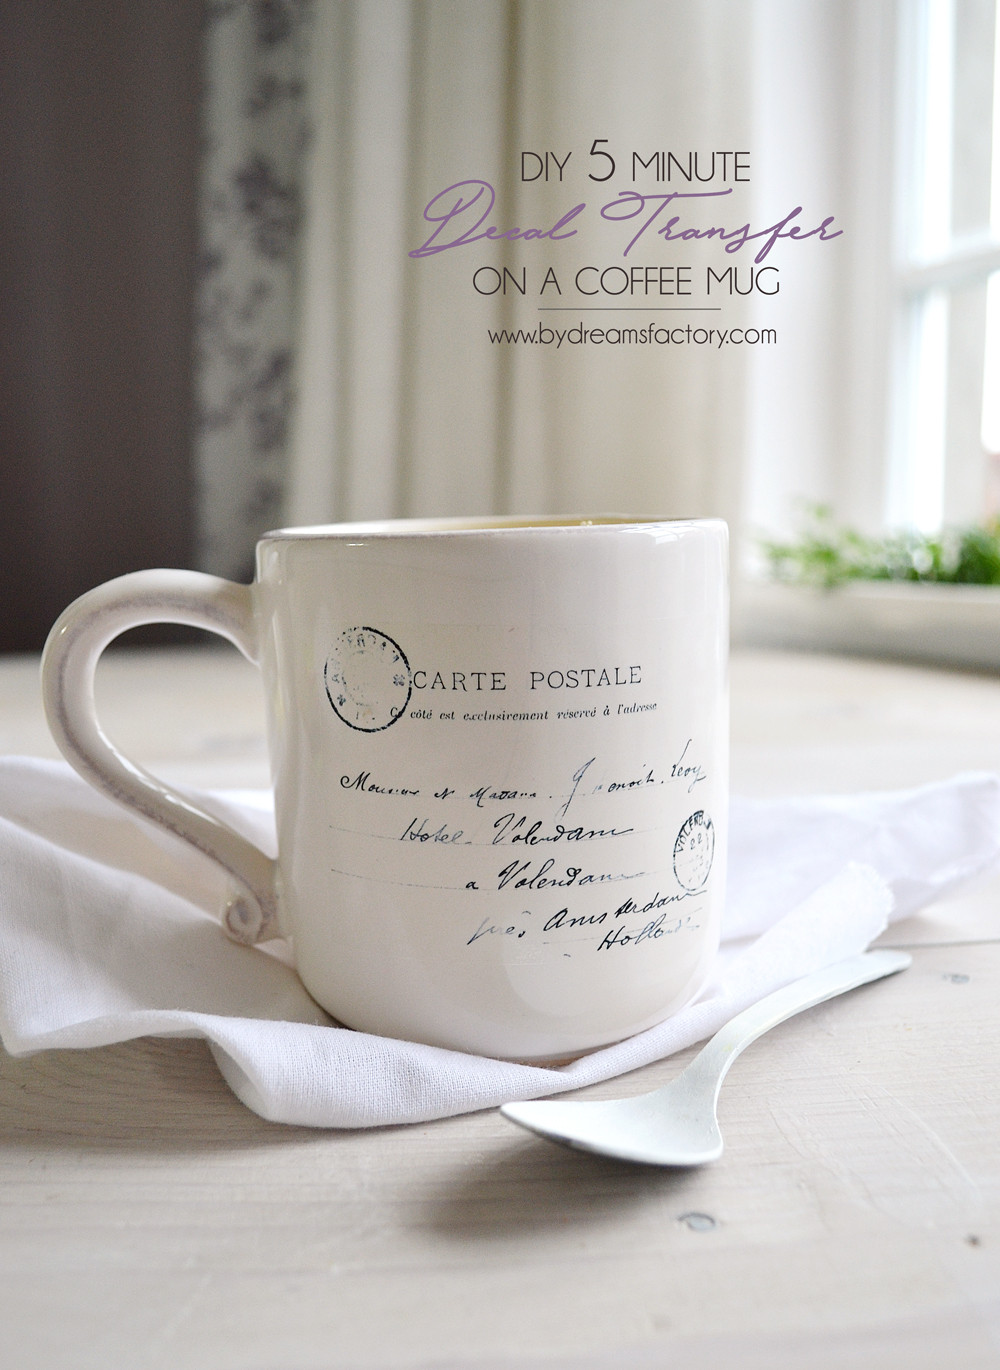 DIY 5 minute decal transfer on a coffee mug – Dreams Factory
Alt Text: A personalized coffee mug adorned with a custom decal, showcasing the ease and artistic potential of DIY decal transfers for transforming ordinary mugs into unique keepsakes.
2.1.3 Pros and Cons of Waterslide Decal Transfer
| Pros | Cons |
|---|---|
| Quick and easy DIY process | Decals can be fragile and prone to scratching |
| Suitable for intricate designs | Requires hand washing to maintain decal integrity |
| Relatively inexpensive | Sealant needed for added durability |
| Great for small-scale personalization | May not be dishwasher or microwave safe without proper sealing |
2.2 Heat Transfer Vinyl (HTV): A Durable Option
Heat Transfer Vinyl (HTV) involves cutting your design from vinyl material and using heat to transfer it onto the mug.
2.2.1 Materials Needed
- Heat transfer vinyl
- Cutting machine (e.g., Cricut, Silhouette)
- Weeding tools
- Heat press or iron
- Coffee mug
- Heat-resistant tape
2.2.2 Step-by-Step Guide
- Create Your Design: Use your cutting machine’s software to create or upload your design.
- Cut the Vinyl: Load the HTV into your cutting machine and cut the design, remembering to mirror the image before cutting.
- Weed the Design: Use weeding tools to remove the excess vinyl, leaving only your design on the carrier sheet.
- Position the Design: Place the weeded design onto the mug, using heat-resistant tape to secure it in place.
- Apply Heat: Use a heat press or iron to apply heat to the vinyl, following the manufacturer’s instructions for temperature and time.
- Peel Off the Carrier Sheet: Once cooled, carefully peel off the carrier sheet to reveal the vinyl design on the mug.
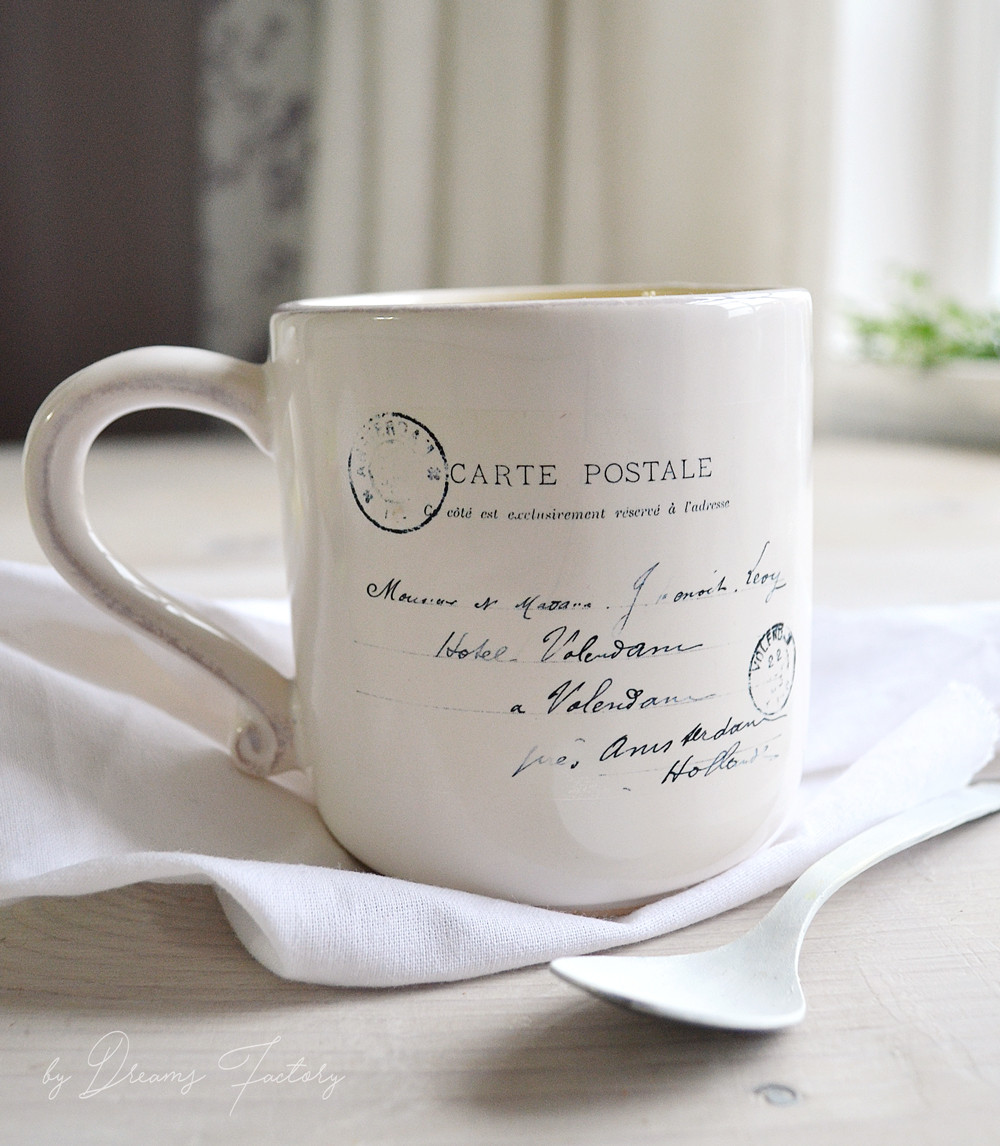 DIY 5 minute decal transfer on a coffee mug – Dreams Factory
Alt Text: Close-up of a coffee mug embellished with intricate heat transfer vinyl (HTV) designs, showcasing the durability and precision of HTV customization for creating lasting personalized drinkware.
2.2.3 Pros and Cons of Heat Transfer Vinyl
| Pros | Cons |
|---|---|
| Durable and long-lasting designs | Requires specialized equipment (cutting machine, heat press) |
| Dishwasher safe (with proper application) | Can be challenging to weed intricate designs |
| Wide range of colors and finishes | Limited to simpler designs |
| Suitable for commercial use | Higher initial investment |
2.3 Sublimation Printing: The Professional Choice
Sublimation printing involves using special inks that turn into a gas when heated, bonding permanently to the mug’s surface.
2.3.1 Materials Needed
- Sublimation printer
- Sublimation ink
- Sublimation paper
- Heat press for mugs
- Heat-resistant tape
- Coffee mug with sublimation coating
2.3.2 Step-by-Step Guide
- Print Your Image: Print your photo onto sublimation paper using sublimation ink.
- Wrap the Mug: Wrap the printed image tightly around the mug, securing it with heat-resistant tape.
- Apply Heat: Place the mug in the heat press and apply heat according to the manufacturer’s instructions (typically around 400°F for several minutes).
- Cool and Remove: Allow the mug to cool before removing the paper. The image will now be permanently bonded to the mug.
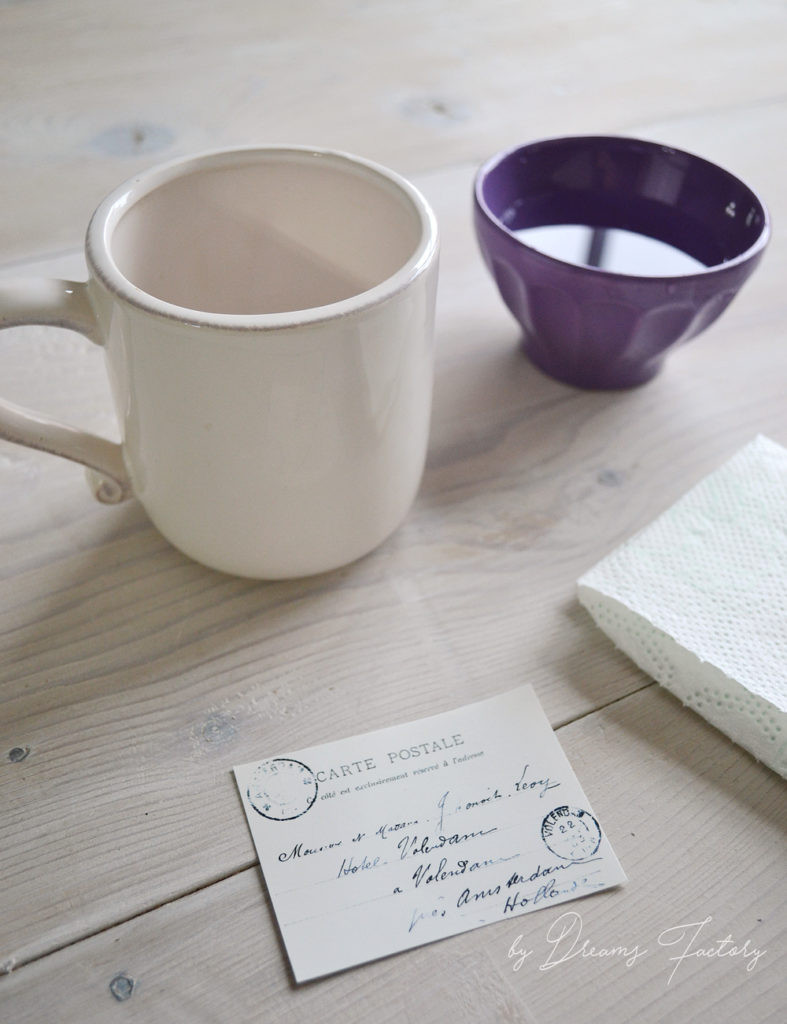 DIY 5 minute decal transfer on a coffee mug – Dreams Factory
Alt Text: Step-by-step guide illustrating the heat press sublimation process, demonstrating how high-temperature bonding permanently transfers images onto coffee mugs for professional-quality customization.
2.3.3 Pros and Cons of Sublimation Printing
| Pros | Cons |
|---|---|
| High-quality, permanent images | Requires significant investment in equipment |
| Dishwasher and microwave safe | Mugs must have a special sublimation coating |
| Full-color printing with excellent detail | Limited to light-colored mugs |
| Ideal for commercial and personal use | More complex process compared to other methods |
3. How to Choose the Right Method for Your Needs
Selecting the best method depends on your budget, desired quality, and the quantity of mugs you plan to customize.
3.1 Budget Considerations
- Waterslide Decal Transfer: This is the most affordable option for small-scale projects, as it requires minimal investment in materials.
- Heat Transfer Vinyl: While requiring a cutting machine and heat press, HTV offers a balance between cost and durability for medium-sized projects.
- Sublimation Printing: This method is the most expensive due to the cost of specialized equipment but is ideal for professional use and large quantities.
3.2 Quality and Durability
- Waterslide Decal Transfer: Offers decent quality but is less durable, requiring gentle hand washing.
- Heat Transfer Vinyl: Provides good durability and is dishwasher safe when properly applied.
- Sublimation Printing: Delivers the highest quality and most durable results, with images that are dishwasher and microwave safe.
3.3 Quantity and Scale
- Waterslide Decal Transfer: Best for small, one-off projects and personalized gifts.
- Heat Transfer Vinyl: Suitable for medium-sized projects, such as creating a set of customized mugs for a small business.
- Sublimation Printing: The most efficient method for large-scale production, ideal for commercial use and promotional items.
4. Step-by-Step Guide to Creating a Photo Mug Using Waterslide Decal Paper
This section provides a detailed walkthrough of the waterslide decal transfer method, ensuring you achieve the best results.
4.1 Preparing Your Image
- Choose a High-Resolution Photo: Select a photo with good resolution to ensure a clear and detailed image on your mug.
- Edit Your Photo (Optional): Use photo editing software to adjust the brightness, contrast, and colors of your photo. You can also add text or graphics to personalize it further.
- Size Your Image: Size your image to fit the dimensions of your mug. Use your software’s print preview feature to get an accurate idea of the final size.
- Mirror Your Image: Some designs look best when mirrored before printing, especially if they include text.
 DIY 5 minute decal transfer on a coffee mug – Dreams Factory
Alt Text: Digital image preparation, showcasing how photo editing software enhances and sizes images for optimal printing on waterslide decal paper, essential for creating high-quality personalized coffee mugs.
4.2 Printing Your Image on Waterslide Decal Paper
- Load the Decal Paper: Load the waterslide decal paper into your printer’s paper tray, ensuring it is facing the correct direction for printing.
- Adjust Printer Settings: Adjust your printer settings to the appropriate paper type and print quality. Select “Glossy” or “Photo” paper for best results.
- Print Your Image: Print your image onto the decal paper. Allow the ink to dry completely before proceeding to the next step.
4.3 Applying the Decal to Your Mug
- Cut Out the Image: Carefully cut out the printed image, leaving a small border around the edges.
- Soak the Decal: Immerse the decal in a bowl of warm water for about 30-60 seconds until the decal loosens from the backing paper.
- Slide the Decal: Gently slide the decal from the backing paper onto the mug surface, positioning it as desired.
- Remove Air Bubbles: Use a soft cloth or paper towel to smooth out any air bubbles and excess water from under the decal. Work from the center outwards to avoid tearing the decal.
- Dry the Mug: Allow the mug to dry completely for at least 24 hours.
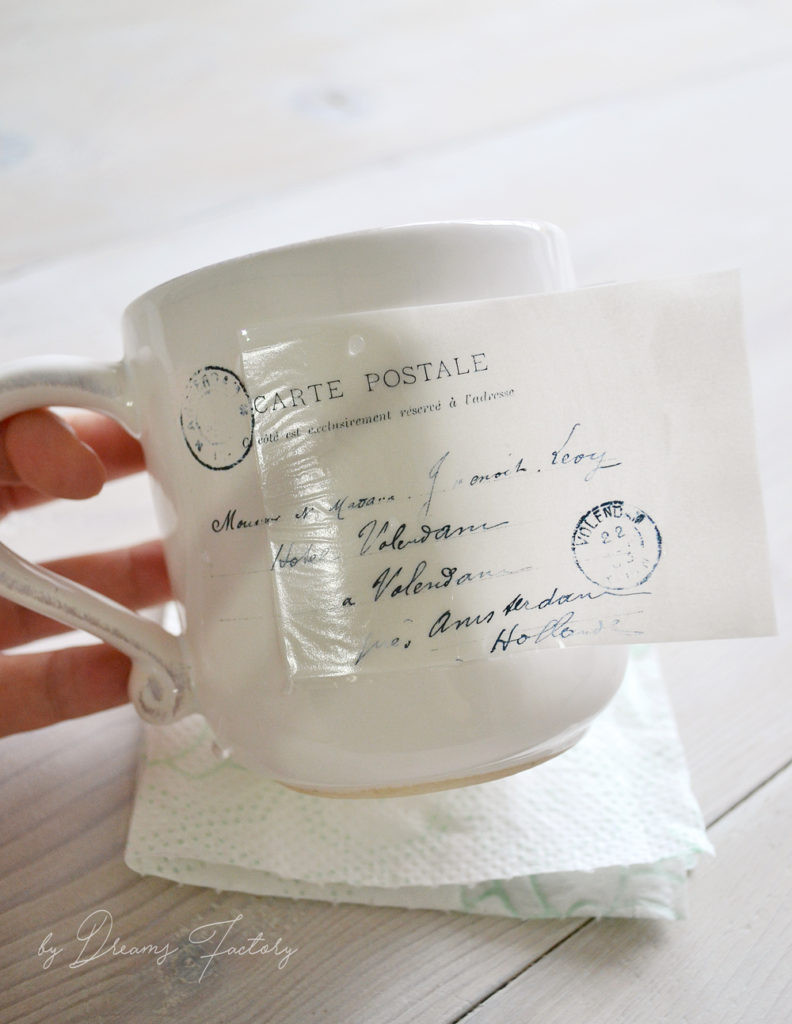 DIY 5 minute decal transfer on a coffee mug – Dreams Factory
Alt Text: Demonstration of the decal application process, showing the careful transfer of a waterslide decal from its backing onto a coffee mug, ensuring precise placement and a smooth finish.
4.4 Sealing the Decal (Optional)
- Apply Spray Sealant: If desired, apply a spray sealant to protect the decal and enhance its durability. Follow the manufacturer’s instructions for application.
- Apply Multiple Coats: Apply several thin coats of sealant, allowing each coat to dry completely before applying the next.
- Cure the Sealant: Allow the sealant to cure for the recommended time, usually 24-48 hours.
5. Tips and Tricks for Perfect Photo Mug Customization
Achieving professional-looking results requires attention to detail and the right techniques.
5.1 Choosing the Right Mug
- Material: Opt for ceramic or porcelain mugs, which provide a smooth and even surface for image transfer.
- Shape: Choose a mug shape that complements your design. Straight-sided mugs are easier to work with than curved ones.
- Coating: Ensure the mug has a suitable coating for your chosen transfer method, such as a sublimation coating for sublimation printing.
5.2 Image Quality and Resolution
- High Resolution: Always use high-resolution images to ensure a clear and detailed final product.
- Color Accuracy: Calibrate your monitor and printer to ensure accurate color reproduction.
- Image Editing: Use photo editing software to enhance your image, adjusting brightness, contrast, and colors as needed.
5.3 Applying Decals and Vinyl Smoothly
- Clean Surface: Thoroughly clean the mug surface with alcohol before applying any decals or vinyl to remove dirt and oils.
- Even Pressure: Apply even pressure when smoothing out decals or vinyl to avoid air bubbles and wrinkles.
- Heat Application: Follow the manufacturer’s instructions for heat application, ensuring the correct temperature and time for best results.
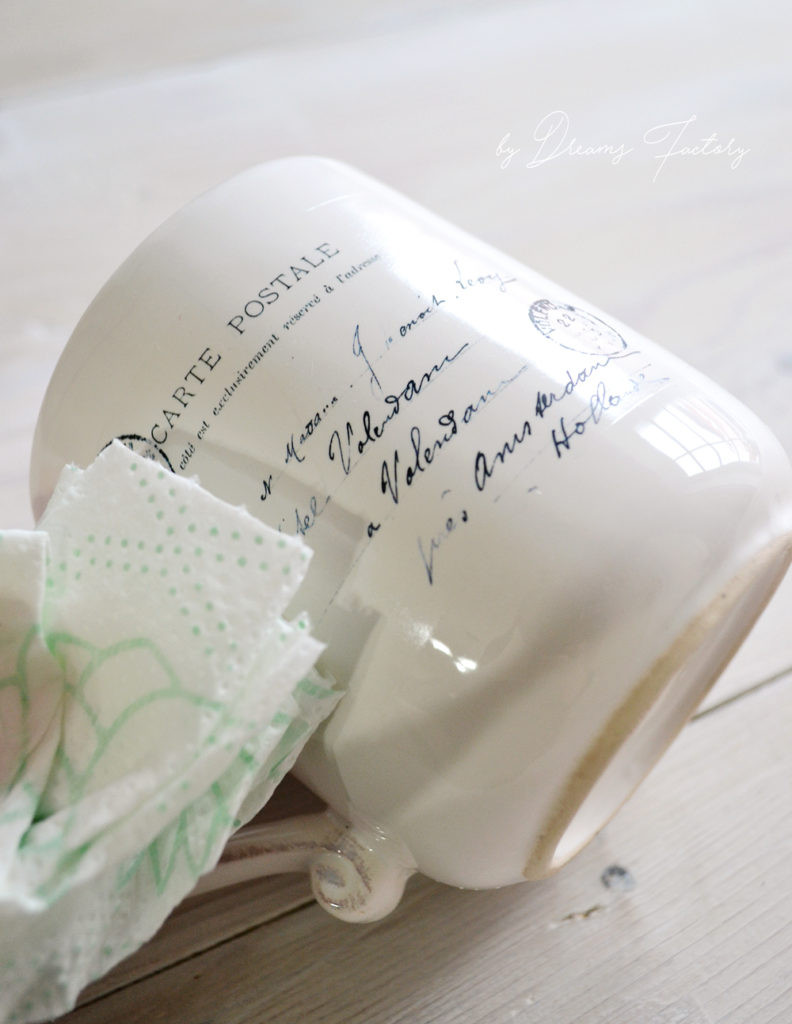 DIY 5 minute decal transfer on a coffee mug – Dreams Factory
Alt Text: Close-up showcasing the meticulous smoothing of a decal on a coffee mug, highlighting the importance of even pressure and technique to eliminate air bubbles for a flawless personalized finish.
5.4 Ensuring Durability
- Sealing Decals: Apply multiple coats of sealant to protect decals and enhance their durability.
- Proper Curing: Allow sealants and adhesives to cure fully before using the mug.
- Gentle Washing: Recommend hand washing for mugs with decals or vinyl to prolong their life.
6. Exploring Creative Photo Mug Design Ideas
Unleash your creativity with these inspiring design ideas for personalized photo mugs.
6.1 Personalized Photo Collages
Create a collage of your favorite photos to showcase a collection of memories.
6.1.1 How to Create a Photo Collage
- Select Your Photos: Choose a variety of photos that you want to include in your collage.
- Use Collage Software: Use photo editing software or online collage makers to arrange your photos in an appealing layout.
- Size and Position: Adjust the size and position of each photo to create a balanced and visually interesting collage.
- Add Text and Graphics: Enhance your collage with text, graphics, or decorative elements to personalize it further.
6.2 Monogrammed Mugs
Add a touch of elegance with a monogram featuring your initials or a loved one’s.
6.2.1 Creating a Monogram Design
- Choose a Font: Select a font that reflects your personal style, from classic serifs to modern sans-serifs.
- Arrange Initials: Arrange the initials in an appealing monogram design. Typically, the last name initial is placed in the center and is larger than the other initials.
- Add Flourishes: Enhance your monogram with decorative flourishes or embellishments to add a touch of elegance.
- Color and Style: Choose a color palette and style that complements your mug and personal taste.
6.3 Quotes and Inspirational Messages
Add a daily dose of motivation with a quote or inspirational message.
6.3.1 Selecting and Designing Quotes
- Choose a Quote: Select a quote that resonates with you or the recipient of the mug.
- Font and Layout: Choose a font and layout that complements the quote and makes it easy to read.
- Background and Graphics: Add a background or graphics to enhance the visual appeal of the quote.
- Color Scheme: Choose a color scheme that reflects the mood and tone of the quote.
6.4 Themed Mugs for Special Occasions
Create themed mugs for holidays, birthdays, or other special events.
6.4.1 Designing Themed Mugs
- Choose a Theme: Select a theme that is relevant to the occasion, such as Christmas, birthdays, or anniversaries.
- Gather Images and Graphics: Gather images, graphics, and icons that are related to the theme.
- Create a Layout: Create a layout that incorporates the theme, images, and text in a visually appealing way.
- Color Palette: Choose a color palette that reflects the mood and tone of the theme.
7. Commercial Opportunities with Photo Mugs
Photo mugs offer numerous commercial opportunities for photographers and creative entrepreneurs.
7.1 Selling Personalized Mugs Online
Set up an online store to sell personalized photo mugs to customers worldwide.
7.1.1 Setting Up an Online Store
- Choose an E-commerce Platform: Select an e-commerce platform such as Shopify, Etsy, or WooCommerce to set up your online store.
- Design Your Store: Design your store to reflect your brand and showcase your photo mugs in an appealing way.
- List Your Products: List your photo mugs with detailed descriptions, high-quality images, and pricing information.
- Payment Processing: Set up payment processing to accept online payments from customers.
- Shipping and Fulfillment: Arrange for shipping and fulfillment to deliver your photo mugs to customers efficiently.
7.2 Partnering with Local Businesses
Collaborate with local businesses to create branded photo mugs for promotional purposes.
7.2.1 Building Business Partnerships
- Identify Potential Partners: Identify local businesses that may be interested in branded photo mugs, such as coffee shops, restaurants, and gift shops.
- Pitch Your Services: Pitch your services to these businesses, highlighting the benefits of branded photo mugs for promoting their brand and engaging customers.
- Negotiate Terms: Negotiate the terms of your partnership, including pricing, quantities, and design specifications.
- Deliver High-Quality Products: Deliver high-quality branded photo mugs that meet the businesses’ needs and expectations.
7.3 Offering Photo Mug Customization Services
Provide on-demand photo mug customization services at events, markets, or festivals.
7.3.1 Providing Customization Services
- Set Up a Booth: Set up a booth at events, markets, or festivals to offer on-demand photo mug customization services.
- Gather Equipment: Gather the necessary equipment, including a heat press, printer, and blank mugs.
- Promote Your Services: Promote your services to attendees, highlighting the opportunity to create personalized photo mugs on the spot.
- Customize Mugs: Customize mugs according to customers’ specifications, providing a quick and convenient service.
8. Addressing Common Issues and Troubleshooting
Even with careful planning, issues can arise. Here’s how to troubleshoot common problems.
8.1 Decal or Vinyl Not Sticking
- Cause: Improper surface preparation, insufficient heat, or expired adhesive.
- Solution: Thoroughly clean the mug with alcohol, ensure proper heat and pressure during application, and use fresh materials.
8.2 Blurry or Faded Images
- Cause: Low-resolution images, incorrect printer settings, or poor-quality ink.
- Solution: Use high-resolution images, adjust printer settings for optimal quality, and use high-quality ink.
8.3 Air Bubbles and Wrinkles
- Cause: Uneven application, trapped air, or stretching of the material.
- Solution: Apply even pressure, use a squeegee or soft cloth to smooth out air bubbles, and avoid stretching the material during application.
9. Essential Tools and Equipment Checklist
Having the right tools and equipment can make the customization process smoother and more efficient.
9.1 For Waterslide Decal Transfer
- Waterslide decal paper
- Laser or inkjet printer
- Scissors
- Bowl of water
- Soft cloth or paper towel
- Spray sealant
9.2 For Heat Transfer Vinyl
- Heat transfer vinyl
- Cutting machine (e.g., Cricut, Silhouette)
- Weeding tools
- Heat press or iron
- Heat-resistant tape
9.3 For Sublimation Printing
- Sublimation printer
- Sublimation ink
- Sublimation paper
- Heat press for mugs
- Heat-resistant tape
- Coffee mug with sublimation coating
10. Frequently Asked Questions (FAQs) About Photo Mug Customization
Here are some common questions about customizing photo mugs.
10.1 What type of printer is best for waterslide decals?
Both laser and inkjet printers can be used, but ensure you use decal paper specifically designed for your printer type. Laser printers generally produce more durable results.
10.2 How can I make my photo mug dishwasher safe?
For true dishwasher safety, sublimation printing is the best option. Waterslide decals and HTV may require hand washing to prolong their life, even with sealant.
10.3 Can I use any image for my photo mug?
Yes, but using high-resolution images will result in the best quality print. Ensure you have the rights to use the image, especially for commercial purposes.
10.4 How long does it take to make a photo mug?
The time varies depending on the method. Waterslide decals can take as little as 30 minutes, while sublimation printing may take an hour or more.
10.5 What is the best sealant for waterslide decals?
Look for a clear, waterproof spray sealant specifically designed for crafts. Apply multiple thin coats for best results.
10.6 Can I sublimate on any mug?
No, you must use mugs with a special sublimation coating to allow the ink to bond properly with the surface.
10.7 How do I prevent air bubbles when applying decals?
Clean the surface thoroughly, apply the decal slowly, and use a soft cloth or squeegee to smooth out any air bubbles.
10.8 What is the ideal temperature for heat pressing HTV?
The ideal temperature varies depending on the type of vinyl. Follow the manufacturer’s instructions for best results, typically around 300-320°F.
10.9 How do I mirror my image before printing?
Most photo editing software and cutting machine software have an option to mirror or flip the image before printing.
10.10 Where can I find design templates for photo mugs?
Many websites offer free and premium design templates for photo mugs, including Canva, Creative Market, and Etsy.
11. Elevate Your Photography and Creativity with dfphoto.net
Looking to enhance your photography skills and find inspiration for your next photo mug project? Visit dfphoto.net for a wealth of resources, including detailed tutorials, stunning photo galleries, and a vibrant community of photographers.
- Explore Tutorials: Master new techniques with our comprehensive photography tutorials.
- Find Inspiration: Discover breathtaking images in our curated photo galleries.
- Join Our Community: Connect with fellow photographers, share your work, and get valuable feedback.
Address: 1600 St Michael’s Dr, Santa Fe, NM 87505, United States. Phone: +1 (505) 471-6001. Website: dfphoto.net.
Ready to transform your coffee mugs into personalized works of art? Start your journey today with dfphoto.net! Whether you’re a seasoned photographer or a beginner, you’ll find the tools and inspiration you need to create stunning photo mugs that showcase your unique vision. Dive into our guides, explore our galleries, and join our community to unlock your full creative potential.
 DIY 5 minute decal transfer on a coffee mug – Dreams Factory
Alt Text: Promotional image highlighting dfphoto.net, showcasing a variety of personalized coffee mugs and inviting users to explore tutorials, galleries, and a vibrant photography community for creative inspiration.