Putting a lock on photos on your iPhone is a common need for privacy-conscious users, and at dfphoto.net, we understand this. This comprehensive guide explores various methods to safeguard your precious memories with photo security and image protection. By the end, you’ll know how to protect your private images, ensuring your personal content remains secure with advanced security features.
1. Why Should You Lock Your Photos on Your iPhone?
Locking photos on your iPhone is essential for maintaining privacy and security. It prevents unauthorized access to personal or sensitive images and offers peace of mind knowing your memories are protected. Here’s a closer look at the benefits:
- Protecting Private Information: Photos can contain sensitive data, such as personal documents, financial information, or intimate moments. Locking them ensures this information remains private.
- Preventing Unauthorized Access: If your iPhone is lost, stolen, or borrowed, locking your photos prevents others from viewing them without your permission.
- Maintaining Personal Privacy: Locking photos helps maintain your personal privacy by preventing unwanted eyes from accessing your private moments.
- Securing Sensitive Content: Whether it’s confidential work-related images or personal documents, locking your photos ensures that sensitive content is secure.
- Avoiding Embarrassment: Accidental viewing of personal photos by friends or family can be embarrassing. Locking them avoids such situations.
iPhone with photo lock app displayed
2. What Are the Search Intentions Related to “How to Put a Lock on Photos iPhone?”
Understanding the search intentions behind “How To Put A Lock On Photos Iphone” helps tailor content to meet user needs effectively:
- Step-by-step Guides: Users seek detailed instructions on how to lock their photos using built-in iPhone features or third-party apps.
- App Recommendations: People look for recommendations of reliable and secure apps specifically designed to lock photos.
- Privacy Concerns: Users want to understand the risks of unauthorized access to their photos and the importance of securing them.
- Troubleshooting: Individuals search for solutions to issues they encounter while trying to lock their photos.
- Security Advice: Users seek tips and best practices for ensuring their photos are securely locked and protected from potential breaches.
3. What Are the Built-In iPhone Features to Lock Photos?
While the iPhone doesn’t offer a direct “lock” feature for individual photos, there are built-in methods to enhance your photo privacy.
3.1 Using the Hidden Album
The Hidden Album is a built-in feature that allows you to move photos out of your main Camera Roll, making them less visible.
How it works:
- Select Photos: Open the Photos app and select the photos you want to hide.
- Share Option: Tap the share icon (the square with an arrow pointing up).
- Hide Option: Scroll down and tap “Hide.” The photos will be moved to the Hidden Album.
- Accessing the Hidden Album: Go to the “Albums” tab and scroll down to the “Utilities” section. Tap “Hidden.”
- Authentication: Starting with iOS 14, you can require Face ID, Touch ID, or your passcode to view the Hidden Album, adding an extra layer of security.
Limitations:
- The Hidden Album is not password-protected by default. Anyone with access to your phone can view it unless you enable authentication in settings.
- Photos are still stored on your device and iCloud, so they are not completely isolated.
3.2 Setting a Passcode, Touch ID, or Face ID
Securing your entire iPhone with a passcode, Touch ID, or Face ID is a fundamental step in protecting your photos.
How it works:
- Open Settings: Go to the Settings app on your iPhone.
- Face ID/Touch ID & Passcode: Tap “Face ID & Passcode” or “Touch ID & Passcode,” depending on your iPhone model.
- Turn Passcode On: If you haven’t already, tap “Turn Passcode On” and follow the instructions to set up a passcode.
- Add Fingerprint/Face: If applicable, enroll your fingerprint for Touch ID or set up Face ID.
- Require Passcode: Adjust the “Require Passcode” setting to determine when your passcode is needed (e.g., immediately, after 1 minute, etc.).
Benefits:
- This method secures your entire device, including your photos, so unauthorized users can’t access them without your passcode, Touch ID, or Face ID.
- It’s a simple and effective way to protect your privacy.
Considerations:
- This secures everything on your phone, not just your photos.
- If someone knows your passcode or can bypass your biometric authentication, they can still access your photos.
3.3. Using Guided Access
Guided Access is an iPhone feature that restricts the device to a single app, preventing anyone from navigating to other apps like Photos.
How it works:
- Enable Guided Access: Go to Settings > Accessibility > Guided Access and turn it on.
- Set a Passcode: Tap “Passcode Settings” and set a Guided Access passcode, different from your regular iPhone passcode.
- Start Guided Access: Open the Photos app, press the side button (or home button on older models) three times to start Guided Access.
- Disable Touch: Use the on-screen options to disable touch input, preventing any interaction with the photos.
- End Guided Access: Press the side button (or home button) three times again and enter the Guided Access passcode to exit.
Benefits:
- Limits access to other apps, preventing unauthorized viewing of photos.
- Disabling touch input adds an extra layer of security.
Considerations:
- Requires manual setup each time you want to restrict access.
- Not ideal for long-term photo protection.
4. What Are Third-Party Apps to Lock Photos on iPhone?
For more robust security, numerous third-party apps offer advanced features to lock your photos.
4.1. Best Photo Locker Apps
These apps provide password protection, encryption, and other security measures to keep your photos safe.
| App Name | Key Features | Security Level | User Rating |
|---|---|---|---|
| Photo Lock Vault | Password protection, decoy password, break-in reports | High | 4.7 stars |
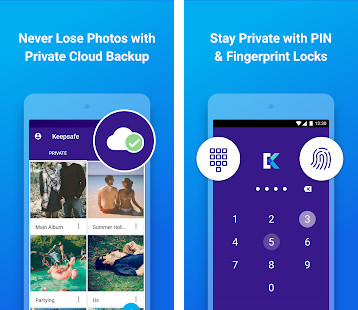
| Keepsafe | PIN protection, fingerprint unlock, private cloud storage | High | 4.6 stars |
| Secret Photo Vault | Password protection, album organization, decoy password | Medium | 4.5 stars |
| Private Photo Vault | Password protection, fingerprint unlock, album management | Medium | 4.4 stars |
| Best Secret Folder | AES-256 encryption, password protection, decoy folder | High | 4.8 stars |
| Lock Photos | PIN & Password protection, Face ID/Touch ID Access, cloud backup, intrusion detection and alerts (with break-in reports) | High | 4.9 Stars |
4.2. How to Use Photo Lock Apps
Using a photo lock app typically involves these steps:
- Download and Install: Download a photo lock app from the App Store and install it on your iPhone.
- Set Up Password: Open the app and set up a secure password, PIN, or biometric authentication method (Touch ID or Face ID).
- Import Photos: Import the photos you want to lock from your Camera Roll into the app’s secure vault.
- Delete from Camera Roll: After importing, delete the photos from your Camera Roll to ensure they are only stored in the secure app.
- Organize and Manage: Organize your photos within the app using albums or folders for easy management.
- Enable Additional Security Features: Explore additional security features like decoy passwords, break-in reports, and cloud backup to enhance protection.
4.3. Security Considerations When Choosing an App
When selecting a photo lock app, consider the following security factors:
- Encryption: Ensure the app uses strong encryption (e.g., AES-256) to protect your photos.
- Password Protection: Look for apps that offer robust password protection options, including PINs, passwords, and biometric authentication.
- Privacy Policy: Review the app’s privacy policy to understand how your data is handled and whether it is shared with third parties.
- Reviews and Ratings: Check user reviews and ratings on the App Store to gauge the app’s reliability and security.
- Additional Features: Consider features like decoy passwords, break-in reports, and cloud backup for added security and convenience.
 Photo Lock Vault app interface
5. How to Hide Photos in iCloud?
While you can’t directly “hide” photos in iCloud, you can manage your iCloud Photo Library to enhance privacy.
5.1. Understanding iCloud Photo Library
iCloud Photo Library syncs your photos across all your Apple devices, making them accessible from anywhere. However, this also means that if someone gains access to your iCloud account, they can view your photos.
5.2. Removing Photos from iCloud
To remove photos from iCloud:
- Delete from Device: Delete the photos from your iPhone.
- iCloud Sync: If iCloud Photo Library is enabled, the photos will also be deleted from iCloud and all other synced devices.
- Recently Deleted Album: The photos will be moved to the “Recently Deleted” album, where they remain for 30 days before being permanently deleted.
- Permanently Delete: To permanently delete the photos immediately, go to the “Recently Deleted” album and delete them from there.
Caution: Deleting photos from iCloud will remove them from all devices synced with your iCloud account. Ensure you have backups if needed.
5.3. Using iCloud Shared Albums
iCloud Shared Albums allow you to share photos with specific people while keeping them separate from your main iCloud Photo Library.
How it works:
- Create a Shared Album: Open the Photos app and go to the “Albums” tab. Tap the “+” button and select “New Shared Album.”
- Name and Invite: Name the album and invite the people you want to share it with.
- Add Photos: Add the photos you want to share to the shared album.
- Privacy: Photos in the shared album are separate from your main iCloud Photo Library and only visible to the people you’ve invited.
Benefits:
- Allows you to share photos selectively without exposing your entire photo library.
- Provides a way to keep certain photos private while sharing others.
6. How to Encrypt Photos on iPhone?
Encryption is a powerful method to protect your photos by converting them into an unreadable format that can only be decrypted with a specific key.
6.1. What is Photo Encryption?
Photo encryption involves using algorithms to scramble the data in your photos, making them unreadable to anyone without the correct decryption key. This ensures that even if someone gains unauthorized access to your device or iCloud account, they won’t be able to view your photos.
6.2. Apps That Offer Encryption
Several apps offer photo encryption features:
- Best Secret Folder: This app uses AES-256 encryption to protect your photos and offers a decoy folder for added security.
- Keepsafe: Keepsafe encrypts your photos and offers PIN protection, fingerprint unlock, and private cloud storage.
6.3. How to Encrypt Photos Using These Apps
- Download and Install: Download and install an app that offers photo encryption from the App Store.
- Set Up Encryption: Open the app and follow the instructions to set up encryption. This usually involves creating a strong password or PIN.
- Import Photos: Import the photos you want to encrypt into the app’s secure vault.
- Encryption Process: The app will automatically encrypt the photos, making them unreadable to anyone without the correct decryption key.
- Delete from Camera Roll: After encrypting, delete the photos from your Camera Roll to ensure they are only stored in the secure app.
7. How to Password Protect a Folder on iPhone for Photos?
While the iPhone doesn’t offer a native way to password-protect folders, you can use third-party apps to achieve this.
7.1. Using the Files App with Third-Party Apps
The Files app allows you to manage files and folders on your iPhone, but it doesn’t offer built-in password protection. However, you can combine it with third-party apps to create password-protected folders for your photos.
How it works:
- Download a File Management App: Download a file management app like Documents by Readdle, which offers password protection features.
- Create a Folder: In the file management app, create a new folder for your photos.
- Import Photos: Import the photos you want to protect into the folder.
- Password Protect: Use the app’s features to password-protect the folder.
- Move to Files App: Move the password-protected folder to the Files app for easy access.
7.2. Creating a Password-Protected ZIP File
Another method is to create a password-protected ZIP file containing your photos.
How it works:
- Download a ZIP App: Download an app that allows you to create ZIP files with password protection, such as iZip.
- Create a ZIP File: In the ZIP app, create a new ZIP file and add the photos you want to protect to it.
- Set a Password: Set a strong password for the ZIP file.
- Store Securely: Store the ZIP file in a secure location, such as the Files app or a cloud storage service.
7.3. Storing Photos in Secure Notes
You can also store photos in the Notes app and password-protect the note.
How it works:
- Create a New Note: Open the Notes app and create a new note.
- Add Photos: Add the photos you want to protect to the note.
- Password Protect: Tap the “…” button and select “Lock Note.” Set a password or use Face ID/Touch ID to protect the note.
Limitations:
- This method is best suited for a small number of photos, as it can become cumbersome to manage a large collection of images in the Notes app.
 Keepsafe private photo vault app
8. How to Remove EXIF Data from Photos for Privacy?
EXIF data contains metadata about your photos, such as location, date, and camera settings. Removing this data can enhance your privacy.
8.1. What is EXIF Data?
EXIF (Exchangeable Image File Format) data is metadata embedded in image files that contains information about the photo, such as:
- Camera Model: The type of camera used to take the photo.
- Date and Time: When the photo was taken.
- Location: GPS coordinates of where the photo was taken.
- Camera Settings: Settings like aperture, shutter speed, and ISO.
8.2. Why Remove EXIF Data?
Removing EXIF data can protect your privacy by preventing others from accessing sensitive information about your photos, such as your location or camera settings.
8.3. Apps and Methods to Remove EXIF Data
- Using Third-Party Apps: Several apps can remove EXIF data from your photos, such as Metapho and Exif Metadata.
- Online Tools: Online tools like ImageOptim and Online Exif Tool can also remove EXIF data from your photos.
- macOS: On macOS, you can remove EXIF data by opening the photo in Preview, going to Tools > Show Inspector, and then clicking the “Remove Location Info” button.
8.4. Step-by-Step Guide to Removing EXIF Data
- Download and Install: Download and install an app or use an online tool to remove EXIF data.
- Import Photos: Import the photos you want to remove EXIF data from into the app or tool.
- Remove EXIF Data: Follow the instructions to remove EXIF data from the photos.
- Save the Modified Photos: Save the modified photos without EXIF data to your device.
9. How to Back Up Locked Photos?
Backing up your locked photos is crucial to prevent data loss in case of device failure, loss, or theft.
9.1. Importance of Backing Up Locked Photos
Backing up your locked photos ensures that you can recover them if something happens to your device. Without a backup, you risk losing your precious memories and sensitive information.
9.2. Backup Options
- Private Cloud Storage: Some photo lock apps offer private cloud storage, where your photos are automatically backed up to a secure server.
- Encrypted External Hard Drive: You can back up your locked photos to an encrypted external hard drive for added security.
- Password-Protected Computer: You can also back up your locked photos to a password-protected computer.
9.3. Step-by-Step Guide to Backing Up Locked Photos
- Choose a Backup Method: Select a backup method that suits your needs and security requirements.
- Connect to Backup: Connect your iPhone to your chosen backup method (e.g., private cloud storage, encrypted external hard drive, password-protected computer).
- Transfer Photos: Transfer the locked photos from your photo lock app to the backup location.
- Verify Backup: Verify that the photos have been successfully backed up by checking the backup location.
- Regular Backups: Schedule regular backups to ensure that your locked photos are always protected.
10. Legal and Ethical Considerations
Locking photos on your iPhone involves legal and ethical considerations that you should be aware of.
10.1. Privacy Laws and Regulations
Be aware of privacy laws and regulations in your jurisdiction, such as GDPR (General Data Protection Regulation) in Europe and CCPA (California Consumer Privacy Act) in California. These laws govern how personal data is collected, used, and protected.
10.2. Ethical Considerations
- Respect for Privacy: Respect the privacy of others when taking and storing photos. Obtain consent before taking photos of people and ensure that you are not violating their privacy.
- Data Security: Take steps to protect the security of your photos and prevent unauthorized access. Use strong passwords, encryption, and other security measures to keep your photos safe.
- Transparency: Be transparent about how you are using and protecting photos. Inform people if you are recording them and explain how you are safeguarding their privacy.
10.3. Terms of Service of Apps
Read the terms of service and privacy policies of any photo lock apps or cloud storage services you use. Understand how your data is being collected, used, and protected.
FAQ: How to Put a Lock on Photos iPhone
- Can I lock individual photos in the iPhone’s Photos app?
No, the iPhone’s Photos app doesn’t allow you to lock individual photos directly. However, you can use the Hidden Album feature or third-party apps to achieve this.
- What is the Hidden Album on iPhone?
The Hidden Album is a built-in feature that allows you to move photos out of your main Camera Roll, making them less visible. You can access it in the Albums tab under Utilities.
- How do I password-protect the Hidden Album?
Starting with iOS 14, you can require Face ID, Touch ID, or your passcode to view the Hidden Album by going to Settings > Photos and enabling “Use Face ID” or “Use Touch ID.”
- Are there any third-party apps to lock photos on iPhone?
Yes, several third-party apps offer advanced features to lock your photos, such as Photo Lock Vault, Keepsafe, and Secret Photo Vault.
- How do photo lock apps work?
Photo lock apps typically involve downloading the app from the App Store, setting up a secure password or biometric authentication method, importing the photos you want to lock from your Camera Roll into the app’s secure vault, and then deleting the photos from your Camera Roll.
- What security features should I look for in a photo lock app?
Look for apps that offer strong encryption (e.g., AES-256), robust password protection options, a clear privacy policy, positive user reviews and ratings, and additional features like decoy passwords and break-in reports.
- Can I hide photos in iCloud?
You can’t directly “hide” photos in iCloud, but you can manage your iCloud Photo Library to enhance privacy by removing photos from iCloud or using iCloud Shared Albums.
- What is EXIF data, and why should I remove it?
EXIF (Exchangeable Image File Format) data is metadata embedded in image files that contains information about the photo, such as location, date, and camera settings. Removing EXIF data can protect your privacy by preventing others from accessing sensitive information about your photos.
- How do I back up my locked photos?
Back up your locked photos by using private cloud storage offered by some photo lock apps, backing them up to an encrypted external hard drive, or backing them up to a password-protected computer.
- What are the legal and ethical considerations when locking photos on my iPhone?
Be aware of privacy laws and regulations in your jurisdiction, respect the privacy of others when taking and storing photos, take steps to protect the security of your photos, and be transparent about how you are using and protecting photos.
By following these comprehensive steps, you can effectively put a lock on your photos on your iPhone, ensuring your personal and sensitive images remain private and secure. Remember to stay informed about the latest security practices and tools to maintain the highest level of protection for your digital memories.
Visit dfphoto.net for more tips, tutorials, and resources to enhance your photography skills and protect your visual content. Join our vibrant community of photographers in the USA and discover new ways to express your creativity while ensuring your privacy. For further inquiries or assistance, feel free to contact us at Address: 1600 St Michael’s Dr, Santa Fe, NM 87505, United States or Phone: +1 (505) 471-6001.