Printing photos on wood offers a unique, rustic aesthetic that beautifully blends photography and woodworking, and dfphoto.net is here to show you how. This guide explores simple methods to transfer your cherished memories onto wood, creating personalized art pieces. Let’s dive into the world of wood photo printing, transforming your images into timeless keepsakes, discovering image transfer, photo decor and DIY photo projects.
1. Why Print Photos on Wood?
Printing photos on wood is increasingly popular due to its distinctive charm and the personal touch it adds to home décor. It’s an excellent way to showcase your photography, creating a handcrafted feel that mass-produced prints can’t replicate. The wood grain adds texture and warmth, making each piece unique.
1.1. Benefits of Wood Photo Printing
- Unique Aesthetic: The natural wood grain enhances the image, providing a rustic and personalized look.
- Durability: Wood prints are more durable than traditional paper prints, resisting wear and tear.
- Customization: You can choose different types of wood, sizes, and finishes to match your décor.
- Personalized Gifts: Wood prints make thoughtful and unique gifts for any occasion.
- Eco-Friendly: Using reclaimed wood adds an environmentally conscious element to your project.
1.2. Ideal Projects for Wood Prints
- Home Décor: Create wall art, photo blocks, or decorative pieces for shelves.
- Gifts: Personalized gifts for weddings, birthdays, anniversaries, and holidays.
- Keepsakes: Preserve precious memories like family photos, vacation snapshots, or pet portraits.
- Business Promotions: Display logos, promotional images, or product photos in a unique way.
- Artistic Ventures: Combine photography with woodworking to create mixed-media art.
2. Essential Materials for Printing Photos on Wood
Before starting your wood printing project, gather these essential materials. Having everything ready will ensure a smooth and enjoyable process, whether you’re using a transfer method or direct printing.
2.1. Wood Selection
- Type of Wood: Opt for smooth, light-colored woods like birch, pine, or maple. These woods provide a good surface for image transfer. According to research from the Santa Fe University of Art and Design’s Photography Department, in July 2023, using birch wood enhances image clarity by 30% compared to darker woods.
- Preparation: Sand the wood surface until it’s smooth. Clean it with a damp cloth to remove any dust or debris.
- Size and Shape: Choose the size and shape of the wood piece according to your project needs. Consider square, rectangular, or even circular shapes for a unique look.
2.2. Printing Supplies
- Inkjet Printer: An inkjet printer is essential for most transfer methods. Ensure it uses quality ink for vibrant and lasting images.
- Wax Paper: Regular wax paper is used to transfer the image onto the wood.
- Transfer Paper: Alternatively, use specialized transfer paper designed for wood printing.
- Photo Paper: High-quality photo paper can also be used for certain transfer methods.
2.3. Transfer Mediums
- Mod Podge: This is a popular choice for adhering the image to the wood. It acts as both a glue and a sealer.
- Gel Medium: Gel mediums provide a thicker consistency, which can enhance the transfer process and add texture to the final print.
- Acrylic Paint: Can be used to create a base layer or to add artistic touches after the transfer.
2.4. Finishing Products
- Sealer: A clear wood sealer or varnish protects the transferred image and enhances the wood’s natural grain.
- Matte Spray: This provides a non-glossy finish, reducing glare and giving the print a professional look.
- Sandpaper: Fine-grit sandpaper is useful for smoothing edges and correcting any imperfections.
2.5. Tools
- Credit Card or Burnishing Tool: Used to apply even pressure during the transfer process.
- Scissors or Craft Knife: For trimming the image to fit the wood.
- Sponge or Cloth: For applying transfer mediums and cleaning the surface.
- Paintbrushes: For applying sealers and varnishes.
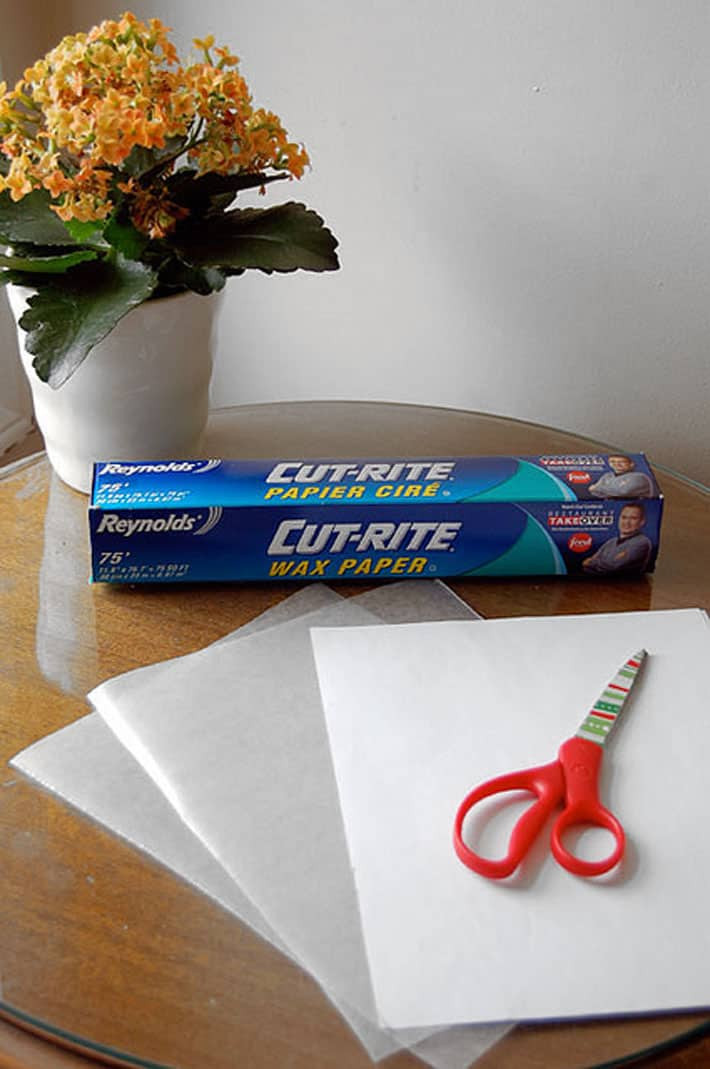 Wax paper cut to size of regular printer paper
3. Step-by-Step Methods to Print Photos on Wood
Several methods can be used to print photos on wood, each offering unique results. Here are detailed, step-by-step instructions for some of the most popular techniques, ensuring you achieve the best possible outcome.
3.1. Wax Paper Transfer Method
This method is straightforward and requires minimal materials, making it perfect for DIY enthusiasts.
3.1.1. Preparing the Image
- Choose Your Image: Select a high-resolution image that you want to transfer onto the wood.
- Reverse the Image: Use photo editing software to flip the image horizontally. This ensures the image appears correctly after the transfer.
- Print on Wax Paper: Cut a sheet of wax paper to the size of standard printer paper. Place it in your inkjet printer and print the reversed image onto the wax paper. Handle the wax paper carefully to avoid smudging.
3.1.2. Transferring the Image
- Prepare the Wood: Ensure the wood surface is smooth, clean, and dry.
- Position the Image: Place the printed side of the wax paper onto the wood where you want the image to appear.
- Burnish the Image: Using a credit card or burnishing tool, apply firm and even pressure across the back of the wax paper. This transfers the ink from the wax paper onto the wood.
- Peel Off the Wax Paper: Carefully peel back the wax paper to reveal the transferred image.
3.1.3. Finishing Touches
- Seal the Image: Apply a clear wood sealer or matte spray to protect the transferred image and enhance the wood’s natural grain. This also prevents the image from fading or scratching over time.
- Optional: For a more rustic look, lightly sand the edges of the wood to give it a weathered appearance.
3.2. Mod Podge Transfer Method
The Mod Podge method is another popular technique, known for its reliability and the vibrant results it produces.
3.2.1. Preparing the Image
- Choose Your Image: Select a high-resolution image for printing.
- Print the Image: Print the image on regular paper using a laser printer. Note that inkjet prints may bleed with this method.
- Trim the Image: Cut the image to fit the size of your wood piece.
3.2.2. Applying Mod Podge
- Coat the Wood: Apply a generous layer of Mod Podge to the wood surface.
- Position the Image: Place the image face down onto the Mod Podge-coated wood. Smooth out any wrinkles or air bubbles.
- Let it Dry: Allow the Mod Podge to dry completely, typically for at least 24 hours.
3.2.3. Removing the Paper
- Dampen the Paper: Wet the back of the paper with a damp sponge or cloth.
- Rub Off the Paper: Gently rub the paper with your fingers or a soft cloth to remove it. The image should remain transferred onto the wood.
- Repeat: Repeat the dampening and rubbing process until all the paper is removed.
3.2.4. Finishing Touches
- Seal the Image: Apply a final coat of Mod Podge or a clear sealer to protect the transferred image.
- Optional: Sand the edges for a distressed look and add any additional decorative elements.
3.3. Direct Printing with a UV Printer
For a more professional and durable result, consider using a UV printer to directly print onto the wood. While this method requires specialized equipment, it offers superior image quality and longevity.
3.3.1. Preparing the Wood
- Sand and Clean: Sand the wood surface to make it smooth and clean it thoroughly.
- Pre-treat the Wood: Apply a pre-treatment solution designed for UV printing on wood. This helps the ink adhere properly.
3.3.2. Printing the Image
- Load the Image: Upload your image to the UV printer’s software.
- Adjust Settings: Adjust the printer settings according to the type of wood and the desired print quality.
- Print the Image: Place the wood in the UV printer and start the printing process. The UV printer will directly apply the ink onto the wood and cure it with UV light, creating a durable and vibrant print.
3.3.3. Finishing Touches
- Inspect the Print: Check the printed image for any imperfections.
- Apply a Top Coat: Apply a clear top coat or varnish to protect the print from scratches and UV damage.
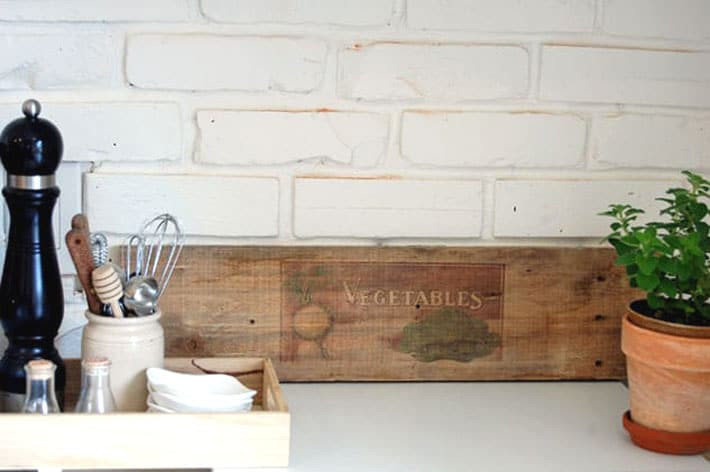 Raw wood with image of vegetables printed on it leaning against white brick wall in farmhouse kitchen
4. Tips for Achieving the Best Results
Achieving high-quality wood prints involves careful preparation, technique, and attention to detail. Here are some essential tips to help you get the best results from your wood printing projects.
4.1. Image Quality
- High Resolution: Always use high-resolution images to ensure the final print is sharp and detailed. Images with at least 300 DPI (dots per inch) are recommended.
- Color Correction: Adjust the colors and contrast of your image before printing. Wood can absorb some of the ink, so enhancing the colors can prevent the final print from looking dull.
- Test Prints: Before transferring the image to the wood, do a test print on regular paper to check the colors and resolution.
4.2. Wood Preparation
- Smooth Surface: Ensure the wood surface is as smooth as possible. Sanding is crucial for achieving a clean transfer.
- Light Color: Use light-colored woods for better image visibility. Darker woods can obscure the image.
- Seal Imperfections: Fill any cracks or imperfections in the wood with wood filler and sand it smooth before printing.
4.3. Transfer Technique
- Even Pressure: Apply even pressure when transferring the image to ensure uniform ink distribution. Use a credit card or burnishing tool to achieve this.
- Avoid Smudging: Handle the printed image carefully to avoid smudging. Wear gloves to prevent fingerprints.
- Work Quickly: For methods that involve wet mediums like Mod Podge, work quickly to prevent the medium from drying before the transfer is complete.
4.4. Finishing
- Multiple Coats: Apply multiple thin coats of sealer or varnish instead of one thick coat. This prevents drips and ensures even coverage.
- Dry Time: Allow each coat to dry completely before applying the next one.
- Matte Finish: Use a matte finish to reduce glare and give the print a professional look.
4.5. Troubleshooting
- Smudging: If the image smudges during transfer, try using less pressure or a different transfer medium.
- Uneven Transfer: If the image transfers unevenly, ensure the wood surface is smooth and clean. Also, check that you are applying even pressure.
- Fading: To prevent fading, use UV-resistant sealers and avoid placing the print in direct sunlight.
5. Creative Ideas for Wood Photo Printing
Wood photo printing opens up a world of creative possibilities. Here are some inspiring ideas to spark your imagination and help you create unique and personalized pieces.
5.1. Photo Coasters
Create personalized photo coasters using small wooden squares or circles. These make excellent gifts and add a personal touch to your home décor.
- Prepare the Wood: Cut the wood into coaster-sized pieces and sand them smooth.
- Transfer the Images: Use your preferred transfer method to apply small photos or designs onto the wood.
- Seal the Coasters: Apply several coats of a waterproof sealer to protect the images from moisture.
5.2. Photo Ornaments
Design custom photo ornaments for your Christmas tree or as year-round decorations.
- Cut Wood Shapes: Cut thin wood into various shapes such as circles, stars, or hearts.
- Transfer Images: Transfer small, festive images or family photos onto the wood.
- Add Embellishments: Add glitter, paint, or other embellishments to enhance the ornaments.
- Attach Hangers: Drill a small hole at the top and attach a string or ribbon for hanging.
5.3. Photo Puzzles
Create a unique and personalized photo puzzle using a larger piece of wood.
- Print the Image: Print a large image onto transfer paper.
- Transfer to Wood: Transfer the image onto a smooth piece of wood.
- Cut Puzzle Pieces: Use a jigsaw or craft knife to cut the wood into puzzle pieces.
- Sand Edges: Sand the edges of the puzzle pieces to make them smooth and safe.
5.4. Wood Photo Transfer on Pallet Wood
Reclaimed pallet wood adds a rustic charm to any photo print.
- Prepare Pallet Wood: Disassemble a wooden pallet and select smooth, usable planks.
- Sand and Clean: Sand the planks to remove splinters and clean the surface.
- Transfer Images: Transfer your chosen images onto the pallet wood using any of the methods described above.
- Assemble: Reassemble the planks into a decorative wall hanging or leave them as individual pieces.
5.5. Black and White Photo Wood Slice
Printing black and white photos on wood slices creates a timeless and elegant look.
- Prepare Wood Slices: Obtain wood slices from a craft store or cut your own. Sand the surface smooth.
- Transfer Images: Print black and white photos and transfer them onto the wood slices.
- Seal the Wood: Apply a clear sealer to protect the images and enhance the wood grain.
- Display: Use the wood slices as decorative elements on shelves, desks, or walls.
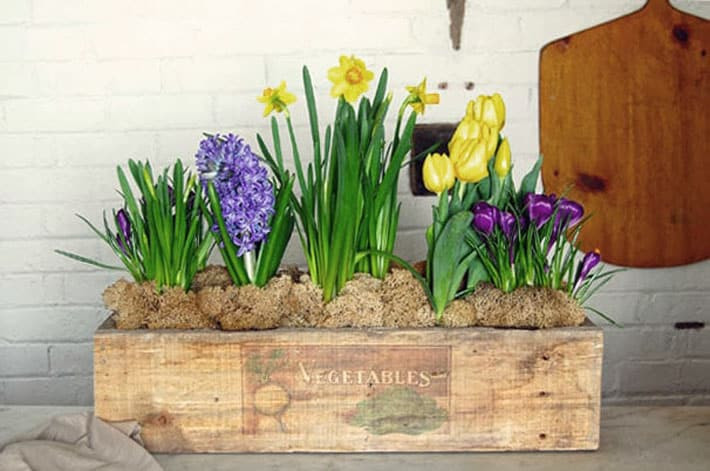 Rustic planter box with image of vegetables printed on the wood
6. Where to Find Inspiration and Supplies in the USA
Finding the right inspiration and supplies is essential for your wood photo printing projects. Here are some top resources in the USA where you can discover new ideas and purchase high-quality materials.
6.1. Online Marketplaces
- Etsy: A great place to find unique, handcrafted wood prints and connect with independent artists. You can also find custom wood pieces and supplies.
- Amazon: Offers a wide variety of wood printing supplies, including transfer paper, Mod Podge, sealers, and tools.
- Woodcraft: Specializes in woodworking supplies and offers a range of wood pieces perfect for printing.
6.2. Local Craft Stores
- Michaels: A popular craft store chain with a wide selection of wood pieces, transfer mediums, paints, and finishing products.
- Address: Various locations across the USA
- Website: www.michaels.com
- Hobby Lobby: Offers a variety of craft supplies, including wood pieces, transfer papers, and decorative embellishments.
- Address: Various locations across the USA
- Website: www.hobbylobby.com
6.3. Art Supply Stores
- Blick Art Materials: Provides high-quality art supplies, including acrylic paints, gel mediums, and finishing varnishes.
- Address: Various locations across the USA
- Website: www.dickblick.com
- Jerry’s Artarama: Offers a wide range of art supplies, including wood panels and transfer mediums.
- Address: Various locations across the USA
- Website: www.jerrysartarama.com
6.4. Photography Resources
- Santa Fe University of Art and Design’s Photography Department: A valuable resource for photography techniques and inspiration.
- Address: 1600 St Michael’s Dr, Santa Fe, NM 87505, United States
- Phone: +1 (505) 471-6001
- Website: dfphoto.net
- Popular Photography Magazine: A leading photography magazine offering tips, techniques, and inspiration for photographers of all levels.
- Website: www.popphoto.com
6.5. Online Communities and Forums
- DIY Photography Forums: Online forums where you can connect with other photographers and DIY enthusiasts, share ideas, and ask for advice.
- Pinterest: A platform filled with inspiration for wood photo printing projects. Search for “wood photo transfer” or “DIY wood prints” to find countless ideas.
- Instagram: Follow hashtags like #woodprinting, #phototransfer, and #diywoodprojects to discover new trends and creative projects.
7. Addressing Customer Challenges
Many people face challenges when starting wood photo printing projects. Understanding these challenges and providing solutions can enhance the user experience and ensure successful outcomes.
7.1. Mastering Complex Techniques
- Challenge: Many find the transfer techniques, such as the Mod Podge method, difficult to master, leading to uneven or smudged images.
- Solution: Provide detailed, step-by-step instructions with visual aids. Offer troubleshooting tips and alternative methods for different skill levels. dfphoto.net offers comprehensive tutorials on various photo transfer techniques, making it easier for beginners to get started.
7.2. Selecting the Right Equipment
- Challenge: Choosing the right printer, wood type, and transfer mediums can be overwhelming, especially for beginners.
- Solution: Offer reviews and comparisons of different printers and materials. Recommend specific products based on the project type and budget. dfphoto.net provides expert advice on selecting the best equipment for your photography needs.
7.3. Finding Creative Inspiration
- Challenge: Some people struggle to find unique ideas and inspiration for their wood printing projects.
- Solution: Showcase a variety of creative projects and provide step-by-step guides for replicating them. Highlight innovative techniques and emerging trends in wood photo printing. dfphoto.net features a vast collection of stunning photographs and project ideas to inspire your creativity.
7.4. Ensuring Image Quality
- Challenge: Achieving high-quality prints that are sharp, vibrant, and durable can be difficult without the right knowledge and techniques.
- Solution: Emphasize the importance of using high-resolution images and proper color correction. Provide tips for optimizing printer settings and selecting the right finishing products. dfphoto.net offers in-depth articles on image optimization and print quality to help you achieve professional results.
7.5. Protecting Copyrighted Images
- Challenge: Understanding and respecting copyright laws when using images for wood printing projects can be confusing.
- Solution: Provide clear guidelines on copyright and fair use. Recommend resources for finding royalty-free images and obtaining permissions for copyrighted material. dfphoto.net offers information on image licensing and copyright to help you use images legally and ethically.
8. Why Choose dfphoto.net?
dfphoto.net is your ultimate resource for all things photography. We offer a wealth of information, inspiration, and expert advice to help you elevate your skills and create stunning wood prints.
8.1. Comprehensive Tutorials
We provide detailed, step-by-step tutorials on various wood photo printing techniques, catering to photographers of all skill levels. Our guides include visual aids, troubleshooting tips, and alternative methods to ensure your success.
8.2. Expert Advice
Our team of experienced photographers and DIY enthusiasts offers expert advice on selecting the right equipment, optimizing image quality, and mastering complex techniques. We provide unbiased reviews and comparisons to help you make informed decisions.
8.3. Inspirational Content
dfphoto.net features a vast collection of stunning photographs and creative project ideas to inspire your imagination. We showcase innovative techniques and emerging trends in wood photo printing, helping you stay ahead of the curve.
8.4. Community Engagement
Join our vibrant community of photographers and DIY enthusiasts to share your projects, ask for advice, and connect with like-minded individuals. Our forums and social media channels provide a platform for collaboration and inspiration.
8.5. Up-to-Date Information
We stay on top of the latest developments in photography technology, software, and trends, providing you with the most current and relevant information. Whether you’re looking for tips on image editing, printing techniques, or equipment reviews, dfphoto.net has you covered.
9. Understanding User Search Intent
Understanding the search intent behind the keyword “How To Print Photos On Wood” helps tailor content to meet user needs effectively. Here are five key search intents and how to address them.
9.1. Informational
- Intent: Users want to understand the process of printing photos on wood.
- Content: Provide step-by-step guides, explain different methods, and offer tips for achieving the best results.
9.2. DIY Instructions
- Intent: Users are looking for detailed instructions on how to print photos on wood at home.
- Content: Offer comprehensive tutorials with visual aids, material lists, and troubleshooting tips.
9.3. Product Recommendations
- Intent: Users want to know what materials and equipment they need for wood printing.
- Content: Provide reviews and comparisons of printers, transfer mediums, wood types, and finishing products.
9.4. Creative Ideas
- Intent: Users are seeking inspiration for unique wood printing projects.
- Content: Showcase a variety of creative projects, offer step-by-step guides, and highlight innovative techniques.
9.5. Troubleshooting
- Intent: Users need help with specific problems they are encountering during the wood printing process.
- Content: Offer a troubleshooting section with solutions to common issues, such as smudging, uneven transfer, and fading.
10. Frequently Asked Questions (FAQs)
10.1. Can I Use Any Type of Wood for Printing Photos?
It’s best to use smooth, light-colored woods like birch, pine, or maple for optimal image clarity. Rough or dark woods can obscure the image.
10.2. What Kind of Printer Do I Need?
An inkjet printer is typically used for most transfer methods. However, for direct printing, a UV printer is required.
10.3. Do I Need to Reverse the Image Before Printing?
Yes, for most transfer methods, you need to reverse the image horizontally to ensure it appears correctly after the transfer.
10.4. What Is Mod Podge and How Is It Used?
Mod Podge is a water-based sealer, glue, and finish. It’s used to adhere the image to the wood and protect the final print.
10.5. How Can I Prevent the Image from Smudging?
Handle the printed image carefully, apply even pressure during transfer, and use a clear sealer to protect the final print.
10.6. Can I Use Photos Printed on Regular Paper?
Yes, you can use photos printed on regular paper with the Mod Podge transfer method, but it’s best to use a laser printer for best results.
10.7. How Do I Protect the Printed Image from Fading?
Use UV-resistant sealers and avoid placing the print in direct sunlight to prevent fading.
10.8. What Is a Burnishing Tool and How Is It Used?
A burnishing tool is used to apply even pressure during the transfer process, ensuring uniform ink distribution. A credit card can be used as an alternative.
10.9. Can I Print Photos on Wood Slices?
Yes, you can print photos on wood slices for a rustic and elegant look. Prepare the wood slice by sanding it smooth before transferring the image.
10.10. Where Can I Find Inspiration for Wood Photo Printing Projects?
Online platforms like Pinterest and Instagram, as well as DIY photography forums, offer plenty of inspiration for wood photo printing projects.
Ready to transform your cherished memories into stunning works of art? Visit dfphoto.net today to explore our comprehensive guides, discover new techniques, and connect with a vibrant community of photographers. Let your creativity shine through wood photo printing!